• When you click on links to various merchants on this site and make a purchase, this can result in this site earning a commission. Affiliate programs and affiliations include, but are not limited to, the eBay Partner Network.

1950 Dodge Panel Van (My Long-Term project that needs to be completed!!!)

Awsome work right there! Unfortunately, when I click on the video links it says 'this video is private'.
 
I'm a bit of a sucker for vans and wagons and your build is just too sweet. Love what you've done with the nose and the overall looks of the van, the exhaust is pretty cool as well and the tilt front clip is a nice touch. Really, really cool build.
 
Awsome work right there! Unfortunately, when I click on the video links it says 'this video is private'.

Thank you... I'll check out the permissions:)

- - - Updated - - -

Here's another Video of the Cowl Vent

[video=youtube_share;0yl0K_q6yz4]http://youtu.be/0yl0K_q6yz4[/video]
 
The videos should work now... Please let me know if they do or don't:)

[video=youtube_share;ZLJPqcCcU-A]http://youtu.be/ZLJPqcCcU-A[/video]
 
Hey BDL . . . don't know how I've missed this build . . . but this is just SO COOL . . . love what you're doing with the panel van ! ! !

I can only imagine what it'll look like when you get it done . . . keep up the great work and thanks for sharing with us ! ! !
 
Love those old panel trucks. There is so much you can do to them.
 
Here are a couple more ideas I have had for the paint on my truck... Maybe go with the gray on the outer coat, but put it over top some red-oxide primer and sand through the gray in strategic places. Of course, I would use a heavy coat of primer sealer under the red-oxide so the body is safe from the weather.

CaliforniaSunPatina16.jpgCaliforniaSunPatina3.jpgCaliforniaSunPatina10.jpgCaliforniaSunPatina9.jpgCaliforniaSunPatina11.jpgCaliforniaSunPatina6.jpgCaliforniaSunPatina7.jpg
 
I started this build way back in 2001 and he build has had, let's see now, one, two, three different engines; four different rear ends, two different front suspensions plus several different plans for the interior and has not seen the road since I purchased it. Sad, huh. Come on guy... FINISH IT! Yeah, well... I hope to. Soon. Maybe. Here are the links to the threads on Dodgetalk.com. (If I am breaking the rules by posting them, please let me know and I will remove them. Thank you!)

1950 Dodge Panel Van (on a 2006 Charger chassis housing a 2007 5.7LHEMI V8)
1st 1950 Panel Thread
2nd 1950 Panel Thread
3rd 1950 Panel Thread
4th (and current) 1950 Panel Thread

I'd like to post a few teaser pics so you can see how it's changed over the years. I'll be updating this build thread as well as the one on Dodgetalk from now on. God willing, it will be back on the road soon!

I had been using photobucket.com, but they have made some changes that I don't like... So, I've switched to imgbb.com. Here's the link to my imgbb.com image database: 1950 Dodge Panel Van — imgbb.com
 
So, a lot has changed since my last post on this build in 2014. Biggest change is the chassis on this truck. It changed because I decided to swap to a Hemi 5.7 and then decided to go with a 2006 Dodge Charger chassis to boot. The pros are many, but the cons of this move are many too. Biggest con is the time it's taking to start over on several parts of the build. However, the truck is going to be a FAR FAR better driver than what it was going to be. Anyway... scroll through the linked imgbb.com photo album to catch up.

Here's the latest:

The build continues... I have transplanted the radiator core support to this chassis. Here are some pictures and a video.


Radiator core support from the driver side, with flash.
20170914_162750.jpg


Radiator core support from the driver side, without flash.
20170914_162800.jpg


Passenger side front fender
20170914_162054.jpg


Driver side front fender
20170914_162616.jpg


Video of the tilt-front-end (rough as she is now)
[VIDEO]
 
Back in the 50's, my grand parents used to pack my dad and his 5 siblings into the back of one of those on a mattress and go on vacation. From NJ to Maine. 700 mile round trip in a tin can...
 
Update from the weekend's work on the Panel Van. I worked more on the front end of this beast. I tied the radiator core support to the upper strut mounts and then tied the upper strut mounts to the A-pillar of truck body. I removed the sheet metal that was bent as the '06 Charger flipped over and replaced it with a combination of new square steel and sheet metal. I'm still anxious to re-work the fenders and hood latches, but I have come a long way this weekend! :)


More Photos... Because the video is ok, but pictures are sometimes better.

From the top
20170917_191710.jpg

20170917_191737.jpg


Passenger side
20170917_191719.jpg

20170917_191201.jpg

20170917_191641.jpg

20170917_191345.jpg

20170917_191355.jpg

20170917_191408.jpg


Driver side
20170917_191728.jpg

20170917_191156.jpg

20170917_191620.jpg

20170917_191217.jpg

20170917_191240.jpg

20170917_191247.jpg

20170917_191301.jpg

20170917_191309.jpg
 
I continued working on the front end last night. Started off by re-working the hood latch mechanisms so the cables come out in a direction that actually makes sense. Unfortunately, I didn't take any pictures of the latches while they were out. They started out life as tailgate latches on a an '03 RAM. As tailgate latches, though, they were operated by pulling on a rod. When I converted them to be used with a cable, I wasn't thinking about the angle... I was just thinking about the fact that they needed to work with a cable. Now, however, the cable actually comes off the latch in an angle that works with the truck. I'll have to take some pics tonight.

After doing the latches, I spent some time adjusting the hinges on the front end so the tilt-front-end sits level against the rest of the body. Then, I added the hood to the tilt-front-end and adjusted that. Adjust, measure, adjust, measure... But everything needed to be perfect so I could move forward with the fenders. ...which I was about to do. Then, I realized how little room there was for the steering column and I decided to tackle that before the fenders. Of course, one thing always calls for another. While I was right there working on the steering column, I needed to tackle the brake booster and pedal assembly. I didn't anticipate just how much would need to be re-worked by throwing the Charger under this truck.

There is so much to consider when trying to make this chassis work. I had planned to use the '04 PT Cruiser steering column since it worked well with the dash. However, since I am determined to use the '06 Charger wiring for engine management and all (almost all) the controls within the truck, it is easier (for wiring purposes) to throw that PT Cruiser column out and replace it with the Charger column. The fact that the '04 PT is not a Canbus car, really screws things up.

Just changing the column may seem simple, but it really isn't. The Charger column mounts in an entirely different manner than the PT Cruiser. The Charger column does not include the ignition switch. The Charger column has a Mercedes Benz version of collapsible column that takes up entirely too much room. But... The steering shaft needed to be re-worked anyway because of the fact that I'm now using the Charger front suspension and rack-and-pinion. So, ok... Just get to it and start tackling the issues.

I needed to start with a clean slate... So out came that side of the firewall. When I get home today, I'll start by removing the stock exhaust manifolds and replace them with the long-tube headers. Then, I'll put the Charger column in so I can start laying out the steering shaft and figure out where it will need to come through the firewall. Good thing is... There is room for me to push the firewall out wherever I need.

Here's the trick... As I am running the steering shaft, I also need to consider the brake booster and master cylinder bracket location inside the cab. It's a ballet of sorts that will take time, but really won't be a big deal.


Wahoo! The hood is on!
20170918_194756.jpg


The firewall minus a nice section that will house the steering shaft and brake booster.
20170918_194828.jpg
 
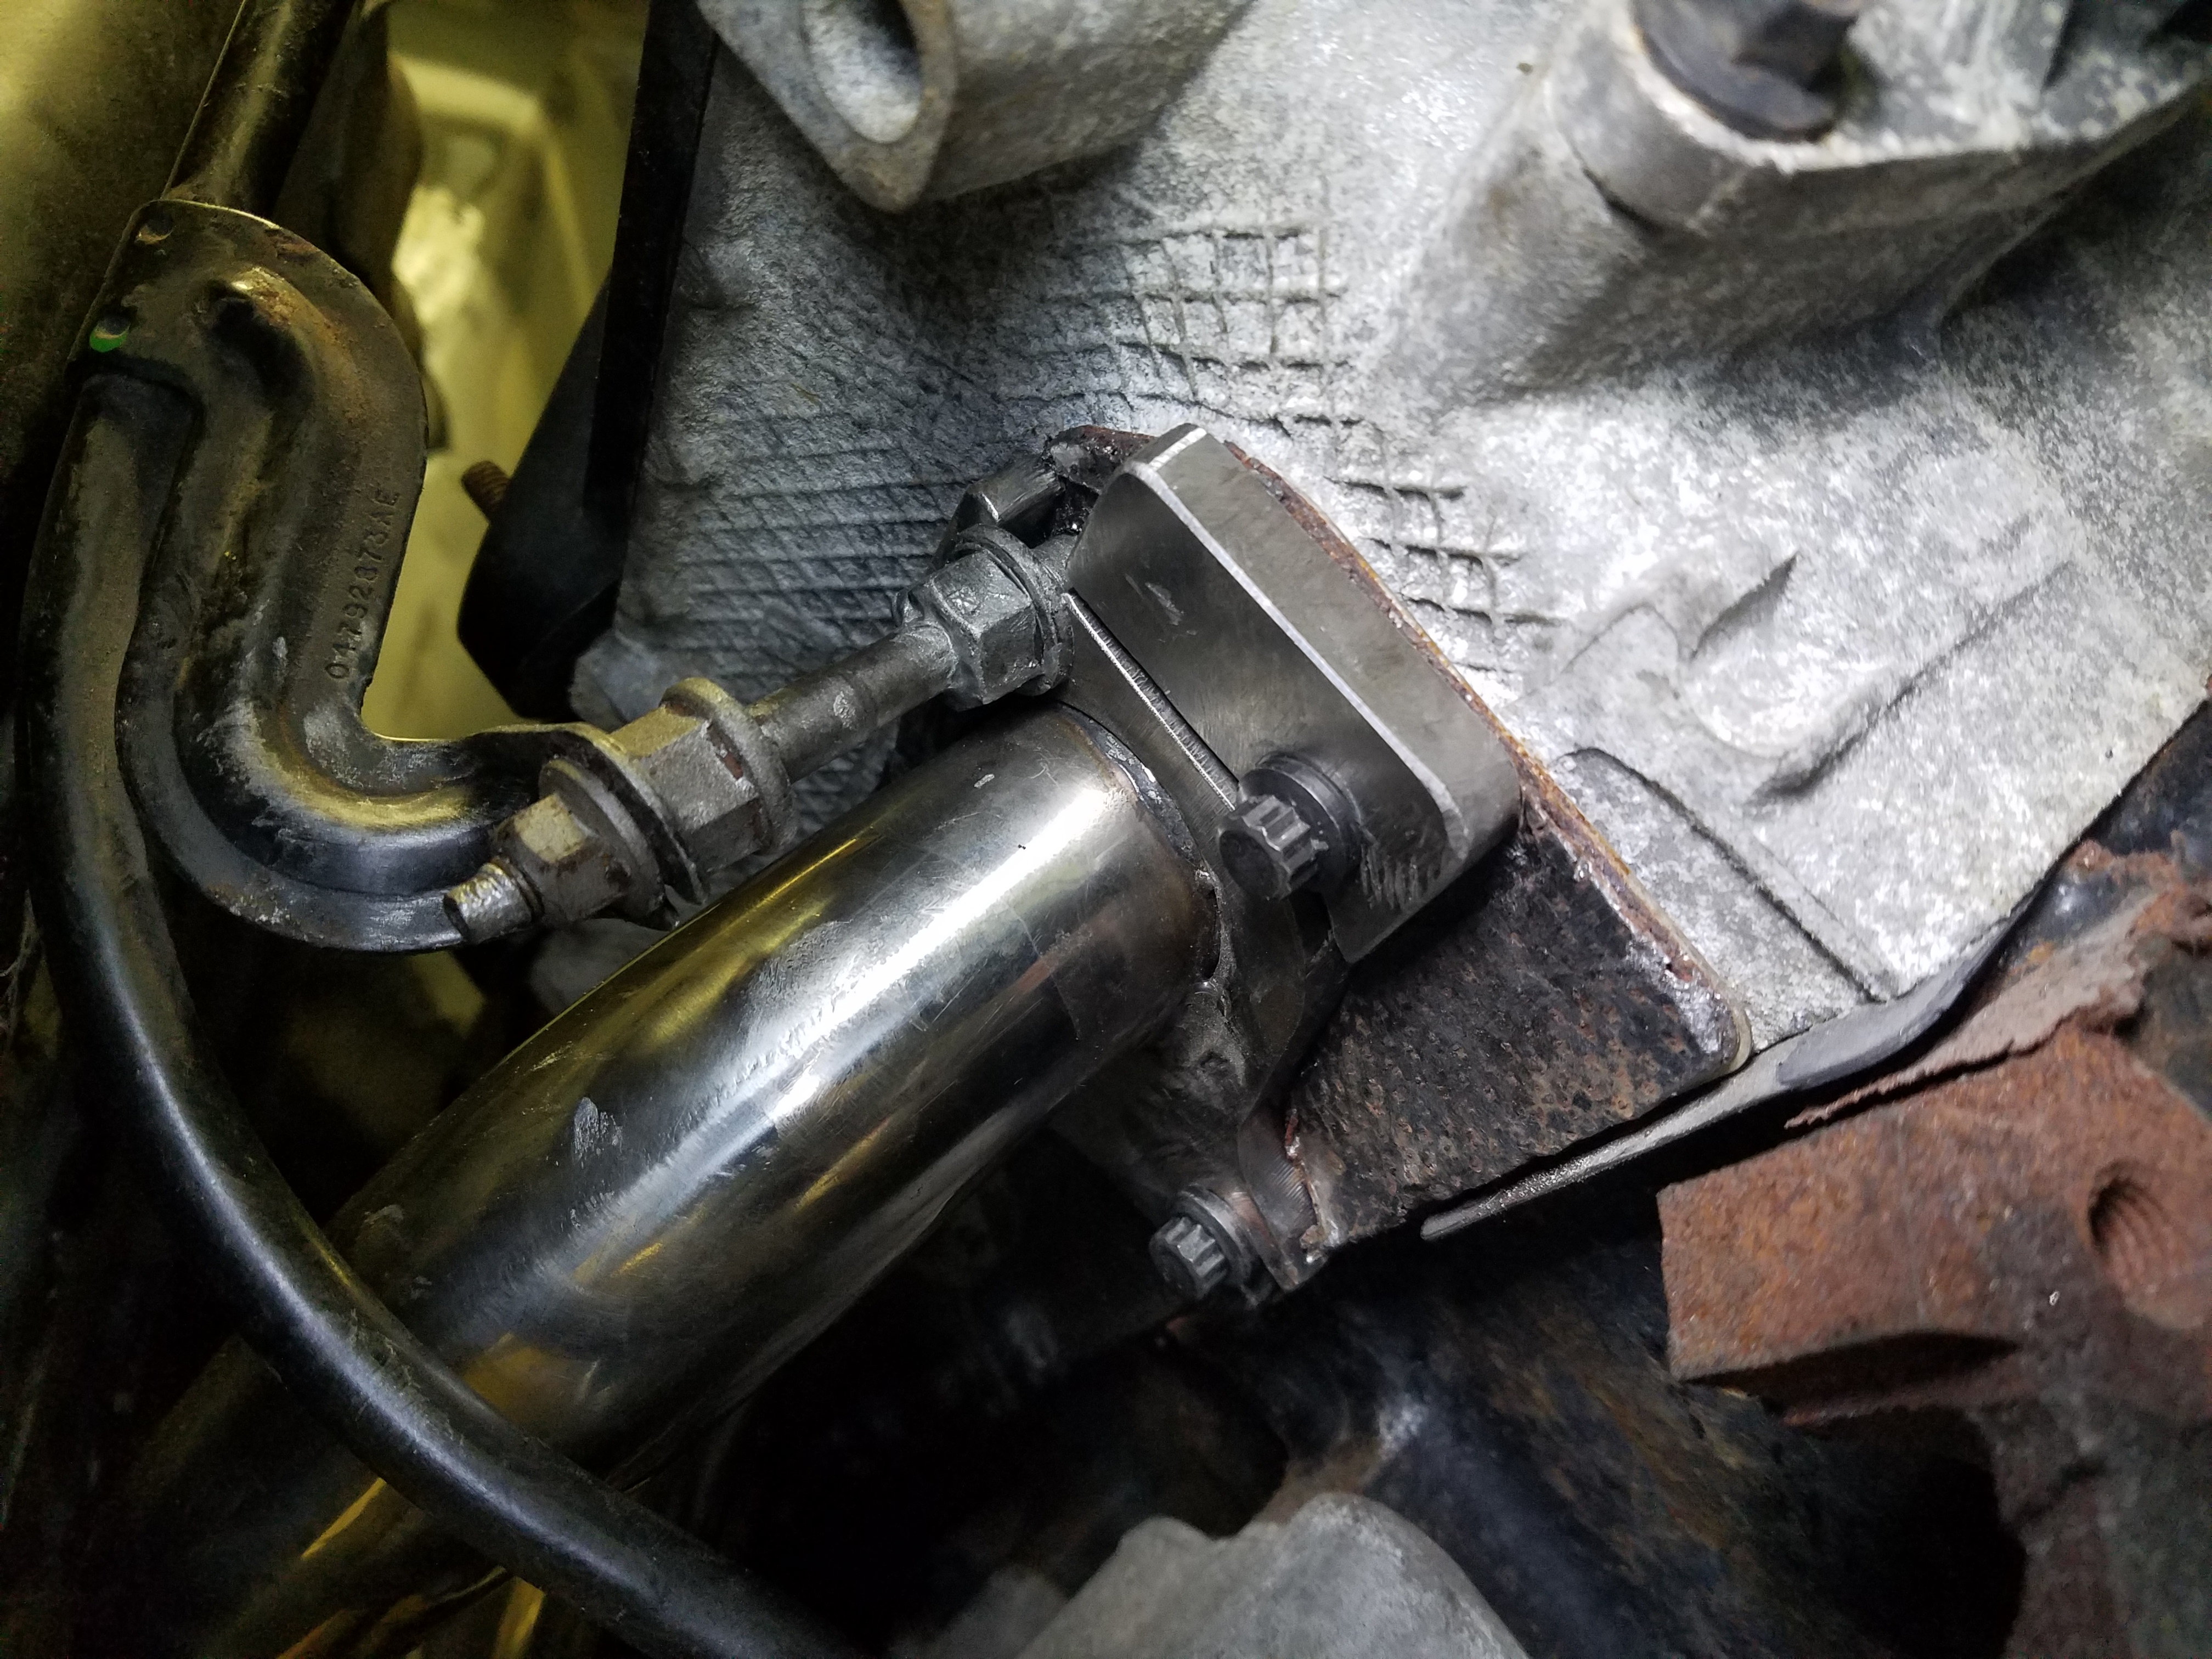
Updates... Steering column is in. Headers are on. EGR is bypassed (on the header side of the head). Oil dipstick tube is re-mounted.

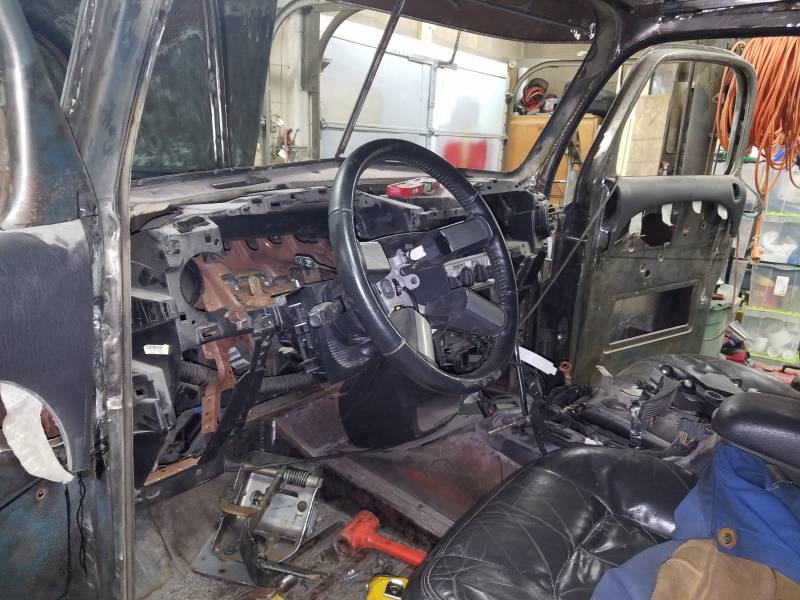
So, I did decide to use the '06 Charger steering column. I was afraid it was going to be rough to swap it in, but I was pleasantly surprised. It was about the easiest column swap I have ever done (once I got over myself and decided to take the saw to the PT dash, that is). I cut out the PT Cruiser column mount to make room for the same piece from the Charger dash frame. Then, I cut into the Charger dash frame to retrieve the column mount. Both column mounts were welded to similar round tubes on the dash frames. That made it so easy because I basically slipped the Charger mount around the round tube in the PT dash and welded it in. That was it. On the other hand, the steering shaft is a completely different story.

The steering shaft connection on the Charger column has a bolt running through it directly into the end of the steering shaft on the end of the column. It's difficult to describe, but trust me, it's different than the way Dodge has always connected their steering shafts in the past. The change is most likely due to the fact that the parts all bear a stamped Mercedes emblem. It wouldn't be an issue, but I simply don't have enough room for Mercedes' answer to a collapsible steering shaft. Anyway, all I can use from that shaft is the splined end. So, I have begun to cut and weld several different steering shafts to come up with a set of u-joints that will work for my situation. I'll need to cut, rotate and re-weld the double u-joint I made because I just wasn't thinking. I do that sometimes. Oops. The basic plan is to have a double u-joint on top, have the shaft go through a bearing on the firewall, then have another u-joint that leads to another shaft that leads to another u-joint at the rack & pinion itself. That's the shaft plan. Take a look at the pictures to see what I have.

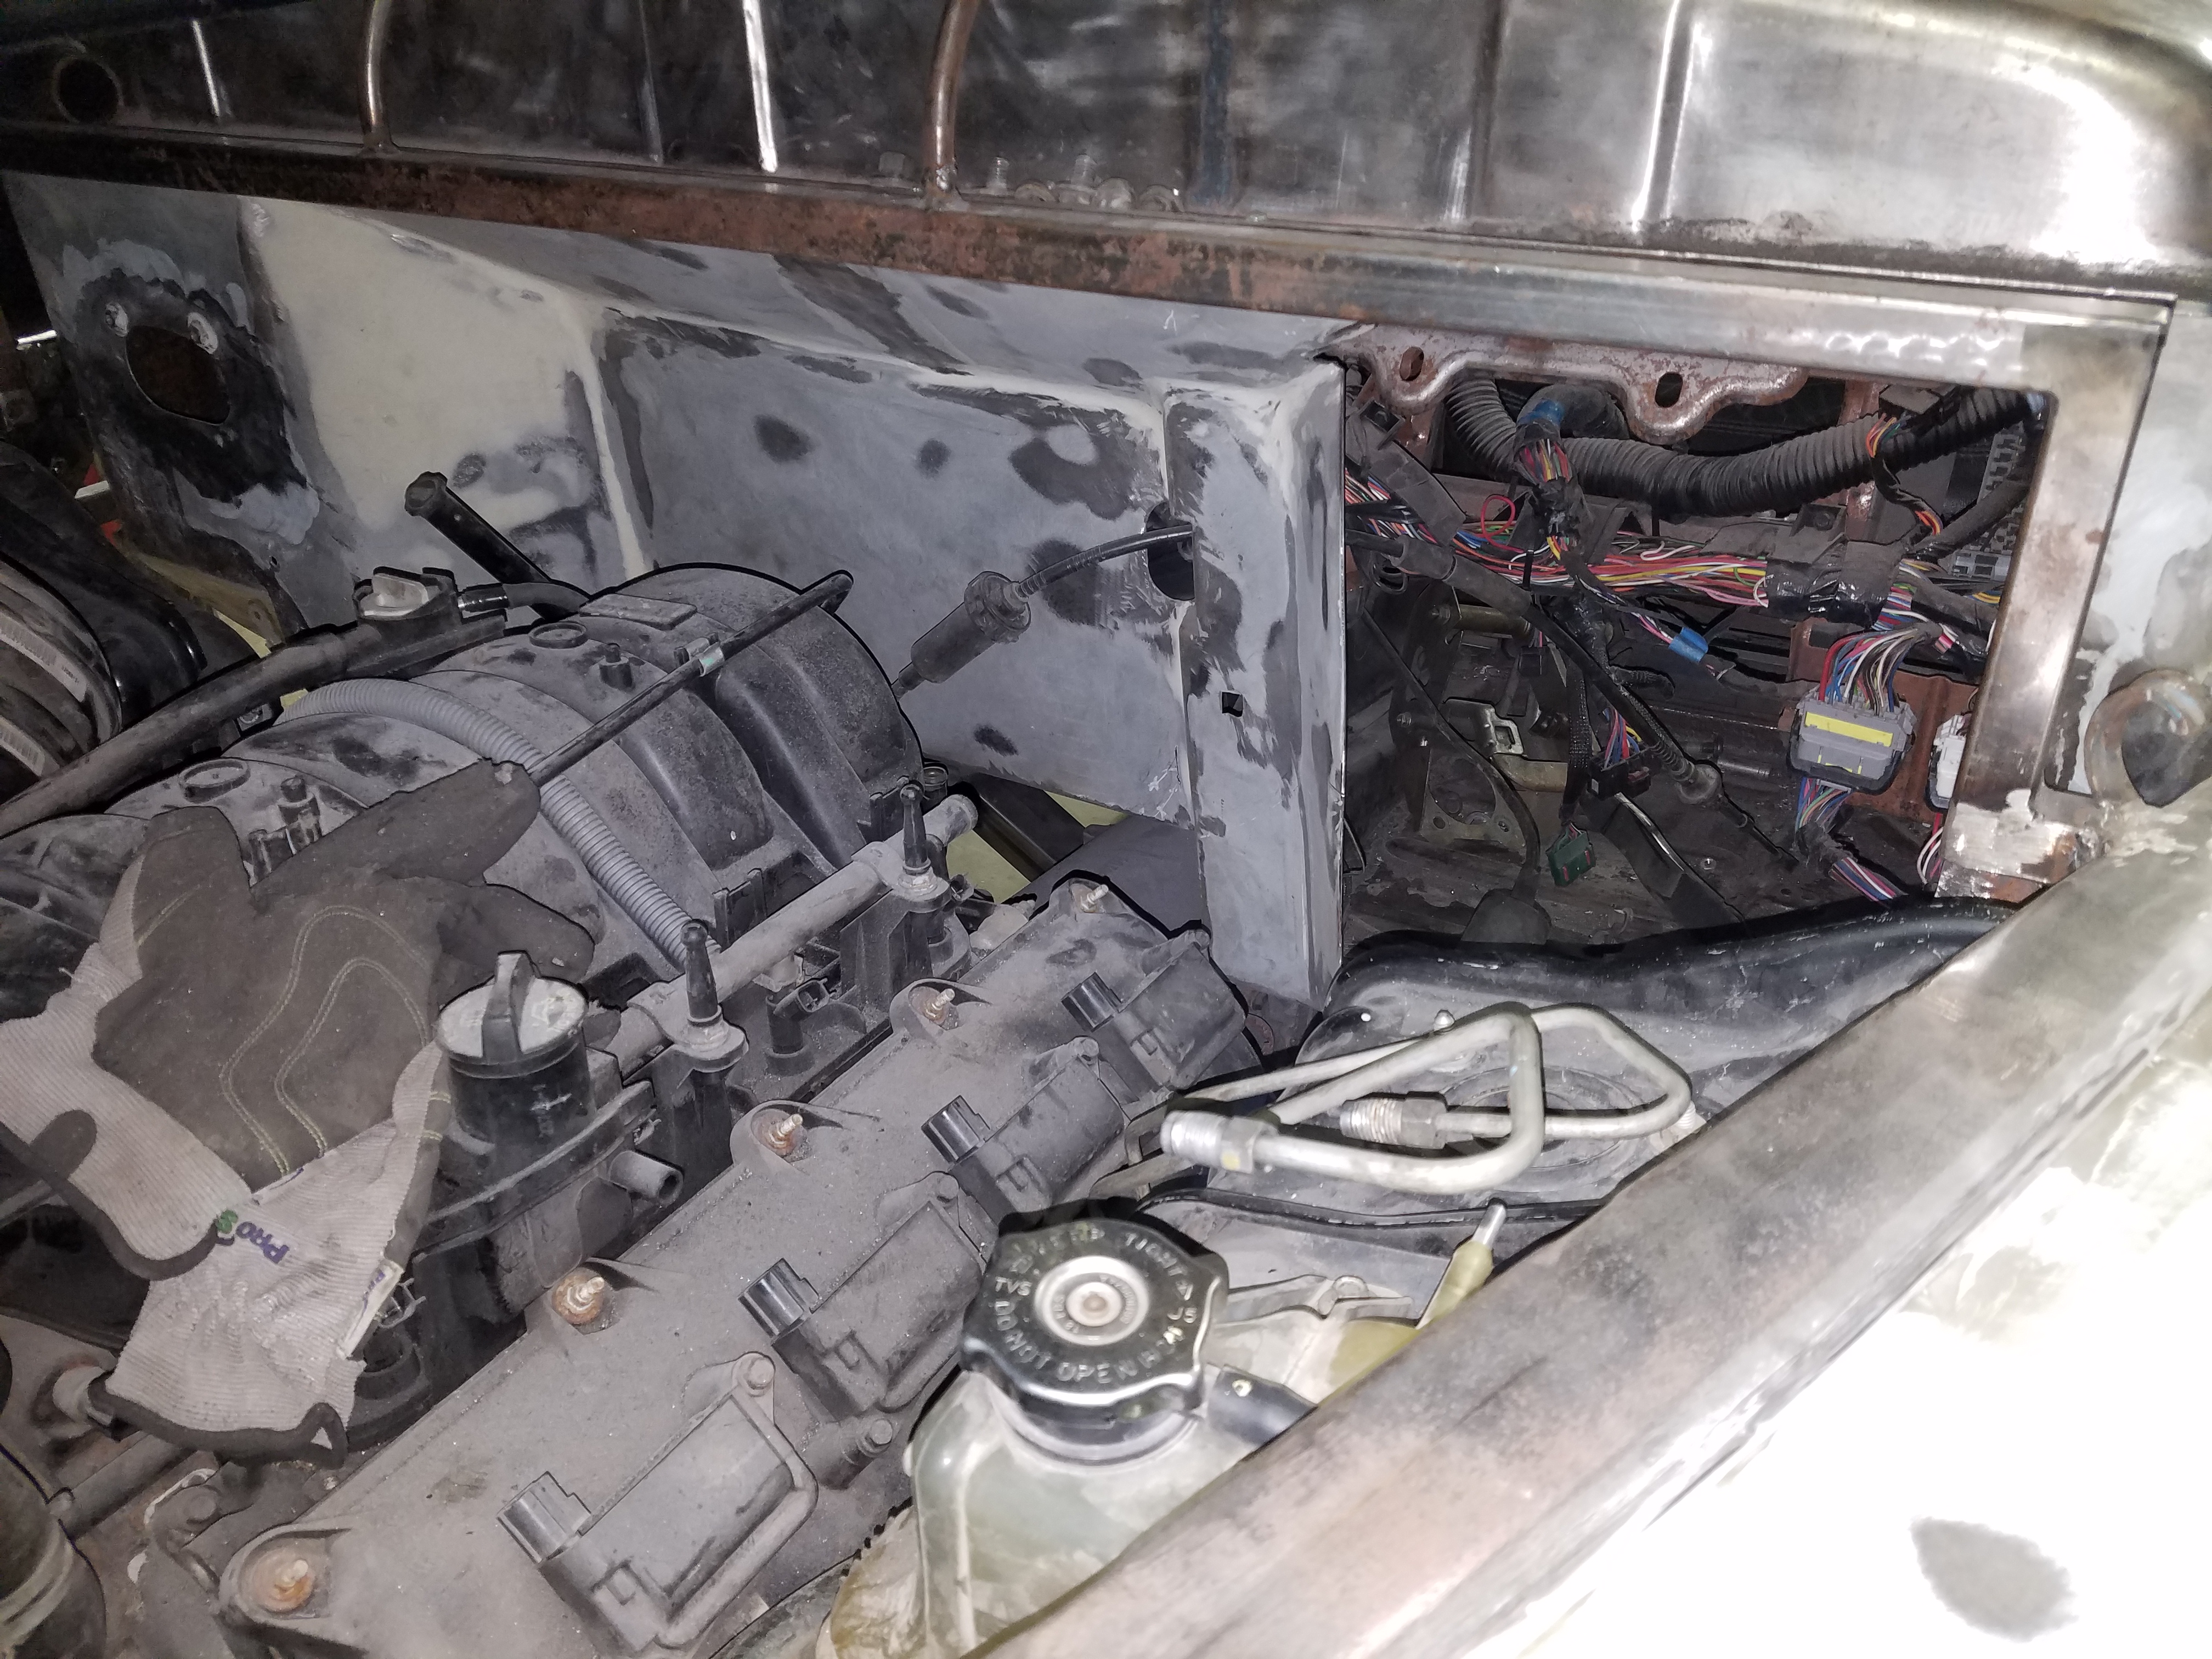
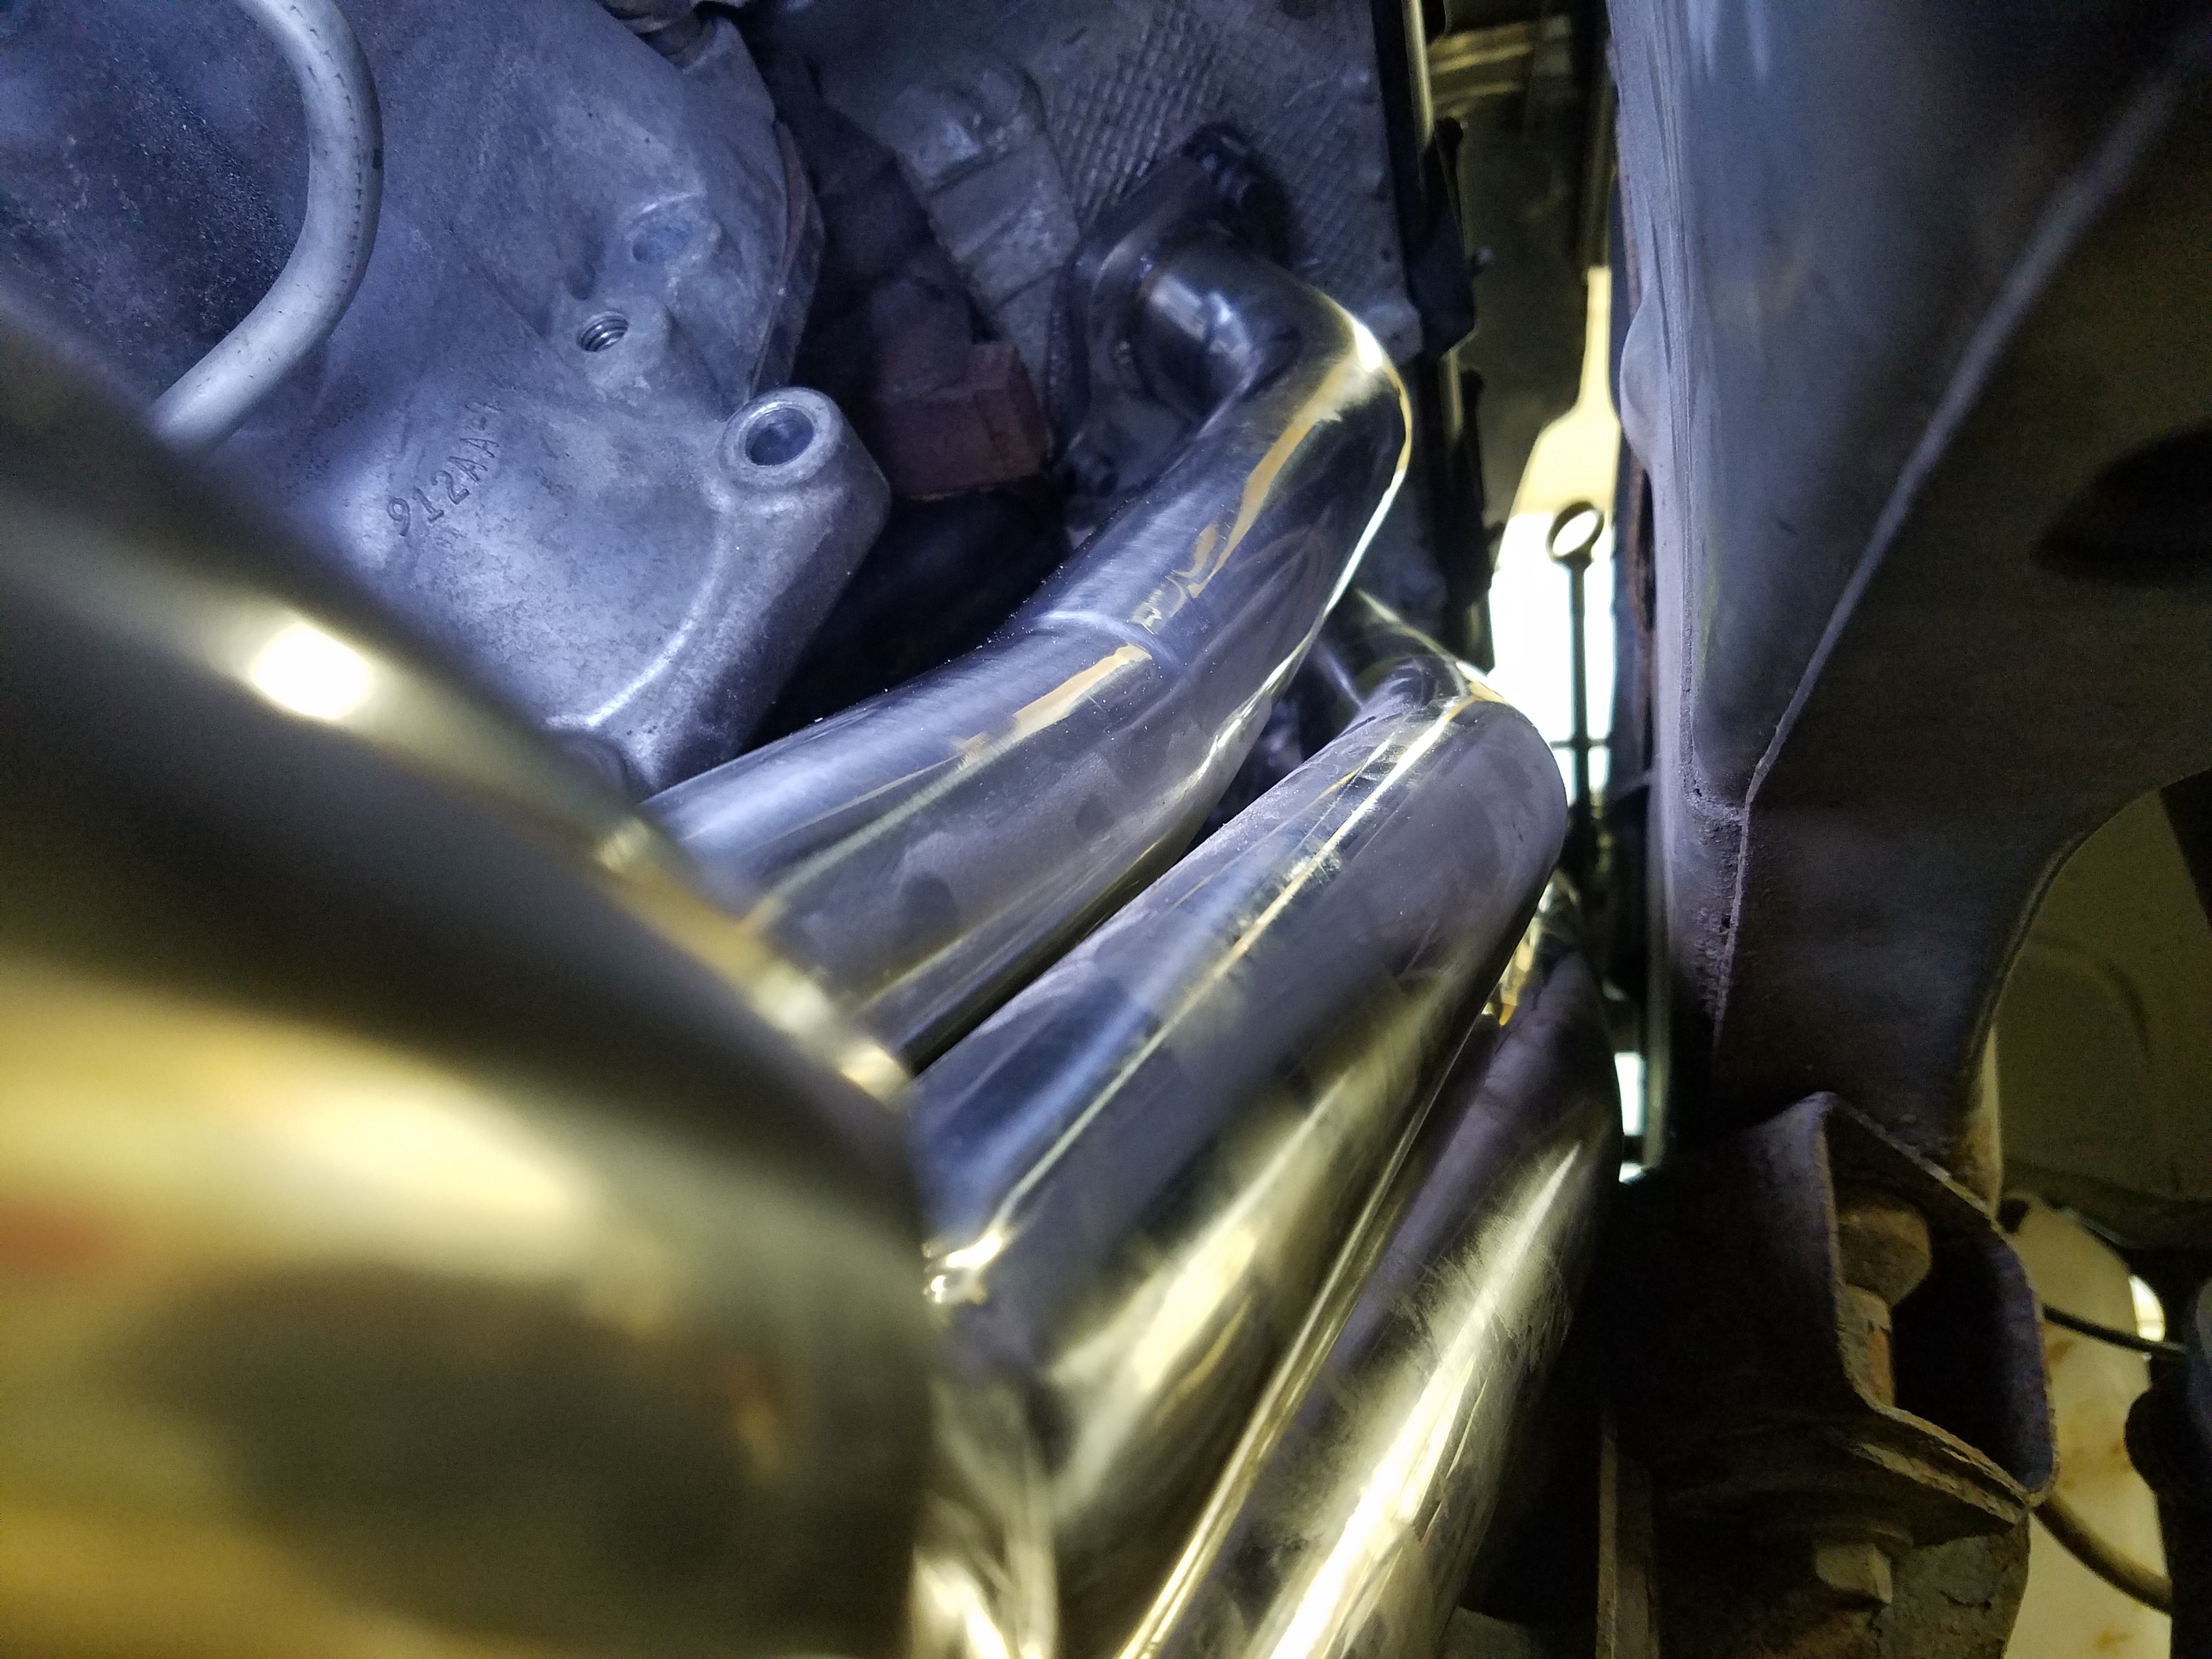
Once I had the column in place, I moved to swapping out the stock exhaust manifolds for the long-tube headers. The header bolt holes had to be "adjusted" to make them fit, but it wasn't a big deal. Picked out an appropriate drill bit and reamed all the holes. Slotted one, but other than that, it was good on the driver side. The passenger side had to have the same drilling/slotting treatment, but then also had to make a cover/plug for the EGR port that originally went into the OEM manifold. Here's a question... Should I drill that plug and put a 304 stainless tube back in to reinstate the EGR? What do you think?

The idea of "Gauges" is one of the many things rattling around my brain too. The '04 PT Cruiser dash houses a set of '04 PT Cruiser gauges. Well... I have summarily dismissed the idea that they might work because the '04 PT was not based on a canbus wiring system. However, the '06 PT was based on the canbus wiring system. The junkyard I frequent (and get AWESOME deals from because they all know me well) doesn't currently have any '06 PT's that I can snag an instrument cluster from, but I did snag one from a Dodge Caliber since it's the same as the one from the PT. It fits (more or less) in the dash itself, but I'll need to heavily modify the '04 PT dash bezel to make it work. So, the idea is rattling around in my head. Some sort of solution will fall out. ...eventually.


OOOHHH... SQUIRREL! Just saw this on e-bay! 1948 Dodge Other Pickups


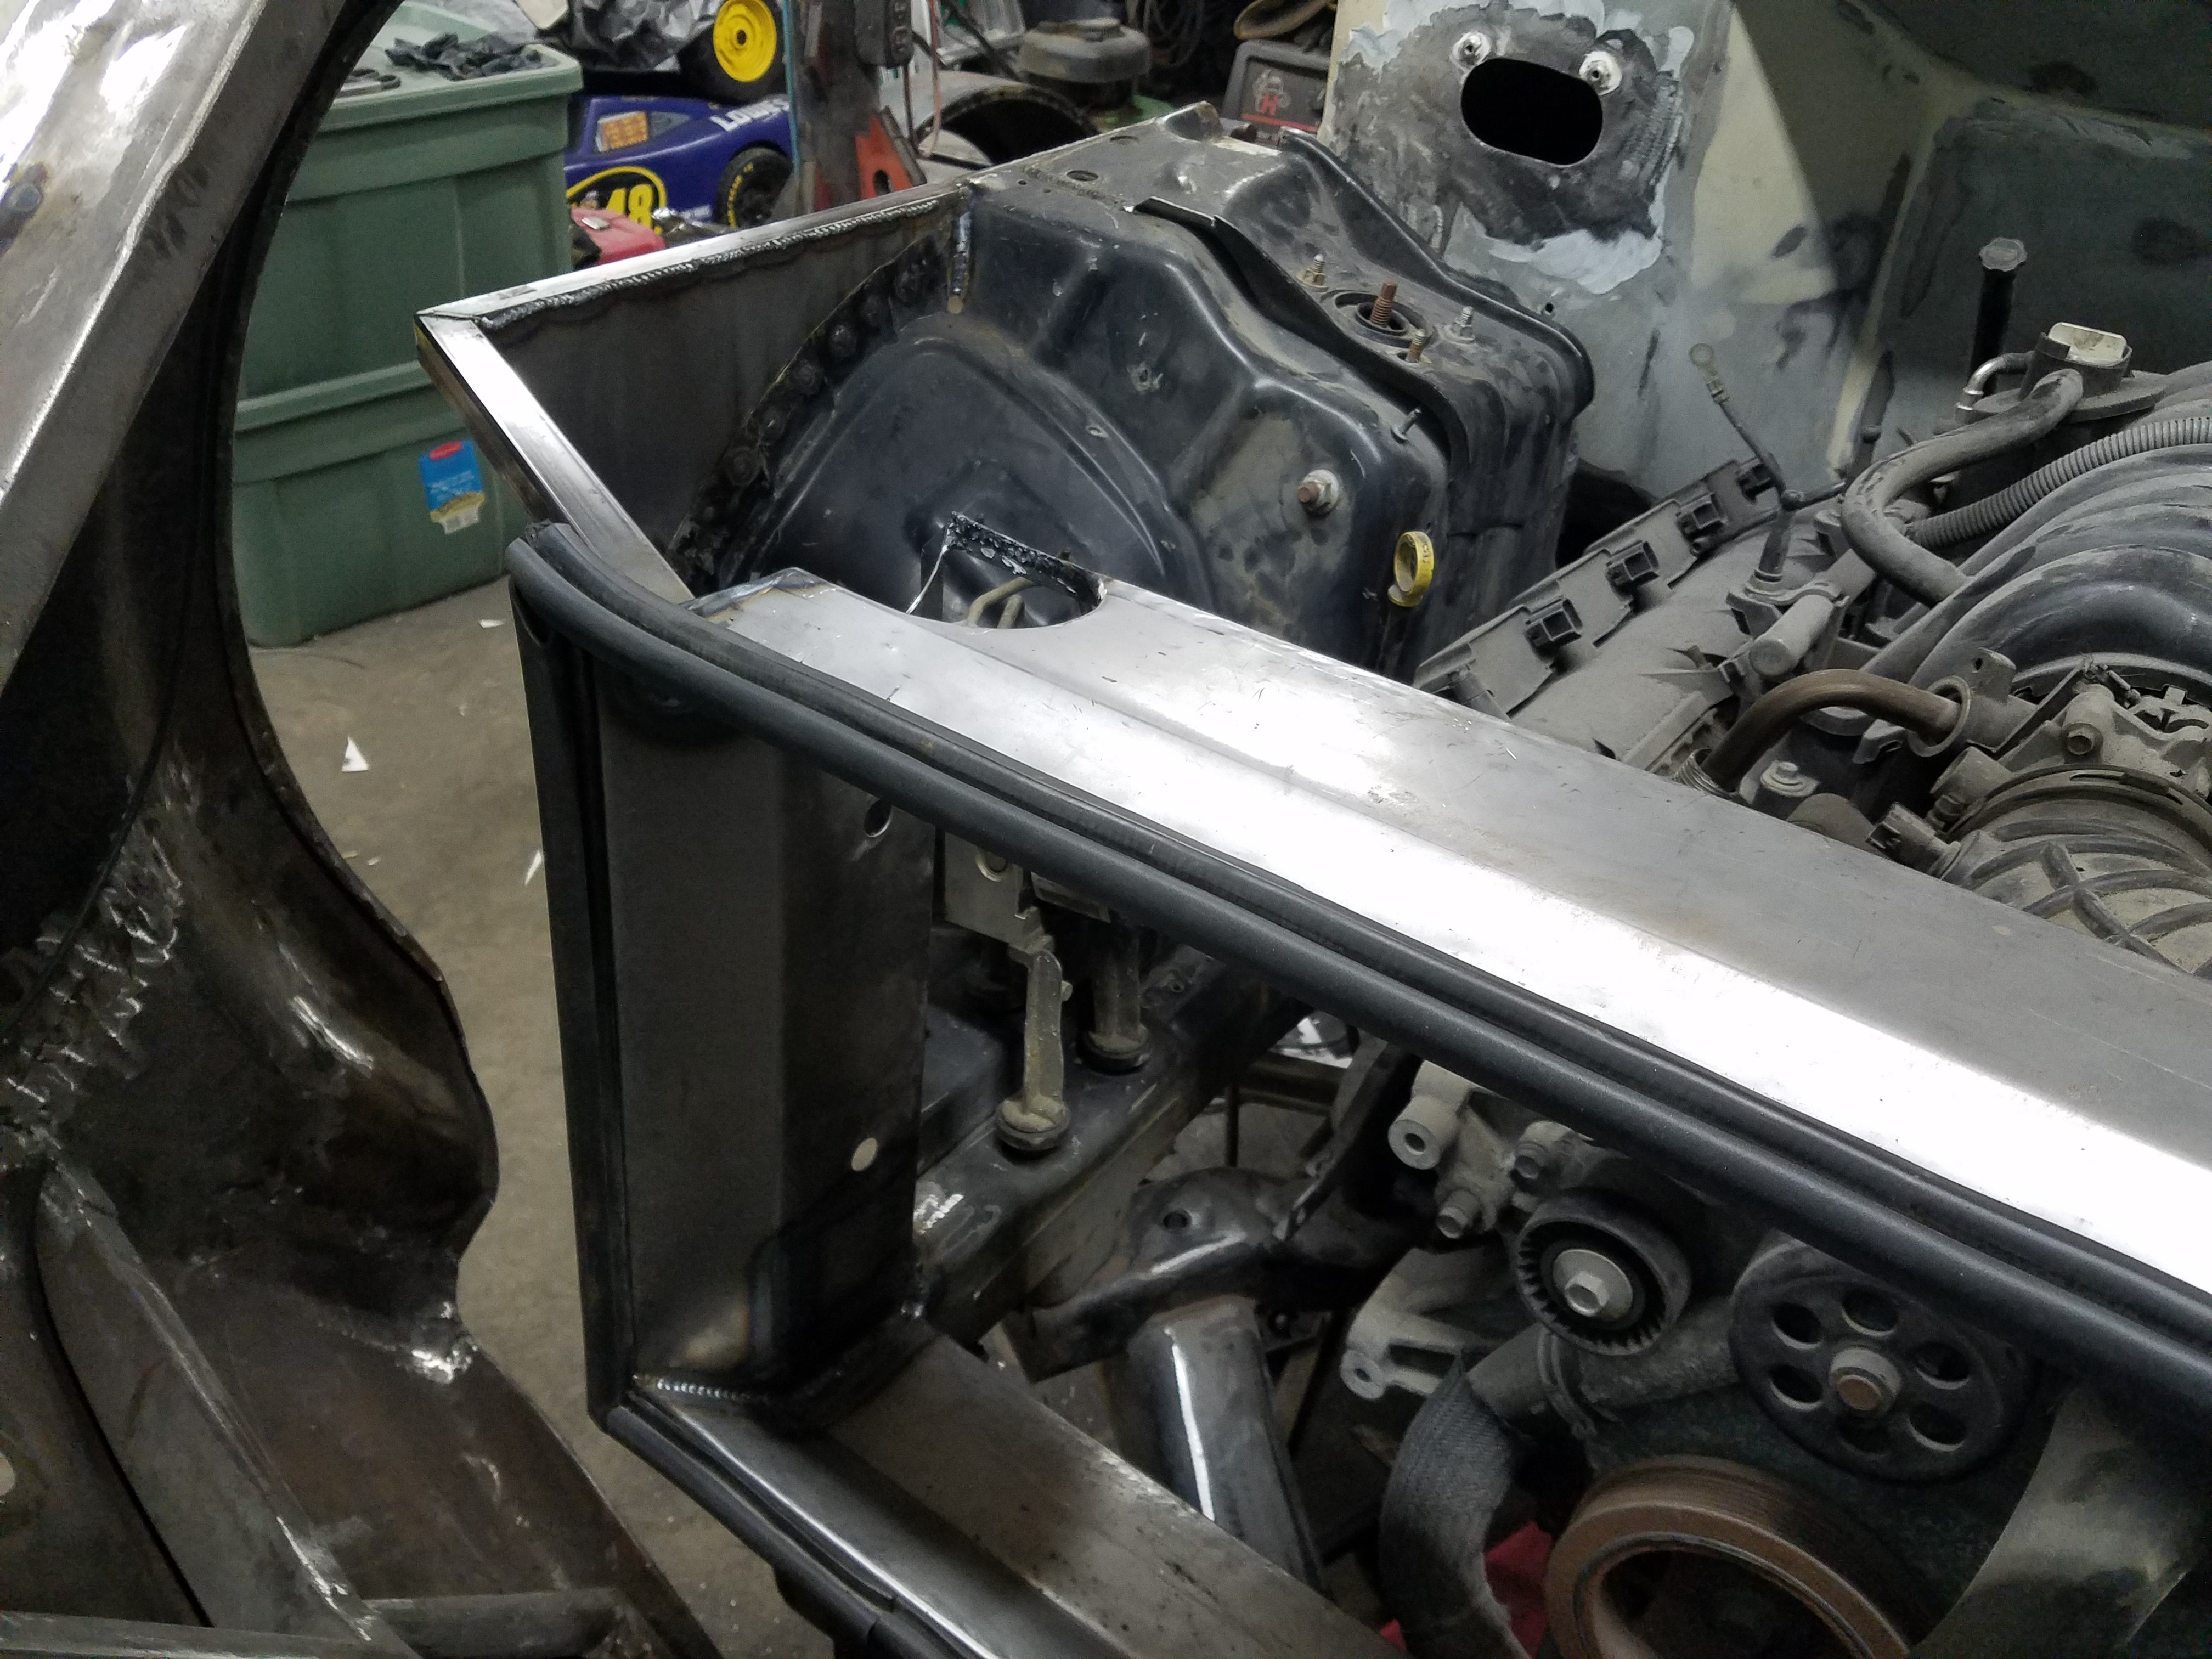
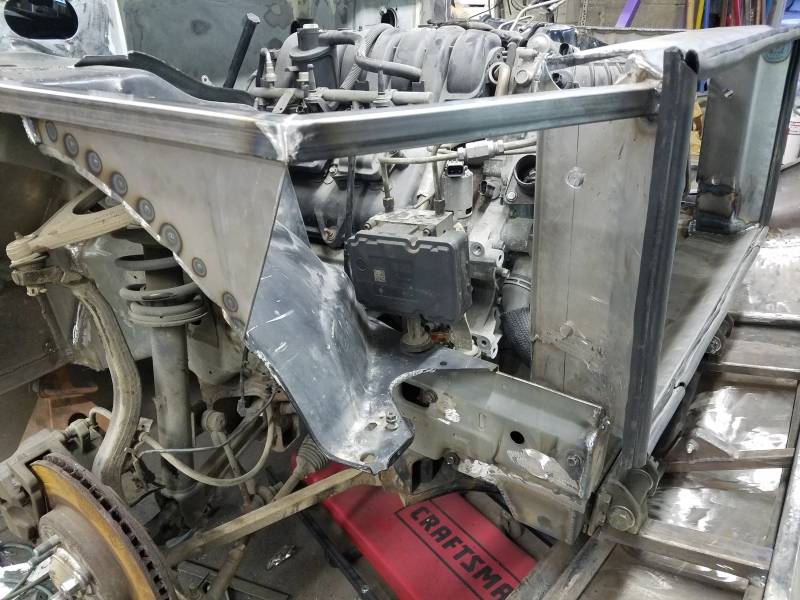
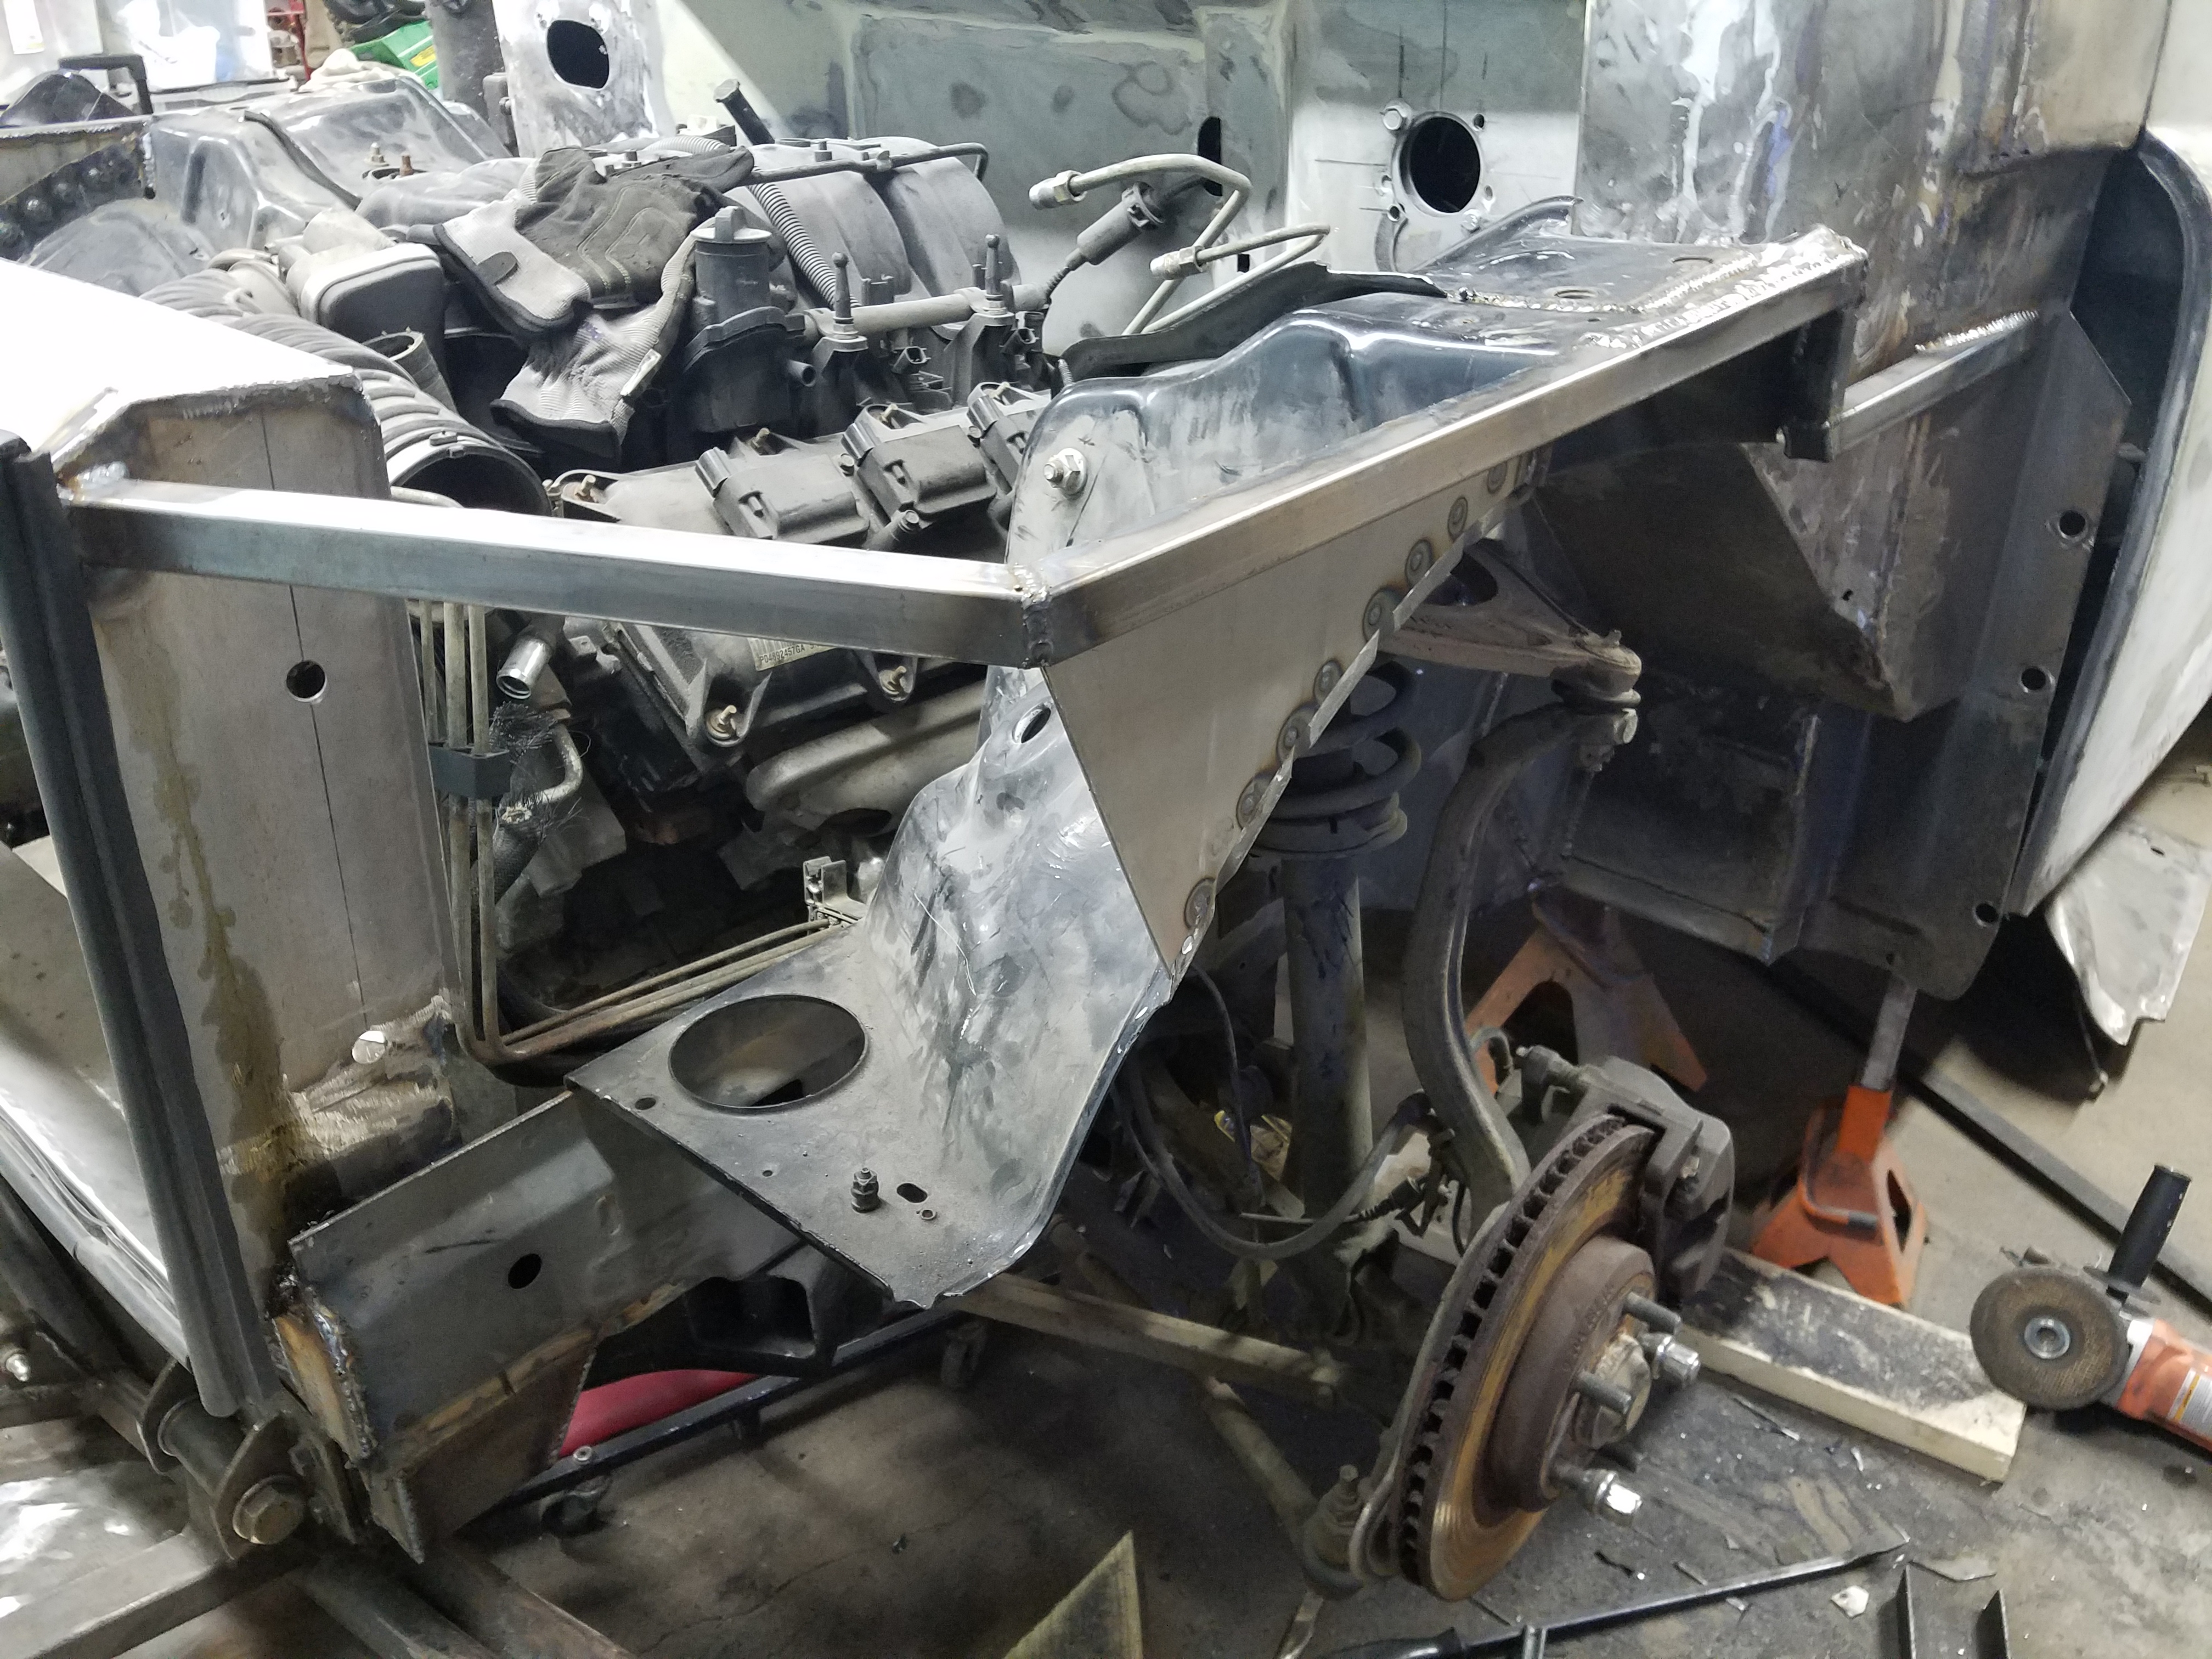
Driver side of engine (without exhaust) showing where the rack & pinion input is in relation to the engine
20170919_201737.jpg


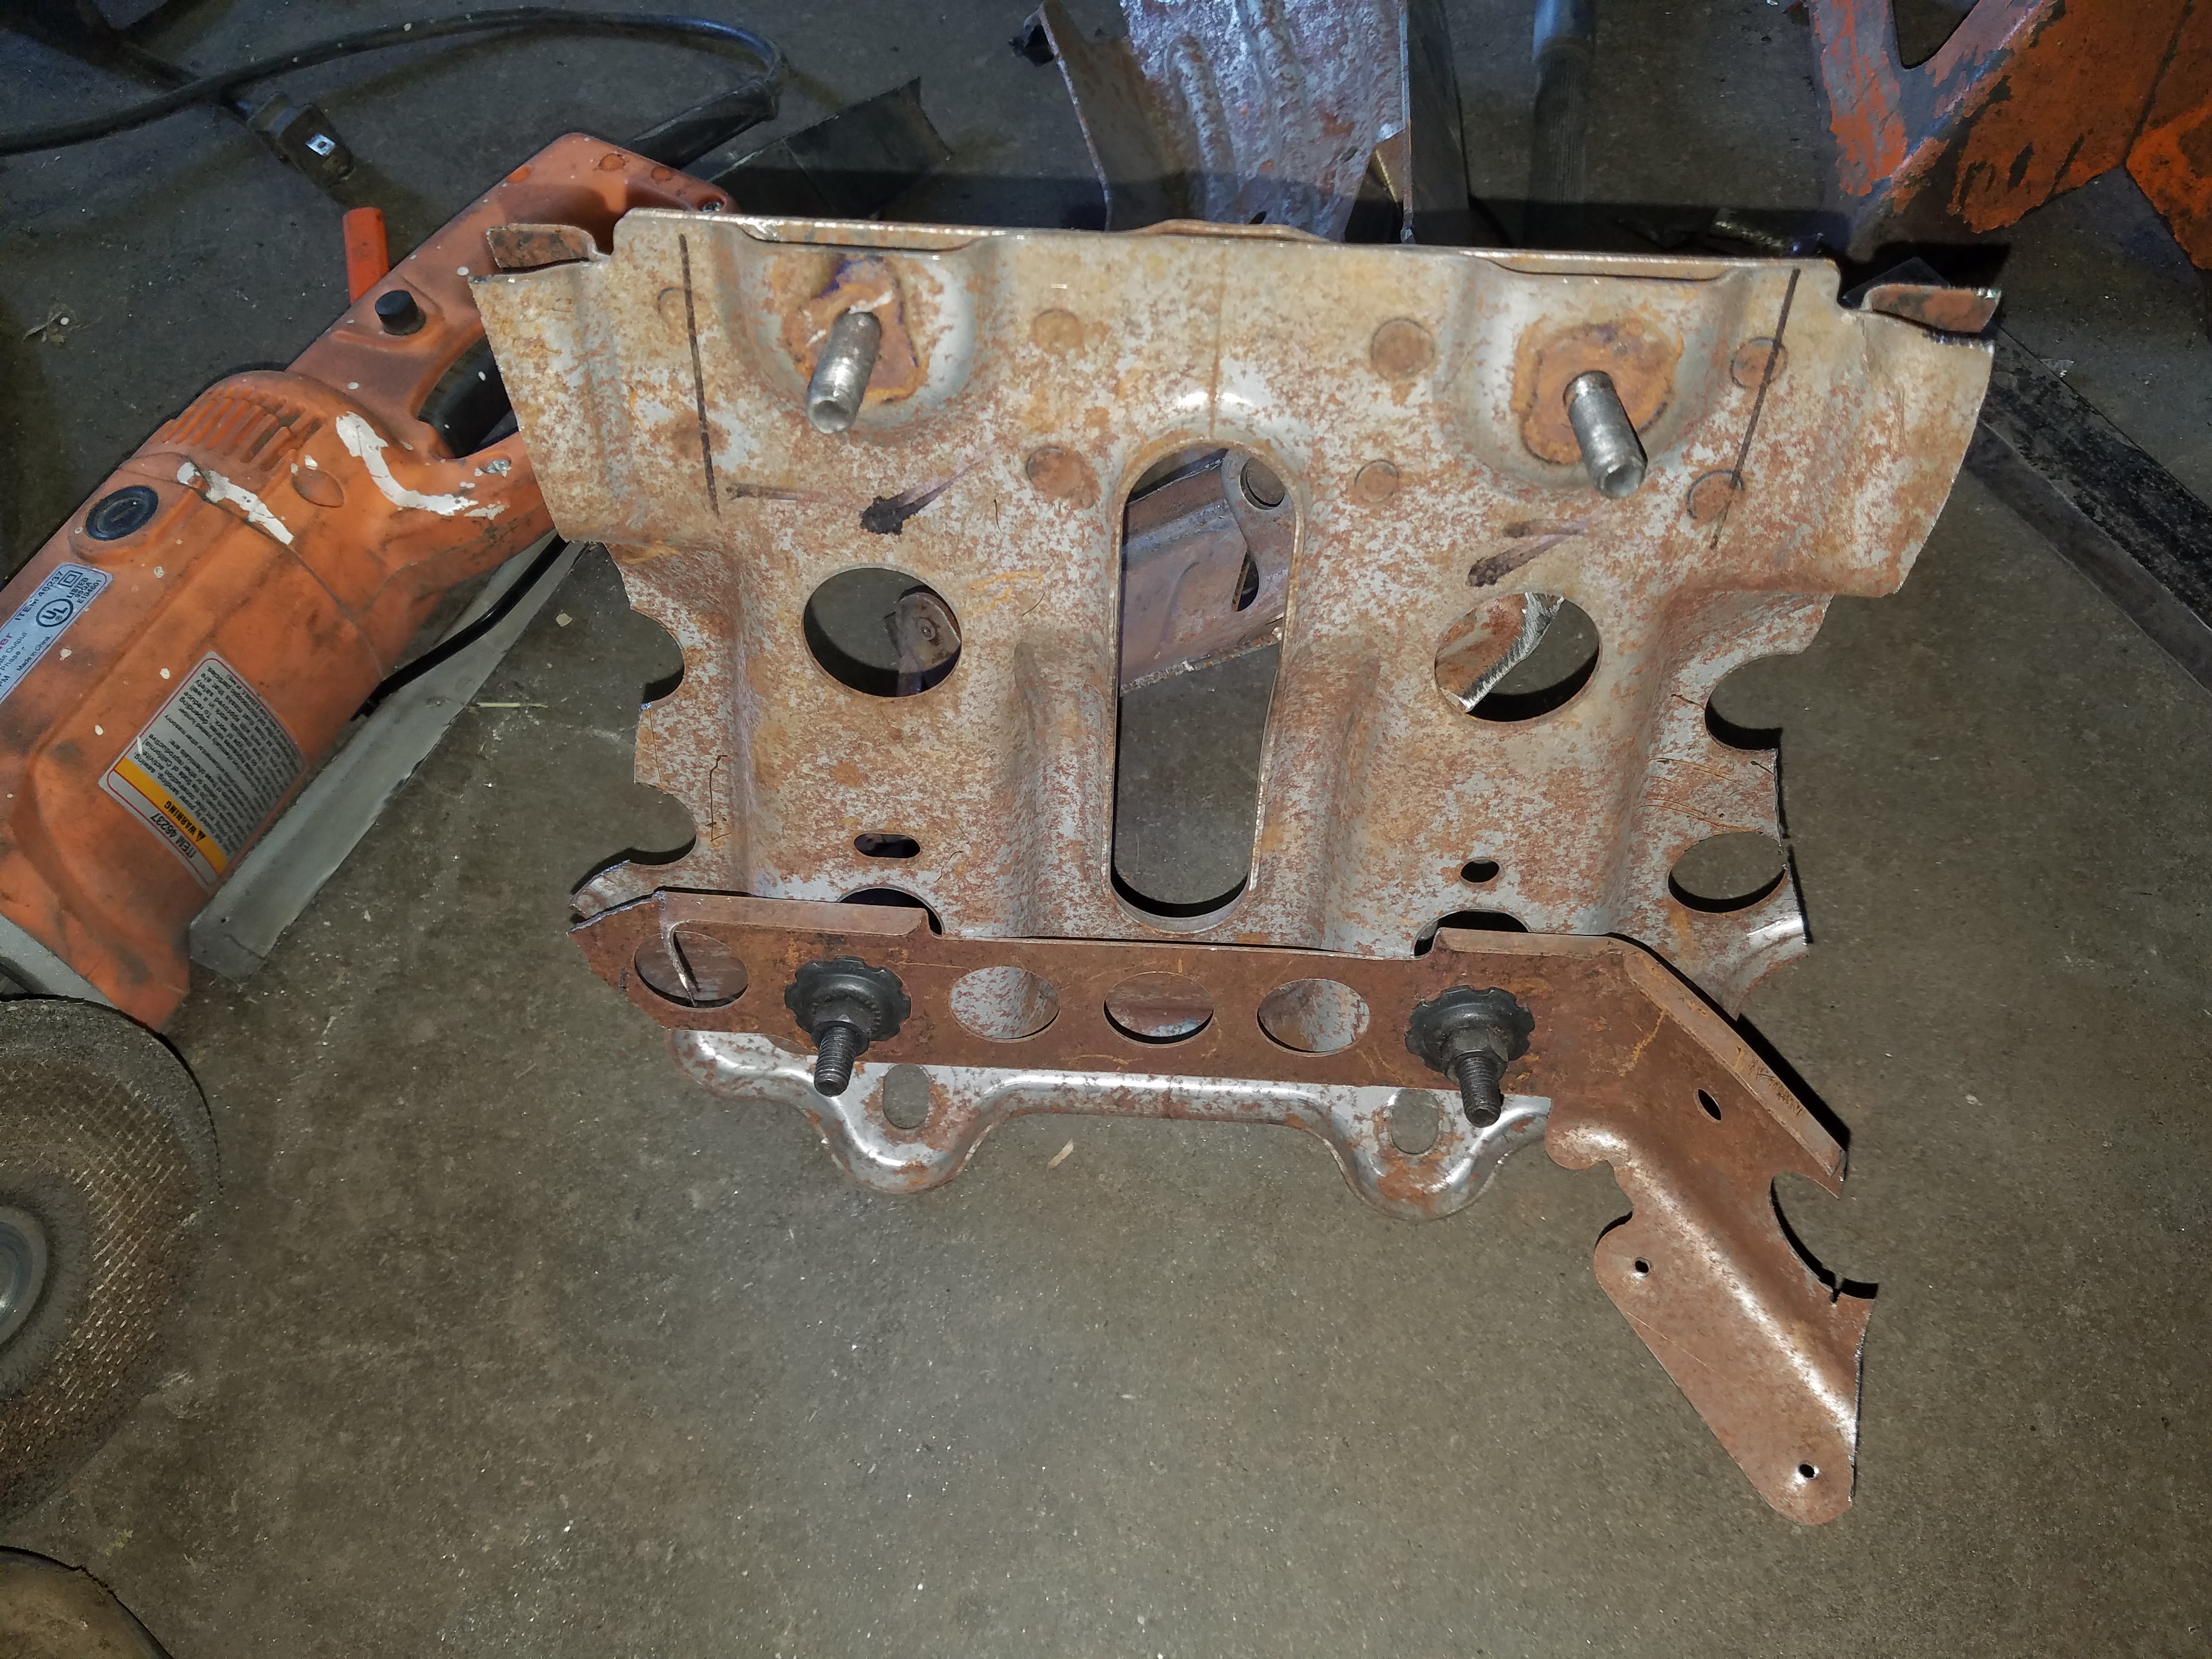
PT Cruiser steering column mount I removed
20170919_170405.jpg

20170919_170348.jpg


Charger steering column mount I removed
20170919_170419.jpg


Charger steering column mount installed in the PT dash
20170919_165722.jpg

20170919_165728.jpg


Charger steering column mounted in the PT dash
20170919_202402.jpg

20170919_202342.jpg


Steering column video


Modified double u-joint (that will need to be cut back apart, rotated 90 degrees and welded back together)
20170920_194949.jpg

20170920_194943.jpg


Steering shaft video


Driver side header installed
20170920_133817.jpg

20170920_133801.jpg

20170920_133734.jpg


Passenger side header installed
20170920_165017.jpg

20170920_165005.jpg

20170920_164947.jpg

20170920_164940.jpg


Oil dipstick mount (the silver is anti-seize)
20170920_164850.jpg

20170920_164840.jpg
 
Auto Transport Service
Back
Top