• When you click on links to various merchants on this site and make a purchase, this can result in this site earning a commission. Affiliate programs and affiliations include, but are not limited to, the eBay Partner Network.

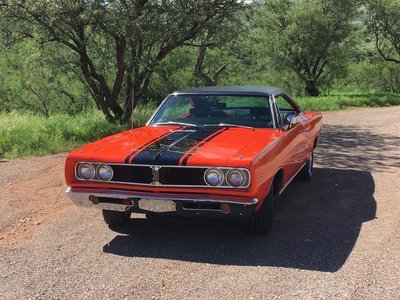
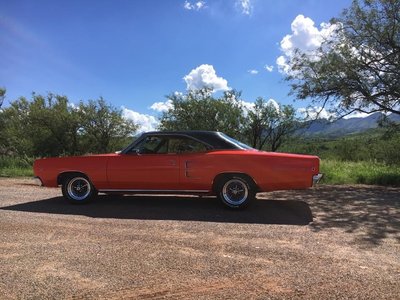
1968 Coronet 500 Project

My Belvedere requires an apology lol.

It is about 40 highway / 60 street driving. It cruises nice at 70 mph, but I hold it to 60mph on the frontage roads. It really likes to go! No A/C for me though :(
 
What's your timing set at?

The factory setting is 2 Degrees ATDC, '67 was 2 BTDC. I can't remember if I set it to the correct '68 or '67. I think 2 BTDC because it was pinging a bit under light load when it was really hot.
 
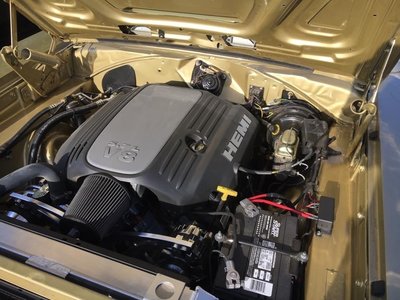
Interesting day.... 105 in Tucson, drove the Coronet in town to pick up my mom for a birthday early dinner around 4. The factory air cleaner makes a big difference with temperature in town. Pulling the cooler air from off to the side of the engine instead of sucking the really hot air above the manifold kept the temp below 208 with the AC running on the hottest day I have driven it in town.

The F$%^#$%$ing fuel tanks still leaks. I smelled gas when I stopped to pick up my mom and when we got to the restaurant. I thought I saw it dripping near the RH muffler and got really concerned. I filled it this morning so it was down about 3 gallons. Though about AAA and a tow but I could not detect a leak after it sat in the parking lot for 2 hours. I drove it home jacked it up and can't find or smell anything now it is down to about 2/3 of a tank... Grrrrrrrr.... should have left the Carter 2 barrel on the thing.....

Lastly the damn AC controls switch broke. None of the buttons do anything and it is stuck with the AC on. I think the dash got so hot it deformed and the switch track popped out of the vacuum switch pin. I don't think it actually has broken parts, I hope. Those AC switch parts are $$$$$$

Jim
 
Where to start. I pulled the AC panel out to see what was going on. The AC switch is a 50 year old plastic beast that was assembled in two pieces. One piece has pins and the back has holes. The two were assembled and the pins were melted to create plastic "rivets" to hold them together. 50 year old plastic is brittle. The pins all broke and the rear came off. I did not get photos but be VERY CAREFUL NOT TO REMOVE THE VACUUM PLATE from the front half. This is a FASCINATING design, clearly a mechanical engineer! Too hard to explain but if you rebuild your switch you will understand.

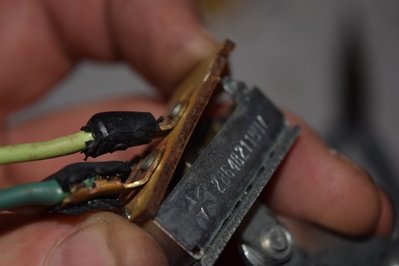
The first thing I did was drill and tap the pins for 3/8" #4-40 machine screws. I was fat dumb and happy till I burnt my finger on the fan speed switch and the vacuum switch. when reassembling the dash. The switch came back out. They were getting WAY to hot. You can see the blacked plastic.

DSC_0598.jpg


DSC_0599.jpg


The compression rivet was oxidized and making poor connection which = resistance and heat with high current. I soaked the parts in vinegar for 20 minutes to clean the oxidation..

DSC_0600.jpg


The fan speed switch was the same story. The AC switch is the MASTER on for the fan and the fan switch is the speed adjustment so they both get high current.

DSC_0602.jpg


I was measuring over 500mV across these connections and assuming 3 amps for the fan that is 1.5W of power in those small connections. I bent only the 2 opposing tab and slipped the phenolic board from under the front tab. I soaked them all in vinegar.

DSC_0604.jpg


Here is the sliding contact for the fan speed switch. It moves and the flat plane contacts rivet nubs on the bottom of the phenolic board.

DSC_0605.jpg


It is spring loaded to press again the nubs.
DSC_0606.jpg


The vacuum switch fan On/Off contact is similar but you can't mix them up they won't fit.

DSC_0607.jpg
DSC_0608.jpg
DSC_0603.jpg
 
Here are the 2 contact plates. The fan speed switch on the left and the vacuum on/off on the right.

DSC_0609.jpg


All clean.

DSC_0610.jpg


The phenolic board was hot and is brittle.
DSC_0611.jpg


DSC_0612.jpg


The first thought was to tighten the rivets. DO NOT DO THIS; I REPEAT; DO NOT DO THIS......

DSC_0613.jpg

DSC_0614.jpg


ALL THIS DOES IS SHATTER THE BRITTLE PHENOLIC BOARD.

You can't get Red Devil anymore but I have a stash from my days of curing olives I picked at the park. This is strong base to neutralize the vinegar acid. This is a must.

DSC_0615.jpg


Next I soldered the rivets for the maximum current capability and lowest resistance.

DSC_0616.jpg
DSC_0617.jpg


I then tried to fix my mistake with JB Weld. It failed...
DSC_0618.jpg
 
Here is the failure but it also shows how the switch works.

DSC_0618.jpg
DSC_0619.jpg

DSC_0620.jpg

DSC_0622.jpg
DSC_0621.jpg


Installed and ready for test.

DSC_0623.jpg


The fan on/off switch in the vacuum housing worked perfectly. Did not get hot at all anymore. Also the Blue wire above had a bad connection due to the wires getting corroded. You should TEST every high current connection with an ohm meter and fix anything that is greater than the minimum your meter can read.

Back to the drawing board.

DSC_0624.jpg


The fan switches are very expensive and I decided to make a new board. Cut one from stock I had laying around and make a paper template of the original. Here I have 2 of the 3 moved over to the new board.

DSC_0625.jpg
DSC_0626.jpg


First snap the board to get the rivet and wire loose.
DSC_0627.jpg
 
This is true craftsmanship! I can't see how you cut that FR4 so precise. Makes me want to do a PCB layout....................
 
Better shot.

DSC_0628.jpg


Hold it and file the top of the rivet off (easier if this was done BEFORE the solder was applied).

DSC_0629.jpg


I used a Dremel tool with a 0.100 grinding tool to dig down into the rivet

DSC_0631.jpg


Using the plier from above I grind a little then try to pull the rivet from the connector. Once free push it into the 0.100 holes in the new board and put the wire connector back on.

DSC_0632.jpg


Here is the bottom where the contactor plate goes.
DSC_0633.jpg


Soldered up wit some pressure to pinch them on the board.

DSC_0634.jpg


After this there was only 50mV across the switch when cold and after it ran a while it was 100mV. It was hot enough to notice but nothing like it was before. This is due to the contact finished of the contact plate and rivets nubs wearing off. Notice I used epoxy to fill the notches after I first made them too large so I could slide the board back and forth to dial in where the contacts were made based on the control arm position. After it dried I filed the correct notch size and bent the tangs back in.

Problem solved.

I then fixed my air vents from flopping shut. I added some silicon hose that needed to be compressed between the vent and the knob. When I installed the knob I had to slightly compress the hose which put preload on it so it has some resistance when moving now.

DSC_0635.jpg
DSC_0636.jpg
 
After all this I thought my charging system died. I went for a drive and the voltage never went above 12.1V but the current was through the roof on the ammeter. I pulled the alternator and regulator and double checked and cleaned everything. Nothing seem wrong. I then got out my charger and realized even at jump start mode my charger could not move that Deka battery off 12V! What was going on is with me working on the system for 2 days I ran the battery "down" (if 12V is down) but it is such an awesome battery that it takes a really deep cycle of current to get the voltage to move. The charging system was working as hard as it could (pegged ammeter) but the battery just sucked it up without moving the voltage! Wow, I have not seen this before. After 1.5 hours on the charger the Deka is finally up to 13.4V. That would have been a really strain on the Coronet charging system for sure!

I have also completely understood the cooling and AC system on these old B-Bodies. I know why and how my AC works like it does but that is a story for another day after I draw some diagrams to explain it.
 
This is true craftsmanship! I can't see how you cut that FR4 so precise. Makes me want to do a PCB layout....................

Dremel tool cutoff wheel. Precision does not matter on this it just lays on top of the metal can.
 
Put the Coronet is the small town 4th Parade! She was warm when I got done. 2 MPH in 100 degree weather does it fit her style. Loved hearing the comments from the crowd. Going so slow you can hear everything! Best one was a lady saying "What's a Coronet?" !

IMG_0142.JPG
IMG_0144.JPG
IMG_0146.JPG
IMG_0147.JPG
 
Last edited:
The AC was not working great so I bought a can of 134a and a vent thermometer. Not bad for the original numbers matching RV-2 compressor and hoses. About 36 degrees at 55MPH highway speed and 95F at noon in full sun. At idle it was about 42F.

19665241_1471940669508512_8340011252171371166_n-2.jpg


Only thing I did was replace the dryer, R134a compressor seal and hose o-rings and remove the EPR valve. I did not put a temperature sensor for freeze up to cycle the compressor. Here in Az it is dry enough that that should only be a problem on a few monsoon days.
 
Instrument cluster is finished! Spent the night in Phoenix. Dropped the speedometer and clock off at Dicks Speedometer in Tempe (not the one if Phoenix) Thursday night and spent the night at a resort with a water part. 115F in the day and 102F at 10pm at night.... not for me anymore for sure! Friday at noon got a call that they were ready. Speedometer had the normal cracked plastic retainer for the magnets allowing them to contact the cup and make the speed jump. Mike replaced the plastic bushing with brass that will last forever and calibrated ($175) I wanted the original clock but the mechanism was physically damaged beyond repair so they installed a quart movement for the same price as they would have charged for the repair ($125 instead of $200). The local shop quoted $200-$300 for the speedometer IF they could locate the parts. Dick's said "we for sure will have the parts". Got to spend some quality time with the kids at the waterpark and my dash is 100% functional now. Win, win.... The 60 series 15" wheel must be the same diameter as the F78 14" wheels as the speedo is exactly matching the GPS!

 
Last edited:
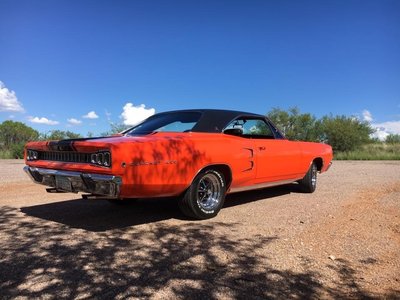
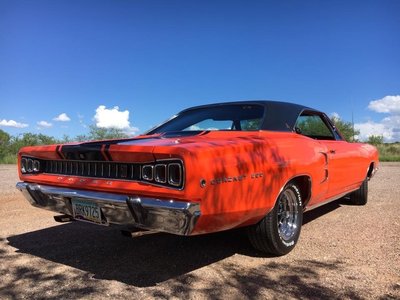
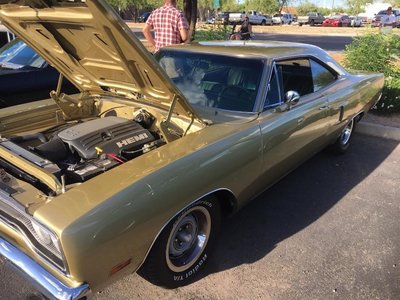
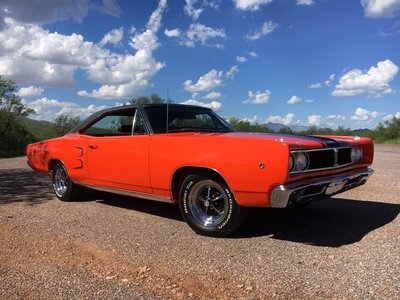
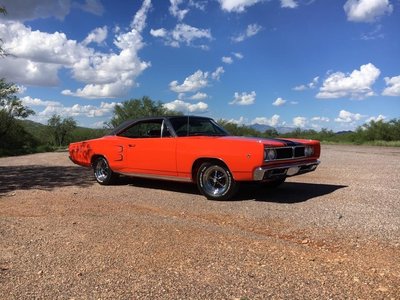
Longest drive yet, about an hours and thirty minutes from home to a car show in Oro Valley. Not a lot of folks braved the heat and chance of summer thunderstorms. Got a really good photo of the Coronet and spent time on the Phone making "Car Art"..... I left early and had to dodge storm cells on the way home. Got home with only needing to drive on wet roads for a few miles. Whew.....
19732372_1475232932512619_2545728401482846604_n-2.jpg
19884433_1476269189075660_3968332059565084434_n.jpg
19989443_1476270199075559_977671626208373031_n.jpg
 
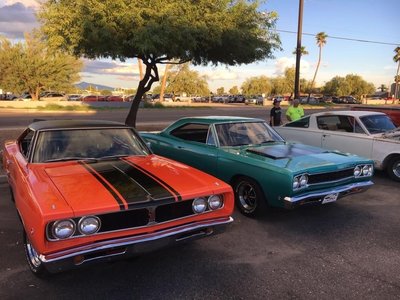
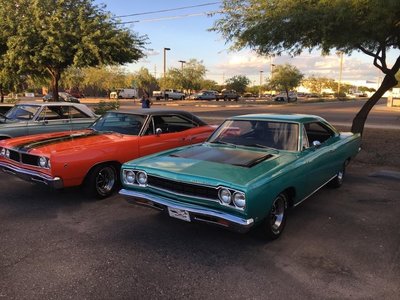
Took her to Tucson twice yesterday after not driving her much for a month do to it raining almost daily during monsoon season (which as been great 14" of rain in the last month!). She has developed a coolant leak that I have not found. It is not much, maybe a few tablespoons when I stop but it is a mystery. Spit polished and took her to Larry Miller Dodge to the Tucson Mopar Club show. Found a great spot to show off the car and the greenery due to all the rain!

Meet my buddy Bill (member here) and we finally got a photo of our cars together, plus a nice '70 Satellite.

20597157_1501293453239900_1590284663909846853_n.jpg 20604542_1501293493239896_7293793440524699280_n.jpg 20604738_1501293583239887_515212996616735311_n.jpg 20621232_1501293609906551_8271833700643416269_n.jpg 20621879_1501293739906538_5134386431975718278_n.jpg 20621892_1501293743239871_4208130213017302081_n.jpg 20622138_1501293449906567_4321315765444841993_n.jpg 20622219_1501293599906552_2794084430473696363_n.jpg 20638514_1501293456573233_1494663680480492562_n.jpg 20638776_1501293443239901_976759725485462297_n.jpg
 
%^&#$#$%# aftermarket water pump is weeping coolant....... grrrrrrr.
 
GMB has a great reputation; surprised this failed. Weeping out shaft?
 
That's a great group of B bodies. I need to drive down for a visit sometime.

I'll take some of that rain, we get some sprinkles but the clouds miss us for the most part. If it's going to be humid might as well get the rain too.
 
Auto Transport Service
Back
Top