• When you click on links to various merchants on this site and make a purchase, this can result in this site earning a commission. Affiliate programs and affiliations include, but are not limited to, the eBay Partner Network.

Yankee Express RestoMod Project

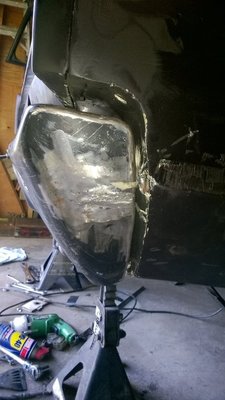
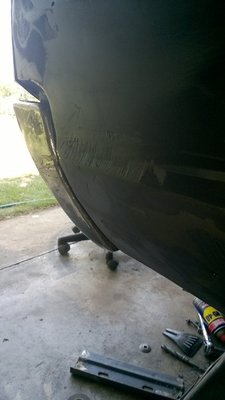
Spent some hours at the wire wheel cleaning up frontend odds and ends. Slathered some filler on all of the little dents and bumps on the right side. I'm going to use as little as I possibly can.

WP_20170817_17_33_19_Pro.jpg
 
More pics....i'm re using the tie rod ends as they only have 69,000 miles on them but I will get new snap on grease boots for them.

WP_20170819_11_46_12_Pro.jpg WP_20170819_11_45_57_Pro.jpg WP_20170819_11_45_10_Pro.jpg WP_20170819_11_45_15_Pro.jpg WP_20170819_11_45_20_Pro.jpg WP_20170819_11_44_57_Pro.jpg WP_20170819_11_45_04_Pro.jpg
 
Pieces & parts :lol: looking good...

god I hate doing body work anymore :BangHead:
seal, sand, filler, sand, prime, glaze, sand, prime, sand & seal,
sand, paint & sand some more :lol:

I need to do some too,
I'm procrastinating & putting it off as long as possible...

I wish I had a bigger garage :soapbox:
 
Been a while since I popped in here. It does look good in the black! Kinda looks familiar too. She's come a long ways since you started. I'm sure glad things worked out to where you kept the old girl!

:thumbsup:
 
Been a while since I popped in here. It does look good in the black! Kinda looks familiar too. She's come a long ways since you started. I'm sure glad things worked out to where you kept the old girl!
:thumbsup:
So am I. I have been enjoying working on her. it gives me something to do that my TBI has little or no effect on. it distracts me from PTSD triggers and issues as well. So it's all good. Thanks for checking in.
 
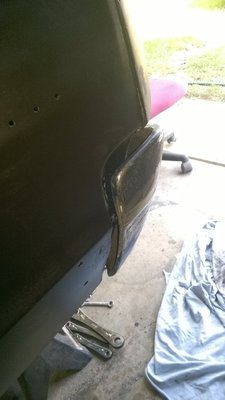
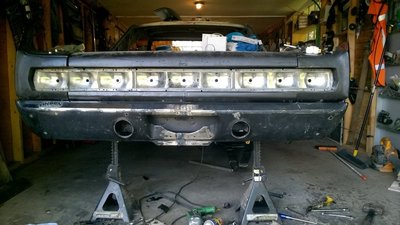
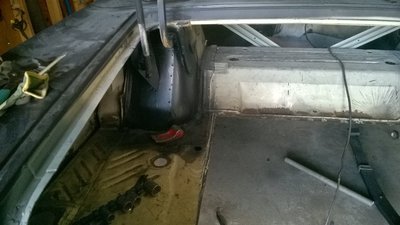
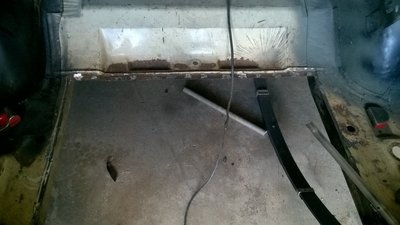
I have been busy with working on the Express so here's an update! I laid down the black primer so I could better see the dings and dips in the skin and I have placed a little filler in a number of spots on the right side as a test of how much I remember about bodywork. Apparently enough. I bought a set of DURA Blocks to sand with and so it begins....lol. In between sanding I have been fixing up the rear face a bit. It came to me after awhile sitting and staring at the rear of the car that something was off. I loosened everything up and shifted the bumper and brackets around and couldn't find a happy spot that lined up all around. Decided that I had not added enough length to the bumper. So I sliced it in half again and added another 1 1/4'. That created as many problems as it fixed though. Now the bumper bolt holes no longer line up with the holes in the brackets, but the ends of the bumper wrap around perfectly on both sides. The bumper also needed to come out away from the mounting surfaces of the brackets about 1 1/8th" in all planes. So I had to figure out a way to do that. I could either mount the brackets out from the rear frame member or the bumper out from the brackets. I decided the brackets need to be securely mounted to the frame and the bumper spaced out from the brackets. Having no spacers on hand I improvised with a few extra old sockets. I took some galvanized 6" long carriage bolts and ran them through the newly drilled holes and the sockets and the brackets and ran nuts down to hold them up. There was a lot of experimenting for a bit to get the right distance from the brackets in all planes so the bumper lined up how I wanted it to. I finally got it right after a whole day of fooling around with it. Now I'll disassemble it and clean it all up and fine tune some things and prime it all. The ends wrap around tight on both sides after some banging with a BFH. They were too close before I added another 1 1/4" and were hitting the body in a couple of places. Now it's all hanging away enough to clear. I also finished the left wheel tub, and sliced out the floor pan of the trunk along the tops of the frame lip, leaving a 1/4 " for the new metal to rest on the lip and butt up and the seam at the front was de spot welded so the new pan can flush up right. After hanging the 70 RR rear bumper where it would live I marked the rear frame cross member for removal of two circles where the exhaust will come through to poke out of the former back up light ovals.

WP_20170827_16_27_46_Pro.jpg WP_20170827_16_05_01_Pro.jpg WP_20170827_16_05_11_Pro.jpg WP_20170827_16_05_27_Pro.jpg WP_20170827_16_05_42_Pro.jpg WP_20170827_16_06_11_Pro.jpg WP_20170827_16_27_39_Pro.jpg
 
Glad you like it! I got the idea from a Texas House Of Hotrods car called Roadkill. That car is a 1970 RR but I liked it so much I tried a 70 RR bumper on mine and liked it too! I thought about grafting a 70 front bumper too but I could hear guys saying, " Why didn't you just buy a RR in the first place?"
 
Now I'm on the prowl for a gas tank to fit in between there in the trunk...
 
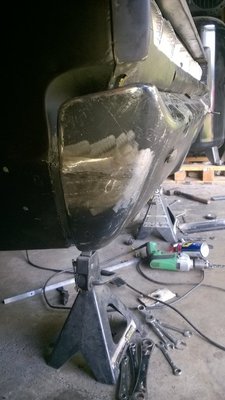
I clamped a straight edge onto the top edge of the bumper today and trimmed it back 3/16ths and scooped out the end turns a bit to clear the bottom of the quarter tails. I finally got the thing to mount up higher so the profile of the bumper matches the quarter where the bumper sits. Now I have to figure out what to use for spacers, 6 of them, to mount it tight and have the entire thing about 1/8th of an inch away from any body panels. Must think on that for a bit. I became unhappy with my first effort to fabricate the lower rail that sits between the two extension lower ends. Gotta think on that too.
 
Well, I got it bolted up where I want it. Then ran across this car on the web and now i'm unhappy again. I guess I'm going to have to do some bodywork magic to make the quarter profile match the bumper edge more closely. Sigh.....

street-machine-hot-rod-restomod-street-rod-muscle-machine-3.jpg street-machine-hot-rod-restomod-street-rod-muscle-machine-4.jpg street-machine-hot-rod-restomod-street-rod-muscle-machine-5.jpg street-machine-hot-rod-restomod-street-rod-muscle-machine-7.jpg street-machine-hot-rod-restomod-street-rod-muscle-machine-8.jpg street-machine-hot-rod-restomod-street-rod-muscle-machine-10.jpg
 
The problem is that the bottom outside edge/corner of the tail extensions is not cut back at a 90* angle but instead slopes down and in. The 67 Bumper has a notch on it to accommodate that. The road runner one does to but not deep enough. So. my choices are to modify the bottom of the extension so the 70 bumper can pull up closer, or, modify the bumper corner to hug the downslope of the tail corner. Also I would have to do something to allow the bumper as a whole to come up another 1/2 inch. I want mine to look like this one.
 
Auto Transport Service
Back
Top