• When you click on links to various merchants on this site and make a purchase, this can result in this site earning a commission. Affiliate programs and affiliations include, but are not limited to, the eBay Partner Network.

Yankee Express RestoMod Project

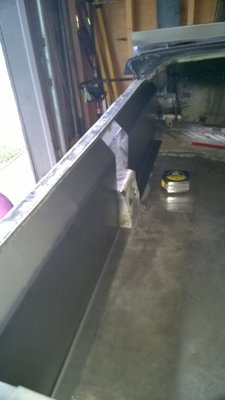
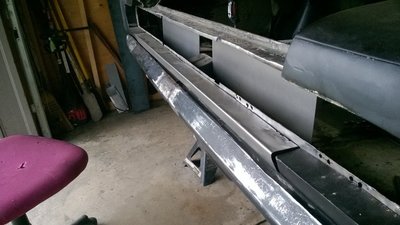
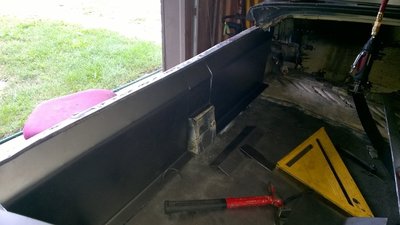
So, I got the trunk piece bent but had the wrong measurements so I have to do it again. The trunk floor is in and i'm going to place an H set of brackets under it frame to frame and weld that to the bottom of the pan for stiffness.

WP_20170907_15_39_11_Pro.jpg WP_20170907_17_12_46_Pro.jpg WP_20170907_17_12_54_Pro.jpg
 
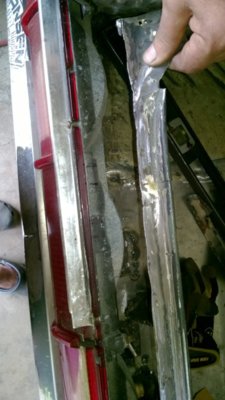
I think that after looking at the rear of the trunk that I can do a better and neater job of building the taillight panel than I did at first. I now have access to an 8 ft brake so I can do it in one go and cut oblong holes to allow me to fasten the screws to the back of the taillight frame. I want to clean it up a good bit.
 
I think that after looking at the rear of the trunk that I can do a better and neater job of building the taillight panel than I did at first. I now have access to an 8 ft brake so I can do it in one go and cut oblong holes to allow me to fasten the screws to the back of the taillight frame. I want to clean it up a good bit.
If the outside is perfect, just make a cap to cover the inside , box it in!
 
Plus I still need to weld along the edges to the old pan but i'll do that all at once when the bracing is ready to go in. When I measured the other piece I apparently saw the 4 on the 4 ft mark and wrote down 44 5/8" instead of 48 5/8". Brain dead.
 
Plus I still need to weld along the edges to the old pan but i'll do that all at once when the bracing is ready to go in. When I measured the other piece I apparently saw the 4 on the 4 ft mark and wrote down 44 5/8" instead of 48 5/8". Brain dead.
Been there done that...lol!
 
Been there done that...lol!
No big deal really, the steel is nine bucks and the brake to form it is free..gotta drive 25 miles though.
I guess the old adage, " Measure twice, cut once", still applies...:rolleyes:
 
Getting the bumper right was a big deal. I also saw someone else's idea for the gas lift mounts and I like it better so I will be changing that too. I need to move on and stop metal working this thing though. lol. I did the rear stuff early on and i'm better at it now though so i'm going back and cleaning things up.
 
So. I did go back and tear out all of the old crap. It's much cleaner looking now and way more user friendly too. Not all done but here's where i'm at right now...these panels will eventually be covered with suitable fabric that matches the floor pad. You know how modern sedans have the cardboard inserts, covered in fabric, in the trunk space, all around the edges from the floor up to the trunk lip? I will also do this. The panels there in the pics have three screws holding them down to the floor on each side. I left 3 3/4 " on the backside for the body of the light bar with the pig tails from the bulbs sticking out.

WP_20170918_16_43_59_Pro.jpg WP_20170918_16_44_29_Pro.jpg WP_20170918_16_59_43_Pro.jpg
 
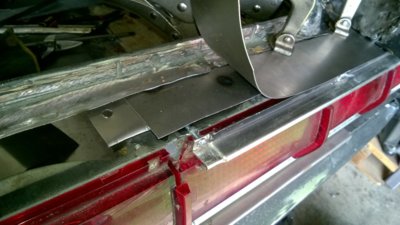
Finally figured out how to redesign the rear of the car so that it would solve several problems. 1. provide solid secure mounting for the tail light. 2.Have the mounting screws easy to get to. 3. Get the trunk lip base up enough to clear the top edge of the tail light assembly AND be part of the mounting surface for the tail lights too. 4. clean up both trunk seal extensions to get the factory built up triple thickness....without the factory built up triple thickness. 5. meld all these elements together in a pleasing coherent way. 6. Have the finished section fit BELOW the trunk lids closed position and leave room for the rubber seal as well. What a PITA!! Wish I had a computer program that would make this 3D and so I could manipulate the picture across all axis's to see what to do.

So here is what I came up with. I was sitting on my rolling chair base staring at the parts and brainstorming when my buddy Rick drove by and honked. He slid to a stop and backed up into the driveway and stood behind me. What's wrong ? he says. I explained the issues. We BOTH stared at it for another 10 minutes until he says, " well why don't you do this...." He came up with the solution that quick and it was something I had not thought of, at all. Go in from the top, instead of the side where the screw holes already existed. Easy.
I ended up not doing that. BUT!! It led me to another idea that did work!
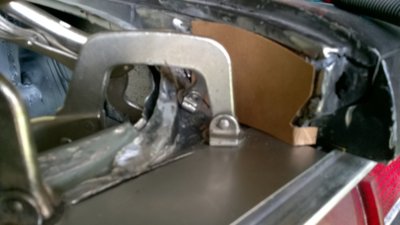
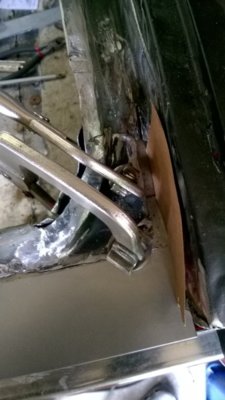
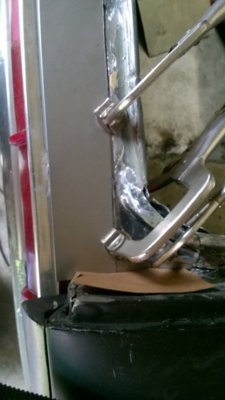
So I bent up some scrap 18 gauge as a base for the torn up trunk extension lips that also attached to the current tail light mounting screw holes and to the rest of the mounting base, to the left and right towards the trunk drop offs. It was simple really....just made the pieces to fit and plug welded them together from the bottom side. Done.
That left the top finished surface to work out, where it meets the old trunk rail and the rail corners. That surface had to extend to the rear out over the tail light base/lens/trim area to protect it from being hit by anything and cracking a lens and also be a flat straight clean surface. I took the old trunk lip and cut the spot welded layers off of the back of it, 2 each, that brought the thickness down to meet the 20 gauge of the finished surface. However, that also made the piece flimsy which is why the factory made it three layers, with two layers at a right angle to the one. Stiffness. So I still needed three layers somehow. The only problem was they had to exist BELOW the finished surface of the final top layer or the trunk lid would smack it when closed because it would be too high.
So I thought about incorporating all three layers in the existing parts and not adding three more to what I already had.
Once I pealed back the top layer and got a look from the side of all three, it was clear that they all had to be joined in such a way that left the tail lights able to be easily removed. I cut a few templates out of pizza box cardboard and made the pieces out of 20 and 18 gauge and fiddled around getting everything just right. I clamped it up and studied it for awhile and saw where it needed tweaking to be perfect.
I closed up the garage and left it that way overnight to see if it still worked for me in the morning. Here's the pics.
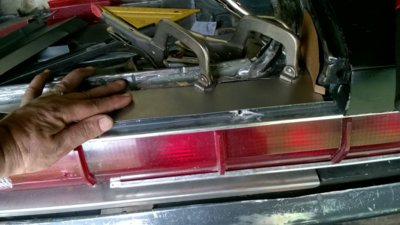
WP_20170920_14_49_48_Pro.jpg WP_20170920_14_54_01_Pro.jpg WP_20170920_14_54_44_Pro.jpg WP_20170920_14_47_45_Pro.jpg WP_20170920_14_47_53_Pro.jpg WP_20170920_14_47_58_Pro.jpg
 
As Hannibal says "I love it when a plan comes together"!
 
BTW..this is purely a mock up. only on the right corner and a small portion of the rail, just to see how to make it happen. Will need to buy some more materials to put the whole thing together
 
Took everything apart today and vacuumed it all out and blew compressed air into the corners and pockets . Ready for an Epoxy primer hose down.

WP_20170922_16_50_17_Pro.jpg WP_20170922_16_50_31_Pro.jpg WP_20170922_16_50_38_Pro.jpg WP_20170922_16_50_54_Pro.jpg WP_20170922_16_51_05_Pro.jpg WP_20170922_16_51_11_Pro.jpg WP_20170922_16_51_23_Pro.jpg
 
Also left off removing the pinstripe tape the other day and just now noticed how good it looks with just the cross stripes.

WP_20170922_16_51_41_Pro.jpg WP_20170922_16_49_21_Pro.jpg
 
Built a new mount for the seat topper and installed it. Got out the plywood and cut a backer board for behind the seats and the down tunnel for the console. Some more fooling around and some 3/6 foam backed fabric and it will be done.

WP_20171003_14_19_03_Pro.jpg WP_20171003_14_19_31_Pro.jpg WP_20171003_14_19_38_Pro.jpg WP_20171003_14_23_13_Pro.jpg WP_20171003_14_23_34_Pro.jpg WP_20171003_14_52_35_Pro.jpg
 
I like it!
ezze,,
n
n]]eueu
I like it!
Me too! Thanks, I need to come up with some creative fastening tabs for both sides and the top and bottom of the back board and also work out the rest of the down tunnel below the console on each side. There's a wood grain plate that snaps in place at the back end of the console with a hole for the base of the fold down armrest assembly. I have to slide that in there and see what space is left to affix the forward bottom edge of the tunnel to the back end of the console. So, a work in progress!
 
If it seems slightly off center to the passenger side that's because it is. The Audi dash is set up to give the driver about an 1 1/2 more room on that side. So it's not in the center, while the seat topper is. So I averaged it out to lessen the off look. Once the windshield is in, and the seats, I doubt anyone will notice it.
 
Auto Transport Service
Back
Top