• When you click on links to various merchants on this site and make a purchase, this can result in this site earning a commission. Affiliate programs and affiliations include, but are not limited to, the eBay Partner Network.

Yankee Express RestoMod Project

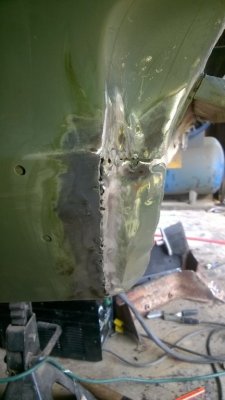
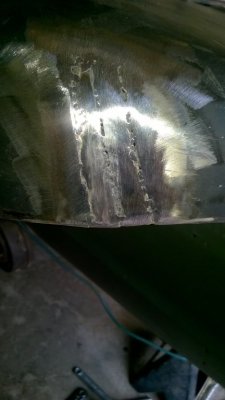
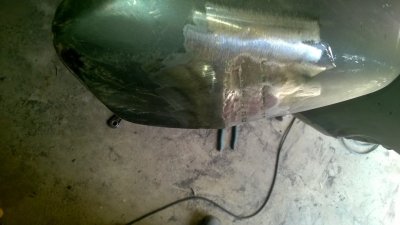
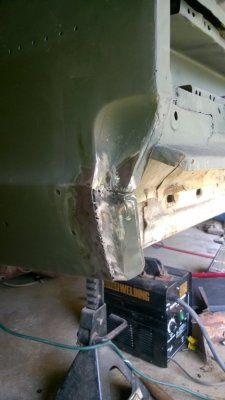
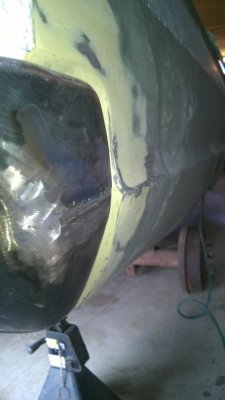
I decided that I did not like the way the rear bumper was matching up to the quarters. I sawed the bumper in half AGAIN and set about getting it finessed just right for matching contours and the angle of the bend of the top edge/corner. I ended up cutting a small portion of the bottom rear edge of the quarter away and fitting a new right angle/curved chunk onto it that now matches the bumper face and I sliced the bumper open on the end where it has a contour line and moved that line upwards and at the same angle as the body line coming back from the door. Now it will look like it came from the factory. I did not take a pic because I'm not done yet and it is all covered in filler and drying overnight. Once I have it all sanded down and shaped just right i'll snap a few. The bumper was also still short by about 7/8ths"so I needed to add some more in length anyway. It was resting against the body on both ends and that is TOO close..
 
UPDATE... I sanded down the filler from yesterday on the right rear and did the fabrication on the left including slicing the bumper contour into two pieces and rearranging them to match the body line.

WP_20161026_14_30_35_Pro.jpg WP_20161026_14_30_23_Pro.jpg WP_20161026_14_30_02_Pro.jpg WP_20161026_14_29_48_Pro.jpg WP_20161026_13_07_33_Pro.jpg
 
Progress...
Looking good :thumbsup::thumbsup:

Your getting more done than I am lately, :mad:
I need more income dang it, spent it all on the house yet again,
this last summer...
 
Progress...
Looking good :thumbsup::thumbsup:

Your getting more done than I am lately, :mad:
I need more income dang it, spent it all on the house yet again,
this last summer...
We did too, 8000 for new windows in our cabin, 3000 for laminate flooring, new range top for the oven because I smashed the glass banging to chicken breasts on it to unstick them from being frozen together. lol. 400 bucks. I'm doing stuff I already have materials for until our house in South Carolina sells. Two mortgages is killing our cash flow. Thanks for following along though, i'm enjoying it except that the damaged tendon /muscle in my right middle back is spasming from doing to much. Taking 600 MG Ibuprofen like candy.
 
I did more gravel $2,500 & new roof, that was about another
$11k of my car funds...

I haven't been doing much work to bring in income lately,
still working a lot, mostly for my elderly aunt & dad,
helping my cousin with his place up here now too,
just no real regular income...

I could have finished my car easily, well mostly,
I'll never be done seemingly, never have been before :BangHead:
I don't like to dip into savings for a project,
kind of like to do it out of parts sales or
projects that are the $$$ intended for my car...
I own every thing outright, my house cars etc.
just the monthly BS, water power gas groceries &
Property taxes is a big one & Income taxes from stocks dividends etc.
Thank god or I'd be in trouble, glad I did it when I had it...
Still it's a $1,500+ month hit, but that's better than it is for many people...
 
Last edited:
I did more gravel $2,500 & new roof, that was about another
$11k of my car funds...

I haven't been doing much work to bring in income lately,
still working a lot, mostly for my elderly aunt & dad,
helping my cousin with his place up here now too,
just no real regular income...

I could have finished my car easily, well mostly,
I'll never be done seemingly, never have been before :BangHead:
I don't like to dip into savings for a project,
kind of like to do it out of parts sales or
projects that are the $$$ intended for my car...
I own every thing outright, my house cars etc.
just the monthly BS, water power gas groceries &
Property taxes is a big one & Income taxes from stocks dividends etc.
Thank god or I'd be in trouble, glad I did it when I had it...
Still it's a $1,500+ month hit, but that's better than it is for many people...


Good News to All!
I have been lucky enough to have been able to proceed forward.
Since I last wrote, I have put on a Classic Industries tail light for the 66 Charger.
It looks good. Not the same as OEM.
I have also put in new carpet on the floors and rear fold down panel, rebuilt the quarter glass window regulators and related hardware.
Had the gauges rebuilt be The Gauge Doc. Awesome Job!!!
Made up and installed some new relays and for the hide away headlights.
Resealed the front and rear windshields.
NOT a job i want to do again any time soon!!
Installed new vent flaps in the rear deck lid area for the passenger compartment.
And LOTS of little things.
I still have to replace the trunk seal, window rubber seals, and the list goes on.

Still, LOVE the work on the one off machine!!!
Keep up the updates, Please!

Sounds like someone's been busy :thumbsup:
 
Sounds like someone's been busy :thumbsup:
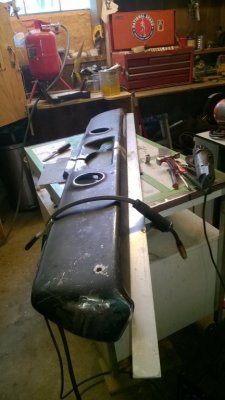
Yah it does, good deal, glad to see you getting after Dodgeman..and the Express updates will keep coming too. Today I welded the bumper back together and tried it. Perfect fit. Now for the bumper mounts.
 
I like the look of the shaker hood scoop but not the 'cuda style. I gave serious thought to using the more square shaped shaker from the Mustangs which I know would draw ridicule, but with the square lines of the '67's I think one would look great sticking out of the hood on the Coronet.
 
I like the look of the shaker hood scoop but not the 'cuda style. I gave serious thought to using the more square shaped shaker from the Mustangs which I know would draw ridicule, but with the square lines of the '67's I think one would look great sticking out of the hood on the Coronet.
I would have to see a drawing of that set up or a pic of one already done in order to give an opinion on how it would fit. Post a pic of the scoop in question and i'll think on it. Might be a good call.
 
Do a search for 1969 cobra jet mustang for images of what it looked like. My main concern with them was hood clearance and how far 'up' it would sit if you used an Edelbrock Performer RPM intake or a Victor type intake. May have to fabricate a lower base for it with one of those. I think the shape is right for the '67 body.
 
Hmmmm.....I looked it up, the scoop, and I feel like it would be lost in all of that real estate on a 67 hood. Now, if you had a cross ram intake and two shaker scoops, that might be trick!
I don't mean to rain on your parade. Build it how YOU want it and drive it like u stole it. I am.
 
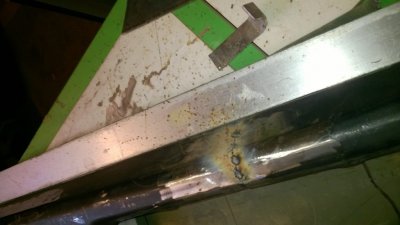
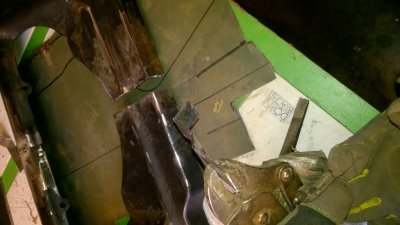
new pics...in case anyone is curious here's how I made the chunks I welded in to make the bumper longer. The metal of the bumper is the same thickness as the frame hunk I cut out for the spring relocation kit so I cut two chunks from that as donor material. I determined the correct length the bumper needed to be and set the two ends up on a flat work table and positioned them at that distance, leaving the gap which I needed to fill. I cut the two raw ends of the bumper to perfectly square and then cut the donor metal to fit in the resulting spaces. One space at the license plate backing and another above that in the narrow part of the bumper. Now, they had to be bent to match the bumper shapes. This is thick steel, like 12 gauge or 10. A bit less than 3/16 thick. So, what I did was set the pieces up next to the bumper ends and scribe the bend points for each contour on them. I took a thin kerf cut off wheel holding the piece so I could see the lines scribed I made a small groove at each end of the line on the other side of the pieces. Turned them over and completed the cuts, taking it deep enough to weaken the steel along the line, about a 1/3 rd of the way through. The metal then bent easily along the scribed lines, closing the cuts. They had to be bent in both directions so when the contour changed directions I simply scribed to opposite side and made the cut there as well. Only difference is that I cut shallower there so when the metal was bent the cut would close up. Once I had them matching the gaps and the shapes I cleaned them up and tacked them in place on the outside of the bumper. I then turned it over and welded them in from the backside. In the one pic u can see the vise grips holding a donor piece on edge to see the bends.

WP_20161028_12_19_08_Pro.jpg WP_20161028_12_19_20_Pro.jpg WP_20161028_12_19_48_Pro.jpg
 
EXPRESS UPDATE...
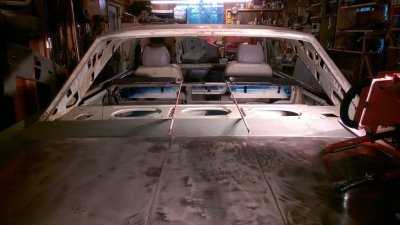
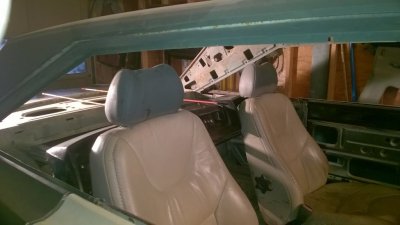
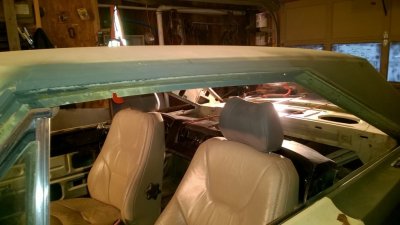
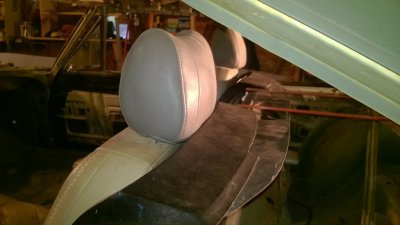
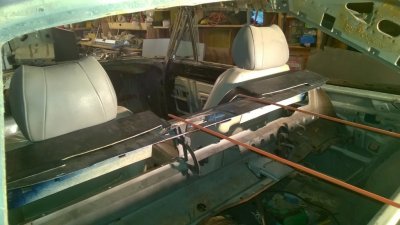
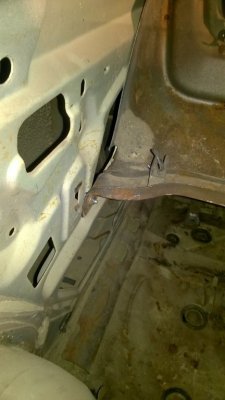
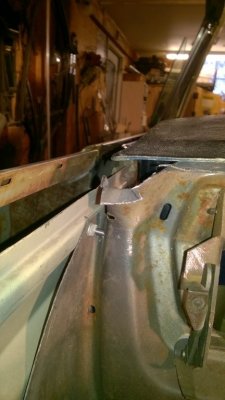
I finally got busy inside the car with mocking up the roadster back panel. Some of you might recall that I bought a 66/67 sport satellite back seat upper panel for this. It has the winged shape I need to start the panel and that shape hugs the bucket seat backs just below the headrests. So, I sat on one of the seats turned around backwards and contemplated the rear seat area for awhile. The sport back did not quite reach to both door frames so I would need something that did, and mount the seat back to it.
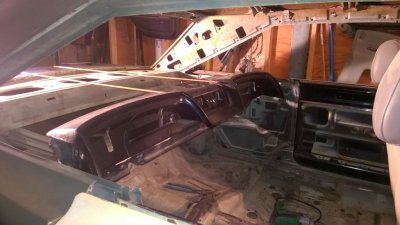
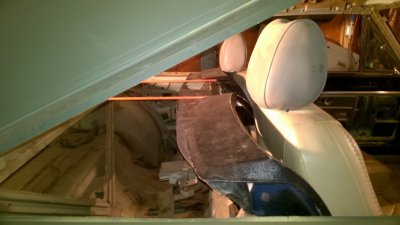
Now, i'm not Dave Kindig or Chip Foose and I don't have stacks of metal hanging around to make stuff from, nor the machinery to do so. Kinda like most of you I expect. So I needed to use what ever I had on hand. I looked around for anything that was long enough and that would work. I noticed the old Coronet dash panel resting in a corner behind some other stuff, I never throw anything away, and realized that it would indeed go all of the way across, it was light weight, it had a curvature that would work great and I already owned it. Bonus!!
So after much screwing around trying to get it in there by myself I finally got some spots marked with a marker where I would need to drill holes to mount it via the original forked lower mounts and a couple of new holes up near the ends.
After digging around in the spare nut/bolt brake drum container I came up with enough parts.
It went in smoothly at the right position and I think will work out fine. I'll slice the majority of the remaining dash away because it will be in the way of the spare tire mount and window cranks etc.

I laid two footer marker poles across the gap and in line with the trunk contour lines to show where the inside contour lines will fall on the panel when I make it. My plan was that you should be able to stand at either end of the car and the lines will carry all of the way through front to back.

WP_20161029_12_52_13_Pro.jpg WP_20161029_12_52_27_Pro.jpg WP_20161029_12_53_49_Pro.jpg WP_20161029_12_53_56_Pro.jpg WP_20161029_12_54_20_Pro.jpg WP_20161029_12_54_29_Pro.jpg WP_20161029_12_54_35_Pro.jpg WP_20161029_12_55_17_Pro.jpg WP_20161029_12_55_21_Pro.jpg WP_20161029_12_56_38_Pro.jpg
 
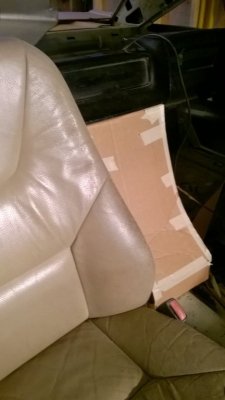
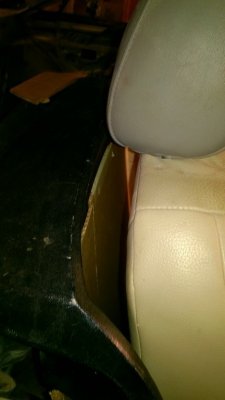
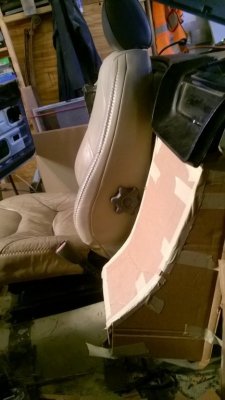
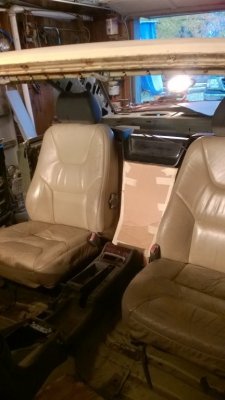
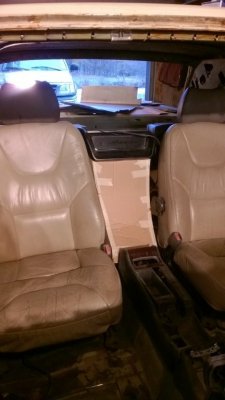
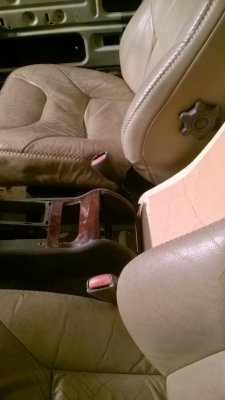
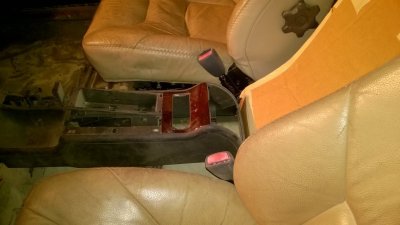
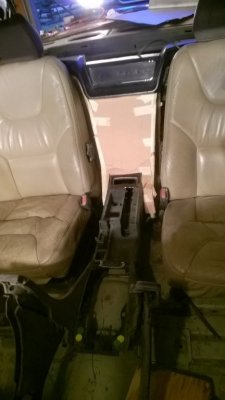
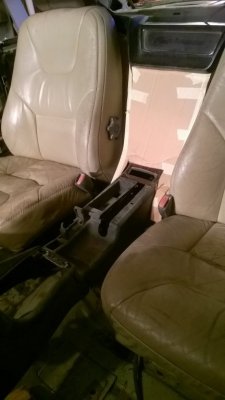
Today I cut out a hunk in the top center of the support structure so that the center panel of the larger whole can be inset lower than the two sides and thus line up with the contours involved. I then welded a cross brace a bit lower for stiffness. I got out the cardboard and made some mock panels that will be covering the vertical space behind the seats and also a mock tower that flows down to connect with the end of the center console from the Audi. I don't have an exact positioning of that console yet so it's all hypothetical. The *** end of the console has a curved a/c vent that sits in a pocket. Absent the vent I can make the tower flow down right into that pocket and it will look it came that way. Just noodling around with various ideas at the moment, still thinking on it.

WP_20161030_16_59_59_Pro.jpg WP_20161030_17_01_00_Pro.jpg WP_20161030_17_01_08_Pro.jpg WP_20161030_17_01_27_Pro.jpg WP_20161030_17_05_18_Pro.jpg WP_20161030_17_05_30_Pro.jpg WP_20161030_17_28_58_Pro.jpg WP_20161030_17_29_05_Pro.jpg WP_20161030_17_33_59_Pro.jpg WP_20161030_17_34_04_Pro.jpg
 
I'm digging it, I admire your ability to make something out of nothing lol. Keep it up

You using fiberglass for the console?
 
I'm digging it, I admire your ability to make something out of nothing lol. Keep it up

You using fiberglass for the console?
If you mean the section that falls down from the center to the Audi console, then, no. I'll use some thin hardwood and build a frame and wrap it with 1/8th " hardboard covered with leather. The panels behind the seat that extend to the floor will be the same hardboard with vinyl. The roadster panel to the back window I am contemplating going back up to Gates Salvage and buying a 66 T-Bird rear deck lid and stripping the skin to use it. It's already shaped just perfect and it will be more durable. I'll have to cut it down of course. I'll cut the original door panels for the quarter glass to fit up against the panels behind the seats. The metal panel that sits atop the door frame which the door panel mounts below will have to be finessed as well. The area where the back seat used to be will be sprayed with a sound deadener.
 
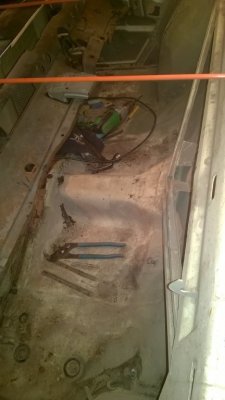
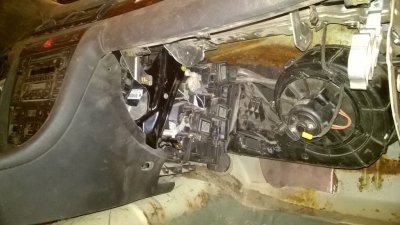
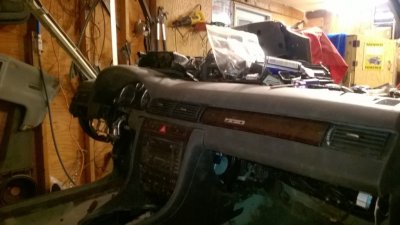
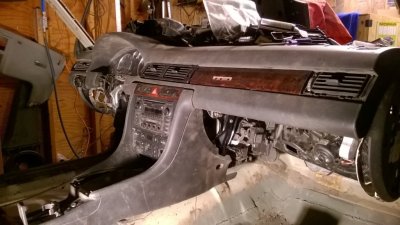
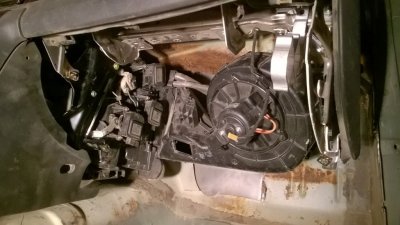
Express update: I bolted the dash in place and assembled the console/symphony stereo/digital dual climate control. Installed the heat/AC today. Trying to get it all bolted up in place so I can fabricate the flat tunnel top it all needs to sit upon. Took me 2 hours to figure out where two brackets were supposed to go. Fit under there almost exactly as I suspected it would. The in and out lines for the heater are closer to the firewall by about 2 inches than I thought they would be but no worries, i'll just snip a bit off the ends so I can make the 90 degree turn and route the hoses out the side and up over the wheel well and down into the engine bay just above the frame rail. The blower motor fresh air inlet is about 2 1/2 inches to the left of center. Other than that it's all good. Once I have the tunnel top made , bought the steel today, I can work out the parking brake cables entrance spots and shift lever positioning. Going to go with a short pistol grip. Also need to get the steering wheel mounted up into place and mark the firewall for the pass through. Also need to get the DUST off of everything!!lol.

WP_20161104_18_27_41_Pro.jpg WP_20161104_18_27_47_Pro.jpg WP_20161104_18_28_12_Pro.jpg WP_20161104_18_28_35_Pro.jpg
 
Auto Transport Service
Back
Top