• When you click on links to various merchants on this site and make a purchase, this can result in this site earning a commission. Affiliate programs and affiliations include, but are not limited to, the eBay Partner Network.

Crazy or brilliant idea for Front Frame Rail replacement

Robliepse

Well-Known Member
Local time
3:46 PM
Joined
Apr 13, 2014
Messages
463
Reaction score
278
Location
Buford ga
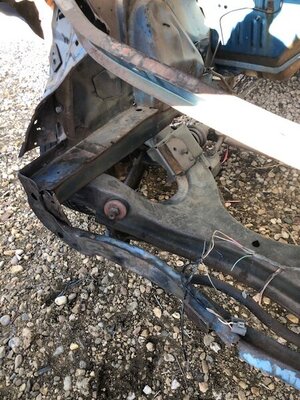
getting around to replacing both front frame rails on my 72 Roadrunner GTX and both rails on my donor Satellite are in really good shape. The K frame, radiator support are still in place. One thought is to remove both rails at the same time leaving the k frame and support in place and install it as one assembly which would keep them square. My concern is that this would be to heavy and difficult to align and would be a pain in the butt.

Second thought is to do it like 99% of the rest of the population does and block the car measure, measure , measure and replace them one at a time. I searched all the frame rail post on the forum and I've never seen anyone mention doing both at once. Even if I do move both at once I'd still have to document and move the frame rail because it has the 72 GTX VIN stamp.

Has anyone had any experience or similar thoughts about doing both at once?
 
a jig or the good one? To move it or keep it in tact? A friend of mine is doing the work in his shop and he's a Chevy guy and we are having a friendly debate on the best way.
besides weight I'm also concerned with factory tolerances of donor car torsion bar mount and the GTX mounts. I would think a lot of different tolerances will be stacking
 
I is not a crazy idea at all. I've built and repaired may cars and trucks using salvaged parts.
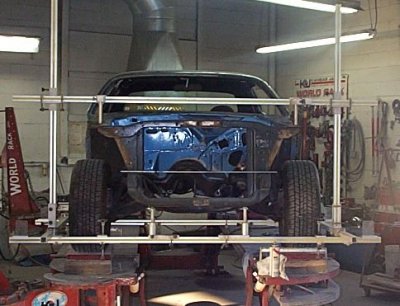
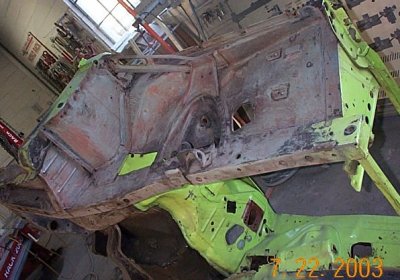
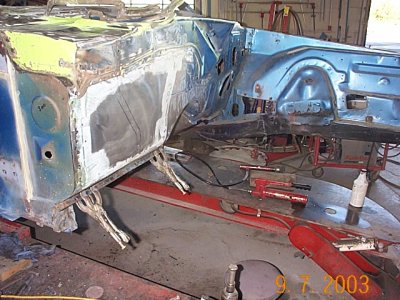
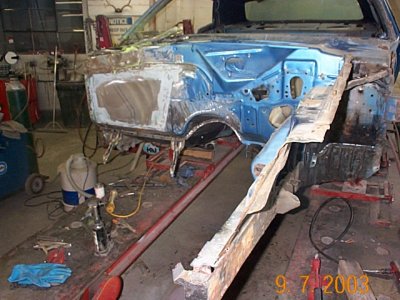
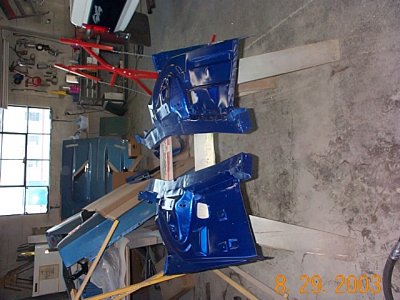
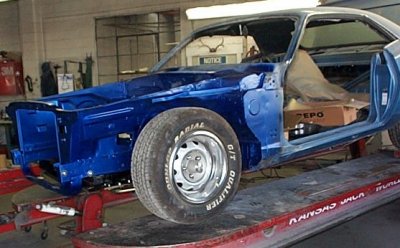
these are some images of a 1973 Cuda. the frame rails needed to be replaced due to some old repairs that was not good.
since the car we were repairing was not in a recent collision we measured the body and took notes of the dimensions for later reference.
If you have a service manual or body manual that may have dimensions use it also as a reference but the final results are how the sheet metal fits. A tape measure, tram gauge and level are your best tools and or a good measuring system like I used.
I have access to a Kansas Jack frame rack which is what the car is fastened to in the images.
First thing would be to set up the car as level as possible and so it won't move and take your measurements.
for this I used our Kansas Jack measuring system which fastens to control points on the under body of the car.
Use the rocker panels as a place to start making a datum line measuring since these cars are a uni body and have no frame rails.
Before you start taking your car apart take note how the doors, fenders and hood fit. If any things doesn't look right decide why and how to fix it when doing your repairs. You don't want to weld before you know you have a straight and true body.
It is time consuming using old weld on parts due to the fact that you need to take apart and prep the parts to be used.
take note of where and how many spot welds were used when built OEM and try and reproduce how it was done.
I replaced one apron at a time then welded in the core support but I did not weld anything until I mocked up and fit the fenders to the doors that were already fit to the 1/4 panels. It takes many vise grips and I use self tapping screws to hold the parts in place while doing this.
building a jug as mentioned for the parts is also a must. You can use metal and or wood or a combination of both to hold the parts in place.
There is a lot more info to doing this kind of job than could be described in a few paragraphs so feel free to ask questions as you go.
sorry for the small fuzzy images this was back when I didn't have a very good digital camera.

73cudafront.JPG
used parts ready to prep
73cudaclip.JPG
right side fire wall repair and prep.
73firewall.JPG

DCP02835.JPG
I prepped primed and base coat the aprons before welding in place. once the job was completed I seam sealed and painted the entire engine compartment.
DCP02810.JPG
I should have taken more images when doing this job, here is it finished.
fast forward to the K member installed after seam sealer and some more paint and clear.
451.JPG
hope this helps, good luck and keep us posted on your progress.

73cudafront.JPG 73cudaclip.JPG 73firewall.JPG DCP02835.JPG DCP02810.JPG 451.JPG
 
just get yourself some help
i replaced the front end on my car
the exact same way all in one unit with the k frame still bolted on
with the rails,inner fenders and rad support still attached.
leaving the kframe on is key because it keeps the whole unit square
if you measure it correctly, there is no need for a jig.
i also have done rear rails,shock support,rear x member, inner rockers and wheelhouses
as one unit in the rear of the car.
when you do it in a section/clip,you will be very suprised that the parts alsmost fall into place and
are very close to spec when you do the first measure.
 
i agree with flypaper....... no jig necessary......... not alot of measuring either............it will only fit one way and the fenders, doors and hood will dial it in

just do it........ you will be surprised how it happens
 
imo
alot of the time, jigs are just simply overkill
i have a single front rail to replace and
i will leave the k frame still bolted to the opposite side and
then bolt the replacement rail right back into it when i go to fit it in.
after i do that, it will be in the exact place where i want it to be.
no fuss,no muss,no jig.

lol...... right again....... let the car be your jig

time spent building jigs is time lost building the car
 
exactly and i don't have enough time as it is..
if you are splicing in larger sections then you might need one
i have seen cars done that way
like the barrelcuda for example.
that car was quartered with a splice going right down the middle
and when i asked the owner why it was done that way
and the cons about it
he got really pizzed off at me..lol
i do not like that method at all.
i would rather replace the whole panel or do a clip as a unit.
as the more splicing you have in the car,
the more chance of it biting you in the azz down the road.
i keep the splicing of parts to a minumum..
 
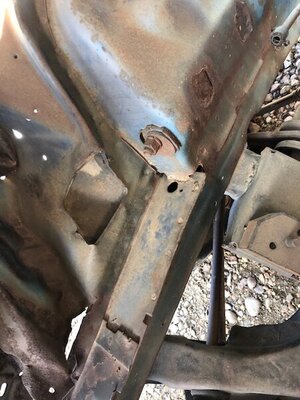
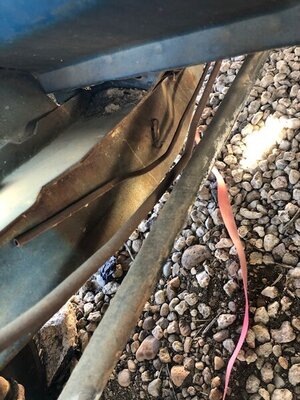
I have a 1968 J Code Road Runner that was hit very hard in the front passenger side. The inner fender will need to be be replaced regardless. I am not sure about the shock tower. The frame has a little tweak to it but other than that it is very solid i.e. there is virtually no rust. I was thinking of either replacing the frame rail, shock tower, inner fender and radiator support from a donor B Body in one piece or try and straighten the frame and replace the shock tower, inner fender and radiator support in one piece from a donor car. If possible I would also like to try and preserve the matching Order Number from my original upper radiator support as well.

I would love to get thoughts from folks who have done this type of work before.

1968 RR IMG_7814.jpg 1968 RR IMG_7815.jpg 1968 RR IMG_7816.jpg
 
Last edited:
I did as they suggested, but used a jig as well and had the body mounted on a frame. I replaced the entire front section in one piece with K-frame jig. First pic is the donor clip sandblasted.

I used scrap metal and a bunch of steel I welded together. (Ignore the small car in last picture.) The green part is the k-frame jig.

You get the idea.

RGAZ

IMG_2328.JPG
front clip.JPG
IMG_0437.JPG
 
I did as they suggested, but used a jig as well and had the body mounted on a frame. I replaced the entire front section in one piece with K-frame jig. First pic is the donor clip sandblasted.

I used scrap metal and a bunch of steel I welded together. (Ignore the small car in last picture.) The green part is the k-frame jig.

You get the idea.

RGAZ

View attachment 1077304 View attachment 1077305 View attachment 1077306
That looks amazing. There hope yet for my project. Thank you for sharing.
 
i replied in you other thread...... check the link I posted
That is so great. Thank you. I am new to the site and didn't think to search for other postings. I love the attention to detail with regard to maximizing the number of factory spot welds in a repair. It still scares me a little bit to replace a frame rail but I am going to give this some serious thought and consideration. P.S. I know of a rust free 66 coronet with a frame rail, inner fender, shock tower and radiator support that just wants to be put to good use.
 
That is so great. Thank you. I am new to the site and didn't think to search for other postings. I love the attention to detail with regard to maximizing the number of factory spot welds in a repair. It still scares me a little bit to replace a frame rail but I am going to give this some serious thought and consideration. P.S. I know of a rust free 66 coronet with a frame rail, inner fender, shock tower and radiator support that just wants to be put to good use.

@Kern Dog is a carpenter by trade, I pretty much walked him through it from 3000 miles away, and he pretty much nailed it....... these cars are all the same, and there is a TON of wisdom in those posts........especially mine :D

pay close attention to why both rails were replaced........A) it was easier and B) it was necessary
 
Auto Transport Service
Back
Top