• When you click on links to various merchants on this site and make a purchase, this can result in this site earning a commission. Affiliate programs and affiliations include, but are not limited to, the eBay Partner Network.

MP valve covers with a twist

Canadian1968

Well-Known Member
Local time
4:21 AM
Joined
Nov 13, 2012
Messages
556
Reaction score
655
Location
london
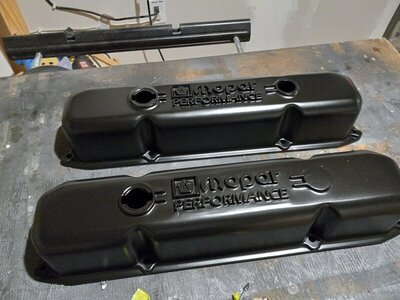
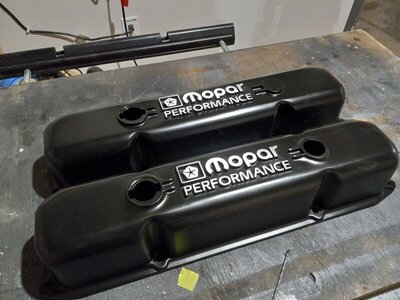
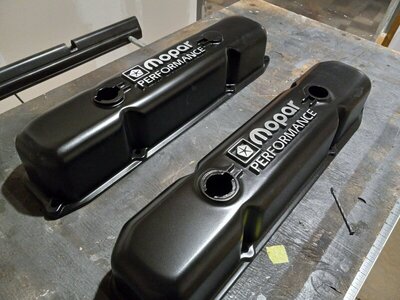
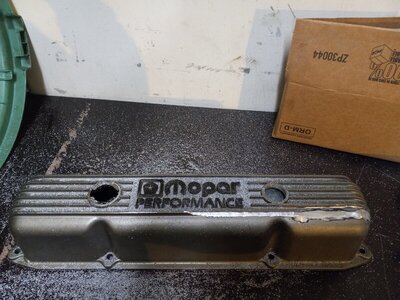
Decided to do an engine bay make over this winter . Wanted some new valve covers of some sort. But couldn't bring myself to spend $200+ on some of the ones that I liked. Plus the potential of fitment issues with a new set So my compromise was to modify my MP valve covers. I had already painted them a different color years ago. This time I went a bit further.

I shaved the fins and stripped the covers again. Painted them with some Hot Rod black from SPI. The I blocked the lettering and brought them to a "brushed" finish.

Pretty happy with how they turned out. The hardest part was around the letter and oil / breather holes. They are not flawless but once installed and caps installed I think they will look great !
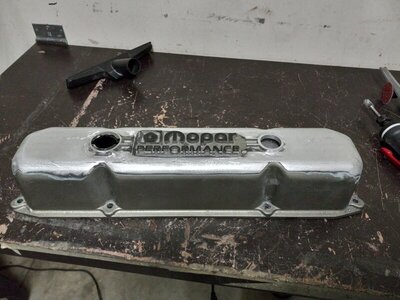
20211127_153415.jpg 20211204_174755.jpg 20220126_183113.jpg 20220126_184847.jpg 20220126_184915.jpg
 
THANKS for all the comments ! I was just looking at the new Felpro gaskets I got for them. They are the thick black ones. I see that one side had a noticeable rounded edge and the other had a "clean cut" flat surface. Which way do you guys put these on ? My thought was to put flat side down on cylinder head ?
 
THANKS for all the comments ! I was just looking at the new Felpro gaskets I got for them. They are the thick black ones. I see that one side had a noticeable rounded edge and the other had a "clean cut" flat surface. Which way do you guys put these on ? My thought was to put flat side down on cylinder head ?
I always did the flat side down because my stamped steel covers had curved edges.

Very cool modification, I like seeing different stuff!
 
Wow, how did you shave them @Canadian1968 ? Those look AWESOME! :thumbsup:

For the fins close to the letters and circles I used a carbide griding bit. Used 4 1/2" sand disk on my angle grinder for edges and a smaller 2" disc on my die grinder . Then used a combo of DA sander and metal file to try and smooth everything out. It was time consuming not going to lie
. Since it's a aluminum it easy to remove a lot of material fast ! So you have be careful.
Filled any big gouges with jb weld. Then primed with 2k high build sanded and filled any large imperfections again. Primed again, sand , and finally sealed and painted.
Wow, all by hand. Mercy!
 
They look great. people will ask where you bought them for sure
 
clear satin powder coat em & that sweet paint job should last forever i'd think
 
clear satin powder coat em & that sweet paint job should last forever i'd think

The paint is a 2k urethane single stage . It may not be as bullet proof as powder coat , but it should be pretty durable !
 
Yours look great. I milled the Indy logo off these valve covers. Wanted a cast cover that looked more stock. A little bondo and paint. Don't be afraid to use bondo on engine parts. This engine has been painted 11 years. Urethane single stage.
Doug

20210308_175030.jpg
 
clear satin powder coat em & that sweet paint job should last forever i'd think

Just to clarify my rare Red X, the heat required to cure that clear coat will make the paint job bubble, lift and look like *** pretty quickly. They are not compatible.
 
Auto Transport Service
Back
Top