You are using an out of date browser. It may not display this or other websites correctly.
You should upgrade or use an alternative browser.
You should upgrade or use an alternative browser.
B Body stiffening
- Thread starter Darius
- Start date
Darius
Well-Known Member
I got so into working I didn't get pics last week so you all will have to wait for this week.
I got the Charger booster and master cylinder assembly mounted in the GTX. I could not use the brake pedal assy from the Charger because it needed to be mounted higher than the underside of the cowl on the GTX would allow. I used an after market brake pedal mounting bracket instead. Had to plug up the opening in the firewall and re-cut the pass-thru for the push rod and bellows from the Charger booster.
I also got my Corbeau GTSII seats and tracks installed so I could position the gas pedal from the Charger which is going to work just fine, I may have to trim the length of the pedal itself, not sure until I get it mounted in the right spot.
I will post some pics sometime this week.
rolling_Thunder
Well-Known Member
looking good Darius -
Sneke_Eyez
Well-Known Member
Darius, this is an inspiring build to watch.
I, for one, cannot wait to see how the final product looks, and I can already tell that it will be truly sweet.
I love things like this, where somebody takes newer parts and puts them in an old car, its just too cool!
Giving me all sorts of ideas now...
I, for one, cannot wait to see how the final product looks, and I can already tell that it will be truly sweet.
I love things like this, where somebody takes newer parts and puts them in an old car, its just too cool!
Giving me all sorts of ideas now...
66_B_Body4ever
Well-Known Member
Incredible work Darius, should be an amazing ride when the dust settles...
Darius
Well-Known Member
I got some pics of the brake booster and master cylinder today. As mentioned, I plugged the original hole and moved the penetration up. I also used the lower portion of the pedal "arm" from the Charger, I'll get pics of that tomorrow


Darius
Well-Known Member
In the last post you can see the accelerator assembly in place. I had to mount it on it's own platform and fab some standoff mounts for it to be in the right position. I also had to cut the "curve" out of the pedal. This created the challenge of fusing it back together in such a way as to make sure it was strong and would not break. The asembly is made of some hard cast plastic that would not melt with ABS glue so I super glued the pieces together , routed out some of the structure and made a steel shaft/shape that spanned the two. I will fill the piece with some type of solid resin/epoxy then insert the steel shank while it it wet and cover it so the whole thing becomes a solid piece again.
Here are some pics of the process.


Here are some pics of the process.
Darius
Well-Known Member
I also got my seats installed/fitted. I chose Corbeau GTSII seats for the most retro look I could find in a comfortable seat that reclines AND tilts forward for rear seat access. They will get recovered later.
The brackets that Corbeau offers are way to tall (my head hit the roof without a headliner!) and they did not come close to lining up with the seat mount holes in the floor. I had to move them back anyway so the holes didn't matter but the height was cut down about 2 1/2" and I welded 3/16 plates to the floor for re-inforcement.


The brackets that Corbeau offers are way to tall (my head hit the roof without a headliner!) and they did not come close to lining up with the seat mount holes in the floor. I had to move them back anyway so the holes didn't matter but the height was cut down about 2 1/2" and I welded 3/16 plates to the floor for re-inforcement.
- Local time
- 1:58 PM
- Joined
- Dec 4, 2009
- Messages
- 34,017
- Reaction score
- 41,693
- Location
- Pasadena, Texas
Wow.....
rolling_Thunder
Well-Known Member
That doesn't seem right to have to cut up the trunk to clear fuel lines. You would think that they would have a recess in the tank for the fuel lines to run along the top of the tank toward the front to make your connection. I just spent a lot of time and money installing a new floor in my Roadrunner and I sure would not want to cut it up for a poor designed fuel tank.
Hey - Billet - thanks for that K-member haha nice seeing you around here too... I saw that same issue so I modified my stock tank with the mounting bracket for a Mitsubishi Eclipse (~2002) and recessed it down into the tank with a 255lph walbro pump...
70roadrunner
Active Member
Well we all know what happened to my moms charger if it shows up missing.LOL Thats ahole lot of work goin in ur car but it will pay off once ur done.Keep up the good work and keepus updated w/more pics on the progress.
Darius
Well-Known Member
Well, work has taken ALL of my time since my last post so I don't really have anything new to add at the moment, just wanted to let you all know this project WILL get done. I love doing this stuff and it is really frustrating when the issue is all about time and not so much the $$$$$. Of course, when there was tons of time the $$$$$$ becomes the issue so I guess that menas you really don't win, it still sucks either way.
I am resisting the urge to become impatient to the point of calling my friend and telling him to finish the car and pay him. He would probably tell me no, you finish it anyway,it is your baby!
I am resisting the urge to become impatient to the point of calling my friend and telling him to finish the car and pay him. He would probably tell me no, you finish it anyway,it is your baby!
Donny
Well-Known Member
- Local time
- 1:58 PM
- Joined
- Aug 28, 2009
- Messages
- 3,206
- Reaction score
- 539
- Location
- North East San Antonio TX
Time and Money, two variables that fluctuate often, I feel your pain.
McMopar
Well-Known Member
You are one ambitious man!!!!
Donny
Well-Known Member
- Local time
- 1:58 PM
- Joined
- Aug 28, 2009
- Messages
- 3,206
- Reaction score
- 539
- Location
- North East San Antonio TX
I've heard from many sources XV is a sucky organization; you have to have a well-balanced machine; customer service, product, and pricing, if you're amiss on any, then you will be shooting blanks.
Darius
Well-Known Member
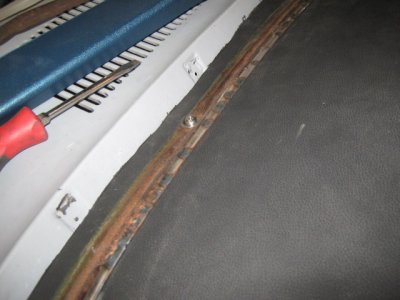
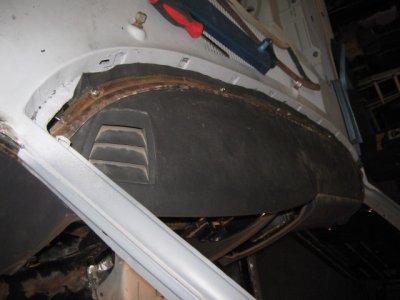
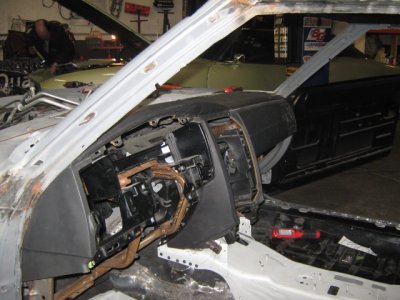
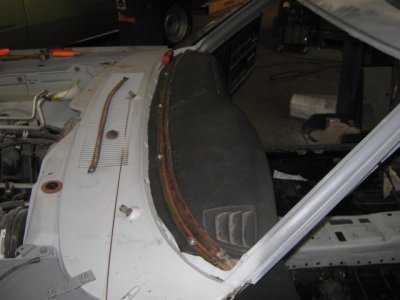
B Body stiffening UPDATE 1-07-11
After I got the dash fit in the GTX I started calling around to inquire about having it re-covered with Vinyl since I hacked on it pretty good in some places. Just dashes was about the only place I could find that would do it without having seams. (Check out their web site...pretty cool process) but they wanted $2500.00 to do it!!!!!!!
I thought "How much could I get a dash panel from a recycler for", answer $300. I figured with what I learned the first time, I could make a second one fit with minimal damage and I could repair and paint it myself...here is the result. I will get better pics later.
I cut just the front 1+" off of a parts car dash frame to use as a "hold down" for the upper dash deck. I welded a 1/8" piece of welding rod onto the bottom leading edge and will round that over and clean it up nice. I welded some flanges to the bottom lip if the GTX dash frame and "sandwiched " the new dash in like that. (sorry, no pics of that).
Next major challenge will be to get all the ducting for HVAC fit in there somehow.
Attachments

Darius
Well-Known Member
That is what I end up doing this way. The first attempt had me using an English Wheel to shape the top part of the parts car dash to conform with the "hump" on the Charger dash. It was starting to look good but the vinyl work was going to take a LOT of time or $$$$$ or both. So after I weighed all the possibilities, the new dash and about 12 hours work and I'm done except for paint. I was able to peel back the vinyl and remove the padding underneath where I needed to so now all I have to do is heat the vinyl and shape it to my finished substrate.
I actually like the way this turned out better, it looks like the one piece it is instead of a part steel part padded vinyl affair.
I actually like the way this turned out better, it looks like the one piece it is instead of a part steel part padded vinyl affair.
Similar threads
- Replies
- 20
- Views
- 2K
- Replies
- 6
- Views
- 722
- Replies
- 3
- Views
- 608
- Replies
- 17
- Views
- 831


