• When you click on links to various merchants on this site and make a purchase, this can result in this site earning a commission. Affiliate programs and affiliations include, but are not limited to, the eBay Partner Network.

My 1967 Belvedere Convertible Plans and Restoration (aka - Mad Scientist Build)

Engine compartment . . . I wonder . . .

So, I've been working on the Belvedere and I've seen this in the engine compartment. And I wonder . . . when the hemi gets installed in here, are these still going to be visible ? I'm hoping to run headers . . . so I think that the answer is yes - they will be seen . . .
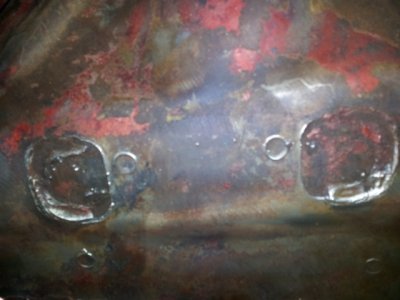
sm_engcomptugly.jpg

- - - Updated - - -

So my next thought . . . can we fix it ?

So - rather then prime parts ( it's dark outside ) and eat undercoating ( unintentionally of course ) I need to practice my welding, so I figured I take a stab at it and see what happens. . .

The original look . . .
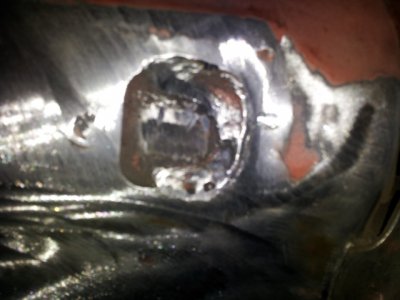
sm_engcompone.jpg

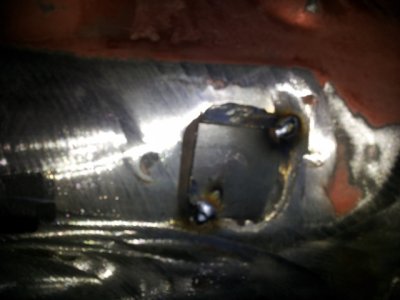
Cut a patch . . . grind on it to make it fit all the welds . . . test fit . . .
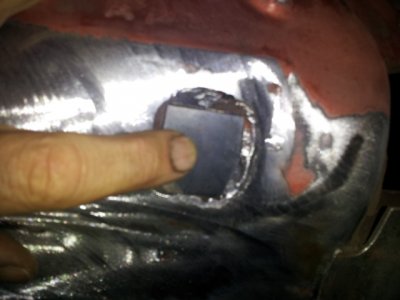
sm_makepatch.jpg

Tack the patch in place . . .

sm_tackpatch.jpg

Weld it . . . ( duh )

sm_weldpatch.jpg

Here's what I had with one completed . . . I think I like it much better !
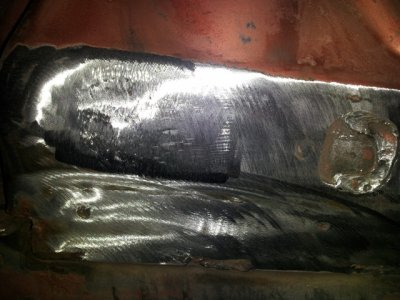
sm_engcomphalfdone.jpg

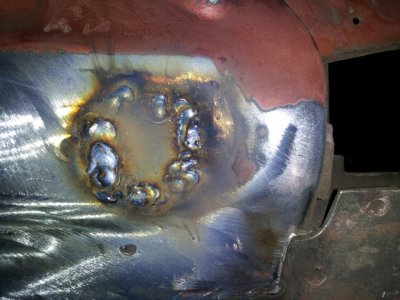
And . . . about an hour later - here's the finished product ( passenger side only ) . . .
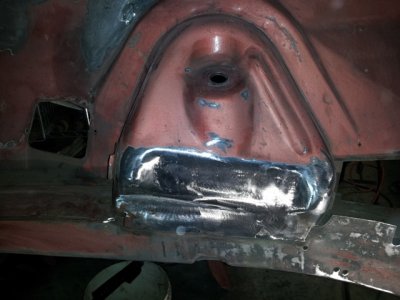
sm_engcompdone.jpg

Well . . . got some welding practice, cleaned up the shock tower . . . and I've got a small task to work on tomorrow, getting the driver side done.

Oh, and a short break from the undercoating removal ( heh heh ) . . . I needed that.
 
looks better with the smoothed over finish.

Thanks Roadrunnerman . . . I appreciate it !

- - - Updated - - -

So I got back inside the engine compartment and worked on the driver side.

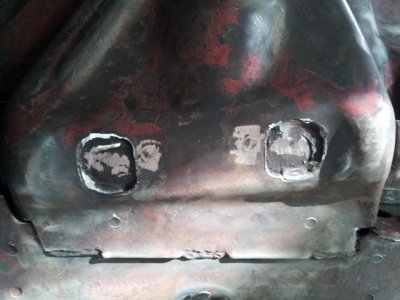
This is what I started with:

sm_driversideengcomp.jpg

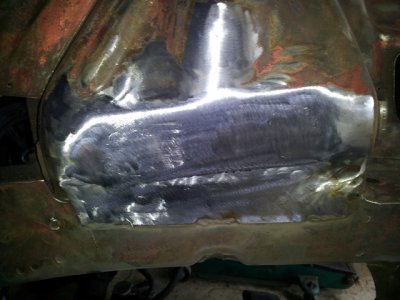
And an hour later I got this:

sm_driversidedone.jpg

So now that is completed !
 
Oil pickup solution . . . very simple

Thanks Kevin and Zack . . . there are some great people on this site willing to help others.

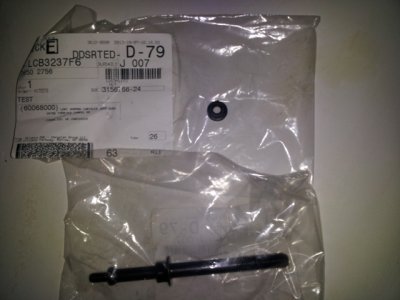
The answer to my center sump oil pickup and missing stud was very simple. My engine cam out of a Dodge Magnum, not a truck. As a result, the original oil pickup was a front pickup, which means I did not have the bolt with a stud that the pickup truck engine has - it has a rear sump. So a simple trip to the local Dodge dealership and now I've got the parts I need to get my engine set up correctly.

sm_hemistud.jpg

Now to get a Manual to help with all the torque specs that I'll be needing for this Hemi . . .
 
since I've removed the rear end from the car, I've got a bunch of parts that need to be cleaned up . . .
and now they're almost ready for etching primer and epoxy primer . . .

A quick note, DO NOT re-use those u-bolts. Go buy new ones. U bolts are almost always yielded from the previous torquing and can break easily if re-used and re-torqued. And for something that holds the entire rear end in the car its worth the $40 for new ones.

And good call on the stud. I forgot the front sump engines didn't get the stud.

Kevin - that makes really good sense . . . I'll definitely be buying new U-bolts.

- - - Updated - - -

After (2) days of fitting, I've finally got the fitment the way I like it and I finally was able to get the driver side frame connector tacked into place. Now "all" that I've got to do is get about 20 feet of metal welded in place along the length of the connectors . . . time to practice my welding ! !

Here's how it's looking:

sm-drframeconnector.jpg

Nice break from scraping undercoating . . .
 
busy busy looking good thanks for the update :icon_thumleft:
 
Kevin - that makes really good sense . . . I'll definitely be buying new U-bolts.

- - - Updated - - -

After (2) days of fitting, I've finally got the fitment the way I like it and I finally was able to get the driver side frame connector tacked into place. Now "all" that I've got to do is get about 20 feet of metal welded in place along the length of the connectors . . . time to practice my welding ! !

Here's how it's looking:


Nice break from scraping undercoating . . .

Alright, you can come over and weld in some for me now....

I got the hood out of the shed and set it on the car...they haven't seen each other for 2 years.
 
Last edited:
Alright, you can come over and weld in some for me now....

I got the hood out of the shed and set it on the car...they haven't seen each other for 2 years.

I'll be happy to help weld them in . . . until you see my welds . . . then you'll want to do them yourself ( heh heh ) . . . Not really, I think I'm actually starting to get the hang of this. Got about 2/3 of the driver side welded in tonight, and some went in so very nice . . . and some went in with a bit of a struggle.

But I don't give up !

What a difference that make to the car floorplans . . . WOW . . . really glad that I went with the full weld in type ( even though I was worried about my welding ).

Glad to hear that you got the Hood back on the car after a 2 year hiatus ! ! ! I was hoping to have my car on the road next year, maybe that's a bit too optimistic ?

Good night of welding . . . getting the hang of if, got some grinding to do make them look nicer. Maybe be able to get the driver side done tomorrow and get started on the fitment of the passenger side too . . . we can hope. ( notice no talk of undercoating removal ? - another day . . . )

Thanks. I won't be doing sub frame connectors for a while but being a 2 door post this chassis is pretty darn stiff. Its actually on par with a couple of newer cars I've had. if you put a floor jack just in front of the spring perch it will lift the whole side of the car at once with little flex.

The hood is sitting in place but not attached...weekend project is to get the underside of that painted and then bolted back on..

Git r done buddy, glad you are getting good with the welder. Takes some time to develop your own technique.
 
busy busy looking good thanks for the update :icon_thumleft:

Thanks Snakeyes . . . I'm keeping busy, thanks for the positive feedback and thanks for following my build. It's sure helps !
 
Frame connectors - progress

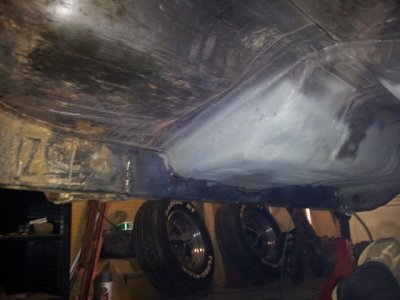
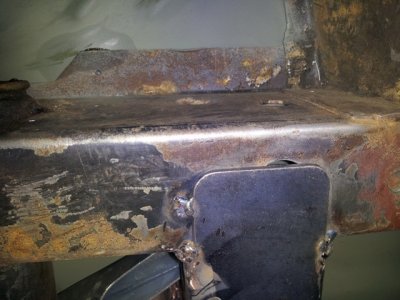
Got to the shop tonight and welded up most of the remaining driver side frame connector. One thing that I saw that I did not like the looks of, the frame connector had a tab the stuck over the weep hole near the torsion bar cross member.

You can see a bit of the hole in the following picture:

sm_weepholehidden.jpg

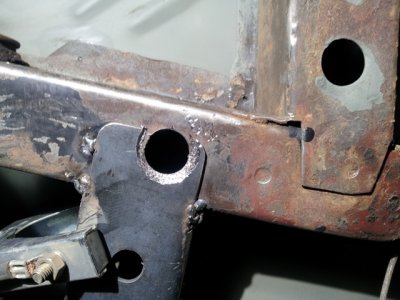
Didn't want to weld the tab in there and cover the hole - so I drilled it out - will weld around it now to keep the hole open.

sm_weepholeopen.jpg

Didn't get started on the passenger side frame connector yet - hope to get on that this weekend.
 
Got to the shop tonight and welded up most of the remaining driver side frame connector. One thing that I saw that I did not like the looks of, the frame connector had a tab the stuck over the weep hole near the torsion bar cross member.

You can see a bit of the hole in the following picture:
Didn't want to weld the tab in there and cover the hole - so I drilled it out - will weld around it now to keep the hole open.
Didn't get started on the passenger side frame connector yet - hope to get on that this weekend.

That was a good plan there. Those holes are necessary or you end up replacing it like I had to with mine :(

Also that will actually be a better connection since you got rid of the straight edge. its why when you add a fish plate for strength its shaped like....well a fish mouth
 
That was a good plan there. Those holes are necessary or you end up replacing it like I had to with mine :(

Also that will actually be a better connection since you got rid of the straight edge. its why when you add a fish plate for strength its shaped like....well a fish mouth

Thanks Kevin . . . Good to know that I'm doing it right ( even though I'm not quite sure I know what I'm doing ? ! ? )
 
Driver side frame connector installed . . .

Spent some time in the shop today finishing up the welding of the driver side frame connector. Got my "fish plate" all welded in and rough ground . . . grinded . . . grounded . . . uh, roughed in . . . will do some clean up tomorrow on it.

sm-holewelded.jpg

Also got started on the passenger side frame connector and got it started on its way to fitting - so it can be welded. I guess after it's done I'll have to get back on the undercoating and finish that task up once and for all . . . ugh ! ! !
 
You certainly have been busy. Welding is definitely a practice makes perfect type of art, keep at it. The 66-67s look really good in convertible mode.
 
You certainly have been busy. Welding is definitely a practice makes perfect type of art, keep at it. The 66-67s look really good in convertible mode.

Was doing pretty good at it - until I had to start welding upside down . . . now it feels like I'm learning all over again. I'm getting it done !

Thanks for the encouragement . . . and I agree - really like them in "convertible mode" ! ! !
 
Was doing pretty good at it - until I had to start welding upside down . . . now it feels like I'm learning all over again. I'm getting it done !

Thanks for the encouragement . . . and I agree - really like them in "convertible mode" ! ! !


Haha, just make sure you dodge the molten rain! Small spot welds stacked overlapping with a decent heat setting works really well for that. Also I can't tell what you are using for a grinding wheel but "flap disks" are amazing for getting a nice smooth finish on your work.

This is a GREAT place to get supplies: http://heleta.com/

http://heleta.com/index.php/flap-discs.html ....these are what I am referring to. If you already use them, disregard.


and when you said "not sure i know what I am doing"....THANK YOU for doing it anyway! I started doing my car the same way, without a fricking clue and its been the greatest learning experience I could have ever hoped for. My fabrication skills have gotten way better, welding, and even painting. In my opinion if you don't feel out of your element you aren't learning something or trying anything....and we only live once!
 
Auto Transport Service
Back
Top