• When you click on links to various merchants on this site and make a purchase, this can result in this site earning a commission. Affiliate programs and affiliations include, but are not limited to, the eBay Partner Network.

70 Hemi Superbird Restoration..................errr.....scratch that........

OK, so I've gotta stayed tuned and see how this turns out. It's going to be one bad black bird!

Even the cat is glued to the computer to see how it turns out!
2065c96f-32f2-4d7c-9d14-0d420a4a0676_zpsd64b4cd8.jpg


- - - Updated - - -

I drilled out the rear seat belt mount and removed it. We'll have no rear seat in this car and I'm removing all the little un-needed items. I'll be removing that lower seat mount bracket as well.
0AC2B3C8-3FDB-44C0-A7E9-18C58C3F74FB_zpsvbmjwg8r.jpg


Cleaned it up some with the wire wheel. I'll cover it with POR15 or something before putting the quarter panel back on.
9C7FFF3F-090A-441A-AFF6-6ABEBB91979F_zpsijksukct.jpg
 
Awesome work, Hemirunner!! I feel your pain with the frame rails, rockers, trunk pan, plug welds, etc. lol.... I will be tuned in with great interest on this build!:popcorn:
 
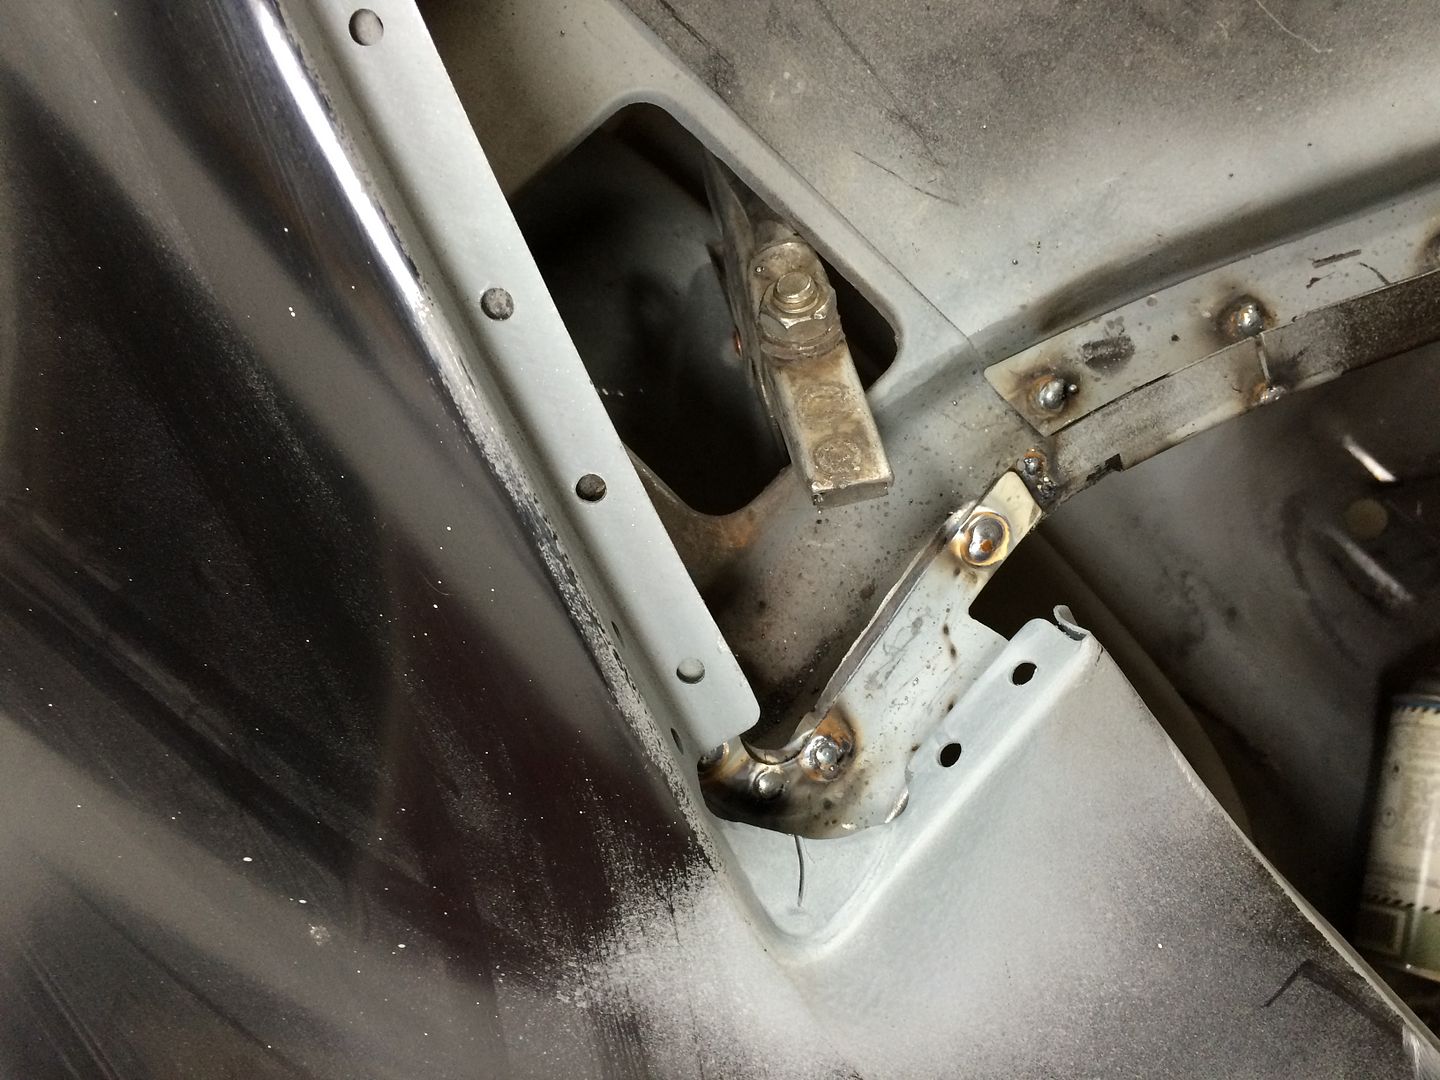
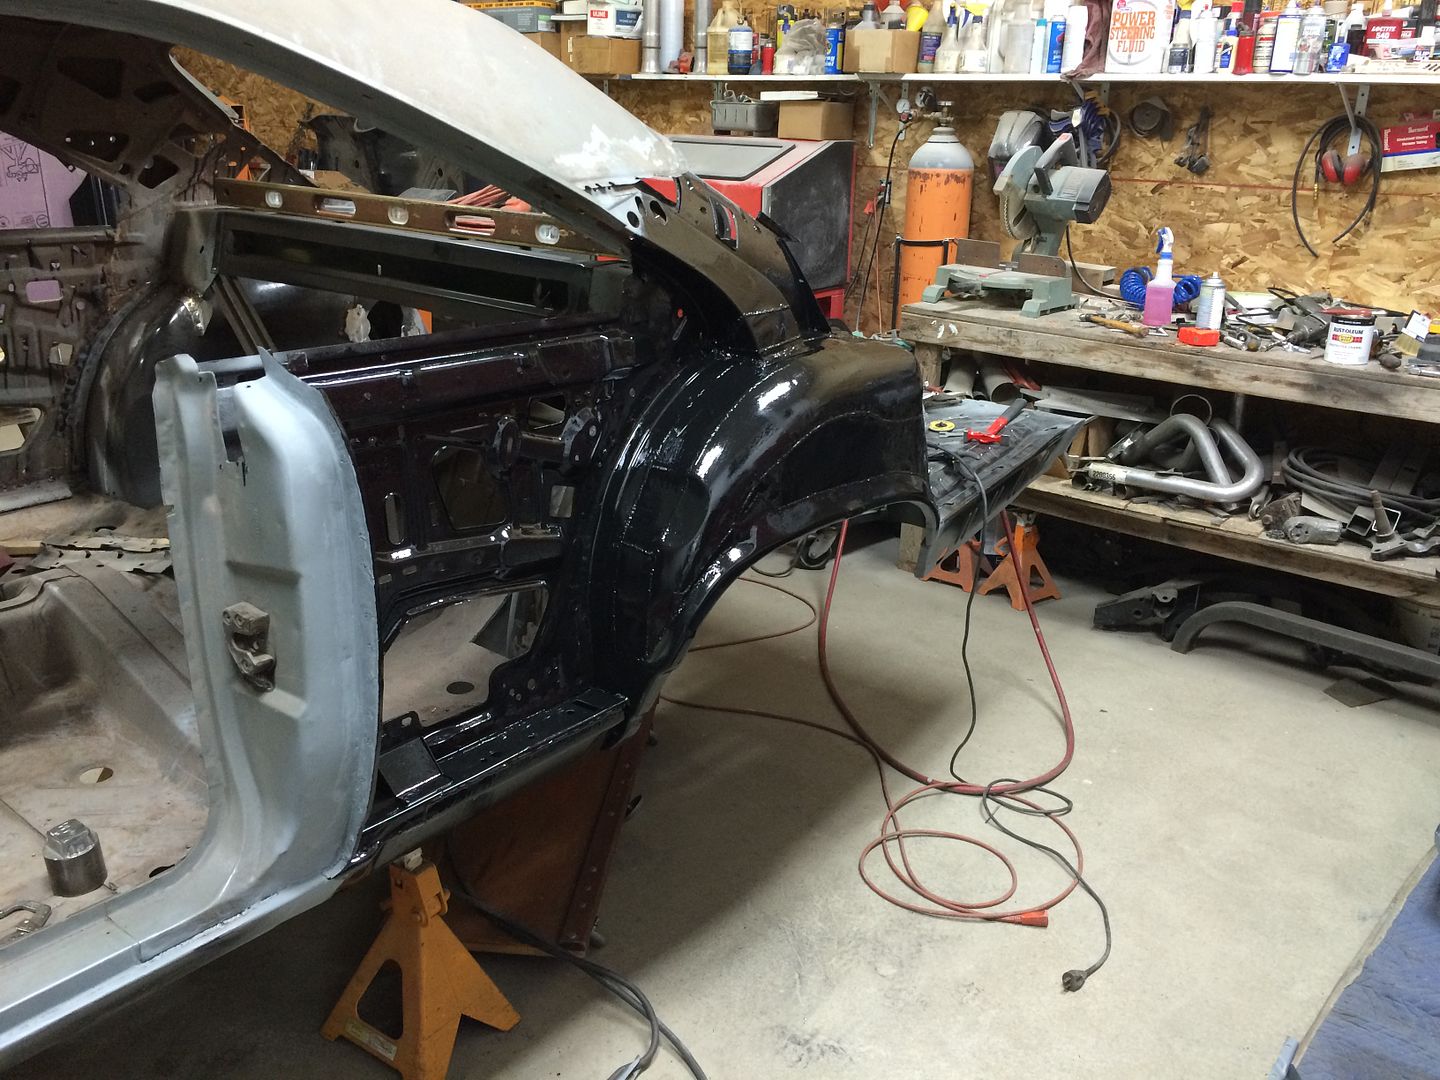
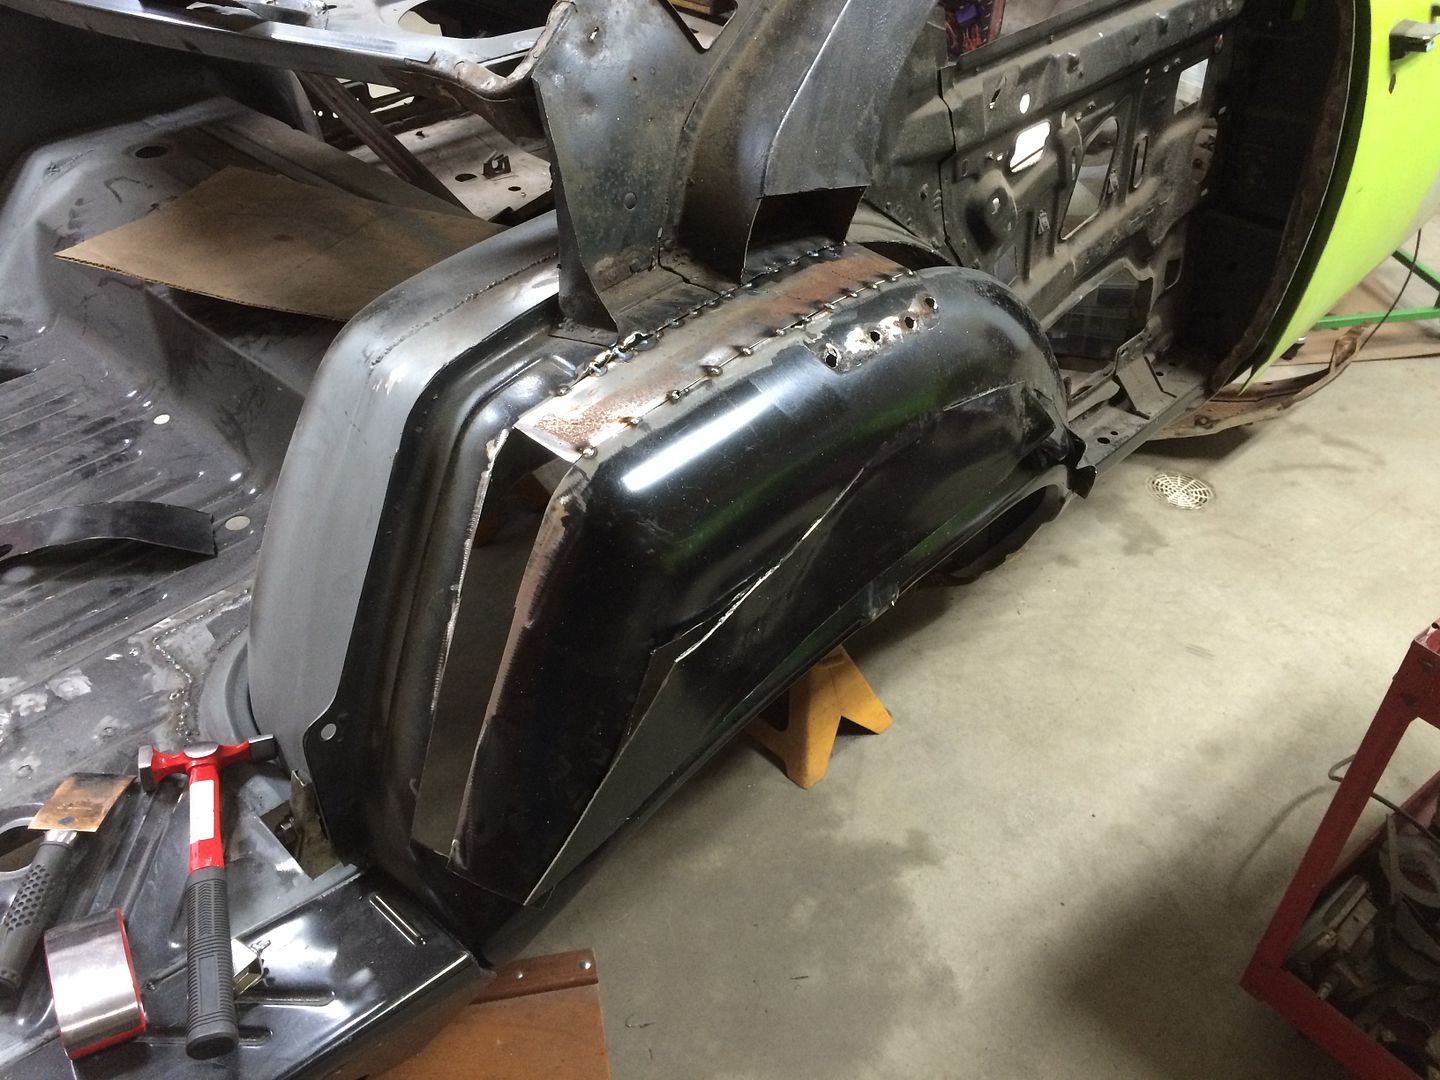
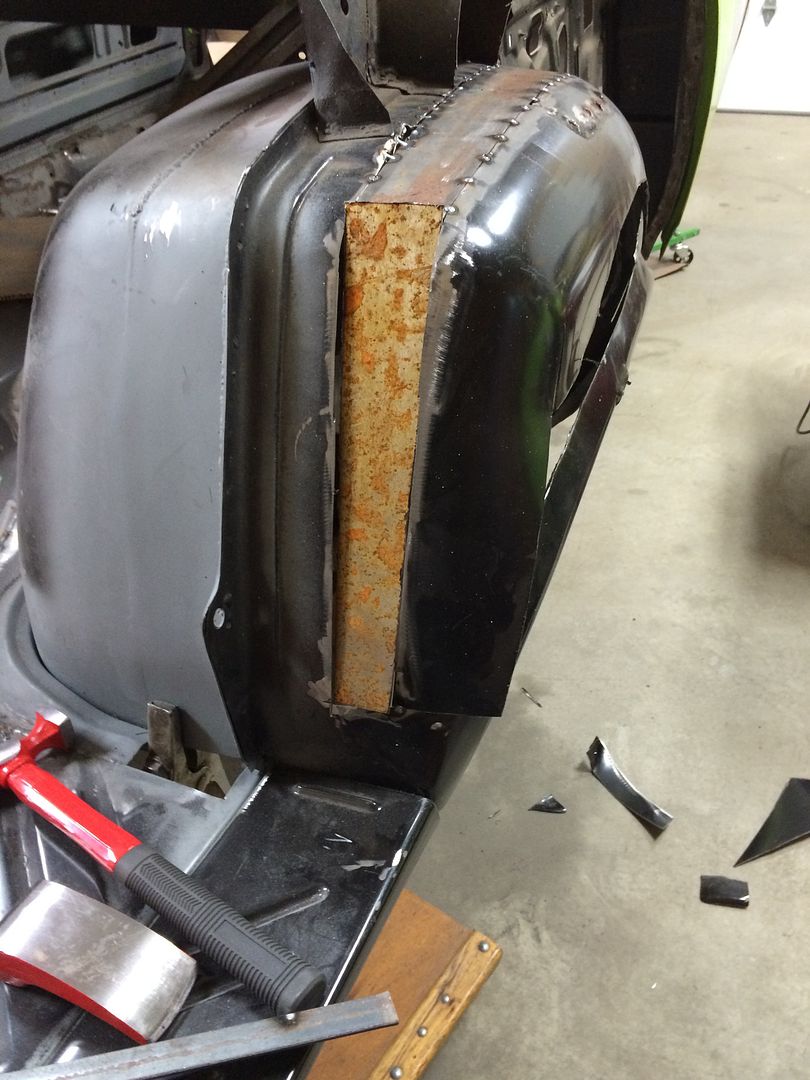
Welded in the rear corner piece on the drivers side so I could do the final fitting on the quarter panel. This assembly is the weirdest configuration of parts ever. I split the corner that was in the quarter panel and it will get hammered into the pocket and welded to it. Strange, but whatever it takes to keep moving forward.
104FD789-7284-4071-8C50-B154C65CEF89_zpsok9ag66c.jpg


- - - Updated - - -

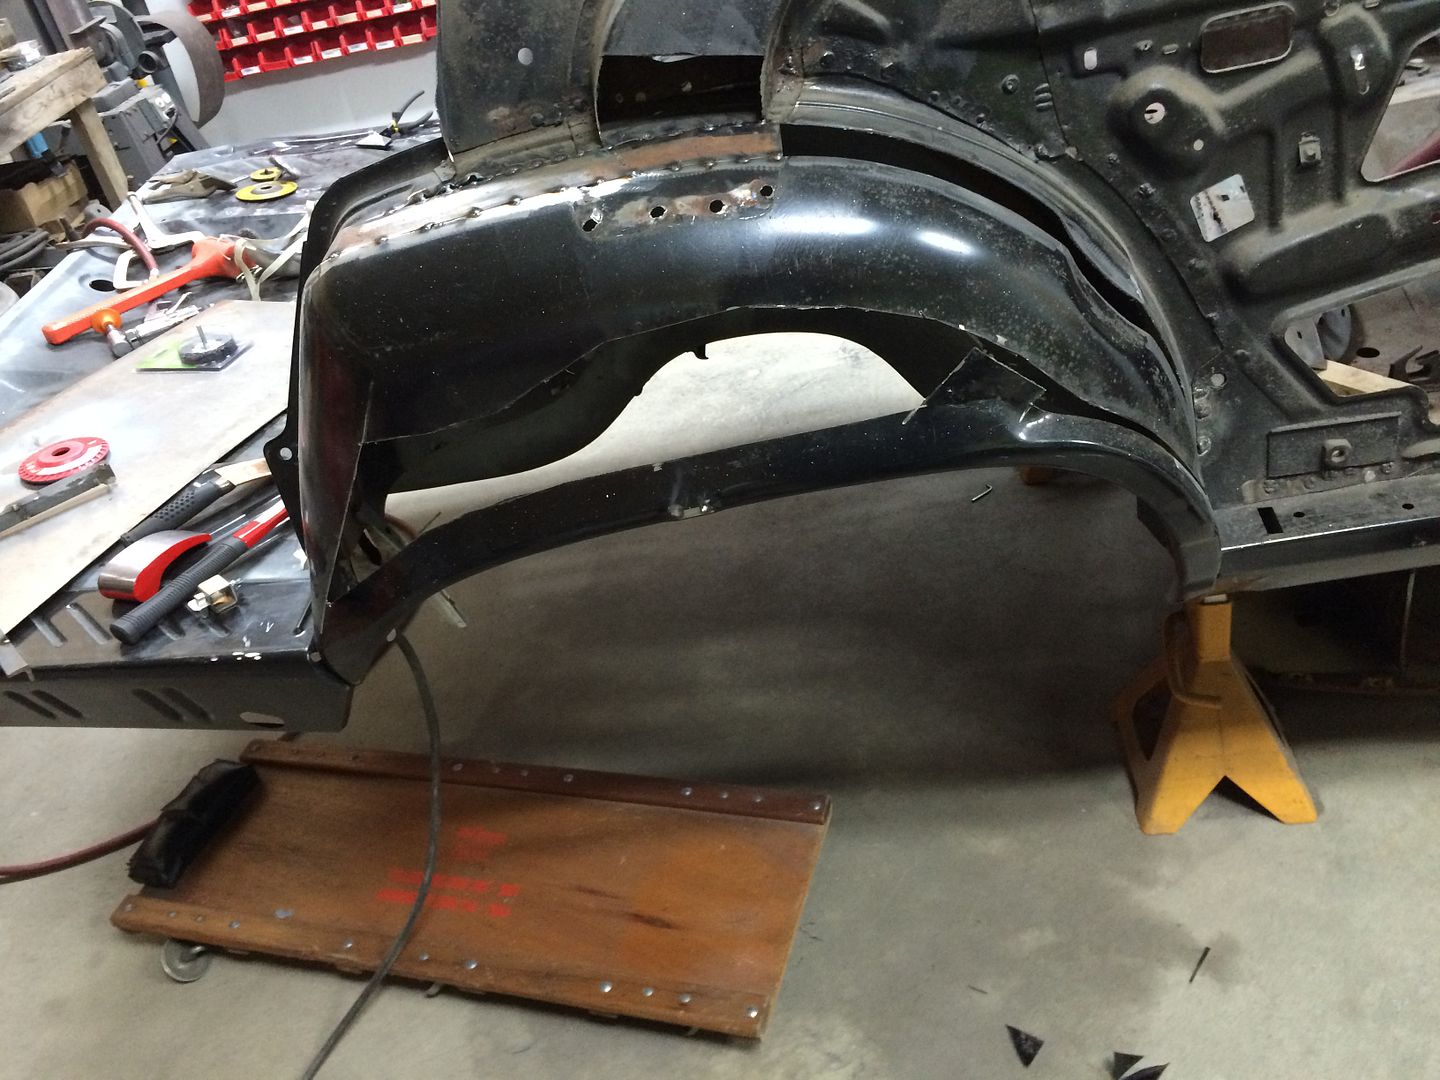
I also had to remake that little curved piece at the bottom of the door jamb. I bent one up and tacked it into place. The quarter panel needs pulled down and the little gap seen in the photo will go away.
F0E65682-AFA5-408B-94A1-6FD458FAB9CC_zps6o1hznc2.jpg


- - - Updated - - -

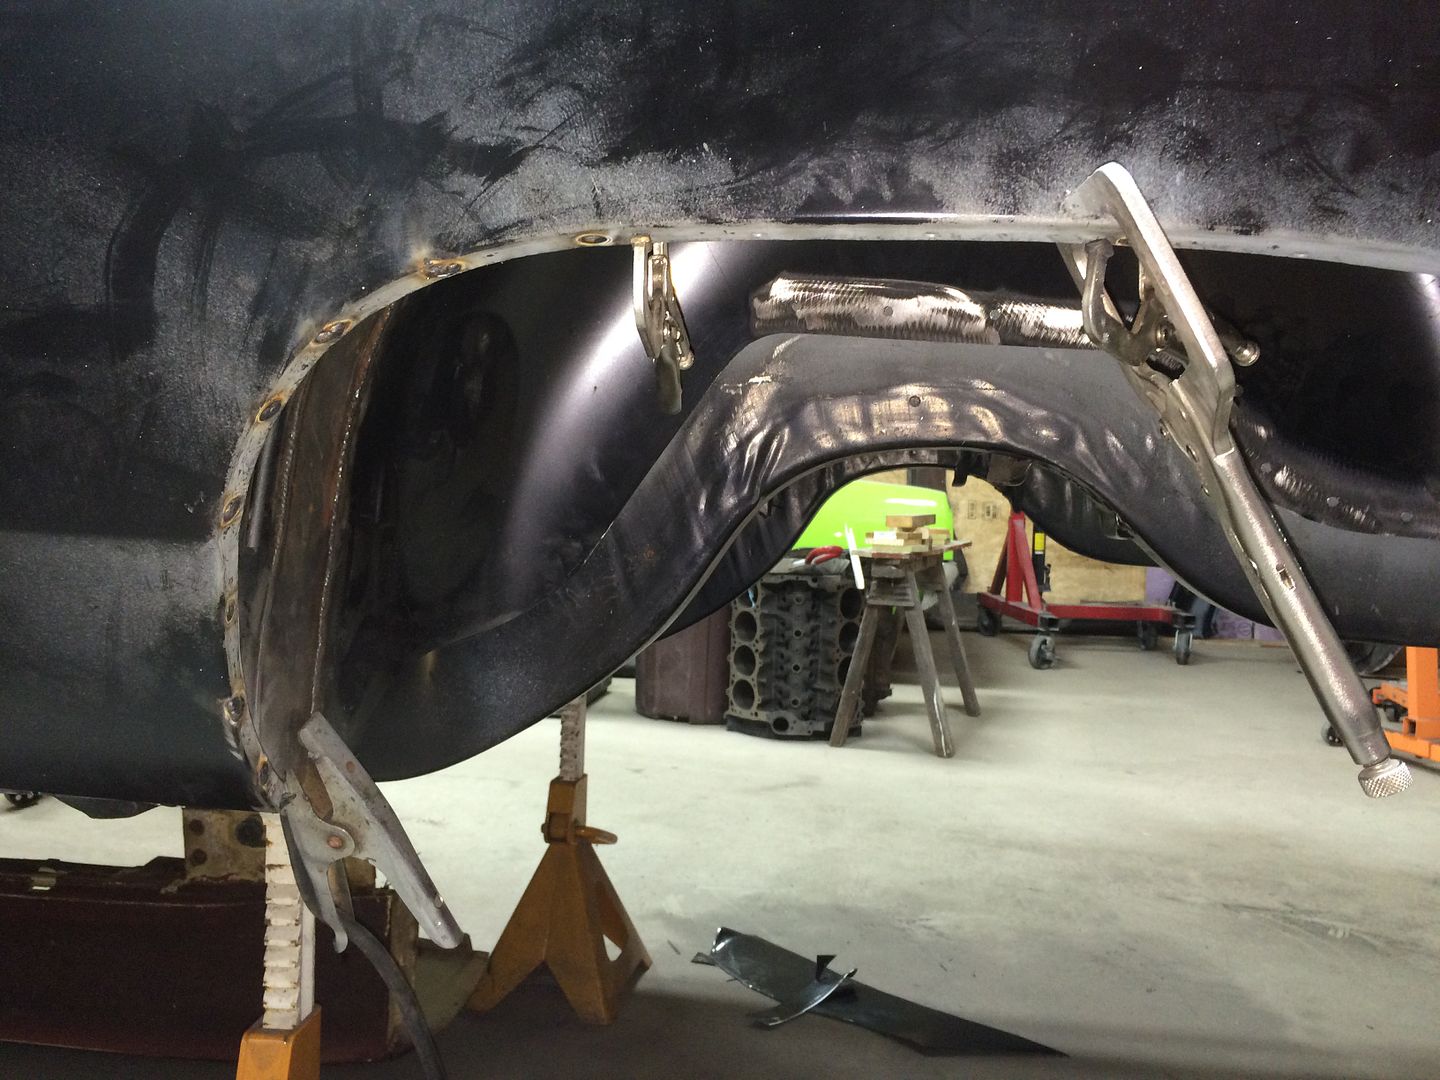
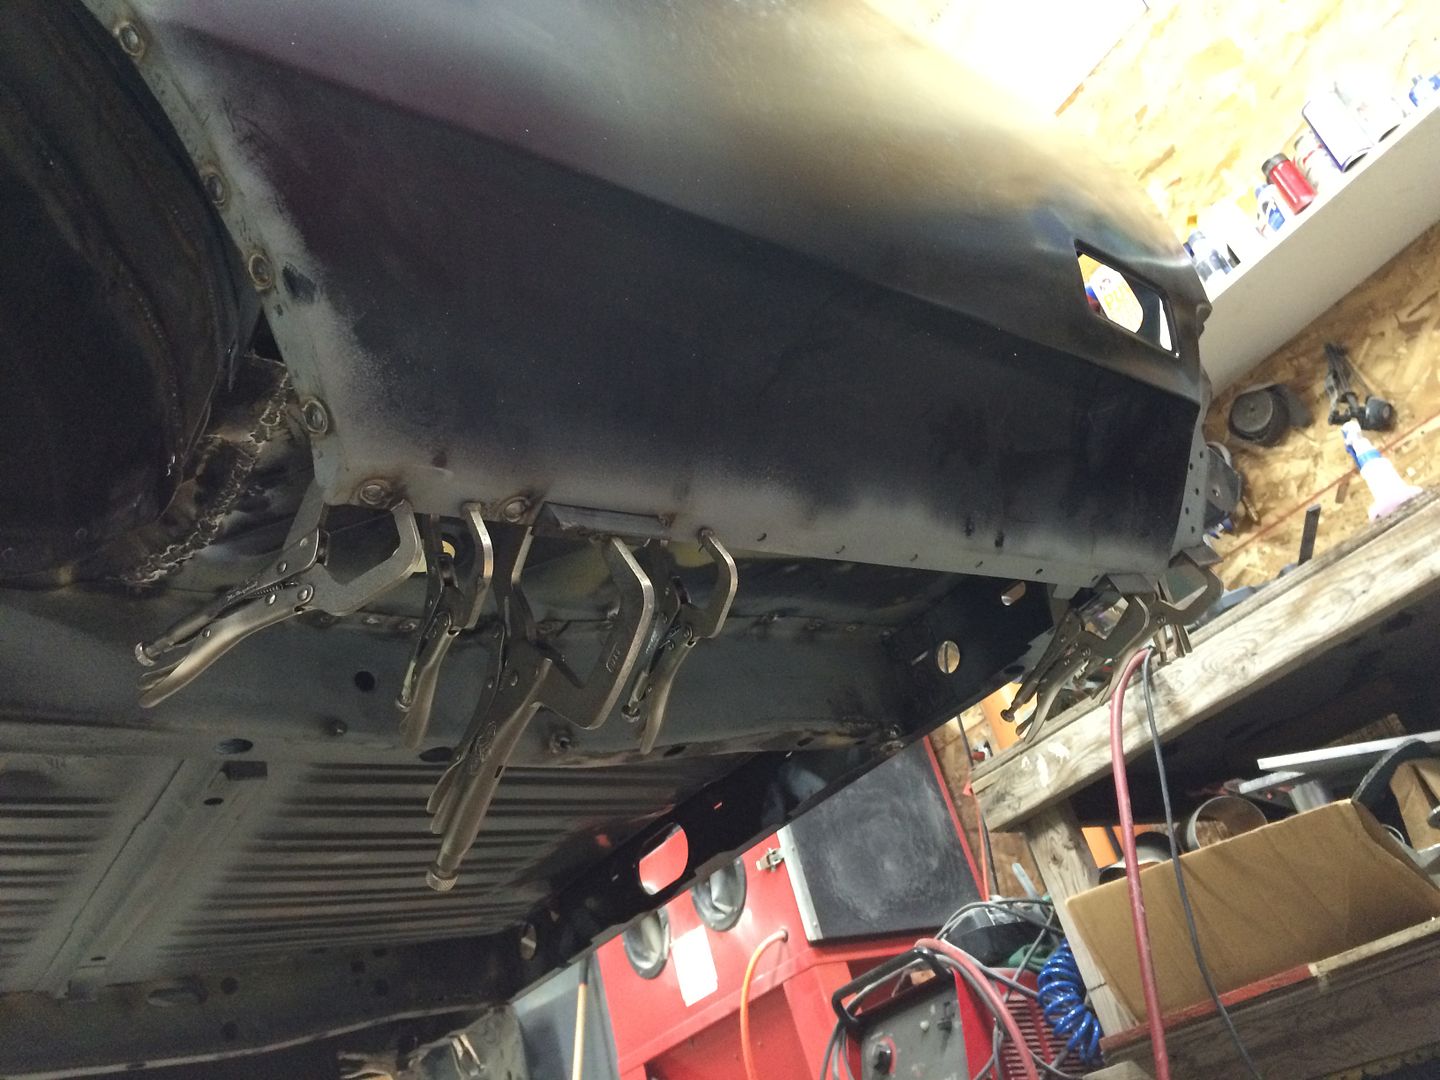
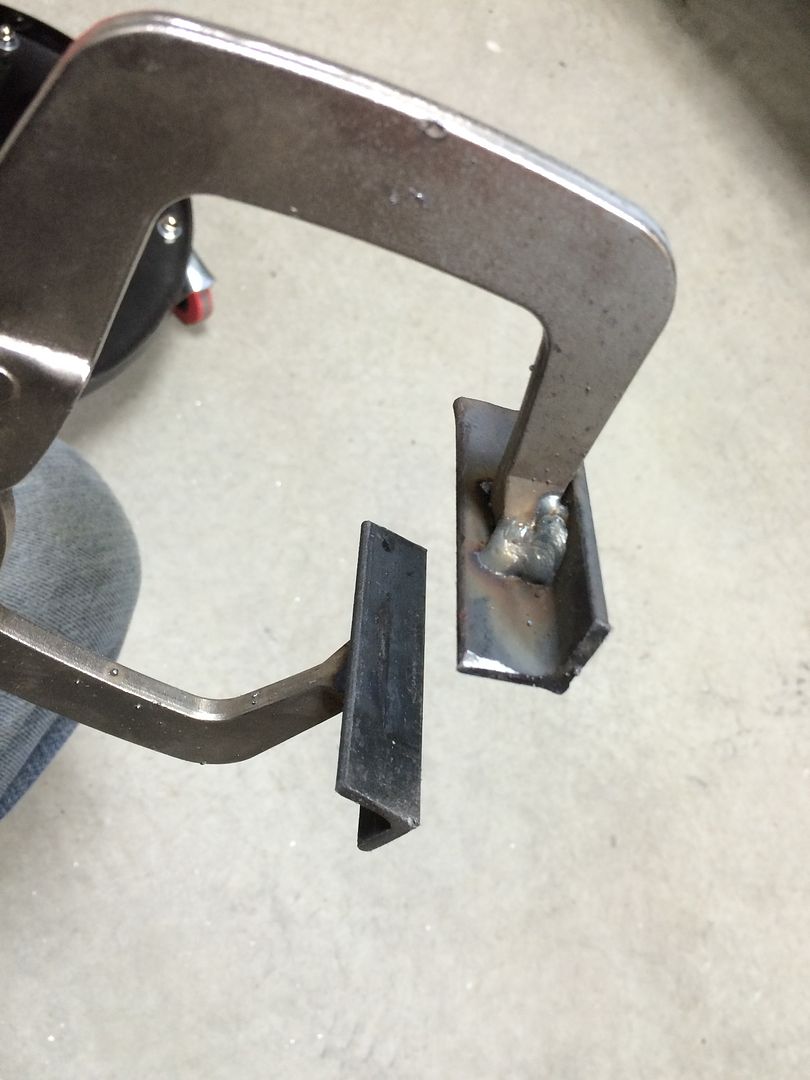
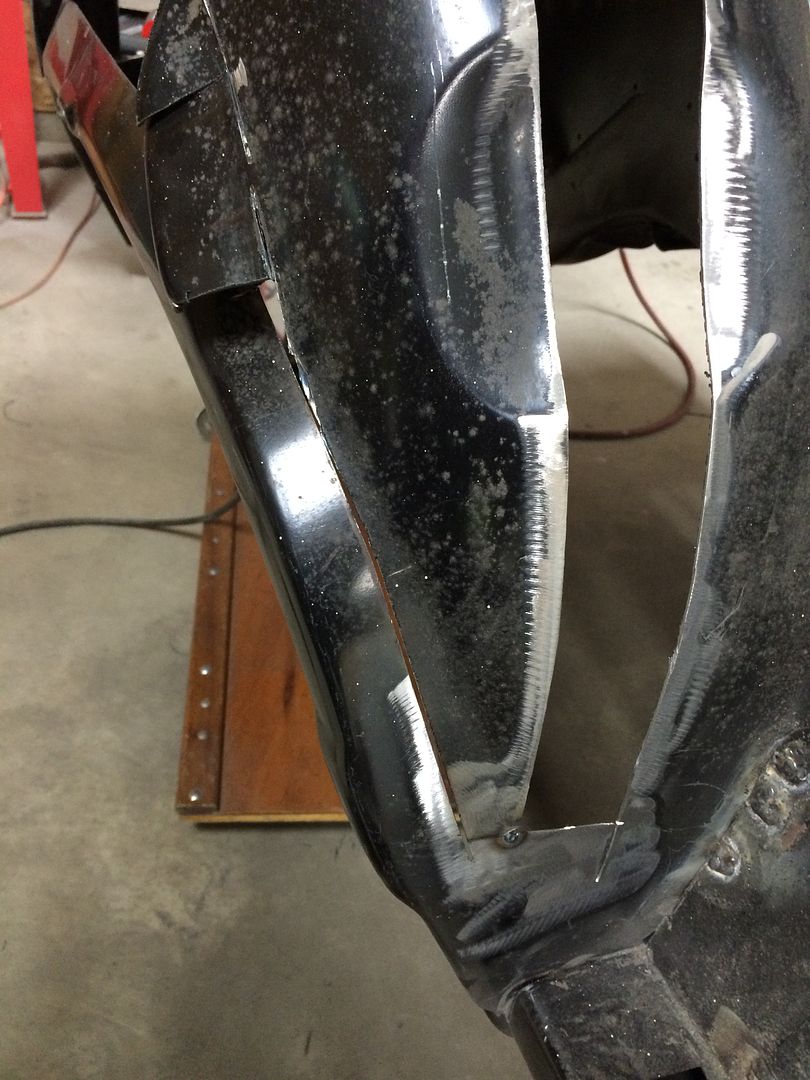
The lower "bend" where the quarter panel wraps around the rocker wasn't a tight enough angle so I had to make a set of folding pliers out of a vice grip clamp. Turns out that this modified clamp works well pulling flanges together like when installing the trunk floor extensions.
9A1D1F01-46AC-4CBB-839A-F8B403BE8D68_zpsjk7flkpf.jpg


- - - Updated - - -

CDF52CE3-0D49-47E5-B81E-42B6A1162E57_zpsxejymiw3.jpg


- - - Updated - - -

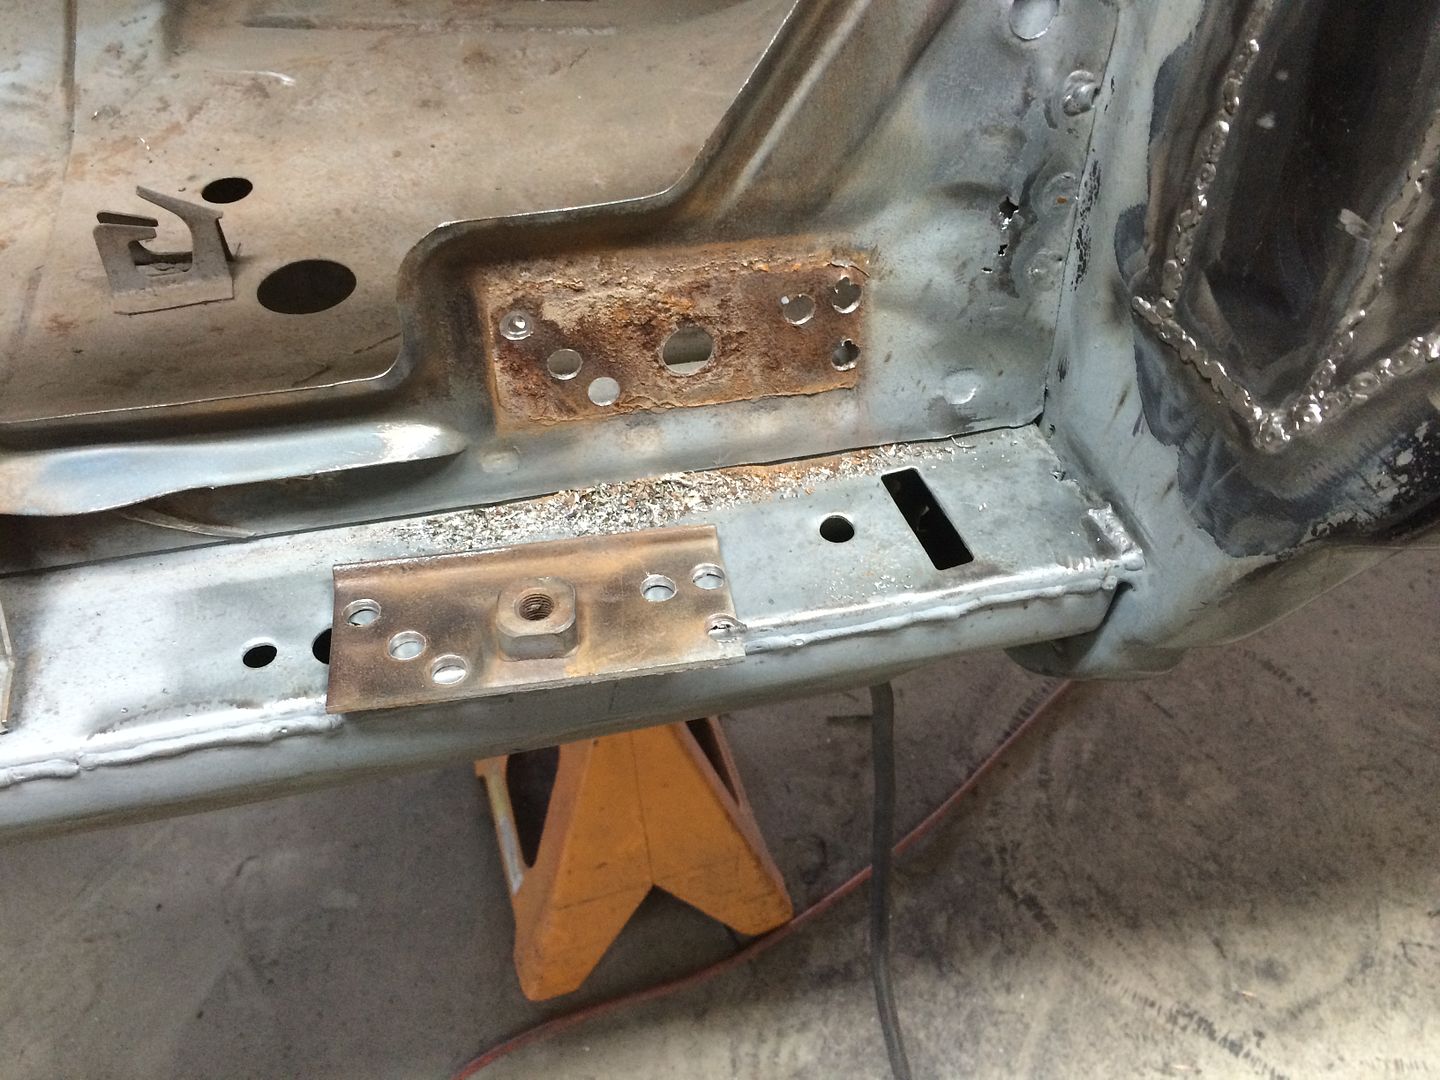
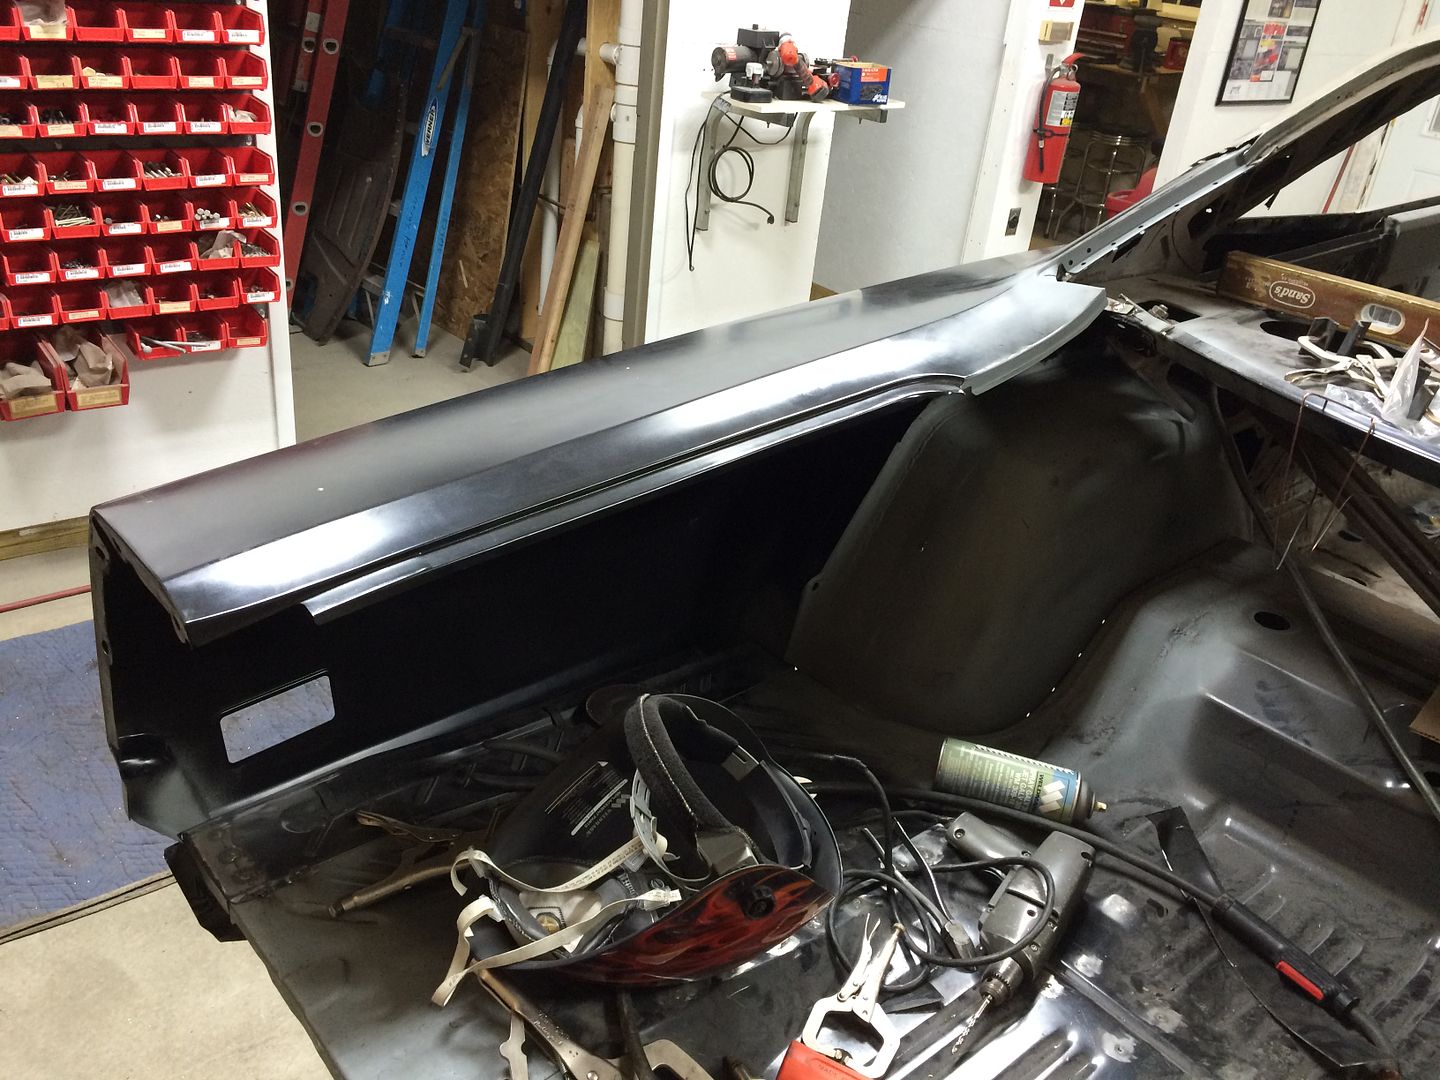
I coated the whole side with POR15 to minimize any rust under there in the future. I then stripped all the E-coat off of the mating surfaces where the plug welds will go and then covered those surfaces with a weld through primer.
481CA781-0E74-4C77-B93D-106191403668_zpst0qyhjad.jpg


- - - Updated - - -

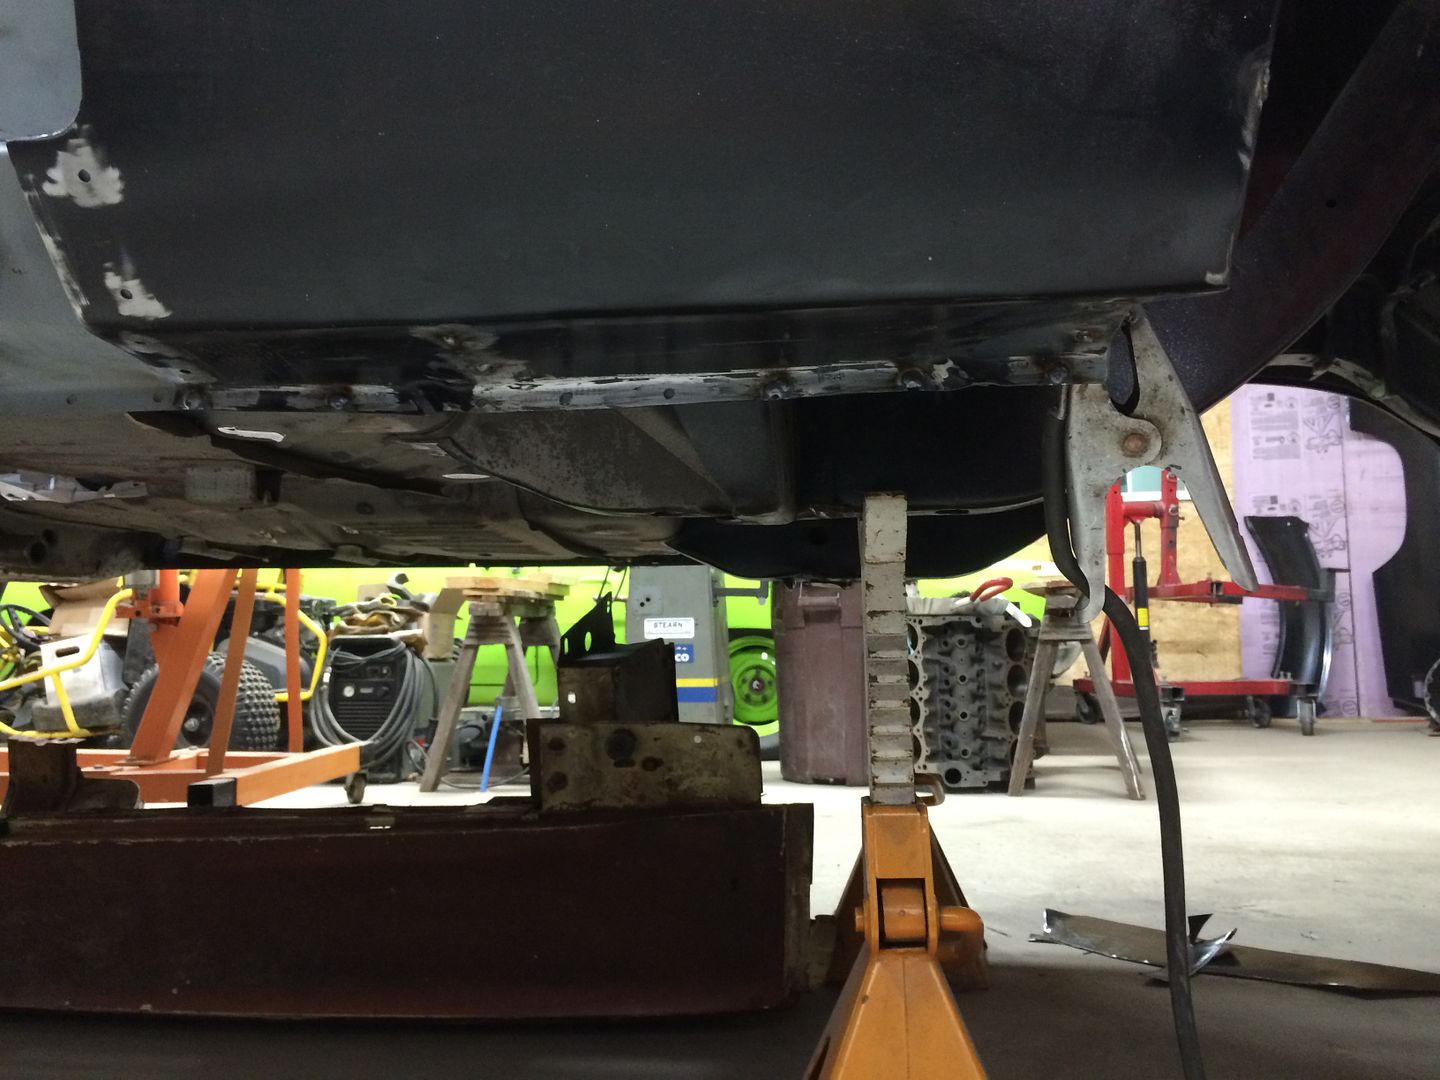
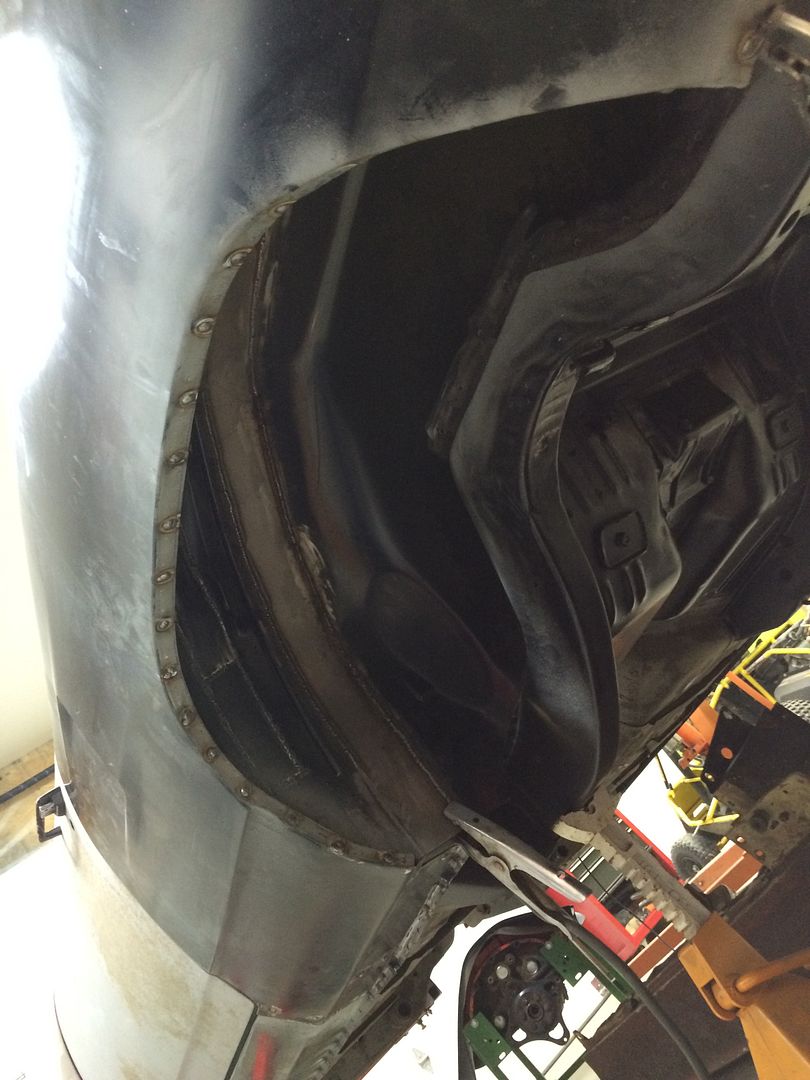
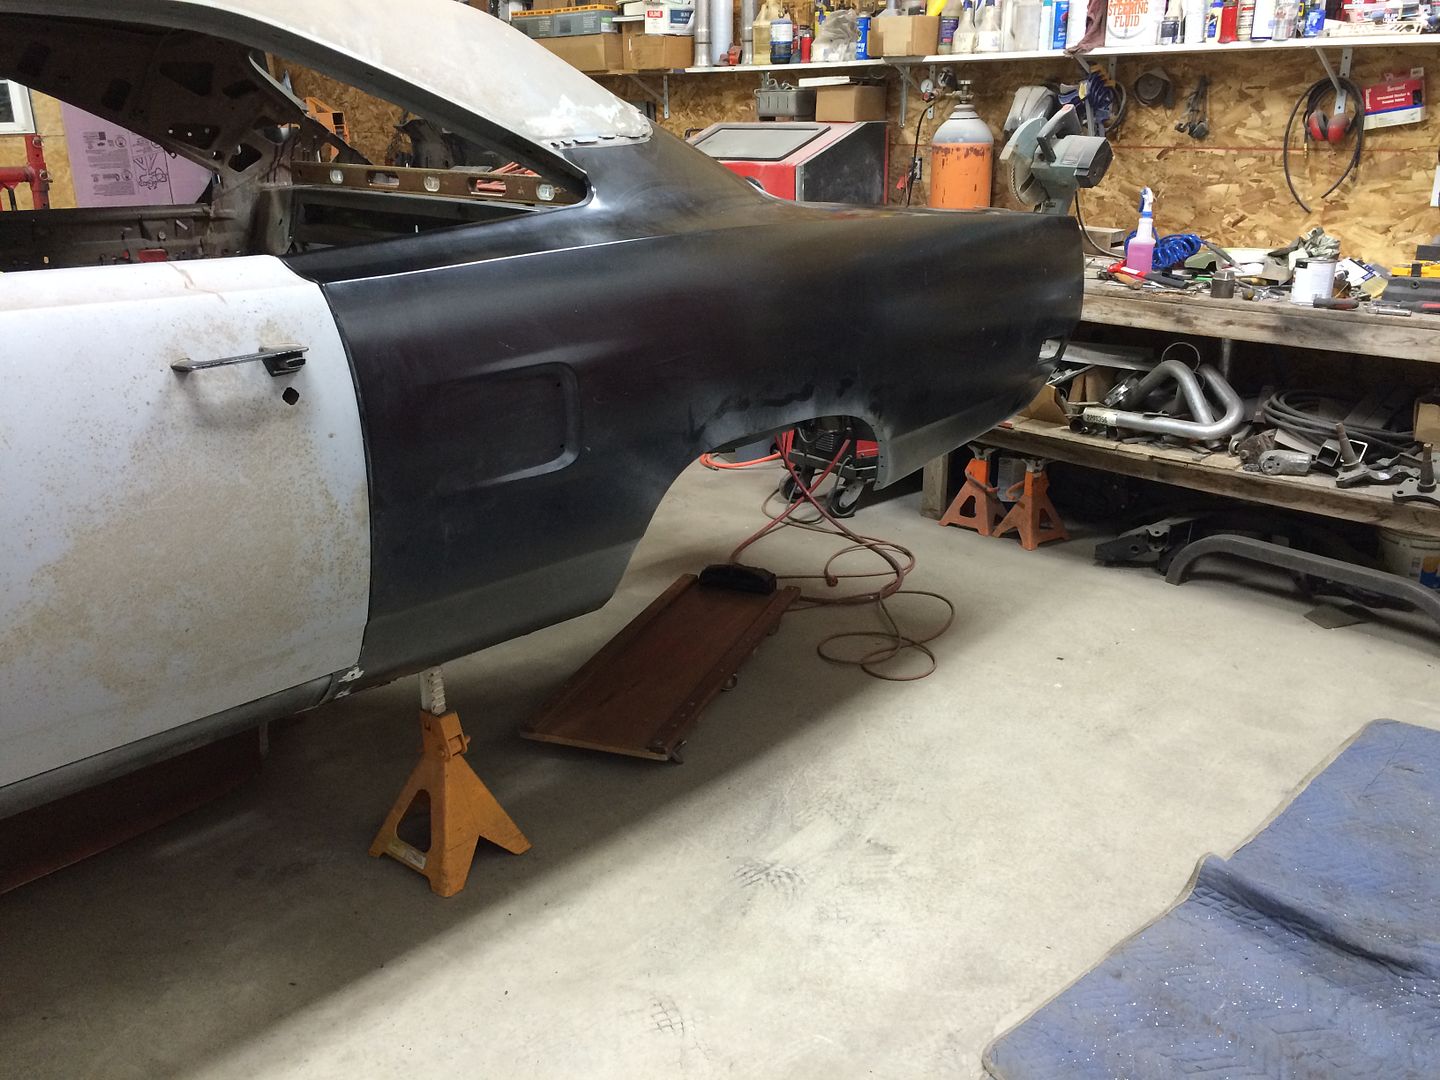
You can see here that the fold where the quarter panel turns to meet the dutchman panel is needing a little more convincing to go down where it should go. At this point, I'm not sure how to do that without damaging it. I'll come up with a solution as usual.

BAB3966B-5EC3-4867-9783-715C78F53067_zpsouwmhb2w.jpg


- - - Updated - - -

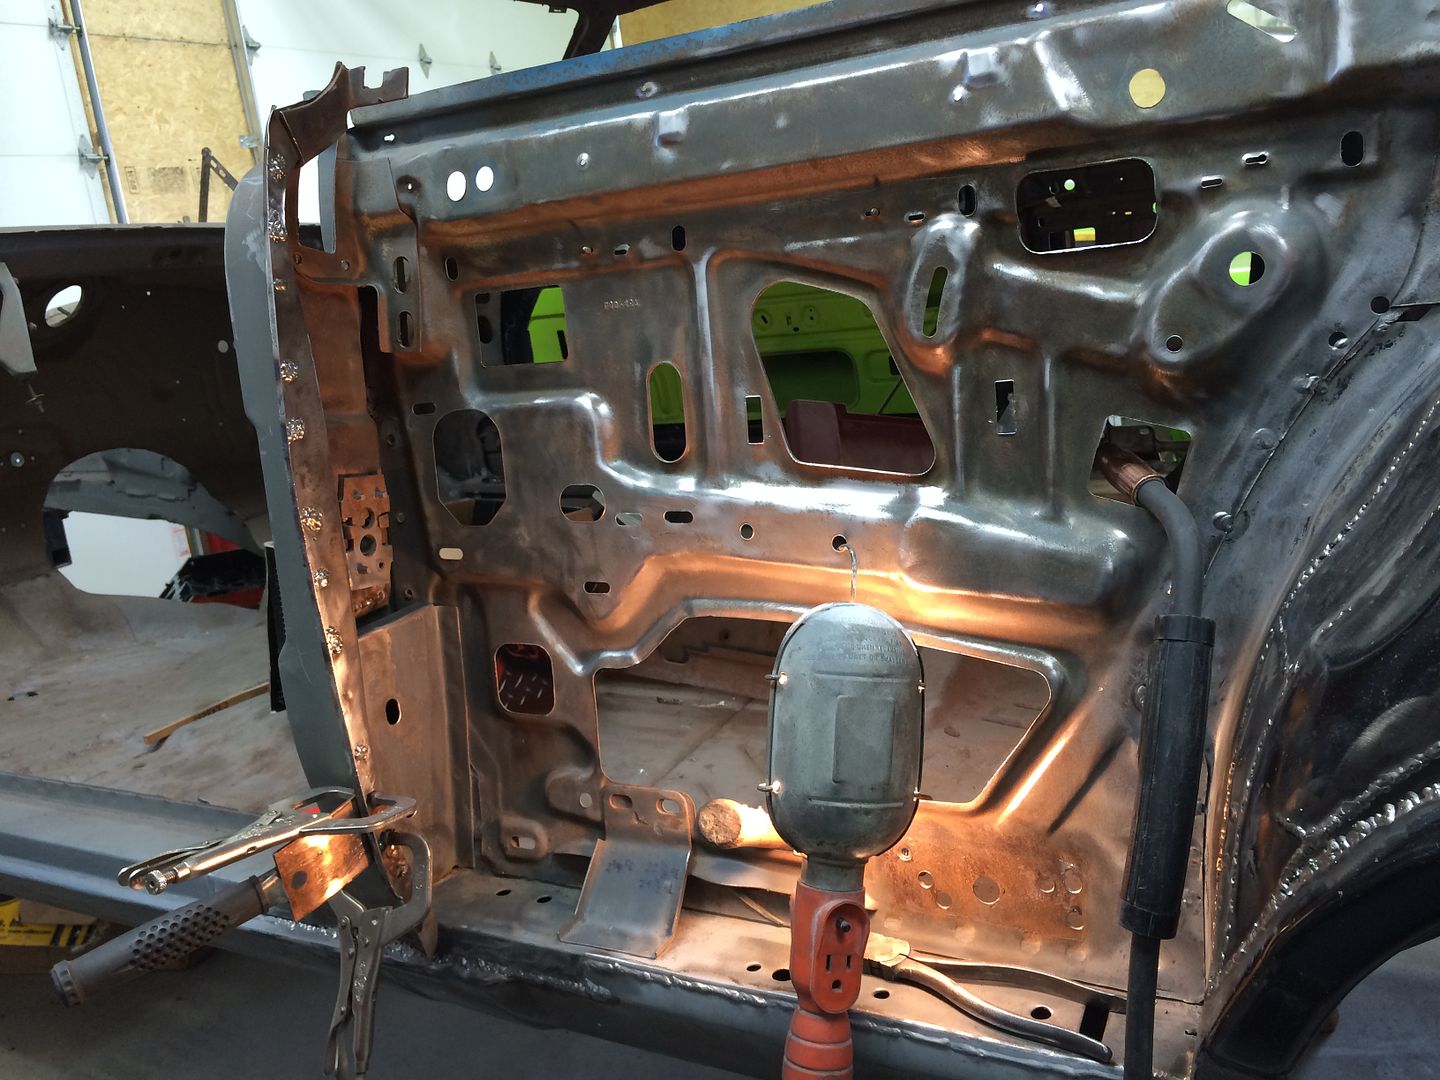
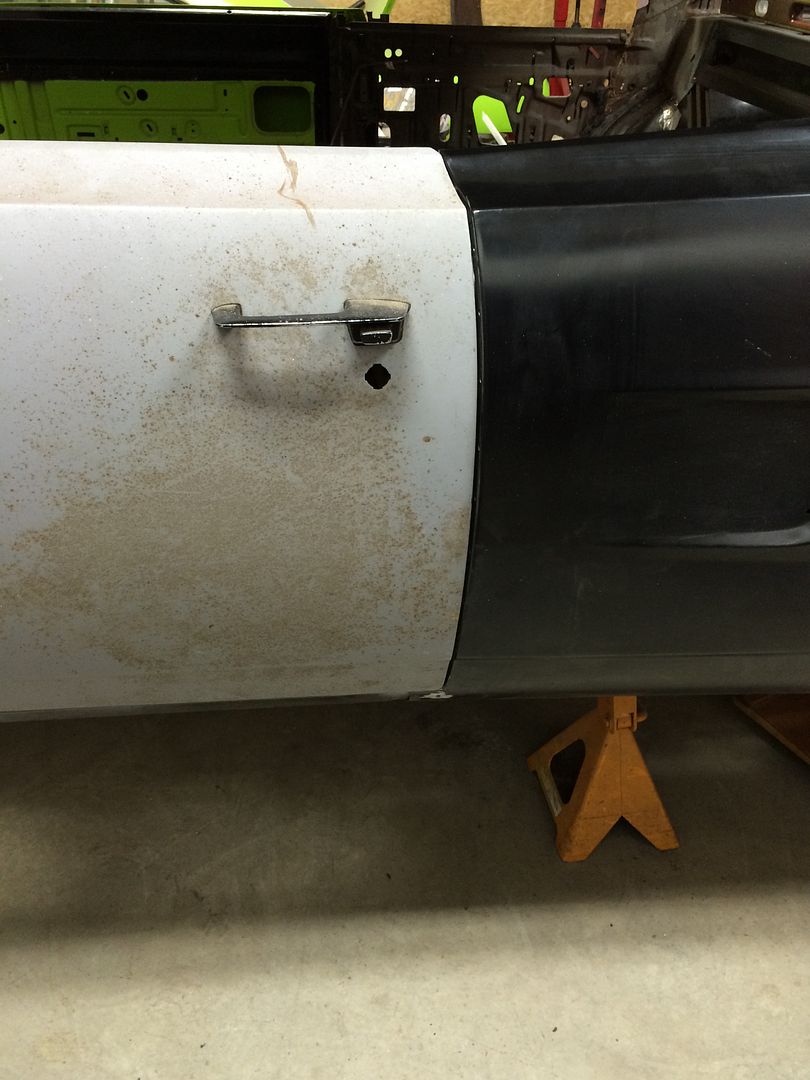
The door seam needs a little work at the top where the angle of the door doesn't quite line up with the angle of the quarter panel. I'll have to determine which I'm going to fix, the door or the quarter. Decisions, decisions.
E07068E2-B8B2-40D0-9982-BCED8D328523_zpsnnys2gtp.jpg


- - - Updated - - -

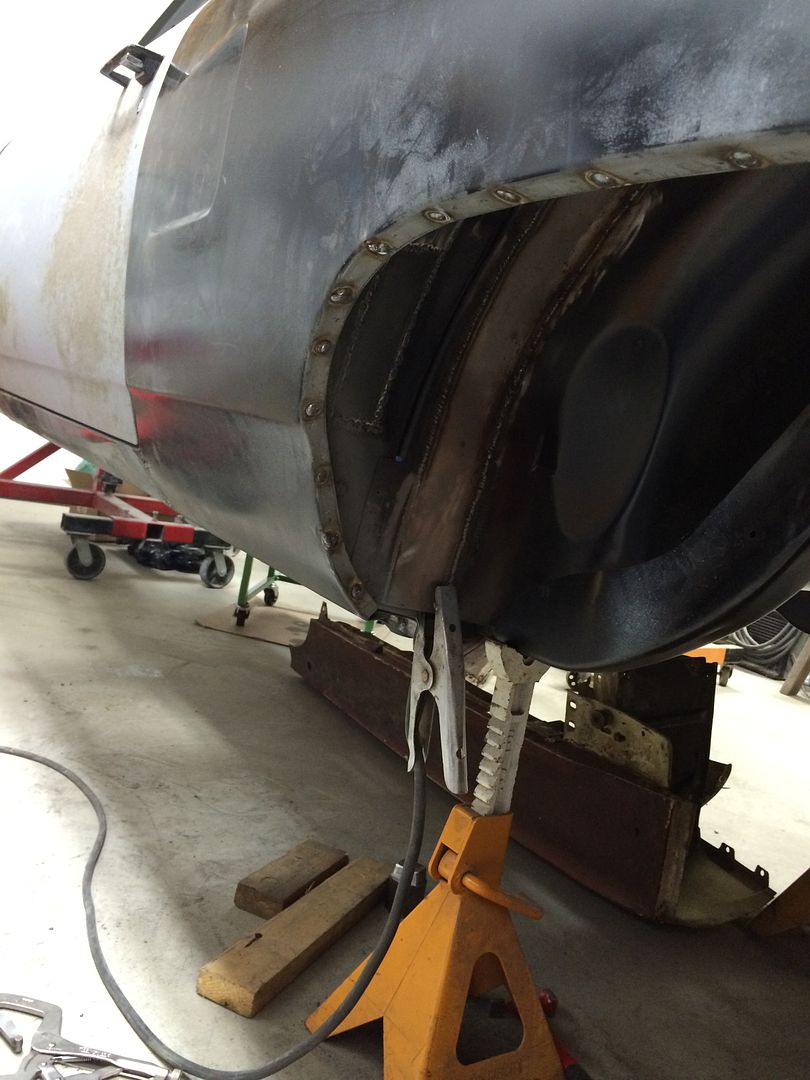
All in all, it fits pretty decent. I have a few things to tweak and another test fit and it will go on for good.
76B4AB6A-489C-495C-8472-5E2872F3D812_zpswmdcyl6k.jpg


- - - Updated - - -

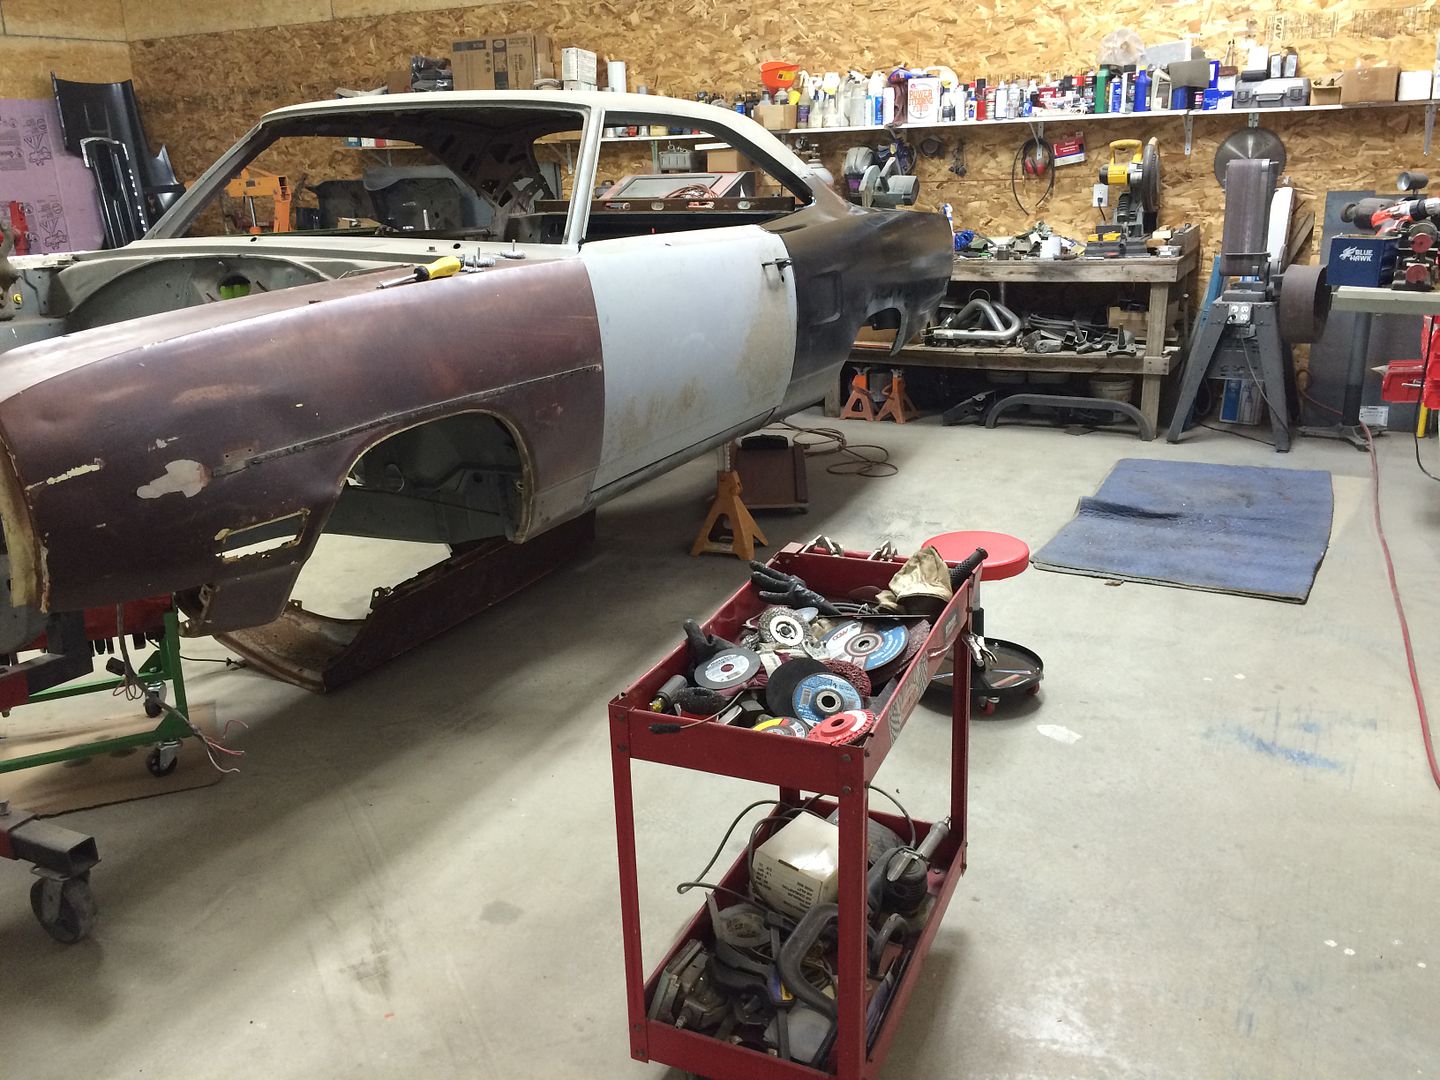
Here's the shot down the body. It's starting to look like a car with the sheet metal back on. All this metal work is giving me some experience to apply to that front fender. That poor thing was used and abused in its day.
EFC78EBA-E61B-410F-89D8-3E49A1EAC141_zpsvf2ci32f.jpg
 
All prepared to put the quarter panel on.
D86E9FDF-1D43-43C5-80C8-079A67F3134A_zpspe4s30nr.jpg


As is the quarter panel.
FB91D0DB-55AA-41C5-97EA-F5BEB2A0E3E7_zps4kuq1ncs.jpg


- - - Updated - - -

Moved around again and went to the right side wheel tub. Started by putting the top piece in. I'm doing this side a little different than the left side and I think it will turn out better. I need 3 of everything as the first is always the "learning" one, lol.
92C3BA8A-E607-43EF-82E7-0EF53CFF96FF_zps96oznwsj.jpg
 
Great work again Hemmirunner, Those tubs are looking really good!
 
Great work again Hemmirunner, Those tubs are looking really good!

Thanks 747, I'm on a mission to get this thing done!

I trimmed the front of the old tub piece to length.
EB48FEEF-9851-418F-B949-B58A638ECEB5_zpspgugowi1.jpg


Then I tacked it to the bottom of the existing tub in the font.
2FA12327-5C56-4E55-945F-CD7D108263E8_zpsom9iyunf.jpg


Then I ran a cut off wheel next to the existing part of the tub and cut the excess off.

- - - Updated - - -

1B9E35E9-5431-493A-A381-F30FA8544EDA_zpsqcemf73r.jpg


- - - Updated - - -

I went ahead and cut the side out of it. I'll trim that piece and put it right back in.
8A1AEB80-FEDC-415F-AE88-9CAE61DB8E4B_zpsgpqkk4fh.jpg


- - - Updated - - -

I zipped out a piece for the rear of the tub. It needs formed at the top and welded in place.
0D198E2C-1306-43FD-9CEC-539D9CF31103_zpsvmksa3h0.jpg
 
GREAT WORK! You definitely are a mission to get this done, lots of work building these old cars but its all fun.. keep on keepin on!!! :)
 
GREAT WORK! You definitely are a mission to get this done, lots of work building these old cars but its all fun.. keep on keepin on!!! :)
Thanks Ron, I try to work a couple of hours every evening on it. Once the metal work is done, it's all downhill from there in my book!!

- - - Updated - - -

Here's the mockup for the engine....just for a teaser...lol....
82E49563-7B6A-4736-8655-FC70D238ADCA_zps9wzih0xf.jpg
 
You couldn't have said it better with the metal work!!! Thats the truth, im enjoying what im doing with mine and the metal work but i imagine it will get to a point ill need to break away and work in another area.. You have this looking great, im some timid when i say ive not been able to be working on mine, my mom is in bad shape and im used to getting away to my little shop as it takes my mind off of "life" BUT, i haven't and now you got me jealous or you gave me some inspiration to just go to a little "metal work" done :) and get away for a few min!!! Thank you sir!!! I can only hope my work will look this good!!!
 
Here's the mockup for the engine....just for a teaser...lol....
82E49563-7B6A-4736-8655-FC70D238ADCA_zps9wzih0xf.jpg

Thanks again, Ron. Hopefully you can retreat to your escape and get an hour or two in. I find it relaxing as well.
 
The progress on this car is awesome! Keep up the good work.

Now I'm feeling emasculated - I only have a little 383 under the hood of my 70 "green machine" (smile)
 
Looks like good progress already! This is gonna be one mean machine!!!
 
looking very nice thanks for the updates :headbang:
 
So I did the final, final, final, final, mock up and fitting of the quarter panel. After it was on, I clamped it down and started welding. The flange under the rocker has a weird curve to it and I drilled some of my holes too close to the edge of the flange. I'll drill a few new ones, finish weld it and then zip off the flange even with the rest of the rocker flanges.
316C6227-DE94-4344-8B40-7A6F08B93150_zpsjx35vkmm.jpg


- - - Updated - - -

The flange around the wheel tub needed a bunch of stretching to get it to go tight to the wheel tub's flange. I plug welded one of the holes in the top center of the flange and then used my stretcher (ball peen hammer) to work the flange in both directions. I think it turned out pretty decent.
F8FC6055-BA5B-4F07-9E11-019D38850DD7_zpstgt7muu1.jpg


- - - Updated - - -

Welded my way down to the trunk floor extension and kept on trucking. Even after numerous "fittings", it still needed a bunch of tweaking and massaging of the mating surfaces to get it to fit "right". I think it'll look pretty good even though it's just a drag car.
9DEFD226-0C2F-4871-82F7-303D969E0BDF_zps3kvqvhdo.jpg


- - - Updated - - -

This should hold a nice sized tire. It measures 17" wide by 34".
33193D65-19D1-4C70-AEF0-A8CFC199D5AE_zpsm9febmjj.jpg


403E4C6E-74F6-471C-9060-6A9335D9B035_zpsoukmr7nk.jpg


- - - Updated - - -

The "body line shot"... lol
E9923F10-ABE2-4D66-A695-114F24BC7E27_zps900dqzsz.jpg
 
Dude holy crap do you want to adopt a kid I'm slightly used and broken kinda fat but I'm useful ! Anyways sweet car I can't believe the parts going into this I'm complaining about the 4000 for the 4 speed conversion I just ordered. I love this build will be watching this and if you want the slightly broken fat kid let me know (I can weld )
Anyways have fun with it wish I had the bank to do something like this .

Two is enough, but thanks for the offer lol. I'm the last guy who would be considered to "have bank", I just got lucky and ended up with this car and the metal for not a lot of money. It's a fun project and I can't wait to finish the sheet metal work and move on to the chassis part. I'm going to do my own TIG welded SFI25.3 spec chassis on it. If I "had bank", I'd just write a bunch of checks and get ready to drive it!
 
Subscribed!!

I like the way you are building this car. It's good to see how you've saved the rockers and chassis legs with quality repairs rather than just replacing with new parts.

Great job!
 
Auto Transport Service
Back
Top