• When you click on links to various merchants on this site and make a purchase, this can result in this site earning a commission. Affiliate programs and affiliations include, but are not limited to, the eBay Partner Network.

My 1967 Belvedere Convertible Plans and Restoration (aka - Mad Scientist Build)

Big thanks to Hammond . . . great forward strut suggestion . . .

Well . . . the install of the forward struts ( being my first time ) is taking it's time as I'm trying to make sure that I've covered all the bases and don't end up with any surprises in the end . . . and least try not to have surprises.

So here's the alignment that I had on the firewall . . . initially . . .
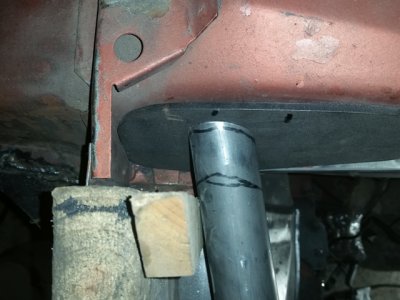
sm_firewalllocation01.jpg

Then I get a PM from Hammond with a suggestion -

unless you want a lift off hood, put the hood springs in the car, in the down position, and make sure they'll clear . . .

experience talking since he "almost" did the same with his 67 Coronet . . . so I put a measure on it . . .
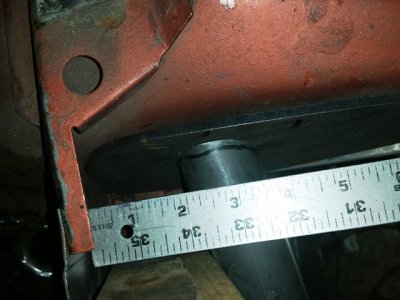
sm_firewalllocation02.jpg

Then put the hinge in place ( in the down position ) . . .
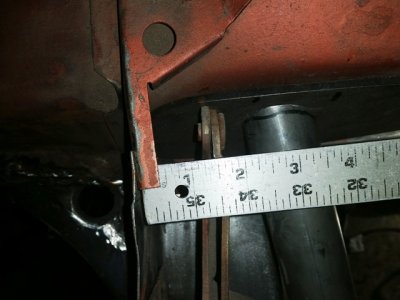
sm_firewalllocation03.jpg

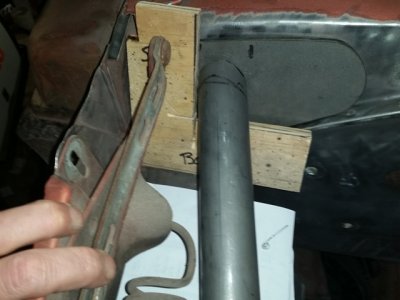
And you can see how close the spring is to the strut . . .
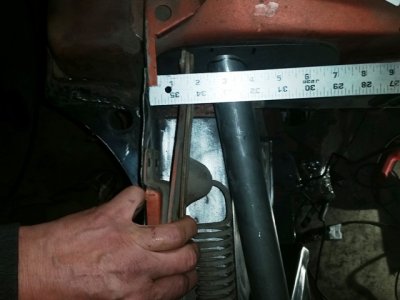
sm_firewalllocation04.jpg

Ok, trying to hold everything in place, including the yard stick, and shoot the picture on the camera . . . it doesn't look "too bad", but if you look at the top picture, you'll see the sharpie marks where it needs to go, compared to the original alignment ( I was off by about 1/2" . . . that would have been really bad ! ! )

Thanks Hammond for the heads up - you saved me from making a pretty big blunder !
 
re mad scientist build!

All good now. I thought it looked a little off. Try to keep the lower tube ends centered on the front frame rail plates and your good. You can mig weld the tubes but a tig will look cleaner and the head is smaller and easy to get in the tight spots. The frame rail plates will be a real pain if you don't get them surgically clean before you mig weld them. Don't even attempt to tig them because the contamination in between the factory seams is impossible to remove. Keep up the great work. Can't wait to see this monster brought to life!

Also if you're going to run a motor plate you'll need an engine block in the car before you weld the tubes for the final fit.
 
Welding in the passenger side forward strut . . .

Well . . . Hopefully with all of Hammond's suggestions I'm good to go, so I'm off to get this thing installed . . . but I'm going to do this a little different ( since I don't have a TIG and my welding skills are still not up to weld and be done quality - yet ).

I'll be using the M.A.G welding methodology . . . that's MIG And Grind ( and Grind ) ( and Grind ) . . . you get the picture . . .

Also, I'll be tacking the tub to the plates, then removing it from the car so I can "try" to weld it with 360 degree access and not be hampered by body panels . . . so here goes nothing for the passenger side install . . .

First, to make sure that I keep the spacing to allow for the hood hinge to fit as suggested by Hammond, I cut myself a piece of plywood that has the spacing from the bottom, and side, as needed for hinge clearance . . . got clearance for the hinge . . .

sm_forstrutsweled01.jpg

Next, as the other pictures of the strut showed some spacing at the front, I shortened the length of the tube to give me a little space . . .

sm_forstrutsweled02.jpg

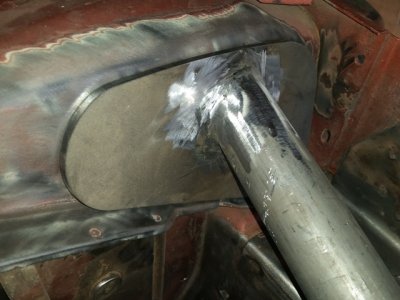
Then MIGed and some grinding on the top firewall attachment . . .

sm_forstrutsweled03.jpg

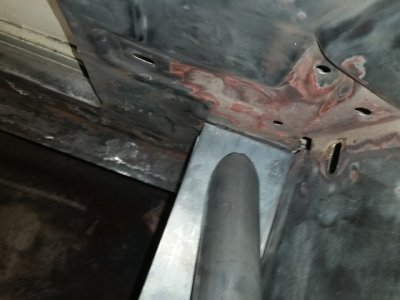
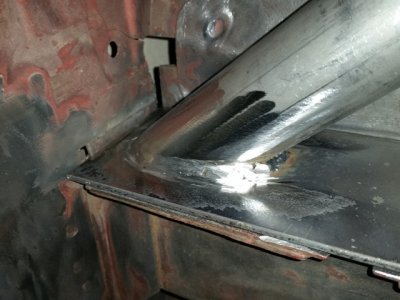
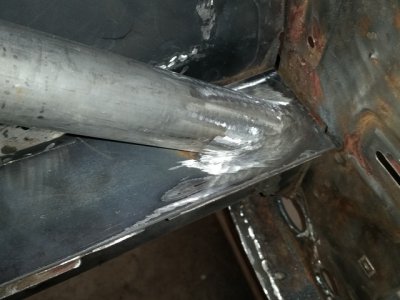
Then MIGed and some grinding on the bottom frame attachment . . .

sm_forstrutsweled04.jpg

And the side view after a little grinding ( to hide all my "ugly" welding . . .

sm_forstrutsweled05.jpg

And the side view of the firewall attachment . . .

sm_forstrutsweled06.jpg

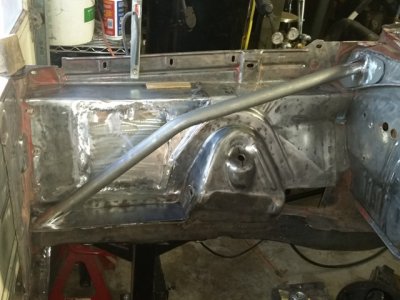
And finally, the tube set into place as it will be mounted in the car . . .

sm_forstrutsweled07.jpg

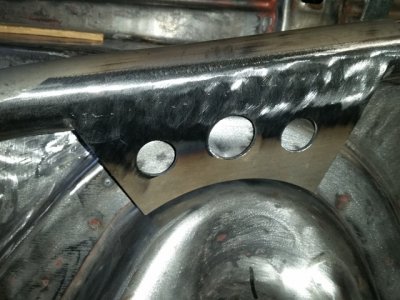
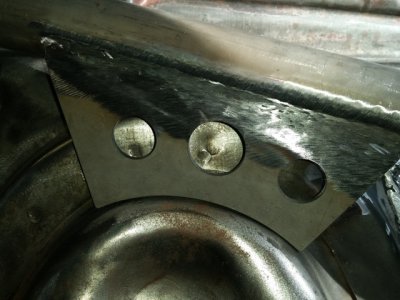
And finally, the welding and grinding of the plate that attaches to the shock tower . . . this turned out pretty good . . . ( smile )

sm_forstrutsweled08.jpg

Now this is all ready to weld into place . . . once I get the driver side one fitted and to this stage . . .

Guess what's next on the schedule ? ? Fitment of the driver side forward strut ! ! !
 
No waiting . . . no delay . . . onto the driver side . . .

Now I've got to try and figure out how to get the driver side to match the passenger side in dimensions and look . . . so I pulled out the 4 1/2" angle grinder and started doing some rough cuts to get the tube close to the lengths that I need . . . then I can get the final fitment as needed . . .

This side, like usual, seems to be going a bit faster . . . the roughed in tube set in place ( with the gauges I made on the passenger side )

sm_driverside01.jpg

So far, so good . . . but making them similar is going to be "fun" . . . ( smile )

- - - Updated - - -

Very nice Kahn, nice fitment!

Thanks 747Mopar . . . very much appreciated !


What can I say . . . I'm a smart arse ! ! ! ( smile )
 
Hey Larry,

Just getting caught up on the thread; stunning progress!

Before I went down the Art Morrison chassis path I was seriously considering using Magnum Force pieces, and from what you've shown I wouldn't have been disappointed; those are some awesome looking pieces!

How goes the progress on the front seats? Do you have a wiring diagram for them? Once I got the diagram for the V seats it made all the difference in mocking them up because I could power them up with a cordless drill battery.

I love and totally agree with your comment about the second side of a particular project going much faster than the first, especially when guys like us have no real experience to draw from when fabbing the first side.

You and your Belve continue to inspire me; keep up the amazing work.

Take care

Hey CarnalSupply ( Bob ) - thanks - I'm having fun with my "mad scientist build" ( smile )

Magnum Force front end:
The Magnum Force front end is incredible and I can't wait to get all the bodywork done to get it installed in the car - still got a little ways to go yet.

Seat wiring diagram:
Un-taped all the wires and traced them all and determine their purpose
got the airbag wires removed from the harness ( the yard pulled the airbags to re-sell )
Got it to function, and got it in the completely down position now - much better.
When they pulled the airbag, they pulled part of the harness that operates the lumbar support - will get up with them and try and recover that
Dealer told me a metal tube connected to the seat belt was a charge, turned out to be a spring to dampen the effects of seat belts impact - cool ideas
Final decision - I think I'm going to keep the seats and make them work ( might need to cut and weld more floor to get them to work )

Second side:
Thought I'd be able to hit the shop last night and make a dent in the driver side, got my tax stuff together and over to my brother to get it out of the way . . .

You're about ready to hang up your welder and you're putting body filler on your car - I'm jealous - but I'll get there someday soon ! !
 
Nice progress Larry. Those front end stiffening tubes really shout out fer racin'. I'm in the same camp as you with the M.A.G. system lol. Now I know the proper term for my welding skills.
 
Great job on getting the rear seat frame in place and I'm really interested in your support work going on here. Nice fabbing Kahn!
 
Driver side fitment and tacked in place . . .

Got the driver side modified and fitted into place . . . the fitment looked good so I tacked it into place so I can do a lot of double checking . . . and make sure it's right.

Here's the strut tacked into place . . .

sm_driverside02.jpg

Now I can go back tomorrow, with a fresh set of eyes, and take another look at the fit . . . if it's good, it'll get welded ! !
 
Minor update - got to the shop and didn't like the alignment - so I ground off the tacks and reset everything, then re-tacked it again.

Will look at it again with a fresh set of eyes tomorrow and make sure I like the new alignment. . . .

Dang - it got cold here this week . . . Brrrrrrrrrrrr
 
Minor update - got to the shop and didn't like the alignment - so I ground off the tacks and reset everything, then re-tacked it again.

Will look at it again with a fresh set of eyes tomorrow and make sure I like the new alignment. . . .

Dang - it got cold here this week . . . Brrrrrrrrrrrr


It's good you did what you felt you had too. you're the ine that had to live with it! We're in a bad cold spell too the places I was working the last 2 days we32 -41 and -38 with the wind chill respectively
 
You aren't kidding about the cold brrrrrrrrrrrrrrr but just think we're nearing the end of it.
 
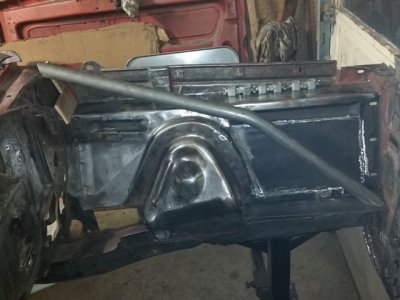
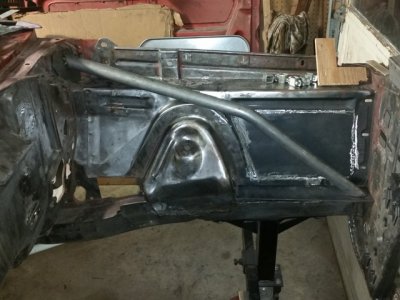
Driver Side forward strut has been welded . . .

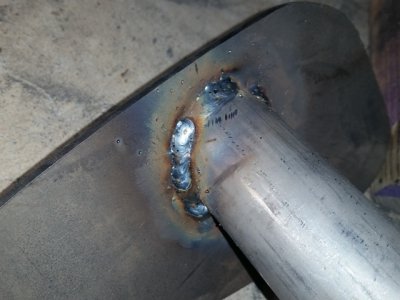
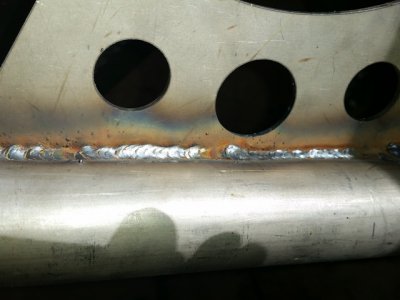
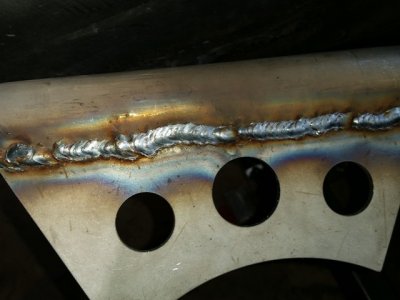
Finally got the alignment correct and got the pieces welded together ( but someone else seems to have done the welding ) Look at these welds that are on theses parts - they do not look like the welds that I usually have on the metal ( and it sure made the grinding process a whole lot easier too )

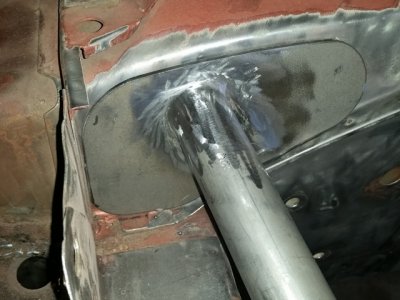
First the top firewall connection to the strut ( uh, who did those welds ? )

sm_driverside03.jpg

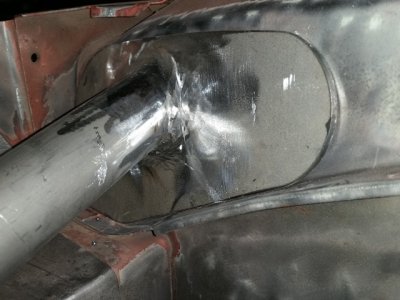
Then the back side of the connection to the shock tower

sm_driverside04.jpg

And the front side of the shock tower connection . . .

sm_driverside05.jpg

The firewall connection with some initial grinding done to it ( sure was a lot easier )

sm_driverside06.jpg

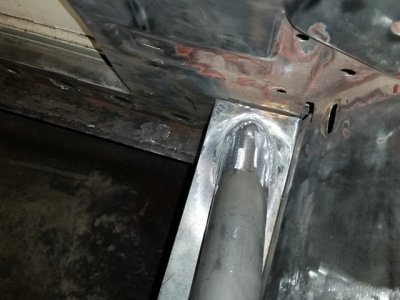
And the frame rail connection with a bit of grinding done to it . . .

sm_driverside07.jpg

And the shock tower bracket with some initial grinding completed . . .

sm_driverside08.jpg

Now I get to put a level on the car and make sure it's still sitting level, then get these struts welded in place permanently . . . YAY ! ! ! !
 
Got a whole bunch of welding to get done now . ..

Got started on the welding of the front struts . . . got a lot of welding that'll need to get done here . . .

Passenger side shock tower attachment . . .

sm_finalweld01.jpg

Driver side shock tower attachment . . .

sm_finalweld02.jpg

Work on the rest of the welding tomorrow . . . I hope . . .
 
kahn, the front suspension looking good and stout....ummm maybe too stout for the 5.7. how about a 6.4 with 470hp. i mean just saying since you have 13inch rotors, rear wheel tubs, all the extra bracing, your taking this 67 to next level might as well go for the 6.4. just think of it as being built.....FER RACING!!!!!!!!!!!
 
One things for sure, this car is going to grab some attention at a show!
 
kahn, the front suspension looking good and stout....ummm maybe too stout for the 5.7. how about a 6.4 with 470hp. i mean just saying since you have 13inch rotors, rear wheel tubs, all the extra bracing, your taking this 67 to next level might as well go for the 6.4. just think of it as being built.....FER RACING!!!!!!!!!!!

Yeah, yeah, yeah USARR . . . but the 5.7 is already sitting in the garage . . . ( sigh ) . . . maybe a later upgrade, then I can put the 5.7 in the shoebox ( hee hee hee hee ). Actually my thoughts are ( maybe ) adding a super-charger to the 5.7 ? ? ? Too bad there's not a 6.7 for my 67 ? ? ? ?

- - - Updated - - -

Great work and show and tell Khan

Thanks Tallhair - much appreciated.

- - - Updated - - -

One things for sure, this car is going to grab some attention at a show!

Thanks 747 Mopar . . . Need a little warmer temps so I can make progress on it so that "someday" I will be able to drive it.

Interesting happening the other day - I've got a digital level that, of course, runs on batteries. Need all the help I can get on keeping things as true as possible. Turned on the display, made a measurement, moved it to the second location and the display went blank ? ? Nothing . . . nothing at all. Brought the level back to the house to replace the batteries and after it sat in the warmer house for a couple minutes, the display started working again ? ?

Guess it was too cold to work in the cold garage - so maybe I shouldn't feel bad if I don't make it out there to work either ? ? ? ( sigh ) . . . ( argh )
 
Auto Transport Service
Back
Top