• When you click on links to various merchants on this site and make a purchase, this can result in this site earning a commission. Affiliate programs and affiliations include, but are not limited to, the eBay Partner Network.

Monroe's 70 GTX

Great outside the box thinking Glenn, got my fingers crossed this works . Is yes then I will copy your idea.
 
Nice work. My grill repair and refurbishment is coming up soon, so I continue to watch with interest!

Hawk
 
I'll be buggered, i think it worked

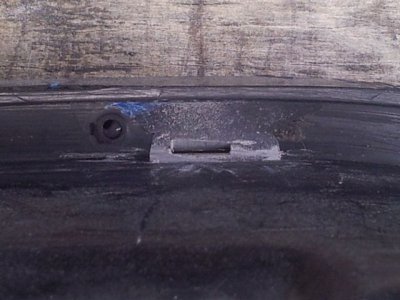
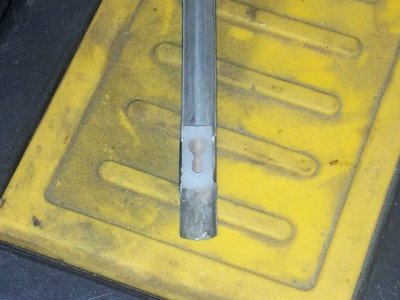
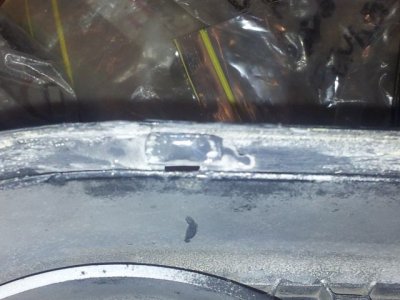
I got the mini file into the sides of the clips and filed away as much of the JB weld from around the plastic clip as I could. These seem to have set pretty bloody good, and yes I am a bit surprised. I only cut one slot on the side to aid removal of the molding because I wanted to make sure that it remained well anchored. It's enough to get a small thin blade in and pop one side off to loosen. Second pic shows the slot cut from underneath. Still need to file a couple of spots here and there but it clips on very well. Disregard the bend in the SS molding, it was glued in when I got it, and I had a helluva time getting it off without damaging it too much. I'll have to do some delicate panel beating to get it back into proper shape but at least the clips hold it down where they should.
Bezel clip 1.jpg Bezel clip 2.jpg Bezel clip 3.jpg Bezel clip 5.jpg Bezel clip 6.jpg
I found that the clips without too much epoxy on the sides clip in better. So be careful not to get it everywhere when attaching. If you try to build up the clip with the epoxy and then file into shape, the trim breaks it off when clipping on. Whereas the plastic clip itself has a bit of give, and allows the trim to snap over it.
 
I forgot to show the clips I used for this. They are the bonnet and eyebrow clips from a HK, HT, or HG holden. I had a HT Premier for my first car and I remembered that they had little clips for the trim which were about the same size as on the grille I was fixing. I managed to get a handful and worked them into this fix. I bought some more off ebay and they arrived today. These ones are actually better. They only need a little bit of filing and then the trim snaps right on. For the other headlight surround I'm going to try and fill up the hole where the old clip was and then just screw on one of these and see if the screw holds in tight. This way it'll be a lot neater and less mess to file away. That's the theory anyway. I've attached the ebay link to the clips if anyone is interested, but I'm sure you blokes in the States would have something similar.

Clip.jpg

http://www.ebay.com.au/itm/200925101210?_trksid=p2060778.m2749.l2649&ssPageName=STRK:MEBIDX:IT
 
Painting the grille

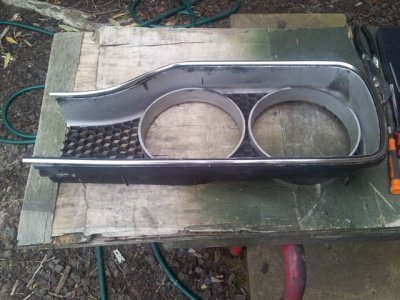
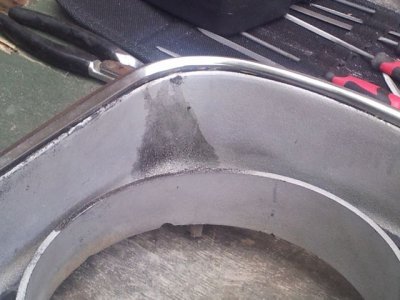
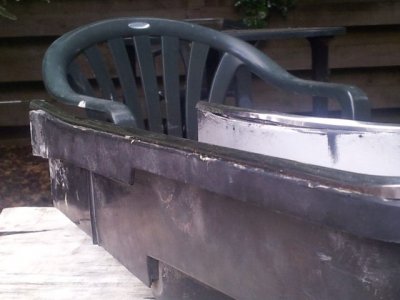
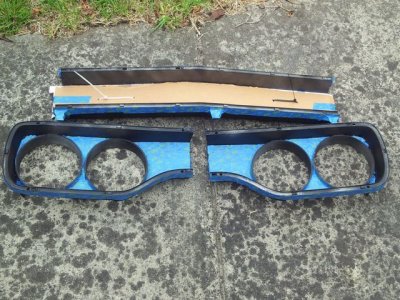
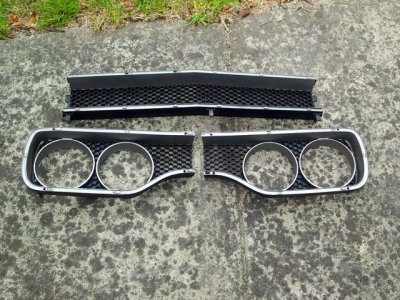
Gave the grille pieces a clean with the degreaser and then a good bath, and then a clean again with the wax and grease remover, before coating with a bit of black to bring 'em back to looking good again. Then spent ages trying to mask 'em up for the silver. I painted them with a can of argent silver that is meant for rallye wheels. It seemed pretty close to how the old paint looked before hand. They came up pretty well.

Grille paint 1.jpg Grille paint 2.jpg

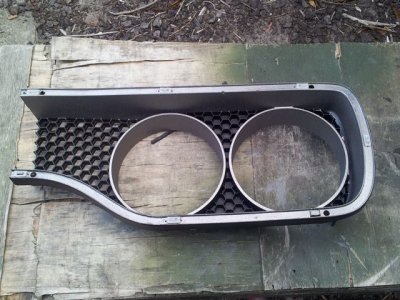
I attached the trim clips on the second headlight bezel with wire and a bit of epoxy. The trim clips on ok but I'm not sure I like it for long term. Disregarded the screw idea because I didn't think it would have much of an anchor. I'll leave as is for the moment but I think I'll try a better way in the future. Just have to think of one.

Grille paint 3.jpg
 
Glenn,

As usual, good work! I was also wondering what paint to use for my grill and had also considered using some of the argent silver wheel paint - I have some laying around. Yours turned out great so I will now definitely use that!

Hawk
 
Gave the grille pieces a clean with the degreaser and then a good bath, and then a clean again with the wax and grease remover, before coating with a bit of black to bring 'em back to looking good again. Then spent ages trying to mask 'em up for the silver. I painted them with a can of argent silver that is meant for rallye wheels. It seemed pretty close to how the old paint looked before hand. They came up pretty well.

I attached the trim clips on the second headlight bezel with wire and a bit of epoxy. The trim clips on ok but I'm not sure I like it for long term. Disregarded the screw idea because I didn't think it would have much of an anchor. I'll leave as is for the moment but I think I'll try a better way in the future. Just have to think of one.

Great work Glenn. I'm not understanding the problem with he clips and attaching them. What is the problem and how were they attached originally?

Is the problem that he correct style of clips are not available and you are using something different and making it work?
 
Congrats, with that grill being one of the coolest parts on the car it has to feel good to get it all squared away. Looks great!
 
very nice job thanks for sharing :headbang:
 
Great work Glenn. I'm not understanding the problem with he clips and attaching them. What is the problem and how were they attached originally?

Is the problem that he correct style of clips are not available and you are using something different and making it work?

The original clips are actually molded in with the grille bezel and were worn away so much, that they no longer touched the stainless trim. The first headlight bezel I fixed had the original clips actually broken off leaving a hole where they once were. On this last bezel, I ground down the remaining part of the clip to actually leave a strip of plastic underneath the new clip I put on. Even though the stainless clicks in, it doesn't feel as firm as when it clicks on the remaining original clips. Still works but I'm a bit unsure of longevity. I don't want to lose the stainless down the road somewhere.
 
Just read all the 21 pages and it is a masterpiece! The 1970 modell is so cool and I really like the green color, if I ever travel to Australia visiting you and see this car live will top the to do list, on second and third place is the great barrier reef and the Sydney opera house...

:notworthy:
 
Your eyes aren't what they used to be. PUT YOUR BLOODY GLASSES ON

Ok, it's been awhile since my last post so I thought I'd fill you in on what I've been doing. The answer is mostly crying and swearing. I went to crank it over a little while back and the starter wasn't working. Wouldn't even turn by shorting with a screwdriver, so I knew I had to take it out. Pulled it apart and saw that the copper stud was worn away quite a bit. Did a bit of adjusting and cleaning and got it to turn again, but only once. Too far gone. I'll keep it and have it rebuilt one day, but for the meantime I ordered a mini starter from DB electrical. I read a few forums and the feedback was mostly good.
After 3 or 4 weeks it arrived (woohoo). Couldn't get it to fit in properly so back on the forum search. Apparently with the 440 you have to take off the extra connection mount that is on the starter, and hook the wires up to the original studs. Managed to route my power lead around enough to give me extra length as the connection is now right up alongside the block. Found it was easier to connect the wires and then mount the starter. Now this is where the tears started.
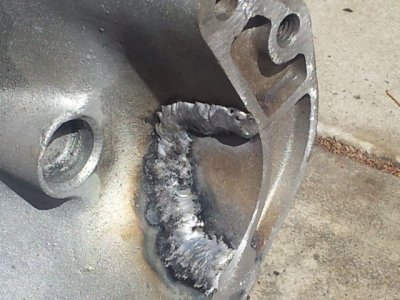
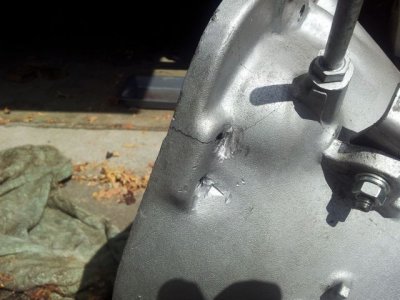
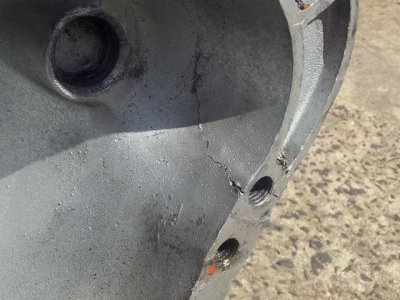
When I took the original starter off, I mean way back when I was taking everything apart, the bottom bolt was a through bolt with a nut on the back. I assumed that someone had stripped the thread in the past. Naturally I'd forgotten all about this in the years between dropping it out and having it rebuilt later on. So of course I didn't remember to get it fixed until I put it back in the car and put the starter back in. I wasn't going to take it out again so I put the bolt and nut back on. Now when it came time to put on the new starter, I had lost that particular bolt and nut, so I just grabbed another. This nut I think was slightly bigger so I filed the side down as it is quite a close fit to the tranny case. As I was doing it up I noticed a line that I hadn't seen before starting to appear. (Thank goodness this was one of the rare times that I put on my glasses under the car) It was probably there all along but obviously I didn't check into why the bottom hole wasn't right. I tightened it up a bit more to see the extent of the crack and of course this opened it up. No choice but to pull the tranny this time and fix it properly. Here's what it looked like.

Tranny crack 1.jpg Tranny crack 2.jpg

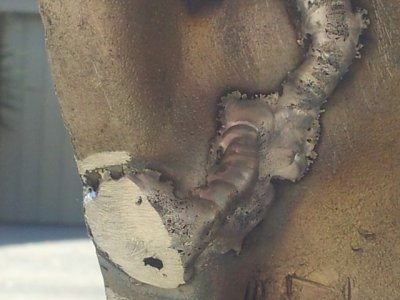
I contacted a welder who does a bit of aluminium work and after looking at it he wasn't keen on trying to fix it. As you probably know cast aluminium is not the cleanest thing to weld, and he wasn't keen on maybe damaging it more. I spoke to the tranny repair shop and he put me on to a bloke that fixes the cracked cases that they come across. A local radiator repairer, Ultimate Radiators. I had the box in the back of the mazda and went and spoke with him. He said that they have to weld through all kinds of crap in his business and he had done a lot of cast aluminium repairs. Dropped it off Thursday night and picked it up Sat morn.

Tranny weld 1.jpg Tranny weld 2.jpg

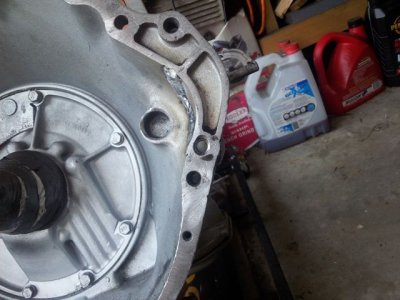
I had to mark up the position of the bottom hole and drill it out again and then put a helicoil through it. I nearly buggered that up by starting the drill in the wrong place. After accepting the limitations of my aging eyes I put on my good glasses and tried again. This time with success, and then tapped out the hole and put in the helicoil.

Tranny weld 3.jpg

Took awhile to get there, but all good again.
 
Man that sucks mate....but at least you got it fixed up OK. Looks like that weld will be strong enough to hold the starter. :icon_thumright:
 
Better now than later Glenn, repair looks great. Always puts a smile on your face when you can get to fire that engine up.
 
just make sure the starter still lines up and throw those old spectacles out. build it man.
 
Glenn,

That sucks. Sorry to hear about the ordeal. I hate having to redo something because it is not right, although that seems to be what happens to me all the time.

The repair looks really solid, so hopefully you are back in good shape now. Do you maybe need to check the fitment of the bell housing again to make sure the trans and flywheel are perpendicular? Not sure if any of the weld affected the face that bolts to the block at all - just something to think about - most likely you already did...

Keep moving forward!

Hawk
 
just make sure the starter still lines up and throw those old spectacles out. build it man.

Thanks 68, I bolted the starter up after the helicoil to double check and all good. No more doing anything without the specs lol.

- - - Updated - - -

Glenn,

That sucks. Sorry to hear about the ordeal. I hate having to redo something because it is not right, although that seems to be what happens to me all the time.

The repair looks really solid, so hopefully you are back in good shape now. Do you maybe need to check the fitment of the bell housing again to make sure the trans and flywheel are perpendicular? Not sure if any of the weld affected the face that bolts to the block at all - just something to think about - most likely you already did...

Keep moving forward!

Hawk

I'm always redoing things Hawk. I tend to rush into something and then feel bad that I didn't take my time and do it properly. Next minute off she comes again.
I put a straight edge on the bell and it all looks good. I think he cleaned it up pretty well. At the moment I'm pretty happy with how it turned out.
 
Sucks finding those things after it's already installed :banghead: but at least you caught it. Better luck going forward.
 
Auto Transport Service
Back
Top