• When you click on links to various merchants on this site and make a purchase, this can result in this site earning a commission. Affiliate programs and affiliations include, but are not limited to, the eBay Partner Network.

My charger restoration dream car

very nice to see others working on their dream car. I have a 68 as well. I wish I had the guts to strip it down and start fresh like you are. I am going about it probably all wrong but I am doing a peice at a time so I can drive it the majority of the time. I am about to rewire mine with the Painless Performance Chassis Harness and put the engine in. Good Luck and God speed you to completion so you can drive it.
 
very nice to see others working on their dream car. I have a 68 as well. I wish I had the guts to strip it down and start fresh like you are. I am going about it probably all wrong but I am doing a peice at a time so I can drive it the majority of the time. I am about to rewire mine with the Painless Performance Chassis Harness and put the engine in. Good Luck and God speed you to completion so you can drive it.
There is nothing wrong in the way you are fixing your car. The great thing is that you have a 68 charger. I would love to be driving mine. I am out of money now after this paint job so it will have to sit a bit so I can save some more money for more parts.
 
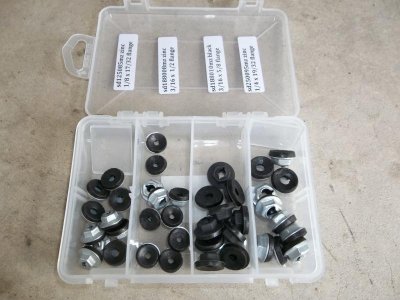
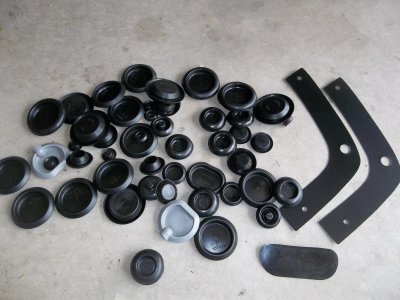
I am finally getting around to working some on my car. I bought a body plug set but I am not sure what plugs go where. There are rubber plugs and plastic plugs. I remember when I removed the old plugs that some were rubber and some were plastic but I did not make note which were which. Does anyone have a diagram or instructions to where each plug goes?:confused1:
105_3432.jpg

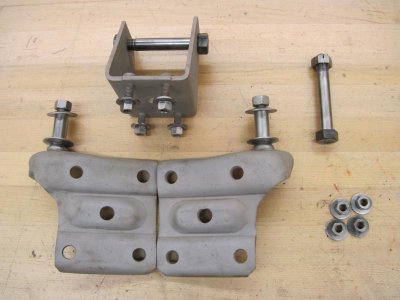
I also got some self cutting nuts with seals to mount my emblems etc.
105_3431.jpg
 
wise move on the new plugs and nuts. they make things soooooooo much easier. build on.
 
Great new parts! That is the way to go.. I tried finding a diagram and came up empty, Most of the floor and trunk plugs should be easy enough, i would match them up and put the ones that fit in, I need to get a compete set myself if i ever get my 69 done, I did find a page that maybe could help with some things you may need or want, You can click on "visit page" after you click on any picture to check it out, There should be a diagram some where here to check the locations, some one will have it.. The best of luck on your ride!! :)

https://www.google.com/search?q=body+plug+locations+on+a+1968+dodge+charger&newwindow=1&safe=active&biw=1523&bih=828&tbm=isch&tbo=u&source=univ&sa=X&ved=0CB0QsARqFQoTCMXn7ZDtlcYCFUk3rAodxfYAVQ
 
Hey showard, where did you get the body plugs and self cutting nuts?
I'm interested in knowing where all the plugs go myself.
 
wise move on the new plugs and nuts. they make things soooooooo much easier. build on.
Your right, using new fasteners makes it much easier. I was saving all my old fasteners and wire wheeling them clean but I am replacing most of them with new.

- - - Updated - - -

Hey showard, where did you get the body plugs and self cutting nuts?
I'm interested in knowing where all the plugs go myself.
Classic Industries has the body plugs but I bought them form eBay because I found the same kit cheaper. The self cutting nuts I also bought from eBay, just type in 40 pcs thread cutting emblem name plate script nuts with sealer assortment Mopar.

- - - Updated - - -

Great new parts! That is the way to go.. I tried finding a diagram and came up empty, Most of the floor and trunk plugs should be easy enough, i would match them up and put the ones that fit in, I need to get a compete set myself if i ever get my 69 done, I did find a page that maybe could help with some things you may need or want, You can click on "visit page" after you click on any picture to check it out, There should be a diagram some where here to check the locations, some one will have it.. The best of luck on your ride!! :)

https://www.google.com/search?q=bod...X&ved=0CB0QsARqFQoTCMXn7ZDtlcYCFUk3rAodxfYAVQ
Thank you Ron. I called up Classic Industries and looked up the other sites and still can not find any guide to where the plugs go. It appears that the rubber and plastic plugs go where ever you want to put them between the trunk and floor pans.
 
I put rubber ones in the floor and in spots where a blast of water might overwhelm a plastic one, like when you hit a water puddle while driving. All though I hope my 68 never sees a rainy day again.
 
I put rubber ones in the floor and in spots where a blast of water might overwhelm a plastic one, like when you hit a water puddle while driving. All though I hope my 68 never sees a rainy day again.
Thanks Kid, That backs up what I was thinking. I plugged them in the places I thought would do best. I also do not plan on driving her in the rain but you never know what I might get caught in.
 
Well, I have been having a busy summer and have not worked on my car much lately. A couple reasons have been money and health problems. I have been dealing with kidney failure for some time now and now it has gotten to the point that I need a transplant. I have been getting several different tests done during this summer. Everything else looks good and going well for the transplant. I have been very blessed with great family and friends. Many of them have volunteered themselves to be a candidate for living donor transplant for me and they have been testing to see if they are a match. Thank you very much.:headbang:
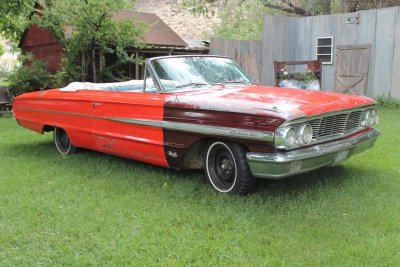
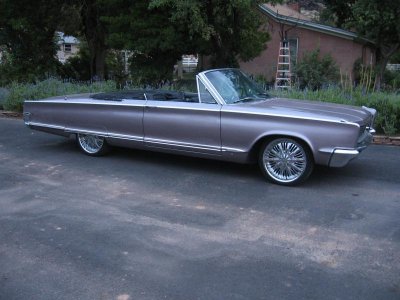
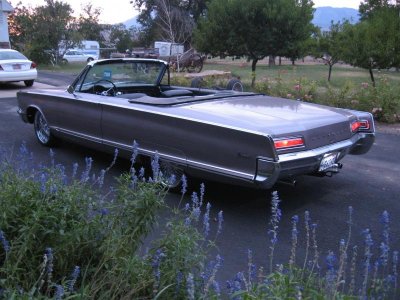
I realize that I can not complete all of my projects so I decided to sell some of them to use the money to finish my charger. I had a 64 Galaxie convertible I decided to sell. I ended up finding a good deal and making a trade. I traded it for a 1966 Chrysler Newport convertible. The problem is that that still didn't help me get any money (it cost money) and it kicked my wife's car out of the garage. I will probably be looking to sell it also.

1964 Ford Galaxie
64 Galaxie Convert.jpg
1966 Chrysler Newport
IMG_1056.jpg

IMG_1055.jpg
 
wow....that is a $#!TLOAD of work !!!! i feel like a peon for what i did.....i saw something bad or missing and i just replaced it....i HAD more money that patience then....keep the party goin!!!!
 
Thank you. I just like to tinker around and I love these chargers.
 
for those hi compression heads are you putting frame connectors in? its probably one of the best value upgrades for the money that you can get.....just remember to weld (or bolt) them in AFTER the entire drive train is in the car....you will see a MAJOR driving difference in the unibody stability
 
I have not got much done lately (hunting season), but I have been picking on a few parts. I have been sand blasting and cleaning some of the suspension parts so that eventually I can get her back on her landing gear.

IMG_0746.jpg
 
Wow! that is a good looking car. I can't wait until I can do that with mine.
 
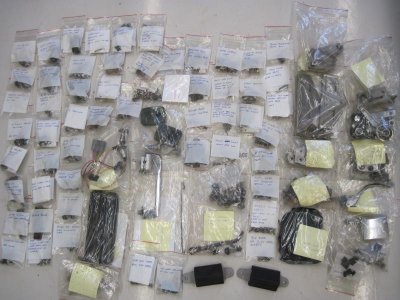
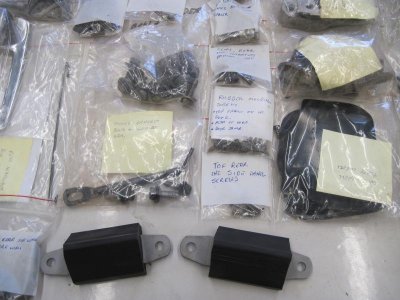
I have not posted lately but I still have been working on a few things. I have been doing the tedious job of locating all of my odds and ends parts that I have boxed away and cleaning them, wire wheeling, scrubbing, painting, and organizing them. I previously labeled them and put them in bags. Many of them I also put a picture of the part and where it goes. I am glad that I did that because I am still having a hard time remembering where and how parts go.
IMG_0768.jpg

IMG_0769.jpg
 
Now that is what is called tag and bag!
Great job
 
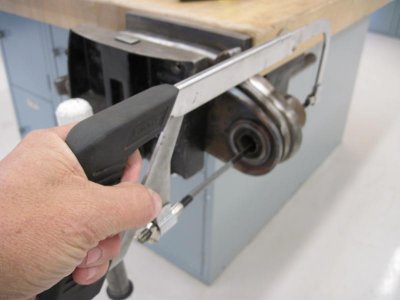
I took me a little to figure how to take out the old bushing on my lower control arms.
I first cut a grove in the inner sleeve and was able to remove it and the rubber fairly easy.

IMG_0750.jpg

I had a harder time trying yo figure out how to get the outer sleeve out. I was trying to press it out the wrong direction.
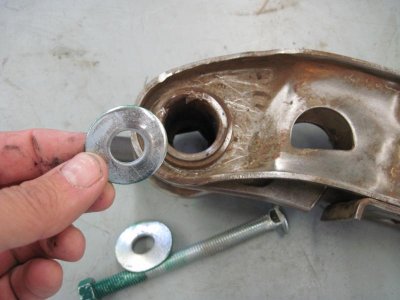
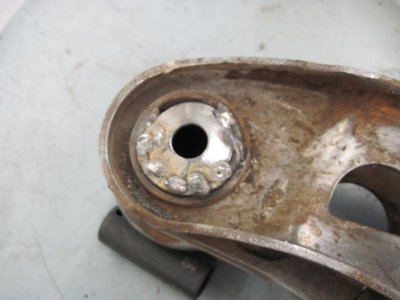
I did some research and found a hint. I tack welded a large washer on and used a long bolt with a nut to press out the outer sleeve.

IMG_0751.jpg

IMG_0752.jpg

- - - Updated - - -

Now that is what is called tag and bag!
Great job
Thank you, I get my ideas from you guys (reading all of the posts)
 
Auto Transport Service
Back
Top