• When you click on links to various merchants on this site and make a purchase, this can result in this site earning a commission. Affiliate programs and affiliations include, but are not limited to, the eBay Partner Network.

Starting my 1974 Charger Restoration...

1974steve

Active Member
Local time
9:58 AM
Joined
Apr 14, 2015
Messages
31
Reaction score
7
Location
Lynden, Wa
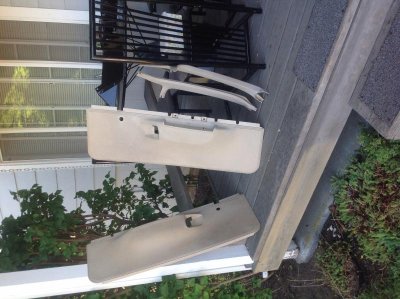
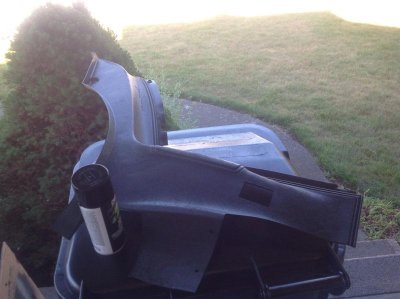
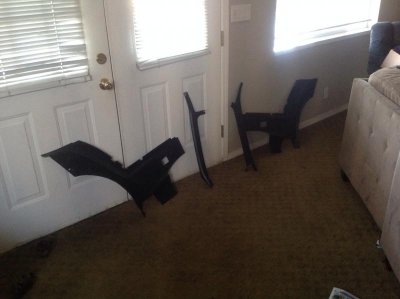
This is my 1974 Charger, that i picked up about 2 weeks ago for $1200. It was a /8-1/4" car. Bought it complete minus the 318. Planning a mild 440/727/8-3/4" for it. This is the beginning stages of the restoration, but as clean as the car is, i dont for see it taking much to restore it...aside from bucket loads of cash :p I will update as i make headway... charger1.jpgcharger2.jpgcharger3.jpgcharger4.jpgcharger5.jpg
 
Nice charger one of my favorites. And welcome to the site ,there's lots of smart guys on here for ?'s you just have to ask and you'll have some kind of answer prity soon . Agen cool car you need any help just p.m. me I've built almost 10 of that style charger
 
@ bb70charger500, yes i am sure i will have questions for you. And thanks for the compliments :)

@kiwigtx, yeah man. i almost fainted when i pulled the carpet up and saw the near perfect floor pans. unbelievable for a from the seattle area to be this rust free.....especially considering its been stored outside for nearly 12 years!
 
Here's a few of mine (this style chargers)IMAG0547_BURST002.jpgView attachment 2520384837939_orig.jpgattachment-1.jpg00r0r_dJe6W2gh1Wl_600x450.jpg00T0T_4Ec96XaIyxT_600x450.jpg

- - - Updated - - -

00m0m_5Xz2RboEnFA_600x450.jpg

- - - Updated - - -

The blue one was painted after I sold it but it was my first charger so I wanted to add it's pic too. I've had a lot more but sadly I didn't think to take pictures of my cars till recently. Oh well agen any ? Please feel free to ask the gold rallye and black s.e. sunroof car are in for resto right now so I can compare if need be good luck on the build
 
wow, bb70charger500!! nice cars! One question, i see on the orange one that is being loaded/unloaded from a trail has the rear bumper tucked...how did you go about doing that? Seen a lot of different ways being done on here, but no one definative way...some say slot the brackets, others say but 71-2 bracket (though some say they done fit the 73-4 cars)...hence my confusion. Thanks :)

- - - Updated - - -

wow, bb70charger500!! nice cars! One question, i see on the orange one that is being loaded/unloaded from a trail has the rear bumper tucked...how did you go about doing that? Seen a lot of different ways being done on here, but no one definative way...some say slot the brackets, others say but 71-2 bracket (though some say they done fit the 73-4 cars)...hence my confusion. Thanks :)
 
71-72 brackets, I just change bumper and all not shure if the brackets will bolt up to the 73-74 bumpers (I don't see why not ) if you can't find brackets you could just cut you brackets and take a inch or two out if your going this route let me know I can measure the 74's bracket and the 72's and see how much it is

- - - Updated - - -

Oh and thanks these cars are my baby's ,I always switch the 73-74 rear bumper out for the 71-72 (I think it looks much better) but I will say the 73-74 tail lights don't fit without modifying the plugs the wireing comes out horizontal instead of vertical like the 71-72 chargers so keep this in mind you will have a problem when you get to tail light install,and remember any ?'s just ask
 
yeah, sweet man! if you could measure the differences for me that would be awesome. finding the 1971/2 bumper and brackets here in Washington is proving to be near impossible and shipping them from anywhere else is way to expensive :/
 
Small update;

Moved the charger across town to a 5 bay shop where i will have more room to restore it. I stripped out the entire interior, windshield, and front suspension. i also included a pic of the only "serious" rust on this car. At the moment,
i am focusing on the front of the car, primarily the engine bay. current plan is to stip down the engine bay and fender well areas of the car so that i can weld all the seams in order to stiffen the chassis up some in an effort to make the car more rigid for handling improvements. i'll post up pictures of that process once i get into it :)
dads car (1 of 4).jpgdads car (2 of 4).jpgdads car (4 of 4).jpgdads car (3 of 4).jpg
 
Looking good I haven't got a chance to measure the brackets yet as the 74 is in storage (I can measure the 72 and get that to you at least as soon as I get someone here to get it out

Keep up the good work
 
Looking good I haven't got a chance to measure the brackets yet as the 74 is in storage (I can measure the 72 and get that to you at least as soon as I get someone here to get it out

Keep up the good work

hey man, no sweat, i know what it can be like to have to shuffle stuff around just to be able to get to it :p honestly i am contemplating fixing my 74's rear bumper and modifying the brackets...all the 71-72 bumpers/brackets i have seen are all over $500 and need re-chroming....wish there was a repop rear bumper for these cars. my rear is slightly tweeked with a dent in it, not sure if i can even save it...but for what i have seen the 71-72 bumpers priced at that are in decent shape, i will try my hardest....
 
Happy fathers day to all my fellow mopar dads and grand-dads! small update...i have not made a lot of progress with the charger due to some family health issues, but that should be changing this week...i hope :p since i couldnt make it across town to work on the car, i brought the car to me...or at least pieces of it so i could make some headway while playing family doctor at home. i started sanding down and repairing the damaged spots in my grille halves and refinished them, polished the stainless outer window trim and drip rail pieces, and i am masking off my tail lamp lenses for refinishing (very tedious...) here are a few pics, i will snap some of the completed grilles once they dry,enjoy :)
image.jpgcharger.jpgcar.jpgcar2.jpgcar3.jpg
 
Looking good man .hope the pics I sent you are helpful.Keep up the good work
 
Thanks guys, heading into the shop today to try and make headway stripping the engine bay and inner fenderwells of paint and undercoating so I can continue seam welding and then coat everything in por15. But it's slow going using a 4" angle grinder and a wire wheel :/ pics later today or tomorrow after some decent progress is made....
 
Got several of the small parts sandblasted and coated in por15. Also fully scrubbed my plastic interior panels and began spraying them with duplicolor adhesion promoter and then their gloss black interior spray paint/dye...turn out ok, we will see how they hold up over time. I will likely end up buyin all new black pieces, but for now with my budget and timeline, this will do for now....for anyone else going this route, be smarter than me and buy 2 cans of the adhesion promoter and 2 cans of the color paint...the panels soak up a ton of it and I ran out half way through :/
 

Attachments

  • image.jpg
    image.jpg
    61.2 KB · Views: 213
  • image.jpg
    image.jpg
    77.5 KB · Views: 205
  • image.jpg
    image.jpg
    50.7 KB · Views: 219
  • image.jpg
    image.jpg
    40.3 KB · Views: 211
Small update; I have been working on the charger from time to time between family issues and working on everyone else's car's. Mainly i have been welding up unnecessary holes and openings in the engine bay and have removed the lower driver's side quarter panel for replacement. now that i have some free time to myself, i hope to make some headway on the charger! i have a metal fabricator helping my to make my own replacement panels, if we can pull it off, it will be a huge savings over buying the expensive tabco skins! i'll keep you guys posted :)charger6.jpgcharger7.jpgcharger8.jpgcharger9.jpgcharger10.jpgcharger11.jpgcharger12.jpgcharger13.jpgcharger14.jpg

- - - Updated - - -

oh, i also scored a 1967 cuda coupe that came with what appears to be 1972'ish b-body buckets! so they will eventually find their way into the dodge!cuda1.jpgcuda2.jpgcuda3.jpgcuda4.jpg
 
Very cool man your picking away at it. Keep it up and before you know it you'll be painting it
 
Great job, I know exactly what you talk about when you don't have your own place to work on car, I have a 72 charger and can't wait to get to work on it again. Keep up on pics I love it.....
 
Auto Transport Service
Back
Top