• When you click on links to various merchants on this site and make a purchase, this can result in this site earning a commission. Affiliate programs and affiliations include, but are not limited to, the eBay Partner Network.

71 Road Runner Restoration Started

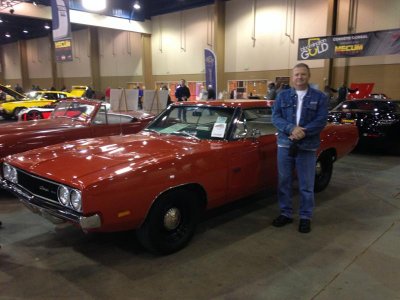
Saturday I went to the Mecum Auction in Kissimmee with a good friend of mine and we FROZE !!!!!!!!!!! (but I still had a GREAT time)

It was my first time ever going to a large auction event like that. It was AWESOME to say the least.

I took over 300+ photos. Some have ben posted here on another thread.

- - - Updated - - -
IMG_9908.jpg

- - - Updated - - -

This was Don Garlit's HEMI Charger 500.

- - - Updated - - -

Anyhow, today I was able to get back to work on the Challenger. Some small stuff had to be done to get it ready for blasting.

- - - Updated - - -

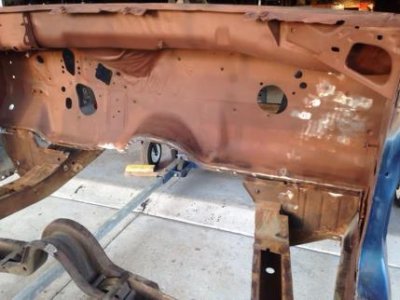
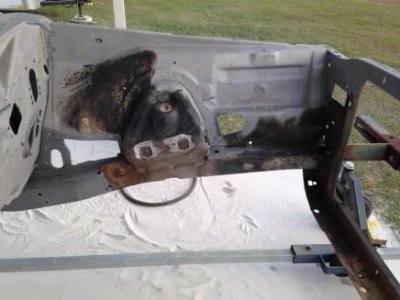
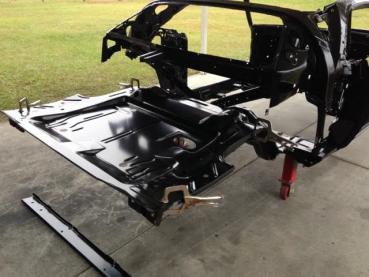
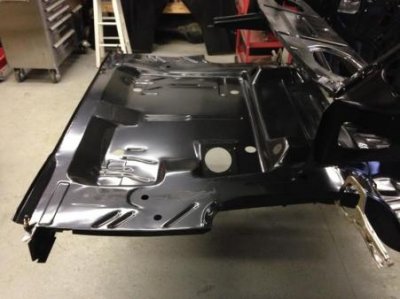
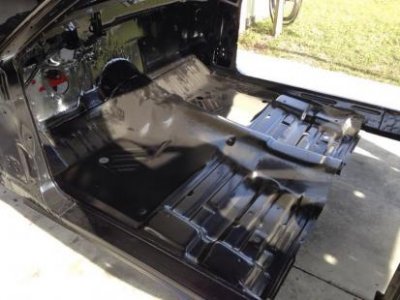
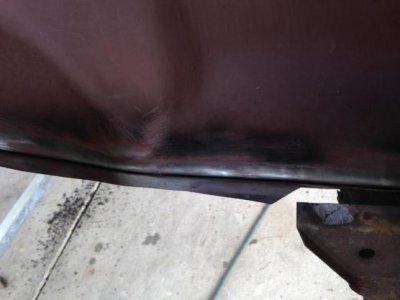
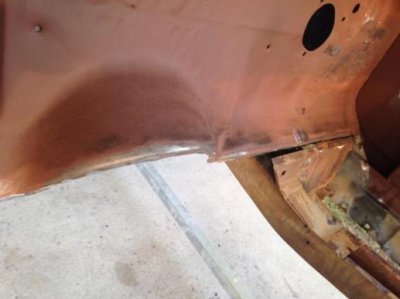
I was able to remove the small front edge lip on the floor pan where it connects to the firewall.

- - - Updated - - -
floor pan.2png.jpg

- - - Updated - - -

Before picture........................

- - - Updated - - -
floor removal 1.jpg

- - - Updated - - -

floor removal 2.jpg

- - - Updated - - -

and afterwards.................................. Now the complete front edge of the old floor pan is out / gone for good.

- - - Updated - - -

Then I went around the rest of the car and looked for sharp edged burrs on all of the spot welds and ground them off. The spot welds sometimes end up with a razor sharp piece of jagged metal on them.

(They tend to make you fingers bleed when your sanding on the car later...................)

- - - Updated - - -

This was followed by some hammer / dolly work on various spots of the car to make the metal nice and straight. This was done in areas like along the bottom edge of the rocker panels, lower radiator core support etc.

- - - Updated - - -

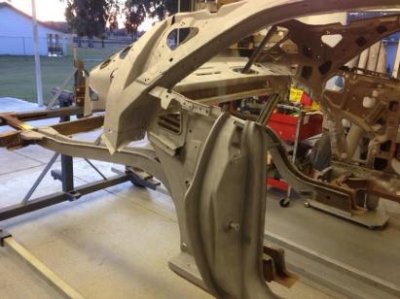
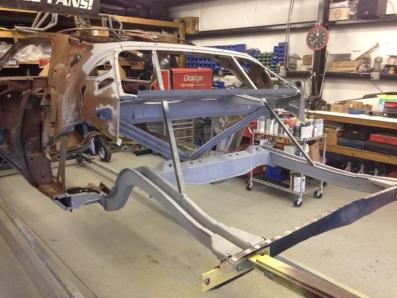
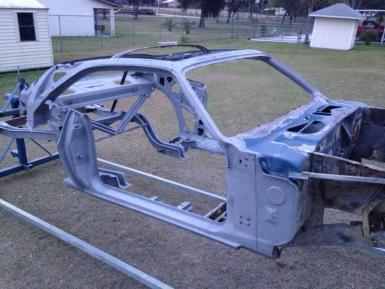
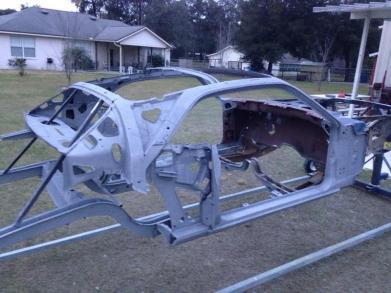
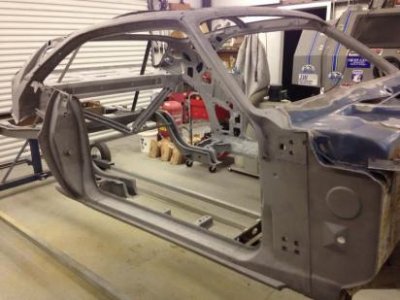
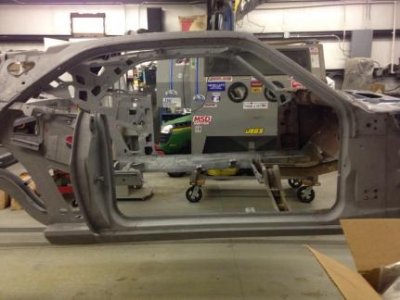
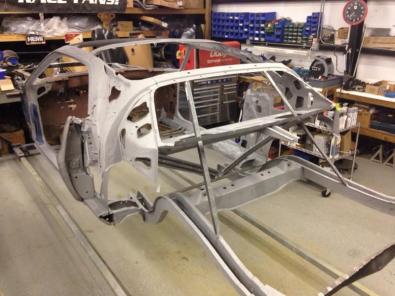
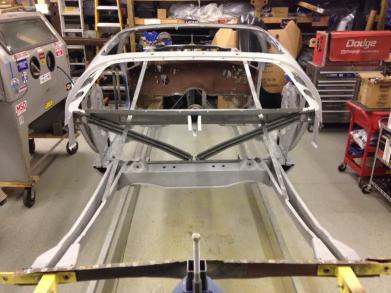
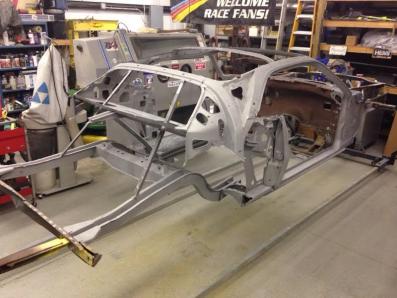
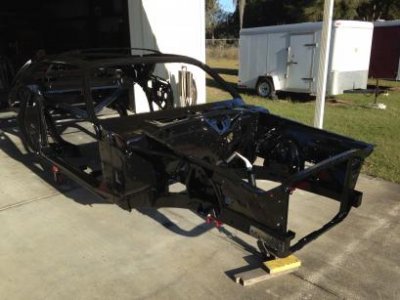
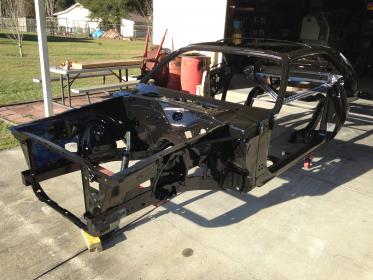
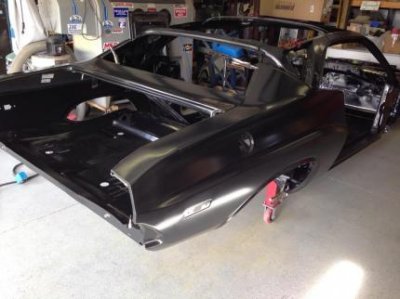
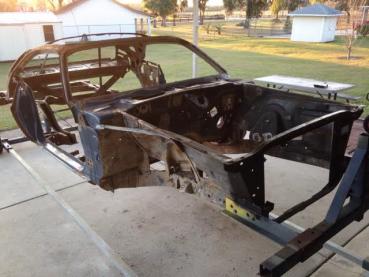
Now the Challenger is FINALLY ready to get blasted down to clean bare metal. I've been looking forward to this day for a long while now.......................

- - - Updated - - -
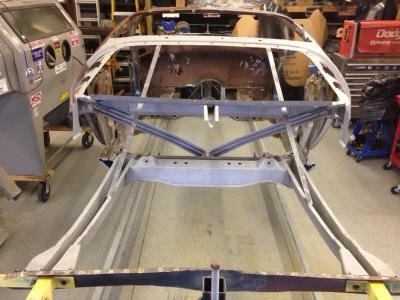
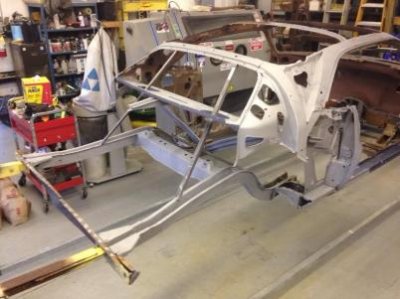
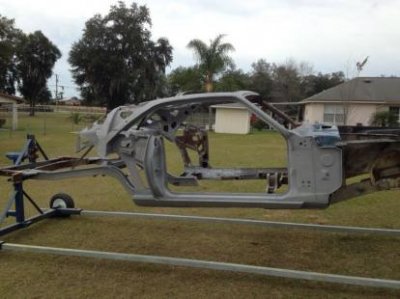
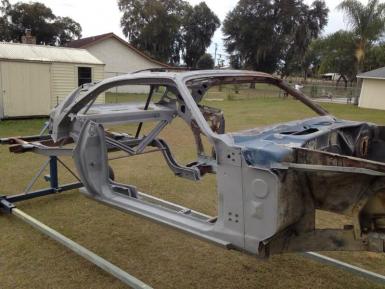
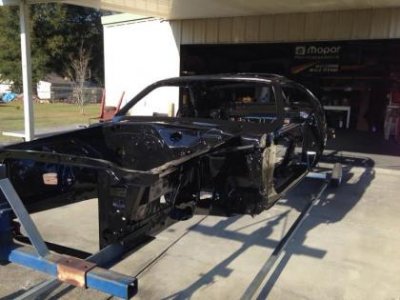
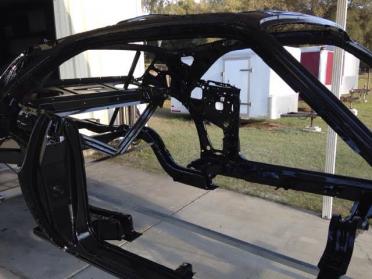
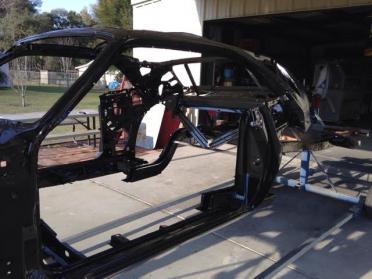
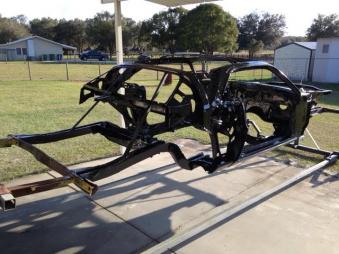
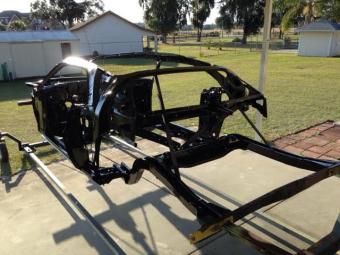
rotisserie 1.jpgrotisserie 2.jpg

- - - Updated - - -

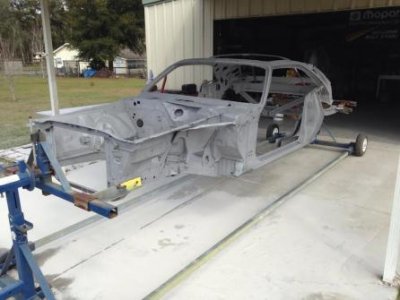
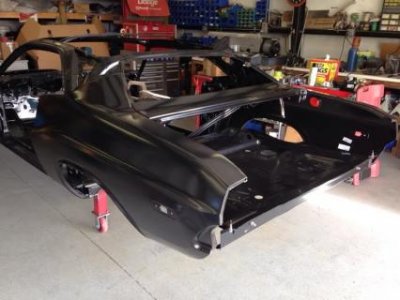
This is how it looked just before I rolled the car back in the shop.

- - - Updated - - -

That's all for tonight. Enjoy
 
Today was another good day. The weather was perfect. Not too hot and the sun was out shining bright !!!! (a good day to get busy on the car since we've been inside due to rain)

- - - Updated - - -

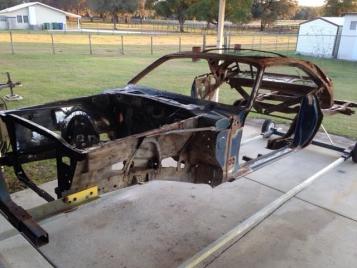
So I started blasting on the Challenger.............................

- - - Updated - - -
sandblasting 5.jpg

- - - Updated - - -

This was after I ran the tank empty of material the first time. I'm doing this outside with my roll up door kept down to keep the blasting media from getting into the shop.

- - - Updated - - -

sandblasting 6.jpg

- - - Updated - - -

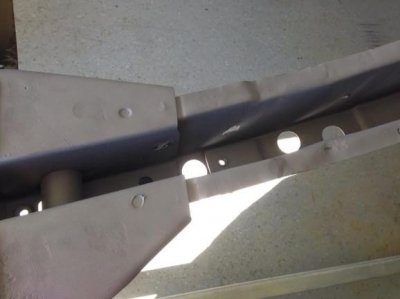
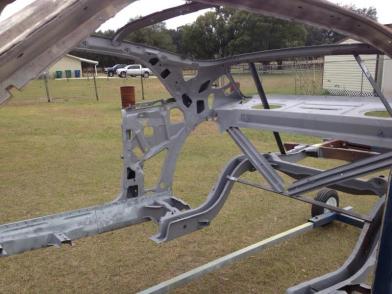
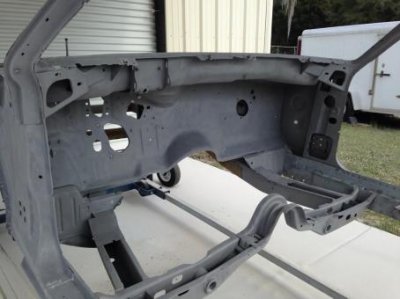
I am able to blast down inside the frame rails. Everything is cleaning up nicely.....................

- - - Updated - - -

In this picture (if you look close enough) you can see a spot welding burr that I missed. These things are like little razors !!!!!!!!!!!! It's in the middle lower left section of the photo.

- - - Updated - - -

sandblasting 3.jpgsandblasting 4.jpg

- - - Updated - - -

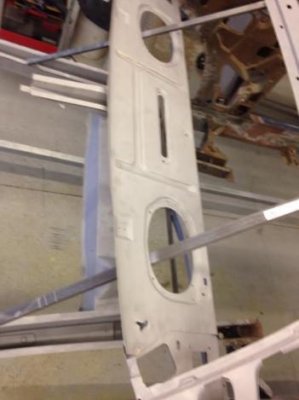
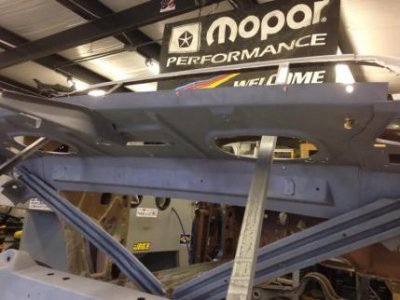
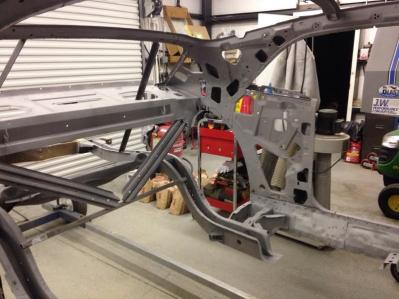
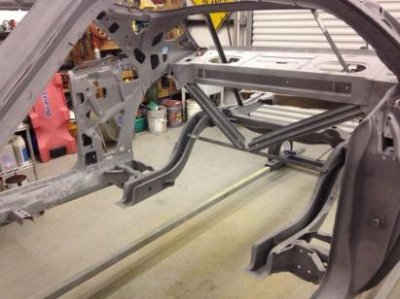
The package tray top and underneath sides are done. I also cleaned the diagonal floor supports since they are close by...............

- - - Updated - - -

sandblasting 2.jpg

- - - Updated - - -

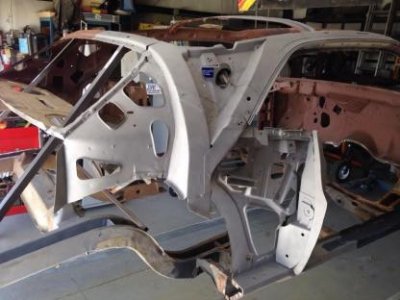
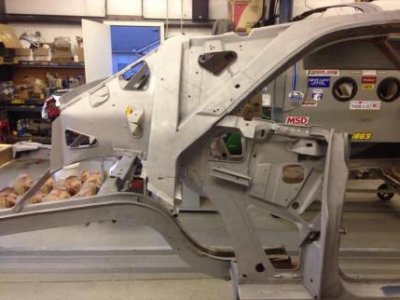
I was able to blast the area where the passenger side rear roll up window goes, the "C" pillar post area and the door jamb area front and back.

- - - Updated - - -

sandblasting 1.jpg

- - - Updated - - -

Most of both rear frame rails (inner and outer) and the rear upper shock cross member is done...............

- - - Updated - - -

sandblasting 7.jpg

- - - Updated - - -

sandblasting 8.jpg

- - - Updated - - -

sandblasting.jpg

- - - Updated - - -

I was able to finish the area around the rear window opening just before it started getting dark. Hopefully if I have a few more productive days like today, I can get the Challenger in black epoxy primer.

Tomorrow I have another project that will take a good part of the day to complete.

Until then .......................... Take care.

- - - Updated - - -

PS don't worry too much about the rear cross member. It's not getting blasted because it is bent and I'm replacing it once the car is back off the rotisserie.
 
Much of today was spent blasting the Challenger. It was an overcast day so the weather was good....................

- - - Updated - - -

21.jpg22.jpg23.jpg24.jpg

- - - Updated - - -

This was a little over half way today.....................

- - - Updated - - -

2.jpg

- - - Updated - - -

It started getting dark so I called it a day.

- - - Updated - - -

3.jpg

- - - Updated - - -

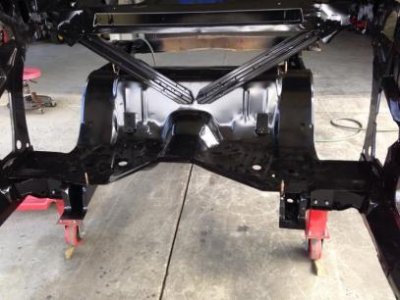
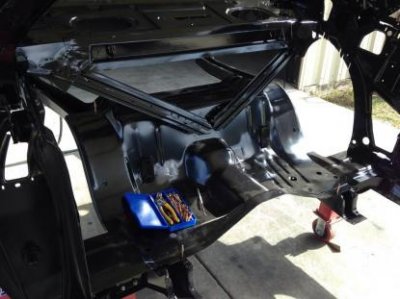
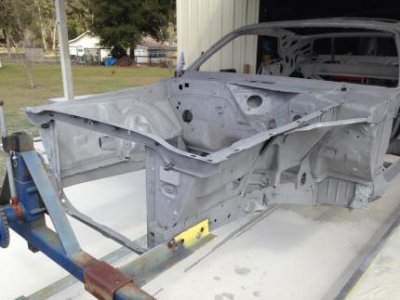
The rear potion of the car is done. Everything from the transmission / torsion bar cross member back is complete now, ready for paint.
- - - Updated - - -

14.jpg20.jpg

- - - Updated - - -

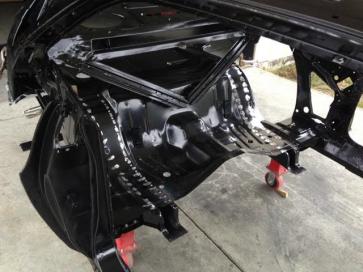
The roof supports, A and C post structures are ready to go.

Everything cleaned up nice. It's really starting to look good.

- - - Updated - - -

6.jpg8.jpg

- - - Updated - - -

So I blew all of the remaining materials out of the nooks and crannies and rolled the Challenger back inside the shop.

- - - Updated - - -

5.jpg12.jpg

- - - Updated - - -

The door jamb areas have been completed on both sides. I was able to finish up the door hinge area on the passenger side. I made a good start on the driver side too. It still has a little to go before it is finished.

- - - Updated - - -

9.jpg

- - - Updated - - -

10.jpg

- - - Updated - - -

11.jpg

- - - Updated - - -

Tomorrow is another day.............. Hopefully I can get the firewall area finished along with the transmission / torsion bar cross member.

Hope you all had a great weekend.
 
Was there a car somewhere in those pictures? :) I see a few hundred Challenger molecules at best!
 
Louis, first time ive looked in, i checked a couple early pages of the plymouth and then jumped here......like your spots, sectioning etc, all very tidy, nicely thought out Main...
Im trying to wrap myself around this, drag car right? getting narrowed rear end?
Ive never been under the skin of one of these, i like the uni body cage boxing roof, sails, and the rails running down mate w/ wheelhouses?

You're definitely init! What pages show the Plymouth in color? The Challenger Pro Street or deicated track car, or am i off base altogether?
I agree about the run on wheel hse, looks factory as hell. im goinh to have to do some catching up, i sure like the look of what ive seen so far.
Smile a Mile
 
Louis, it looks really good. Its all starting to come together now. Good job!
 
Louis, it looks really good. Its all starting to come together now. Good job!

Mark, I'm glad I took your advice on blasting the car myself. At first I was thinking to myself "NO NOT AGAIN !!!!!!!", since it's a time consuming and messy job.

But now the results are showing and I LIKE IT !!!!!!! (plus I didn't have to trailer the car to get it done).

- - - Updated - - -

Was there a car somewhere in those pictures? :) I see a few hundred Challenger molecules at best!

343 molecules to be exact ........................ LOL

- - - Updated - - -

No Jim, it's going to be a street car. Standard rear, nothing fancy. It will have a nicely warmed up 440 with Stealth heads, Comp Cams valve train, Scat rods and SRP forged 10.5 to 1 slugs. Backed up with a pistol grip 4 speed and a 3:55 rear.

- - - Updated - - -

IMG_7778.jpg

- - - Updated - - -

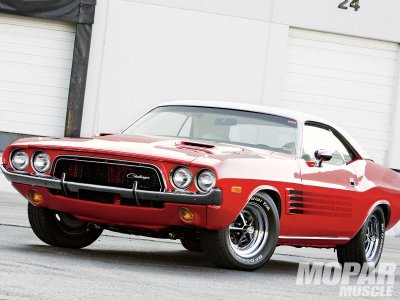
Like this one, but ours will have a black vinyl top......................... and "Rally" wheels instead of Magnums.................

- - - Updated - - -

Today was a GREAT day................. More blasting was completed than I thought would get done.................

- - - Updated - - -

24.jpg25.jpg

- - - Updated - - -

I finished up the interior and the cross member..............

- - - Updated - - -

19.jpg23.jpg

- - - Updated - - -

Then the hopper ran out of material. It was time to reload and get back to work.

- - - Updated - - -

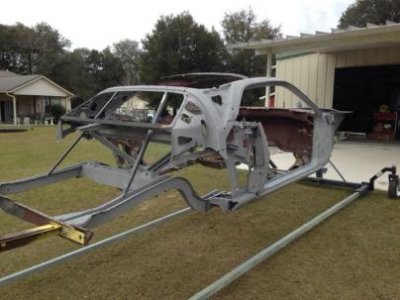
Then the sun started shining bright so I took advantage of this and rolled the car around 180 degrees so it now faces out away from the shop. This allowed me more light and made it easier to see the missed spots when I was blasting.

- - - Updated - - -

11.jpg17.jpg

- - - Updated - - -

View attachment 305130

- - - Updated - - -

Then it started getting dark before I knew it..................... Called it a day, cleaned up and rolled the car back in the shop.

- - - Updated - - -

View attachment 305131

- - - Updated - - -

View attachment 305132View attachment 305133

- - - Updated - - -

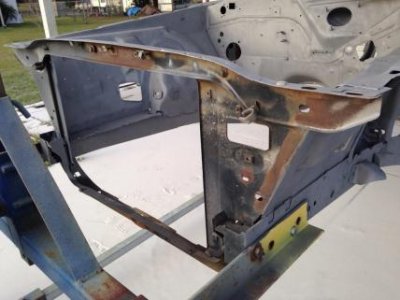
I still need to finish up the radiator core support and the rest the driver side front inner fender well area.

- - - Updated - - -

10.jpg12.jpg

- - - Updated - - -

That is the plan for tomorrow. Then I have to vacuum it out and blow out all of the residual blasting materials.

They are forecasting rain on Wednesday / Thursday so I have to beat the clock and get it painted in epoxy before then............... It will be catastrophic if I don't.

- - - Updated - - -

Sorry but it looks like some of the pictures I posted didn't load properly.................

- - - Updated - - -

One more thing:

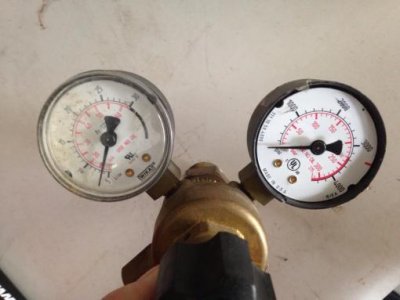
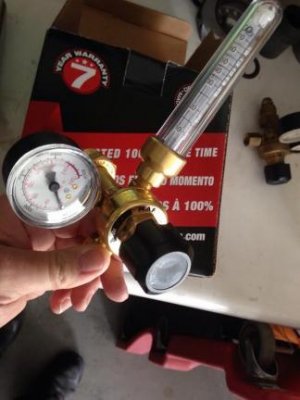
On Thursday I was swapping out my gas bottle on my MIG welder. I DROPPED the regulator and broke the gauges................. Ooops.

- - - Updated - - -

mig regulator 2.jpg

- - - Updated - - -

The lens broke on one and the needle no longer is sitting on the stop.

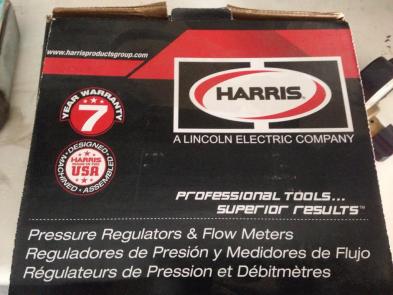
So I stopped by our local welding supply shop and picked this Flow meter up.

- - - Updated - - -

mig regulator.jpg

- - - Updated - - -

Made in the USA with a 7 year warranty.

- - - Updated - - -

mig regulator 1.jpg

- - - Updated - - -

Hopefully soon I can tell you all how it works..................

Later folks !!!!!!!!!!!!!!!!!!!
 
I prefer the ball flow meter myself, nice going!

That's what one of the welders at the supply shop recommended. I figured I would give it a go. Thanks for the encouraging words !!!!!!!!!!

- - - Updated - - -

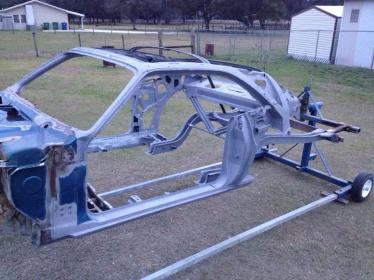
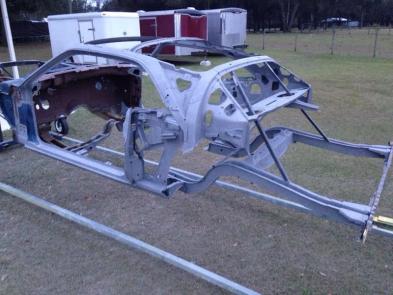
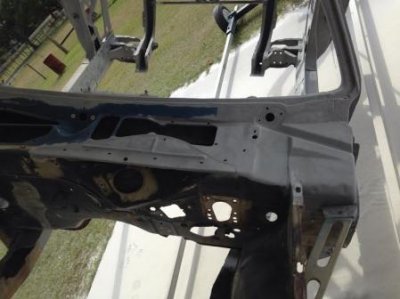
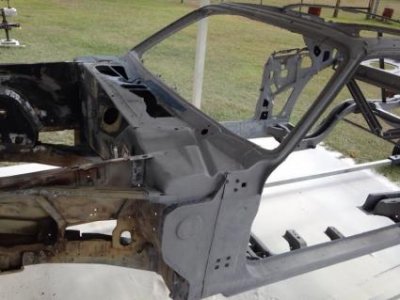
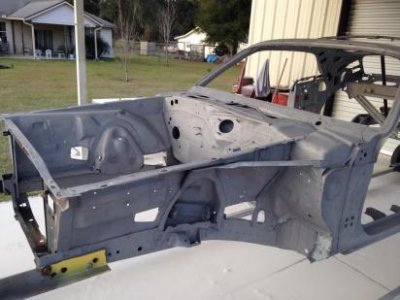
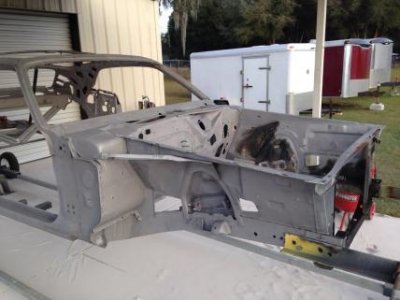
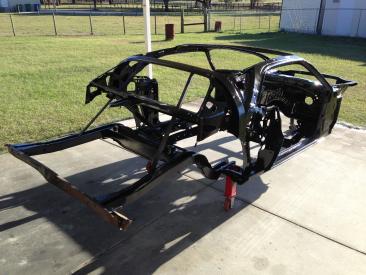
Today I finished blasting the rest of the car....................

- - - Updated - - -

final sand blast 1.jpgfinal sand blast.jpg

- - - Updated - - -

Then I gave it another good look over to see if I missed any of the razor sharp spot weld flashings. These were taken care of with a flap wheel................

- - - Updated - - -

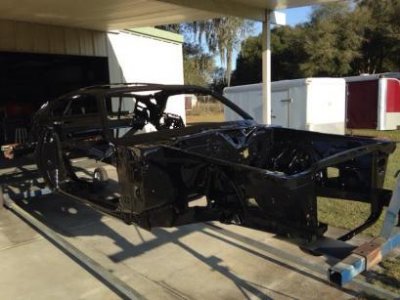
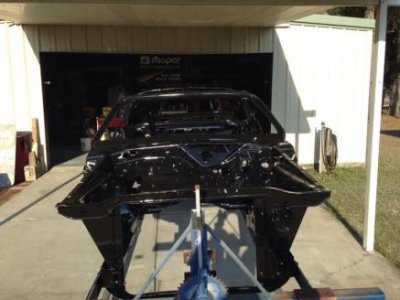
It took me a while to vacuum / blow out the car shell. The rocker panels took the longest.

- - - Updated - - -

rotisserie13.jpgrotisserie14.jpg

- - - Updated - - -

Then I started spraying the black epoxy SPI paint.

- - - Updated - - -

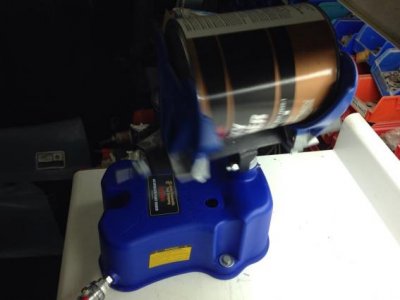
paint shaker.jpg

- - - Updated - - -

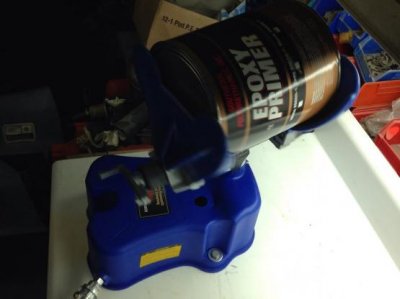
Here is the paint shaker in action. Sine the gallon had sat for a while I rotated it in several different positions to ensure a good mixing............

- - - Updated - - -

paint shaker1.jpg

- - - Updated - - -

rotisserie9.jpg

- - - Updated - - -

rotisserie2.jpg

- - - Updated - - -

rotisserie10.jpg

- - - Updated - - -

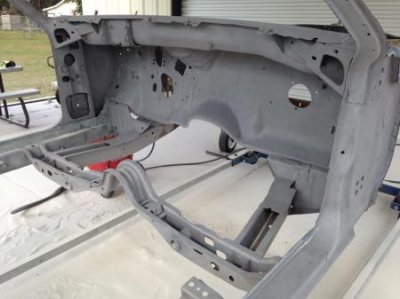
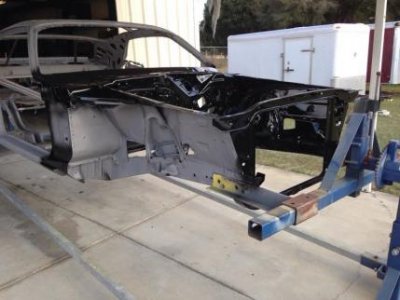
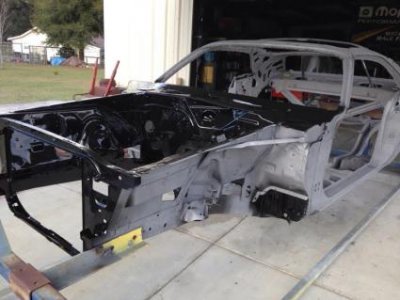
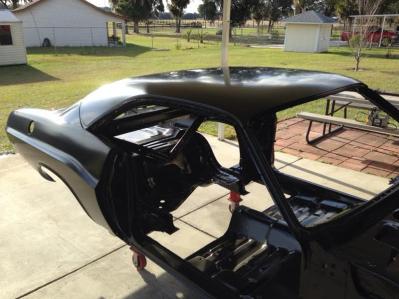
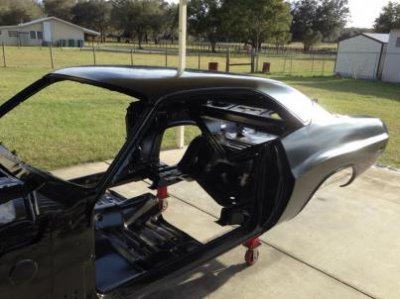
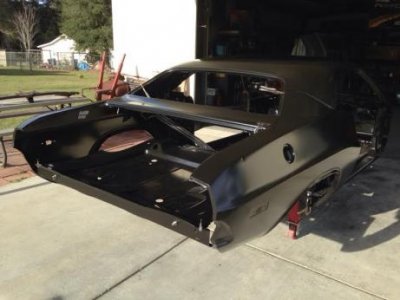
Here are the end results of todays work........................

- - - Updated - - -

rotisserie4.jpgrotisserie5.jpg

- - - Updated - - -

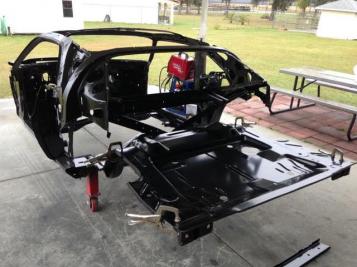
It's all one color now !!!!!!!!!!!!!!!!

- - - Updated - - -

rotisserie6.jpgrotisserie7.jpg

- - - Updated - - -

YIPEE !!!!!!!!!!!!!!!!!!!!!!!!

Tomorrow I'm taking it easy..................
 
Looking waterproof now! Very nice bones to build a new car around.

I've been wanting one of those paint shakers as well... How much air does it consume?
 
Looking waterproof now! Very nice bones to build a new car around.

I've been wanting one of those paint shakers as well... How much air does it consume?

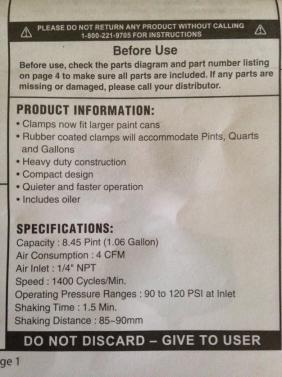
Here is the product info sheet with all of the specs on the paint shaker.

- - - Updated - - -

paint shaker2.jpg

- - - Updated - - -

4 CFM and it operates between 90 to 120 PSI. Hope this helps my friend.............

- - - Updated - - -

Didn't do anything with the Challenger today. Spent most of the day running errands and picking up stuff / shopping with the misses.

- - - Updated - - -

When I bought my 2003 Ram truck back in '04, it was used, (had 17K miles on it), and the previous owner had a muffler shop install a single Flow Master muffler with dual tail pipes exiting the rear.

Over the last few months, my truck has been making some rather strange exhaust sounds, especially at idle. So about a week ago I finally crawled under it and I'm pretty sure the catalytic converters are rattling inside like the internals have broken loose. Once I was under the truck, I surveyed the rest of the exhaust system.

It wasn't pretty. The Flow Master muffler has rusted badly and the baffles inside are now loose as well. The tail pipes now have holes in them................

You see where this is going ???????????????????

- - - Updated - - -

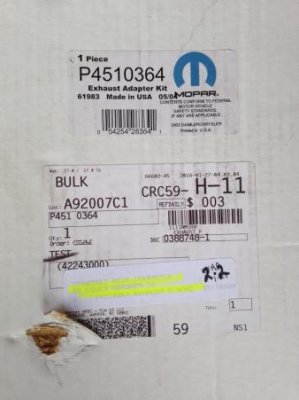
So I made a visit to our local Dodge Dealership.

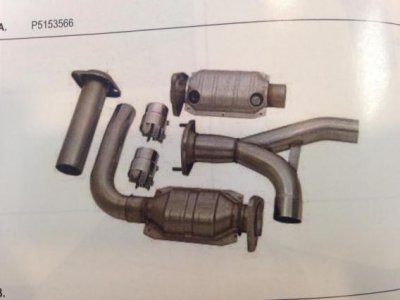
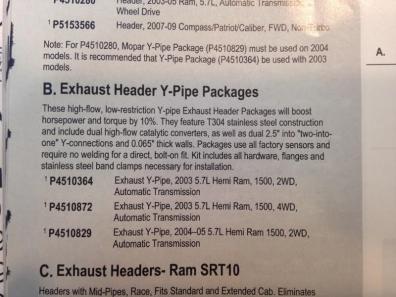
Ordered a high flow cat system .................

- - - Updated - - -

2003 Ram truck exhaust 3.jpg2003 Ram truck exhaust 4.jpg

- - - Updated - - -

Which arrived today !!!!!!!!!!!!!! Sweet .........................

- - - Updated - - -

2003 Ram truck exhaust.jpg

- - - Updated - - -

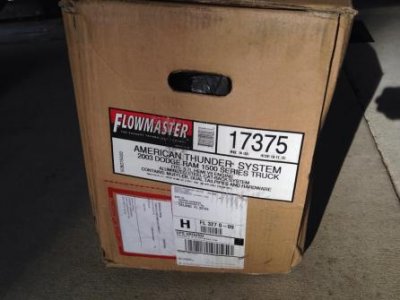
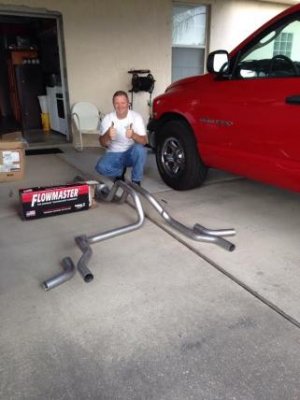
When I got back home, the rest of the story came together............... The UPS man delivered the Flow Master exhaust system.

- - - Updated - - -

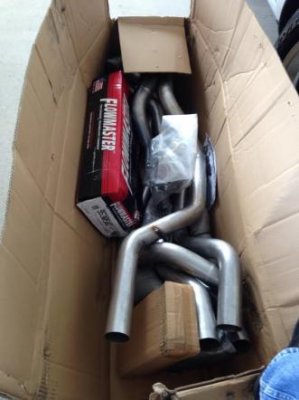
I was worried as hell about the contents because the box was beat up, had a HUGE hole at one end and the staples were pulled apart on both the top and bottom of the box.

So I took it apart and inventoried everything and made sure nothing was missing or damaged.

- - - Updated - - -

2003 Ram truck exhaust 2.jpg2003 Ram truck exhaust 5.jpg

- - - Updated - - -

Luckily everything was OK.............

- - - Updated - - -

2003 Ram truck exhaust 1.jpg

- - - Updated - - -

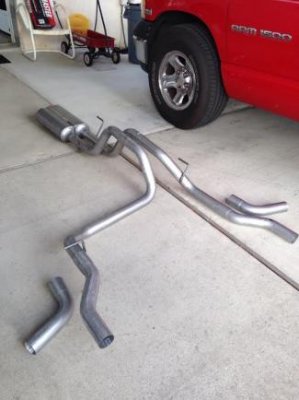
I test fit everything together to make sure the ends of the pipe were not damaged.

- - - Updated - - -

2003 Ram truck exhaust 6.jpg

- - - Updated - - -

Good to Go !!!!!!!!! Two thumbs up .............

- - - Updated - - -

The chrome tips looked great so I repackaged them and hopefully in a few days I will install the system before something else is damaged .

- - - Updated - - -

So while we were at the Dealership today.....................................

- - - Updated - - -

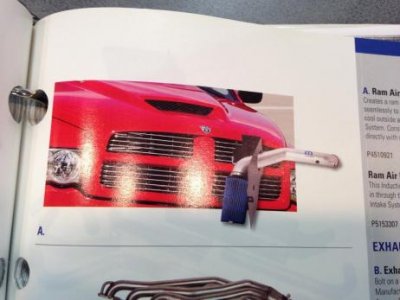
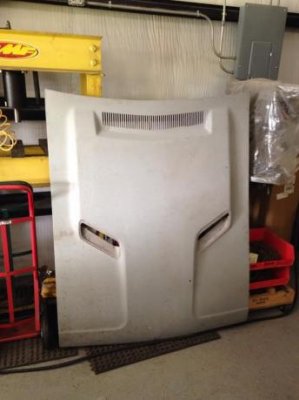
About 5 or 6 years ago I bought a new hood for my truck. I liked the way it looked and since it offered a fresh air option I went for it.

- - - Updated - - -

2003 Ram truck Cold Air 6.jpg

- - - Updated - - -

The hood looks like the one in this picture.

- - - Updated - - -

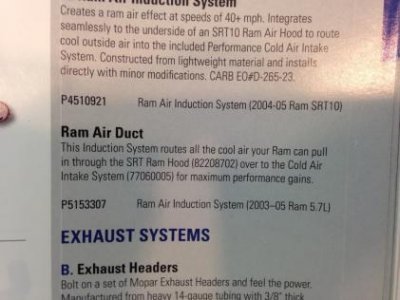
So I ordered a Cold Air kit for it and the air box assembly that seals the air intake to the hood.

- - - Updated - - -

2003 Ram truck Cold Air .jpg

- - - Updated - - -

77060005 Cold Air Kit

P5153307 Ram Air Induction System

These should arrive in a week.

- - - Updated - - -

I will be installing these parts soon.............................

stay posted for updates and photos.
 
OK on my last post, the pictures didn't turn out like I wanted them to. I was using my IPhone.

I did manage to get a lot done over the last few days................

- - - Updated - - -

under the seat floor pan 5.jpgunder the seat floor pan 6.jpg

- - - Updated - - -

I test fitted the "Under the seat" floor pan.

- - - Updated - - -

I marked it out for welding it in position.

- - - Updated - - -

under the seat floor pan 4.jpg

- - - Updated - - -

Then I welded it in place permanently........................

- - - Updated - - -

I left the package tray diagonal braces loose for now to give me more room for adjustments in case they were needed.

- - - Updated - - -

Rally hood.jpg

- - - Updated - - -

Then today I dragged out the "Rally" hood and I removed "Bagged and Tagged" the hood latch assembly and windshield washer hoses & "squirters".

- - - Updated - - -

I removed the hood scoops getting it ready to blast down to bare metal.......................

- - - Updated - - -

trunk lid and rear valance.jpg

- - - Updated - - -

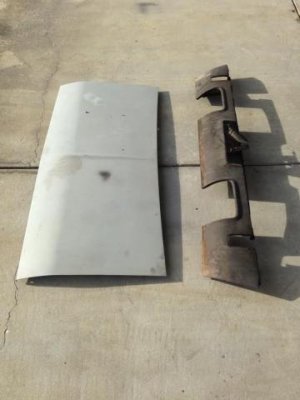
Then I removed the trunk lid off the 1970 Lime Green car for use on the 73. The 70 is getting a "Go-Wing" and this trunk lid doesn't have the cut outs on the bottom side for a spoiler. That's why I picked up a new trunk lid with the cut outs from AMD to replace it on the '70 car.

- - - Updated - - -

Both of these parts need to be blasted as well.....................

- - - Updated - - -

Then I got busy test fitting some of the major parts:

- - - Updated - - -

test fit metal 1.jpgtest fit metal 2.jpgtest fit metal 3.jpg

- - - Updated - - -

The one piece trunk floor fit pretty good..................

I cut off the original rear cross member. It has been replaced with a new AMD one. But for now it's just bolted in place using the rear bumper bolt holes.

- - - Updated - - -

test fit metal    1.jpg

- - - Updated - - -

Then I sat the front floor section in place.................. It will need a little tweaking along the fire wall seam. But I mean it's very minor.

- - - Updated - - -

test fit metal   1.jpgtest fit metal   2.jpg

- - - Updated - - -

Then I clamped on the rear quarters..........................

- - - Updated - - -

and "Dutchman" trunk filler panel................

- - - Updated - - -

test fit metal    5.jpgtest fit metal    6.jpg

- - - Updated - - -

Then I sat the roof skin in position. It fit VERY well...................

- - - Updated - - -

The last thing I did was fit the driver side outer wheel housing. Unfortunately I didn't take any pictures of it..............

- - - Updated - - -

But it looks like it will fit pretty nice too.

I will have to mount the doors, rear tail light panel, trunk lid, & rear lower valance soon. Once I am happy with all of the gaps / frame rail alignments I will secure the panels in place with "Clecko's" and self tapping sheet metal screws.

Then I can start welding everything in position.

- - - Updated - - -

test fit metal    3.jpg

- - - Updated - - -

It's starting to look like a car again...........................

- - - Updated - - -

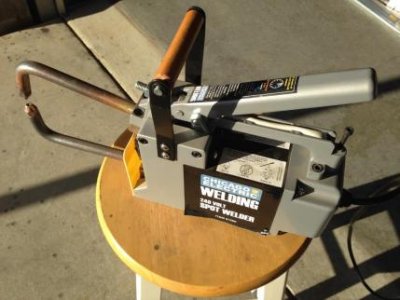
welders 2.jpg

- - - Updated - - -

Now here is the BAD NEWS !!!!!!!!!!!!!

This spot welder ended up being a TOTAL piece of CRAP. I tried to use it today to weld on the outside edges of the under the seat pan. After two spot welds it quit working !!!!!!!!!!!!!! It tripped the breaker.

I dug out my receipt and called the business where I purchased it from.

Get this: I bought it back in July of last year. I used it a few times to practice with shortly afterwards. Then it worked GREAT installing the radiator core support.

I asked them if it was still covered under warranty..........

NOPE !!!!!!!!!!! 90 day manufacturers warranty.

Oh well. They will NEVER GET ANY MORE $$$$$$$$$$$$$ FROM ME !!!!!!!!!!!!

Sucks.

- - - Updated - - -

So I may try to look for another spot welder by another manufacturer.

- - - Updated - - -

Hope you all had a great weekend.

LATER !!!!!!!!!!!!!
 
If that's like my HF 110 unit you'll need a 30 Amp breaker. 20 Amp just didn't cut it.
 
Thanks Ron. My left shoulder is still very painful. I can't sleep hardly at night. I feel beat and worn down to be honest. I try to keep a positive spin on everything though. I'm not a quitter and I never give up once I make my mind up.

- - - Updated - - -

On a positive note, some more goodies showed up today.

Here are a few pictures of the RR horn for a 72 car. This one has the short bracket. It's a reproduction and I still need to test it to see if it works as it should.

- - - Updated - - -

View attachment 213920View attachment 213921View attachment 213922

- - - Updated - - -

The pair of negative battery cables showed up too.

- - - Updated - - -

View attachment 213923

- - - Updated - - -

This was accompanied by the firewall gasket set.

- - - Updated - - -

View attachment 213924

- - - Updated - - -

I had a problem with delivery on the other positive battery cable. I was sent an AC control cable for an E body car by mistake. I contacted the seller and he will be shipping out the correct part. I let him know I would return the wrong part back to him. He agreed to pay for the return shipping so all will be good.

Everyone have a great weekend.

What is that P/N of the neg. battery cables? Are they still available from Ma Mopar?

Thanks!
 
Louis, looking sweet man.....
Ive never worked on any mope past 69 anf never saw one sans skin. Look to be pretty stout uni bodies. The notching of rear frame section is stock? Btw, i have two lexi 4 cammers arriving morrow....the Alphabet Pherrari 280Z roller shows in about a week. Pic loader freezes up on mr, havent been able to post pics. Rock on M8
 
What is that P/N of the neg. battery cables? Are they still available from Ma Mopar?

Thanks!

I'm pretty sure the cables came from "Dale's Cuda Shop" on Ebay. The part number is BC2. They are not from Mopar, but I think Mopar does make one. However I don't know if they are currently available.

- - - Updated - - -

I will check in a day or two for you since I'm heading over to the dealership to pick up the cold air kit and ram air duct work for my 1500 Ram.

- - - Updated - - -

My spot welder was a HF model. The breaker was the proper size. I will take mine apart to see what exactly happened internally with it. After I reset the breaker panel I was able to get it to partially weld another spot. You could tell it wasn't working like it should. It was almost as if it dropped a leg from the 220 and was working at half voltage.

- - - Updated - - -

It just made a little spark and that was it. Then I plugged my 220 Volt Mig welder into the same power source and it worked just fine.

- - - Updated - - -

The spot welder probably just ran out of "Chinesium" along with the warranty......................

- - - Updated - - -

Today I broke out the credit card and made a "hopefully" good purchase............................

- - - Updated - - -

Miller spot welder.jpg

- - - Updated - - -

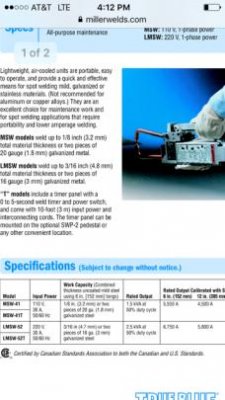
I ordered a Miller 220 Volt spot welder with a timer.

- - - Updated - - -

It is supposed to be in on Friday............................

- - - Updated - - -

Miller spot welder  2.jpg

- - - Updated - - -

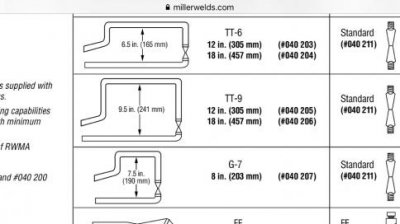
I got the TT-9 tip set so hopefully I can use it around frame rails and the extra reach should help with welding in the trunk floor.

- - - Updated - - -

I opted for the 18 inch tongs.

- - - Updated - - -

PN # 040 206

- - - Updated - - -

Miller spot welder  1.jpg

- - - Updated - - -

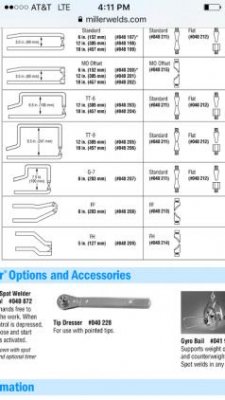
These are some of the other tips that can be purchased separately.

- - - Updated - - -

On the way are two extra sets of standard tips.

PN # 040 211

- - - Updated - - -

I figured that since spot welds are an integral part of the car's structure, I wanted to make sure they were sufficiently strong.

Plus I have the 1970 Challenger to restore next and it has a lot of metal replacement needed in it too.

Hopefully this one will work out much better as far as service life goes. I bought it from a local supplier that has a good reputation for taking care of customers. (Not like the "other" place !!!!!!!)

I get a little leery with internet purchases on expensive items. What happens with it if you have a problem ???? You have to worry about shipping it back etc.

I like to deal with a person face to face.

Anyhow, I'll post some pics of it once it arrives.

Until then....................

- - - Updated - - -

untitled.jpg

- - - Updated - - -

I'll leave you with this parting shot.....................
 
I bought the same miller spot welder with timer 4 years ago, it is a nice unit. I have used it on 3 cars and very happy with it.
Pat
 
I bought the same miller spot welder with timer 4 years ago, it is a nice unit. I have used it on 3 cars and very happy with it.
Pat

Thanks for the words of confidence !!!! (now I don't feel quite so bad about burning up my credit card)

I hope this one holds up and performs as well as yours has.

Louis

- - - Updated - - -

PS: what size tongs did you go with ????
 
Thanks for the words of confidence !!!! (now I don't feel quite so bad about burning up my credit card)

I hope this one holds up and performs as well as yours has.

Louis

- - - Updated - - -

PS: what size tongs did you go with ????

I bought the standard 9" and 18" tongs and I also have the 18" TT-9 tongs that I use the most. I filed the tips to match the original spot welds as the new tips are to small. Plan on making a cart to mount the timer on and hold the spot welder.
good luck!
Pat
 
Auto Transport Service
Back
Top