• When you click on links to various merchants on this site and make a purchase, this can result in this site earning a commission. Affiliate programs and affiliations include, but are not limited to, the eBay Partner Network.

Driver's side mirror Anti-flopification. Take 1

HT413

Semi Pro Bowler
Local time
5:30 PM
Joined
Jul 5, 2012
Messages
5,317
Reaction score
5,322
Location
New Jersey
A number of years ago I picked up this factory drivers side mirror for the grand total of $2. Yep, $2. It was driver quality with plenty of patina but the chrome was solid. Only issue was it had some serious flop going on, we're talkin Al Gore before the little blue pill. So the plan is to de-flop it. Any ideas?

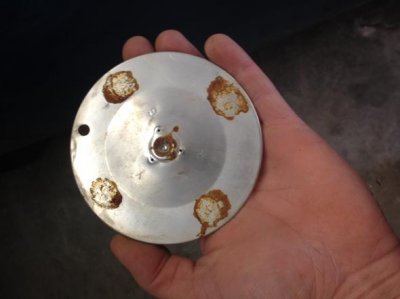
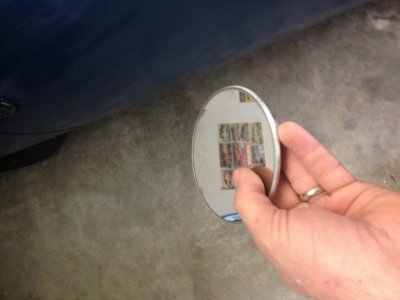
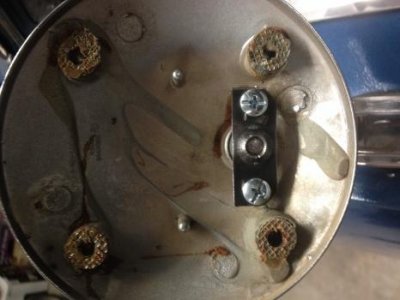
glass came off nice and easy. I used double stick tape to stick a small piece of angle iron onto the glass, let it set for a while, then yanked with a pair of pliers. Came right off in one piece -looks like it was just glued on in 4 places. Should be easy enough to reglue...
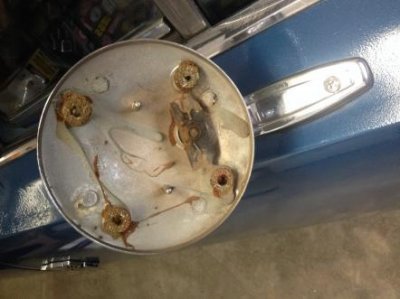
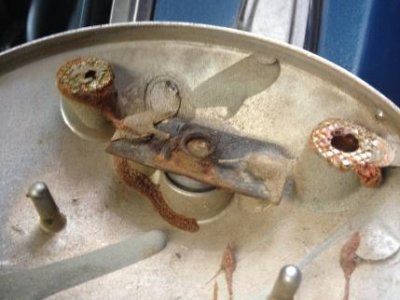
image.jpg

image.jpg

image.jpg

image.jpg
 
Last edited:
Are those screws under what looks like glue? If so, There are several ways to create more friction between the ball and plate. Dimpling the plate a bit would work, or maybe some type of thin/pliable material to tighten the ball to plate. You could also create some "tooth to the inside of the plate, similar to knurling.
 
Are those screws under what looks like glue? If so, There are several ways to create more friction between the ball and plate. Dimpling the plate a bit would work, or maybe some type of thin/pliable material to tighten the ball to plate. You could also create some "tooth to the inside of the plate, similar to knurling.

Nah, looks like rivets. I sure wish it were screws, like the rear view mirror.
 
Grind the rivets off, then drill and tap the pedestals that remain with something like a 10-32 machine thread. Once you get that center plate off, you can either torque it a little to create more friction, or grind the pedestals down a little bit to get the extra interference.
 
Grind the rivets off, then drill and tap the pedestals that remain with something like a 10-32 machine thread. Once you get that center plate off, you can either torque it a little to create more friction, or grind the pedestals down a little bit to get the extra interference.

Sounds like a plan. One worry, what's the housing made of? I hear horror stories about tapping pot metal, not sure if that's what this is.
 
It's pot metal. I've had success drilling and tapping it in the past. I would recommend using some Loctite on the screws so that it holds without over tightening it.
 
I tapped the mounting screws on the tail extensions of the 67 Coronet, they are pot metal. It worked out great.
 
Sounds like a plan. One worry, what's the housing made of? I hear horror stories about tapping pot metal, not sure if that's what this is.

Thanks a million for this post, I've got a flip flopper myself that's been pissing me off something fierce. Now that you've shown me how to get it apart I'm on it.... I think dsd has the right idea.

- - - Updated - - -

Might not hurt to hit them with a blaster with coarse media for more friction.
 
Thanks fellas, for the help. I'll take care of those rivets and drill and tap for some screws. I was thinking of keeping it simple and just hitting both surfaces with some coarse sandpaper and perhaps tweaking the little plate for some more bite.

i originally just bought the $2 mirror to get the car street legal, but we might just get it to be a nice driver with some patina (hey, kinda like me.)

- - - Updated - - -

Thanks a million for this post, I've got a flip flopper myself that's been pissing me off something fierce. Now that you've shown me how to get it apart I'm on it.... I think dsd has the right idea.

You're welcome, is amazing that no information is online for this simple fix. I mean, we ALL have or have had this problem, at some point, no? Even al gore lol.
 
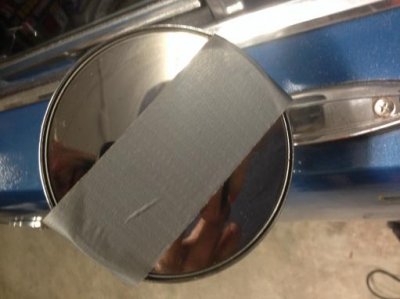
Ok, ground down the rivets, drilled some holes with a #29 drill and tapped the holes for 8-32 screws I had laying around. I then roughed up the ball and socket with some 80 grit, bent the socket plate for a little more leverage and tested it - perfect! So I screwed it all together with some blue loctite.

Didn't take a shot of it, but I used some 3M marine adhesive to glue the glass back on. Before that, I removed the old adhesive and roughed up the surface with a dremel and mini wire wheel.

Oh, and you might notice that I didn't bother removing it from the car - almost perfect work height and a nice stable base, just tossed a big ol canvas drop cloth over the whole area and got to work.

Entire project took me 45 minutes and the mirror is super firm.

image.jpg

image.jpg
 
Last edited:
Outstanding fix, this is why we need a tips and tricks section on this site, for stuff just like this!
 
I was in the garage last night working when I remembered this thread, I grabbed a short piece of box tubing and the 3M 2 sided tape and said enough is enough. Just like you said it popped the mirror right off, mine was a new aftermarket mirror made exactly like yours..... one screw had come loose. Tightened it up and all is good.
 
I was in the garage last night working when I remembered this thread, I grabbed a short piece of box tubing and the 3M 2 sided tape and said enough is enough. Just like you said it popped the mirror right off, mine was a new aftermarket mirror made exactly like yours..... one screw had come loose. Tightened it up and all is good.

Awesome! Glad it worked for ya. Such an easy fix and it took me 3 years to even attempt it lol.

- - - Updated - - -

Check that - it took FOUR years for me to attempt it. Haha
 
I wonder if the glass on a remote mirror will come off the same way? I was wanting to have a new one cut for it. I also have a manual one I picked up that I am going to put on the passenger side.
 
Awesome! Glad it worked for ya. Such an easy fix and it took me 3 years to even attempt it lol.

- - - Updated - - -

Check that - it took FOUR years for me to attempt it. Haha

Just goes to show it's better to just dig in sometimes, so glad it's fixed.
 
Damage after the fact! I removed my mirror from the car and took a small socket that fit over the that black tab and whacked it with a hammer and tweeked it a bit to do a tighten up. Been fine for a few years now.
 
I wonder if the glass on a remote mirror will come off the same way? I was wanting to have a new one cut for it. I also have a manual one I picked up that I am going to put on the passenger side.

Only one way to find out!

- - - Updated - - -

Damage after the fact! I removed my mirror from the car and took a small socket that fit over the that black tab and whacked it with a hammer and tweeked it a bit to do a tighten up. Been fine for a few years now.


Thats a cool idea. I thought about trying to slip some sort of shim material between the ball to achieve that same effect. I just couldnt find anything laying around that I thought would stand up to test of time.
 
I wonder if the glass on a remote mirror will come off the same way? I was wanting to have a new one cut for it. I also have a manual one I picked up that I am going to put on the passenger side.
Let us know if that works. I have one that needs a new bridge built to tension the cables but didn't want to waste the mirror.
 
I wonder if the glass on a remote mirror will come off the same way? I was wanting to have a new one cut for it. I also have a manual one I picked up that I am going to put on the passenger side.
Recommend not putting one on passenger side. Limited use. Wing window smacks mine and I used the factory markers. YO POS got loose and pitted too. Less holes. Just do a shoulder check and hit the gas to move right.
 
Auto Transport Service
Back
Top