• When you click on links to various merchants on this site and make a purchase, this can result in this site earning a commission. Affiliate programs and affiliations include, but are not limited to, the eBay Partner Network.

69 gtx

I think I'm going to reset my odometer to zero as I can't confirm the mileage, but I do have a picture of it for record.
Your doing a good job on your gauges. I sent mine off and had them rebuilt and they set my odometer at zero.
 
Looking good! My speedo will likely need rebuilt too. I want to say Jim Kueneman had his rebuilt in Tucson but I need to read back through his thread to confirm
 
I may call one of the restoration shops to see if they would share how they do it. My gut tells me they won't but it's worth a shot.
 
IMG_20170518_065746.jpg

Got to meet Bud Grant last week. Being a Viking fan this was a big deal for me. Nice guy!
 
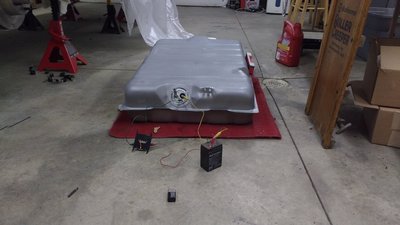
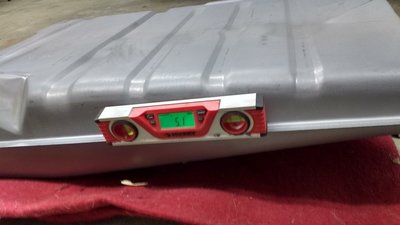
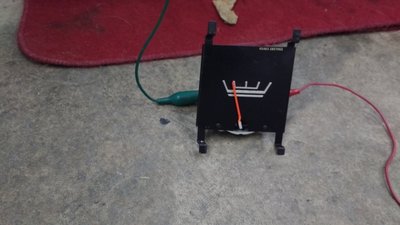
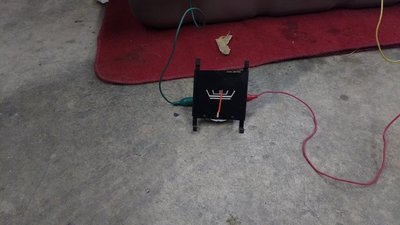
So I had a friend take some measurements of his car to get the angle that the gas tank sets at. I used that to mock up the tank and a power source for the gauge & sending unit.
The first check with 4.5 gallons barley moved the gauge. So I pulled the sending unit back out and tweaked the float arm. Then I was just slightly under 1/4 line. So I put 4 more gallons in and it was dead on at 1/2. the extra 1/2 gallon to put it at 9 pushed the needle to just over half. Close enough. I just want it accurate the last half.

IMG_20170520_130945498.jpg IMG_20170520_113254653_HDR.jpg IMG_20170520_130934375.jpg IMG_20170520_131638654.jpg
 
IMG_20170519_192012547.jpg
IMG_20170519_192108783.jpg
IMG_20170519_194344696.jpg
IMG_20170519_201330573.jpg

I used Mothers Back to Black on my gauge faces. Works great to restore some of the fading. Just used a cotton swab and worked it in, let it set then buffed it out with a micro fiber cloth. Did the process twice. It dries to the touch so it shouldn't attract dust like armor all. I then set the odometer in. I should get the white decal for the increment markings today.
 
I ordered the trim for the park brake, brake and gas pedal for a little bling. From Mega Parts. I was disappointed on the quality of the parts. The faces had a great polish but the sides hadn't been touched. So I spent 30 minutes on the buffer polishing them up, devils in the details they say.
IMG_20170520_102028677.jpg
IMG_20170520_105532874.jpg
 
Last edited:
So I got what I thought was decals for the gauges, turns out it's a stencil for the gauges to paint the increments on. Hmmm wish that had been a little more clear in the description. Guess that's on me. It says to airbrush with Testors flat white in 2-3 light coats. Guess I'll be going to the hobby shop tonight. Also recommends removing needles from gauges, not looking forward to that either. I better get the cheaters out again. Stay tuned for possible stress out......
 
Got my airbrush. Going to practice with it a little before I do the gauges. Got the fuel tank and lines finished Saturday, I'll post pictures tomorrow.
 
View attachment 426236
Got to meet Bud Grant last week. Being a Viking fan this was a big deal for me. Nice guy!
Great progress on the X! I'm a big time Vikings fan as well - born/raised and went to college in Winona if you know where that is - kind of by Rochester, MN. Buds a big deal to the whole family. Quite the guy - I see he's still wearing all his hunting gear. Great you got to meet him! Purple People Eaters forever!
 
So I got what I thought was decals for the gauges, turns out it's a stencil for the gauges to paint the increments on. Hmmm wish that had been a little more clear in the description. Guess that's on me. It says to airbrush with Testors flat white in 2-3 light coats. Guess I'll be going to the hobby shop tonight. Also recommends removing needles from gauges, not looking forward to that either. I better get the cheaters out again. Stay tuned for possible stress out......
I can give the engine a lot of lovin' but to be able to do that to a whole car? Amazing!
 
So I put the gas tank in over the weekend. I'd read where some guys had problems with leads on the tanks at the sending unit. So I bought another ring of the correct thickness and spanner wrench to make my life somewhat easier....
IMG_20170527_105159222.jpg
 
IMG_20170527_105236396.jpg

Had to bend the top clip a little to get the sending unit to fit flush in the tank.
 
IMG_20170527_110441454.jpg

The original piece went in to easy for my liking so opted for the thicker OEM style piece. The spanner wrench got it started to the locking nub. But had to use a screwdriver and hammer to set it. Shouldn't leak now!
 
I used a couple pieces of tape to secure the tank pad while installing, then pulled it off afterwards. Tank went in fairly easy, would have been better with another guy.
IMG_20170527_115911853.jpg
 
IMG_20170527_115933413_HDR.jpg
IMG_20170527_120014606.jpg

The 3" exhaust makes things a bit crowded. Pass side is ok, but I had to reposition the drivers side as it was touching. I may put some adhesive heat reflective product on the tank next to te tail pipes, but I'll drive it first to see.
 
I hooked up the feed and return line. I used some fuel line wrap from summit for heat protection. I like the Velcro stuff as you can put it on after the fact. I also put a few zip ties on at 90 bends for security.
IMG_20170527_120750260_HDR.jpg
 
IMG_20170527_142441457.jpg
IMG_20170527_142605113.jpg

I have this on to the rocker, then more from the tranny crossmember forward to the fuel pump.
 
Auto Transport Service
Back
Top