• When you click on links to various merchants on this site and make a purchase, this can result in this site earning a commission. Affiliate programs and affiliations include, but are not limited to, the eBay Partner Network.

Give me suggestions for Quarter Skin install!

drobertson

Well-Known Member
Local time
6:33 AM
Joined
Nov 15, 2014
Messages
1,148
Reaction score
1,079
Location
Wyoming
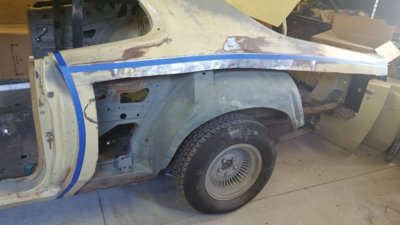
Hey guys, I've been working on the resto-mod of my 73 Hardtop Charger. Not a very rusty car at all, but driver's quarter panel was badly damaged in an accident many years ago (before I bought the car).

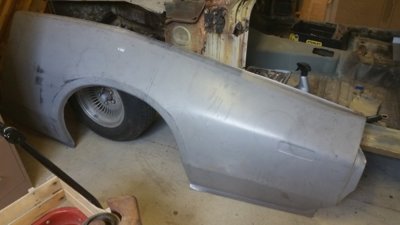
A new quarter was necessary. Full panels aren't available aside from new old stock, and many have had good luck with tabco skins.

The difference is that the quarter skin only extends about an 1 1/2" above the upper body line, and it's 19 gauge steel compared to the factory 18 gauge steel (I measured).

Should the upper edge of the quarter skin be slightly lapped onto the original remains to retain strength in the quarter (and make stitch welding easier)? Or is a butt-weld absolutely necessary? The car is going to be a very nice driver when finished, not perfect show quality.

It might also be noted that I live in a very dry part of the U.S. , and rust isn't a huge concern like it would be down south. Thanks, - David.
 
Last edited:
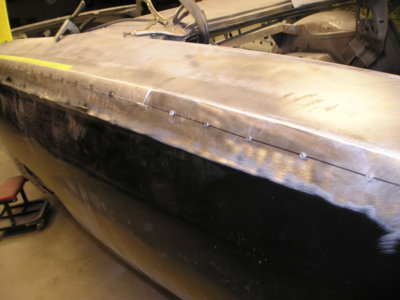
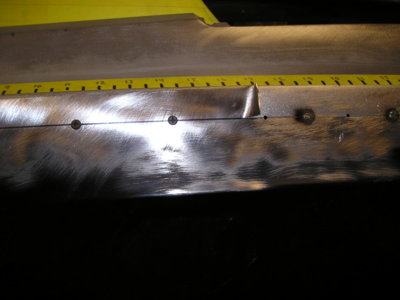
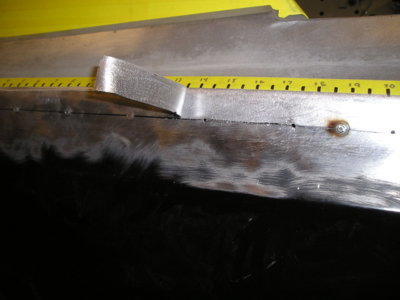
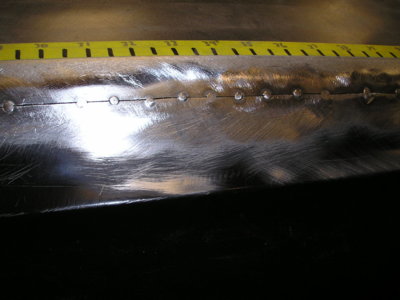
Quarter has been test fitted several times with good success, I'm just trying to decide the best way to stitch 'er in. Right now I'm leaning to buy some of these flange vise grips to flange the old steel, and weld the new skin into the flange. It should be very strong, and it would all sit flush on the outside, to keep fiberglass filler to an absolute minimum.

How would you guys do this? Thanks. -David

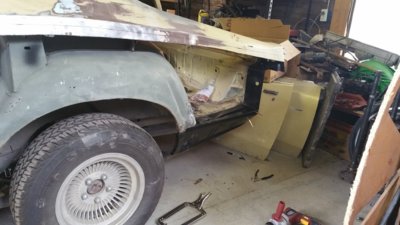
cut-out quarter panel.jpg new tabco quarter skin.jpg trunk drop off.jpg
 
screw it in place where it fits best overlapping about an inch as high up as possible.......use a cutoff wheel to cut through both layers of the overlap, do a couple inches at a time......... this will give you a gap the width of the cutoff wheel....... tack every 2 inches or so using an air blower to immediately cool the welds......... once it is tacked the entire length, go back and fill it in one tack at a time, skipping around and cooling
 
I would go at it at the upper lip of new panel . less area to warp .. thats just me though.. for the most part I agree with the above.
 
I would go at it at the upper lip of new panel . less area to warp .. thats just me though.. for the most part I agree with the above.

yeah.... over the body line works just fine....... I like working tight to that bend though
 
Neat idea with the cut off wheel sized gap. Doesn't sound too bad at all! Maybe if I wrapped some copper around a dolly and held it behind where I'm welding that'll prevent blow-through? Thanks - David
 
screw it in place where it fits best overlapping about an inch as high up as possible.......use a cutoff wheel to cut through both layers of the overlap, do a couple inches at a time......... this will give you a gap the width of the cutoff wheel....... tack every 2 inches or so using an air blower to immediately cool the welds......... once it is tacked the entire length, go back and fill it in one tack at a time, skipping around and cooling

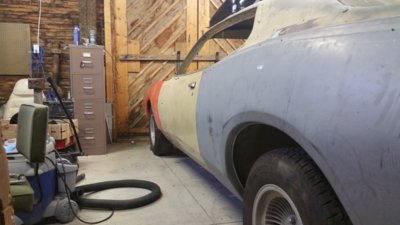
This is how the new quarter fits as of now. Should be really close.

This is my first time doing a 1/4, and I want to do it right with the best of my ability. Not too bad for a 19 year old without any guidance besides the interwebs.

20170909_193140.jpg
 
your welder should fill that small gap with little effort
I hope. It's just a little 140 hobart handler I bought last year at tractor supply. I've since converted it from flux core to MIG, and man is it a world of difference. I have been practicing a lot, but mostly on scrap steel.

Would .035 wire and tip be better than .030 in this application? I'd think so .

Thank - David

I use 030 for everything......... remember one tack at a time..... keep em small as you can

practice a little on the old panel first, cut a slice and weld it up
 
I use 030 for everything......... remember one tack at a time..... keep em small as you can

practice a little on the old panel first, cut a slice and weld it up
Yup I understand the whole tack welding the entire piece in to prevent warpage, rather than a continuous bead. Should be pretty simple, but will take quite a few hours! I have .030 wire in my welder currently, glad to hear I shouldn't need to change it out. Thanks - David
 
It will help if you dress the weld beads with the edge of a zip wheel every now and again too. I like to hammer and dolly as I go in between rounds of welding.

P1010026.JPG P1010027.JPG P1010028.JPG P1010029.JPG
 
Well looks like I have quite the task ahead of me. I don't have much do left before the quarter goes on for the final time.
 
what does your outer wheelhouse and trunk dropoff look like?

Brand new from AMD. Almost done removing the old wheelhouse, but trunk drop-off fits great. Pictures coming in a few minutes.
 
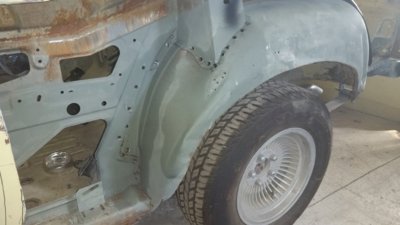
First photo shows the start of removing the old wheelhouse, new one will be plug welded in to somewhat replicate factory spotwelds.

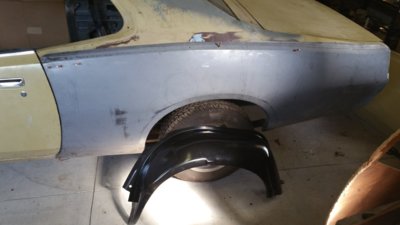
Second photo shows the new wheelhouse, awaiting installation. It looks identical to me! Even the "M" stamping towards the back is there.

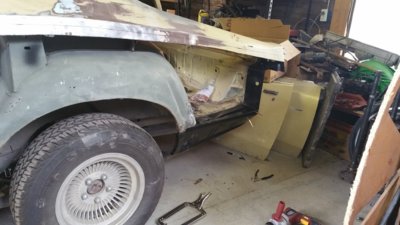
Third photo (posted previously in this thread) shows the fitment of the AMD trunk drop off on the car.

outer wheelhouse removal.jpg AMD outer wheelhouse.jpg trunk drop off.jpg
 
I hope. It's just a little 140 hobart handler I bought last year at tractor supply. I've since converted it from flux core to MIG, and man is it a world of difference. I have been practicing a lot, but mostly on scrap steel.

Would .035 wire and tip be better than .030 in this application? I'd think so .

Thank - David

No, it takes more heat with the larger wire. Use the 0.024" wire, flip the drive roller over for the smaller wire size. Make sure you changed polarity to the DCEP (Electrode Positive) for the solid wire. Practice, and don't be afraid to lay down some longer beads on the practice parts to make sure the metal is actually welded together.
I mention this because a friend (who never welded before) tied doing some quarter panels, and he would pretty much stop welding right after he heard the first spark, so his welds had no penetration, and cracked when he ground them.
 
Sorry to disagree, but Do Not try to run a bead on that quarter. You'll be sorry. The smaller wire is reccomended by a lot of guys, but I use .030 for everything. The way Eldubb440 said to do it is the correct way. Keep a small flatblade screwdriver with you. Sometimes when you cut, the edges move a little. Just stick the screwdriver in the slot and pry slightly to align panels, then tack while you keep them aligned.
 
Auto Transport Service
Back
Top