• When you click on links to various merchants on this site and make a purchase, this can result in this site earning a commission. Affiliate programs and affiliations include, but are not limited to, the eBay Partner Network.

Big D 1969 GTX 440 Rebuild

Logan Hughes

Active Member
Local time
2:17 PM
Joined
Aug 8, 2017
Messages
44
Reaction score
53
Location
Dallas, TX
After purchasing the GTX used in October 1969, I pounded hard on it, especially the first year of ownership. Over my 48 years of ownership I had bodywork performed and a complete repaint. However, I had not done any work on the drive-train. With 72k on the clock and a tired engine, I planned an engine rebuild as a retirement project. My challenge at retirement was that I did not have a good facility nor all the needed tools to do the work. I needed someone with whom to partner on the project. After some research, I found Darren Blake of Blake’s Muscle Car Repair Service. Though it was a sideline business for him, he bled Mopar blue, had a great facility, and was willing to partner with me on the rebuild.

Mentally I had gone back and forth for years whether I would build a hot street engine or rebuild and retain the numbers matching components. By the time I actually connected with Darren, I had decided to retain the numbers matching components and use the latest and best parts to make the engine better than it ever was when brand new. Darren further reinforced this thinking when he suggested extra machine work to improve induction and “blue printing” techniques to make the best stock plus engine.

So the work began. We pulled the engine and disassembled. Two pistons had broken compression rings and the cam lobes were severely worn but the block, heads and crankshaft looked good. The block, heads and crank were off to the machine shop for their magic:

· Magnaflux, hot tank, and deck block

· Align hone main journals & polish crankshaft

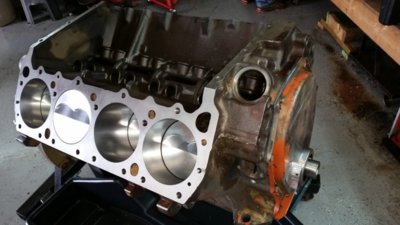
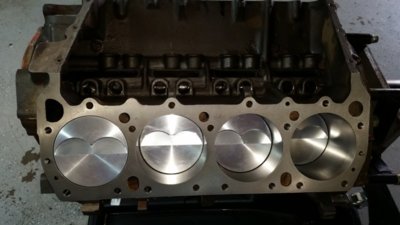
· .030” cylinder overbore and honing

· Balance rotating assembly (SRP forged pistons, Eagle H-Beam rods with ARP fasteners, and polished original stock forged crankshaft)

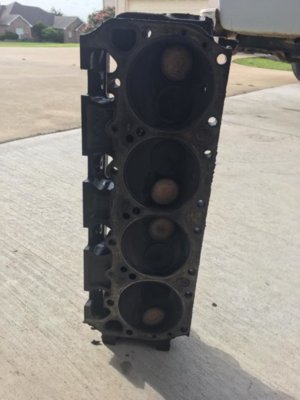
· Magnaflux & mill 906 heads, pocket port, install bronze valve guides/seals/hardened seats/new Comp springs & keepers/set valve height, and 3-angle valve job

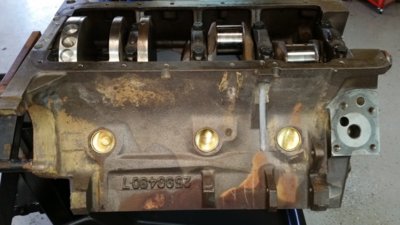
· Install new cam bearings & freeze plugs


MORE TO COME….
20170326_133419.jpg
20170315_205027.jpg
20170402_132707.jpg
20170403_152614.jpg
 
Awesome. Love it. No better way to enjoy your golden years than bombing around in a vintage Mopar (one of my all time favorites I might add). Like I said in another post. 9 months 5 days till retirement for me. Wooo wooo. I plan on a total redo of my 1970 GTX when I get there.
 
Kudos Logan. My rebuilt 440 has my original 383 HP cam that came out when my Day 2 bug first hit. Drag racing started & then when rod let loose in first 440 I went back to stock.
 
Awesome. Love it. No better way to enjoy your golden years than bombing around in a vintage Mopar (one of my all time favorites I might add). Like I said in another post. 9 months 5 days till retirement for me. Wooo wooo. I plan on a total redo of my 1970 GTX when I get there.
Woody you might want to rethink that 9months + post after the better-half starts voicing her opinions, lol!
 
Nope. I've done all the numbers. My net income is the same working or retired (with my pension and soc sec added together). It's a no brainer. Btw, the wife has another 5 years left after I retire. :) :) :)
 
Nope. I've done all the numbers. My net income is the same working or retired (with my pension and soc sec added together). It's a no brainer. Btw, the wife has another 5 years left after I retire. :) :) :)
Thats what I’m saying, “they” get all giddy with ideas about what needs done(besides the car)!!!!
 
Before starting to pull everything apart, take plenty of pictures of the details. From just the pictures posted, there is a lots of details that can be documented if your going back to factory original correct restoration. After all of these years, the car still retains the carb dashpot and bracket, the shorter coil, identification marks on the valve covers, appears to be the correct early style upper radiator hose, plug wire brackets and the list goes on.
Little things like I just mentioned is becoming harder and harder to document as the cars are restored and to find untouched originals are unicorns in the present world. Great car and enjoy the ride.
 
See post #1 for the start of the project….Continued….

While waiting on the machine shop work, I took advantage of the time to perform other tasks:
· I took my 4-speed 833 transmission to a transmission shop to have it inspected along with new seals and gaskets. Fortunately, the gears, bearings, and synchronizers looked good. This is a real tribute to the engineering of this Chrysler 833 transmission!
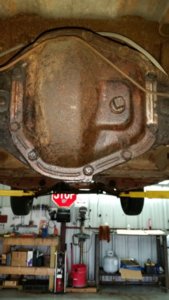
· Removed the Dana 60 inspection cover draining all the lube and polished the cover (spraying with clear coat) before replacing with a new gasket. I then replaced the pinion seal and filled the differential with gear lube.
· Replaced the driveshaft universal joints
· Degreased the k-member and thoroughly cleaned the engine bay
· Evaluated, sourced, and ordered all the miscellaneous parts needed for reassembly. i.e. fuel pump, water pump, thermostat, clutch kit, clutch Z-bar components, sparkplug wires, Pertronix Ignitor II points conversion & Pertronix Flame-Thrower II ignition coil, TTI 2.5” X-pipe exhaust and Summit 2-chamber mufflers, etc.
· Had the original radiator re-cored with 3 row copper.
· Cleaned, degreased, removed the gunk from the Hurst shifter mechanism and re-lubed with dry lubricant.

Stay tuned for the engine assembly, engine installation, and first drive….

20170412_091706.jpg
 
I'm about 7 years from retirement but I'm getting ready to do the exact same thing with my 67 GTX. It actually goes in the shop next week. Love the color of your car. It sounds like you have things wired tight. Good luck.
 
I'm about 7 years from retirement but I'm getting ready to do the exact same thing with my 67 GTX. It actually goes in the shop next week. Love the color of your car. It sounds like you have things wired tight. Good luck.
Thanks! I look forward to seeing your progress! BTW...I highly recommend retirement! LOL!
 
See posts #1 and #8 for the progress of the project….Continued….

We got the engine back from the machine shop and immediately started assembly.

· Installed the crankshaft with Clevite bearings yielding .005” end play and .003” bearing clearance.

· Installed the J.E. (SRP) forged pistons, Eagle “H” Beam connecting rods with ARP fasteners, and Clevite rod bearings yielding .003” piston clearance. The Engine Pro Premium Ductile Plasma Moly Racing Rings had .021” end gap on top compression ring and .018” end gap on the second compression ring. The oil ring was a 3-piece flex-vent unit. The rods side clearance varied from .011” to .016”. The rotating assembly was balanced at the machine shop.

· Installed the Comp Cams Xtreme Energy 23-223-4 Cam with a double roller timing chain.

· Installed the 906 factory heads. The machine shop milled the heads .002”, performed a bowl blend, installed bronze valve guides/seals/hardened seats/new Comp springs & keepers, set valve height, and performed 3-angle valve job.

· Installed Sealed Power HT976 Hydraulic lifters, factory rocker shafts, stamped steel 1.5 to 1 rocker arms, and pushrods.

· Installed new Melling oil pump, oil pan, valley pan, factory intake, factory steel valve covers, new high volume Carter fuel pump, and new thermostat.

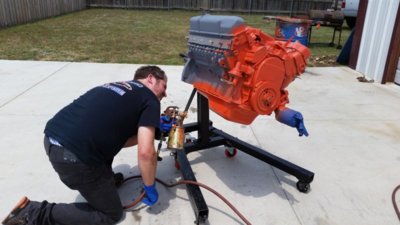
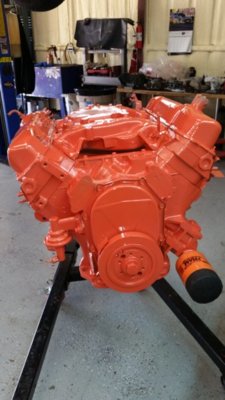
· The final assembled engine was painted with KBS Coatings Hemi Orange engine paint.

Stay tuned for the engine installation, first drive, and impressions….

20170508_102125.jpg 20170509_121632.jpg 20170509_121653.jpg Darrren's 440 Head.jpg 20170518_121604.jpg 20170518_134204.jpg
 
Auto Transport Service
Back
Top