Does anyone have a reference for getting part #s for the 69 GTX that would make things much easier!
You are using an out of date browser. It may not display this or other websites correctly.
You should upgrade or use an alternative browser.
You should upgrade or use an alternative browser.
69 gtx
- Thread starter 69 GTX
- Start date
its-a-mario
Well-Known Member
Mopar Parts books are available for download from MyMopar. Here's the link to the index of available downloads: http://www.mymopar.com/index.php?pid=107 The website also has a separate part number lookup (though I've never used the lookup tool)Does anyone have a reference for getting part #s for the 69 GTX that would make things much easier!
Thank you!
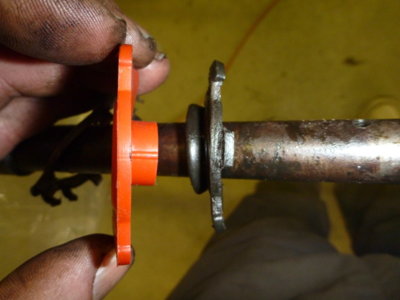
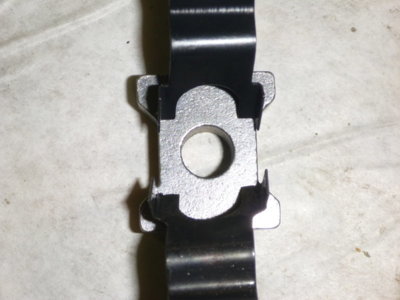
So I had to rebuild kits, one Year one, one Mega Parts. I was going to use the mega parts kit. Everything was going well till I went to I went to install the spring clip. It wasn't wide enough for the 2 pinned pieces and broke. So I had to rob the one out of the year one kit. Verdict buy the year one kit.
So 3wood was kind enough to hook me up with a 4 way flasher switch. I pulled it apart, cleaned it, put a little dielectric grease on it then put it back together. Got the Dremel out with the wire wheel and cleaned it up.
.

So I was thinking of putting a hole like the high beam light on the right side, but I didn't like the location where it was going to be. So I'll figure out something else.
So I was thinking of putting a hole like the high beam light on the right side, but I didn't like the location where it was going to be. So I'll figure out something else.
- Local time
- 4:05 PM
- Joined
- Jan 29, 2018
- Messages
- 19,350
- Reaction score
- 63,143
- Location
- Midland Ontario, Canada
So I had to rebuild kits, one Year one, one Mega Parts. I was going to use the mega parts kit. Everything was going well till I went to I went to install the spring clip. It wasn't wide enough for the 2 pinned pieces and broke. So I had to rob the one out of the year one kit. Verdict buy the year one kit.
I have a rebuild kit from Partsmix and it has the same incorrect and not shaped correct red/orange seal in it. The pin to hold the two pivot/slider blocks was chopped to length plain offshore steel and undersize. Definitely not hardened, honed to shape and light press fit like the original. Turns out I'm using the old pin, blocks etc and ended up ordering (just received today) the correct black rubber seal and a stainless retainer from DMT. The only part I may be using from the kit is the spring clip!

moparnation74
Well-Known Member
I still can't believe the orange seals are still being sold.....Back in the day Ma Mopar offered the kit with the orange seals...I think I still have a couple kit.....I have a rebuild kit from Partsmix and it has the same incorrect and not shaped correct red/orange seal in it. The pin to hold the two pivot/slider blocks was chopped to length plain offshore steel and undersize. Definitely not hardened, honed to shape and light press fit like the original. Turns out I'm using the old pin, blocks etc and ended up ordering (just received today) the correct black rubber seal and a stainless retainer from DMT. The only part I may be using from the kit is the spring clip!
View attachment 582216
That lower end of the column sometimes can be a pain....Seems like this has been your achilles heel....Every restoration has a couple things that just become a PITA....
That aside looking great Tim!
I have a rebuild kit from Partsmix and it has the same incorrect and not shaped correct red/orange seal in it. The pin to hold the two pivot/slider blocks was chopped to length plain offshore steel and undersize. Definitely not hardened, honed to shape and light press fit like the original. Turns out I'm using the old pin, blocks etc and ended up ordering (just received today) the correct black rubber seal and a stainless retainer from DMT. The only part I may be using from the kit is the spring clip!
View attachment 582216
Oh man, so correct on crap parts. I ended up using the new seal and that was it. The rest of my old parts just needed a good cleaning and I reassembled, never took the cross pin out either.
moparnation74
Well-Known Member
The repro industry sucks.....very little good stuff and a massive amount of junk...Oh man, so correct on crap parts. I ended up using the new seal and that was it. The rest of my old parts just needed a good cleaning and I reassembled, never took the cross pin out either.
- Local time
- 4:05 PM
- Joined
- Jan 29, 2018
- Messages
- 19,350
- Reaction score
- 63,143
- Location
- Midland Ontario, Canada
Gpuller
Well-Known Member
View attachment 578882
I only got one picture, it was starting to sprinkle so I had to rush them in the house.
Where is the snow?
That's a classic there  nice sled G.
 nice sled G.
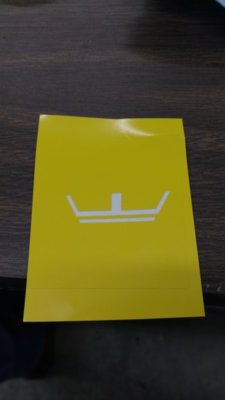
So I took the day off yesterday, and called it spring break. I decided to paint the white markings on my gauges. I bought the stencils. And are they everything tricky! What I learned was to peel the backing off then put it back on a just under the open line. They are really sticky and with the dry air and static cling it was a challenge!
Thought I'd post pictures of the headrests, as Ray asked me how they looked.


Homstead
Well-Known Member
The seats look great! Keep up the good work!
showard
Well-Known Member
Sounds like everyone has had the same trouble with these. My spring clip also didn't fit from the rebuild kit. I also just reused my original ones.View attachment 582190 View attachment 582192 View attachment 582194 View attachment 582195
So I had to rebuild kits, one Year one, one Mega Parts. I was going to use the mega parts kit. Everything was going well till I went to I went to install the spring clip. It wasn't wide enough for the 2 pinned pieces and broke. So I had to rob the one out of the year one kit. Verdict buy the year one kit.
So back to the gauges, I couldn'the get the pictures to load.


So the vinyl stencil is very sticky and hard to position. So I reapplied the backing to just below the lower markings. This helped me get the stencil in postion. You have to be very careful if you have to pull the stencil up not to stretch it. Once happy with the position I rubbed the open edges with a q tip.

So the vinyl stencil is very sticky and hard to position. So I reapplied the backing to just below the lower markings. This helped me get the stencil in postion. You have to be very careful if you have to pull the stencil up not to stretch it. Once happy with the position I rubbed the open edges with a q tip.

68 HEMI GTS
Well-Known Member
Very cool!!
Similar threads
- Replies
- 14
- Views
- 782
- Replies
- 17
- Views
- 1K


