You are using an out of date browser. It may not display this or other websites correctly.
You should upgrade or use an alternative browser.
You should upgrade or use an alternative browser.
Engine test stand
- Thread starter TrackPack
- Start date
- Local time
- 11:35 PM
- Joined
- Jul 17, 2008
- Messages
- 4,751
- Reaction score
- 2,503
- Location
- Southeastern, PA
BeepBeepRR
Well-Known Member
BeepBeepRR
Well-Known Member
Thing is when Im done with the trans and the test stand I can just hook my engine hoist up to it and just have a engine cradle i can stuff the engine in a smaller space. The big cart was a freebie.


- Local time
- 11:35 PM
- Joined
- Jul 17, 2008
- Messages
- 4,751
- Reaction score
- 2,503
- Location
- Southeastern, PA
That's a nice one. Looks like you built it so that it can be broken down for storage?
Yup
Coronet 500
Well-Known Member
We took an old Dodge truck frame and cut the front off added casters there was our temporary engine stand. We have used it countless times now just as is with a rad, bellhousing and a cut torque converter for starting because we didn't have a small flywheel. It's not too heavy, I can stand it up in the corner and it's strong enough to put a car on top to roll around if you wanted. If it ever gets in the way I'll just remove the casters and scrap it at almost zero cost.
64SF
Well-Known Member
Worked great for breaking in the engine...2x2 tubing for the base with steel casters. Cut down (lowered) old engine stand for bell housing attachment. 1x2 tubing for motor mounting to the frame. Wired up ignition/gauges to an old music stand I've had around for years.


64SF
Well-Known Member
The mounting arms do pivot on the base. I welded sleeves to each end of the 1 x 2 arms.Another nice one! Do the motor mount braces pivot on the base?
BeepBeepRR
Well-Known Member
May do this to mine.. That way I can do different engines other than big block mopars
747mopar
Well-Known Member
I built one but it's loaned out at the moment so no pics. What I did was take a solid 1/2" plate and drilled it for a bellhousing, mounted and control panel with mechanical gauges, used 8x8 box for the outward legs where they doubled as fuel cells, 1x1 box hangers for a radiator and 6" casters for easy movement. Using bellhousings make it easily adaptable to any motor and also simplifies starter installation, my motor mount plates also slide for easy adjustment.
68 HEMI GTS
Well-Known Member
Built mine from a k frame and some scrap


rumblefish360
Well-Known Member
I’m still working on it. I went down to my local steel dealer and told him I needed a box beam to fit into a box beam for this purpose.
I now need a few lengths of angle iron and a flat plate to drill holes and mount gauges for the control panel behind the engine and another flat plate to mount an MP ignition & a MSD set up.
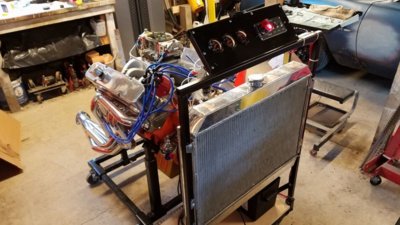
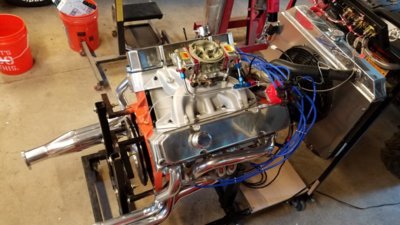
The gas can will be mounted under the fuel pump on that plate you see resting on the bottom. The battery tray is about to be tabbed up. Wiring will be a simple copy from the MP engines book. The radiator is an after ‘79 Magnum small block radiator w/a A body Duster shroud. (*I Think!*) Remember that the radiator should be offset since our engines are offset in the cars engine bay and this engine stand has it centered. Cheap angle iron was used with holes and slots already in it. So offsetting was easy.
The legs that go up to the engine mounts can be moved up or down because they slide into each other. I would just have to set the engine height to the desired level, mark, drill, install a bolt through the box in box leg and let it sit. It is currently set up for a small block MoPar. IDK if a big block would be any different. I’m sure a Ford or Chevy would be.
Diamond plate was used at the back of the bell housing. I put the bell on it, sharpied the drill points, drilled away! The dolly wheels are from Harbor Freight @ 4 inches IIRC. They were the biggest ones there. It is high enough to use the engine hoist (slightly pictured to the right) The hoists legs slip right under the main beams of the stand.
Depending on the cost of steel, it could be cheap. This was not but still way cheaper than a purchase from Summit/Jets/other place. And that is also do to myself welding the beams together & having extra gages on hand.
There will be plenty of room but for now, it gets a on/off starter switch, tachometer, oil pressure, water temp and vacuum gauge. Just the basics to start it up, check for leaks, basic tune up on the carb and distributor.
With the exhaust the way you see it, you can add what you may want to run and listen for the sound. Add an “X” or “H” pipe or just run true duals. The Hedman “S” bend pipes off the headers help with a few inches of clearance on your legs. Not exactly needed but helpful I think.
Being that I can slide the control panel from front to back may also be of help depending on where you want to stand.
The only other part I need is some sort of throttle lever. I haven’t thought much about it but it can’t be that hard. Hell, a long boot lace would do in a pinch. I even remember using our shoe laces for windshield wipers once a long age ago. Dam ‘57 Chevy! LMAO! What a great night!
Last edited:
rumblefish360
Well-Known Member
Nice! What gages do you have on it and how did you work in the throttle cable?
rumblefish360
Well-Known Member
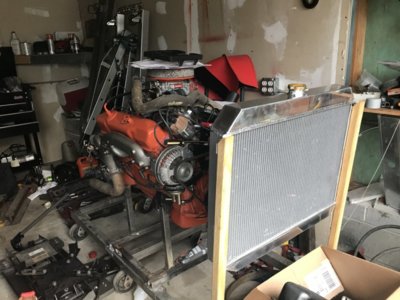
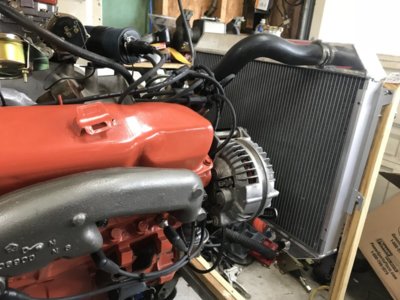
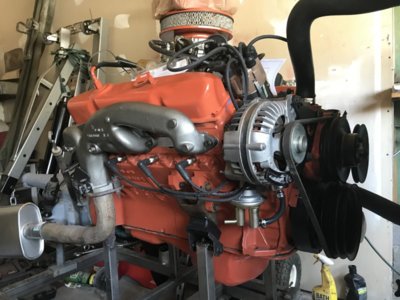
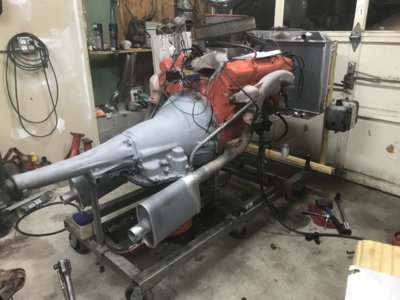
I was just thinking the other day that I should add in a extra mount for the transmission like you have. This way, the auto transmissions I use can also be tested for leaks before installing.I have one I built out of some square tube from home depot and a lack of welding skills. But here it is.. My garage is small and a mess.. So please excuse.. I have a total of about 100 bucks in it.
View attachment 643858 View attachment 643864 View attachment 643866 View attachment 643888
BeepBeepRR
Well-Known Member
Well that was not my intention but you are correct. Also you can go through the gears as well. I found this out by accident. My trans was in drive.. oops.
68 HEMI GTS
Well-Known Member
Nice! What gages do you have on it and how did you work in the throttle cable?
Tach, oil p, engine temp, and volts just because I had it laying around. I used a lawn mower throttle which has plenty on movement for the runstand. Only issue is you don’t get WOT for cycling the accelerator pump for start up.
Similar threads
- Replies
- 44
- Views
- 2K
- Replies
- 3
- Views
- 680
- Replies
- 0
- Views
- 464
- Replies
- 65
- Views
- 2K

