• When you click on links to various merchants on this site and make a purchase, this can result in this site earning a commission. Affiliate programs and affiliations include, but are not limited to, the eBay Partner Network.

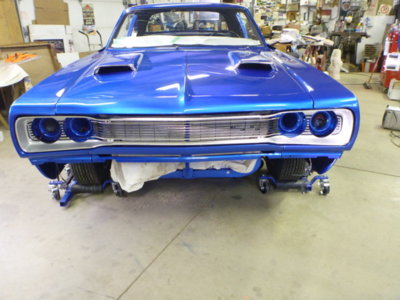
1969 Dodge Super Bee Coupe Restoration

Nice. How long before you can check it for leaks?
It ain't gonna leak.......... if it doesn't get water on it!! lol Butyl strip pressed down hard during install (with the waxed paper strip) onto metal hole and glass forced into the butyl when hot until you see the glass "turn black" so you know it's in the butyl. I have no fear that it's gonna leak if I get caught out in the rain.
 
The assembly line used auto caulking guns with Butyl, but this is a nice clean answer for one off's to install the back glass.

3/8" is the correct thickness for the Coronet / Bee.

No point reaching in and scratching quarter panel paint when you can just sit on the package tray to install the butyl!

Almost all the way around.

My lovely assistant of 36+ years. We took this car to the chapel and back!

Checking trim depth / fit before I get too carried away seating the glass into the butyl.

VERY light heat trying to soften up the butyl a tad so I can get it to come down a bit into the lower spots and seal.

Finally I just put the heat gun in the car and let it run until the car was up to 95F, then pushed the glass down. Still took a LOT of force, one arm hooked in the back window hole the other pushing down on the glass. No other way to get any leverage. Watch out for the hot brunette...

My last entry on back glass.. I promise!
1f642.png
. I wish it looked that perfect in person.

Don't forget your rubber spacer blocks so it doesn't slip down over time.

View attachment 699926 View attachment 699927 View attachment 699928 View attachment 699929 View attachment 699930 View attachment 699931 View attachment 699932 View attachment 699933 View attachment 699934 View attachment 699936
Did you make up those spacers? Do you know the size? Your car is shaping up
 
Did you make up those spacers? Do you know the size? Your car is shaping up

FSM tells you what they are supposed to be, I believe they call out 3/8" thick @ 18" each side of center. That said, test fit your glass onto rubber spacers to simulate the butyl thickness and cut your bottom retainer rubbers as needed to get even metal edge around the perimeter. On this glass I had the 5/16" thick in as shown in the above picture on the passenger side for proper fit and on the drivers side I had them in this way to space up about 7/16 to get the glass even across the top of the hole. After install I just trimmed the rubbers flush with the glass. I've had 5 back glasses set in that hole and they've all been adjusted differently! :eek:
beerestoration2019 041.JPG
 
Not sure why but "Gotta long way to go and a short time to get there" kept playing through my head today. Lucky me... my car has stainless interior trim as well for the door panels.

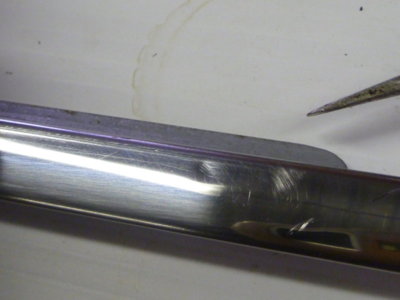
I don't remember any high heeled guests in the back seat, so it must have been Gordy trying to throw beer bottles out the window that put the dents in the trim.

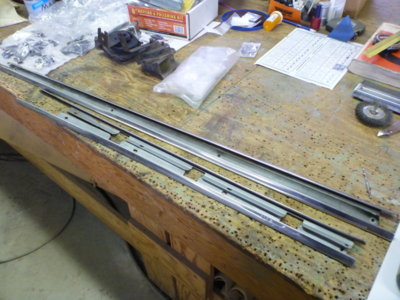
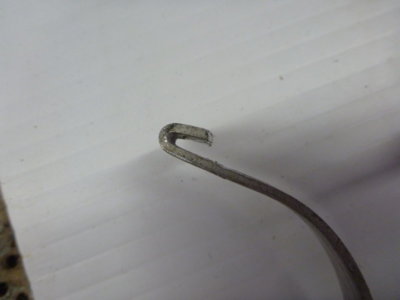
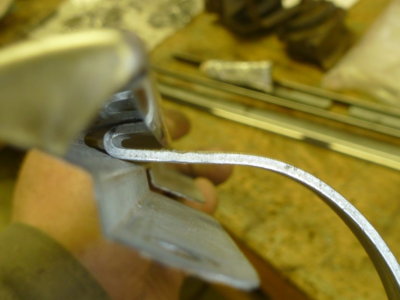
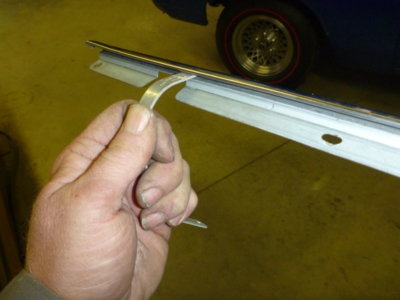
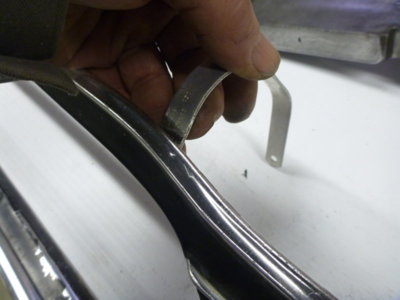
Did some thinking and came up with this "tool" to work the dents out. Made from an aluminum tube clamp strap.

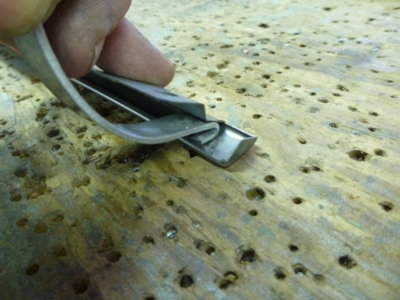
Slip it in the open end and work it down to the dent.

Tool in place for dent removal.

Rock and wiggle until you're satisfied! Goal is trying to make dent slightly proud.

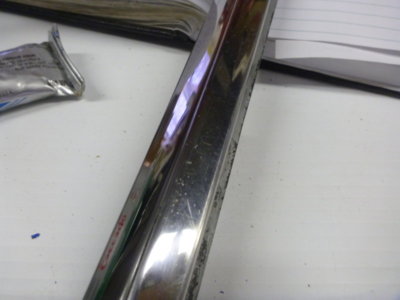
Fine file on the now proud dent, then 400/800/1000 and 2000. Then Brown compound on one buffer wheel and then Green on the other. Hand wiped with MAAS polishing compound and the restored on the left compared to "as removed" on the right.

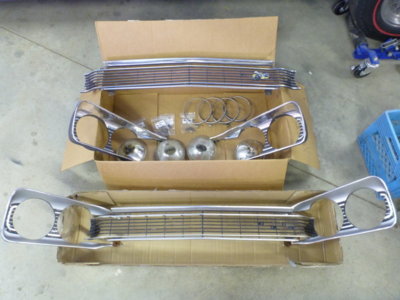
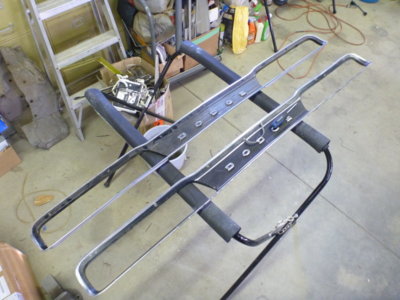
My OE grill assembly top and another that I picked up from two people buying the center from one and the headlight rings from another last year.

Checking fit of all parts to pick the best components to restore while my car is hopefully at the paint shop for it's beauty appointment. Of course I can't find the guy.. hopefully he's taken his wife on a nice vacation with my money!
1f609.png


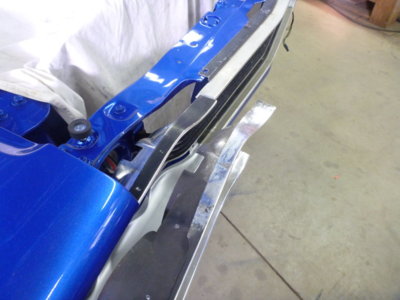
This one has me baffled, so more research required ...or if someone could help me out! Both the ones I bought and my OE are factory blacked out. One is blacked out right out to the center grill and my OE makes more sense only blacked out in the fender area with the rest polished to blend into the mating area of the center sections top edge.


beerestoration2019 105.JPG beerestoration2019 126.JPG beerestoration2019 129.JPG beerestoration2019 131.JPG beerestoration2019 136.JPG beerestoration2019 139.JPG beerestoration2019 143.JPG beerestoration2019 106.JPG beerestoration2019 119.JPG beerestoration2019 124.JPG
 
Last edited:
‘Gordy’, etc. Good story. Remember cruising along the beach in Calif and cigarette ash falling on my fingers by missing vent window while looking at bodies!
 
Well that's a great song and probably brought back some fun memories .
You are taking time to complete everything well .
You should just change the song to short time to go and long time to get there - lol
Can't wait to see it on the road .
 
This one has me baffled, so more research required ...or if someone could help me out! Both the ones I bought and my OE are factory blacked out. One is blacked out right out to the center grill and my OE makes more sense only blacked out in the fender area with the rest polished to blend into the mating area of the center sections top edge.
Well I've looked at a zillion pictures and it appears pending which assembly line, time of production, etc they may have been done both ways. Both of the center grills I have are black on the hump where they attach to the grill support and clean between the hump and the front face... which matches my OE headlight eyebrows where they are clean and just blacked out under the fenders. Others I've found are black all the way across on the top face and probably a better look. Some more to sleep on before I proceed...
 
Don’t forget that grille area was sprayed from under car, so not everything got covered.
 
I'm talking the grill itself, not the rad support and headlight buckets. That was sprayed after the car was coming out of paint.. not after the grill and headlights were in.

Here's black all the way across the top of the grill... I'm just not sure what is truly "correct" . THIS IS NOT MY CAR... just a picture I grabbed off the interweb...
beegrill.jpg
 
Last edited:
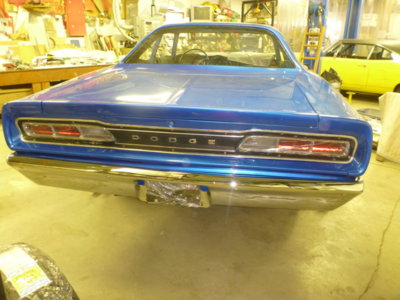
Decided I'd start on the tail panel trim first as a learning curve, as it SHOULD be easier to do than the grill. As per usual.. I have two to work with. My OE and another I got from a guy in California.

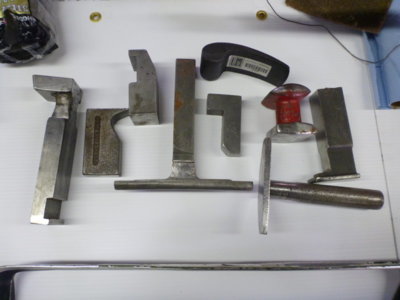
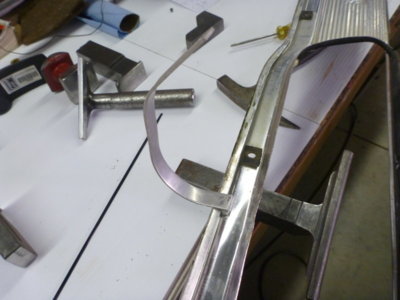
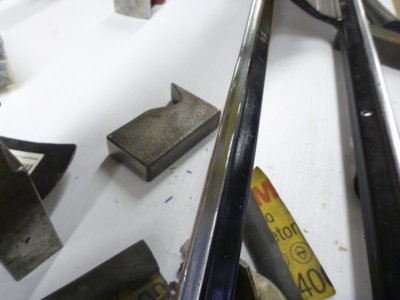
The tail panel being aluminum and my 26 years of building and rebuilding aircraft, I have a few tools up my sleeve for this work. Grabbed a few of my bucking bars that looked useful.

I also get to use the tool I made for the interior trim! Works great as a twister hooked into the back flange on the panel.

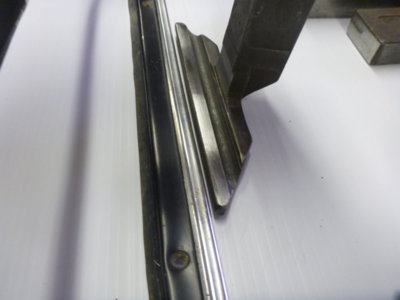
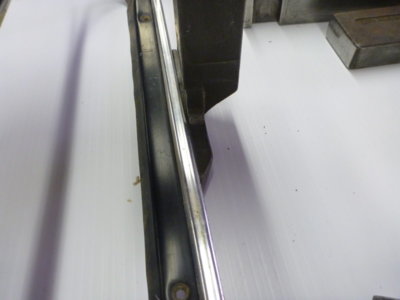
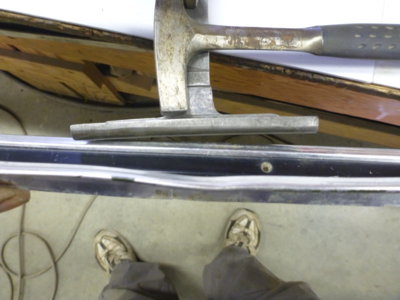
This wing stringer bucking bar is the perfect back up bar to fit the detail of the panel so that I can flatten the "black" area.

Panel sits perfectly in place. Just remember that what ever you use to tap away at the panel to straighten it with... MAKE SURE IT'S POLISHED.. or you'll have a lovely pattern in your finished part.

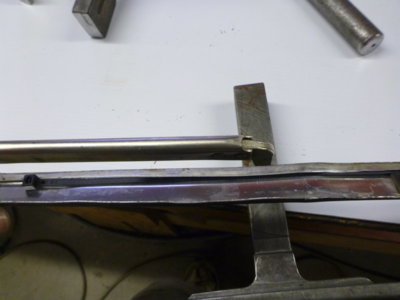
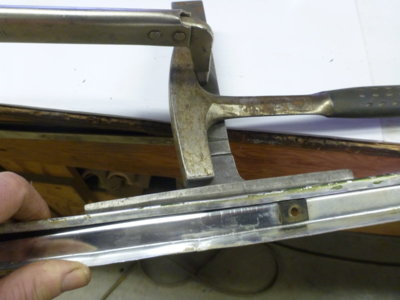
A plastic zip tie slipped in between the back surface of the panel face and the folded over edge. This is to keep it from going flat / cracking when straightening the panel.

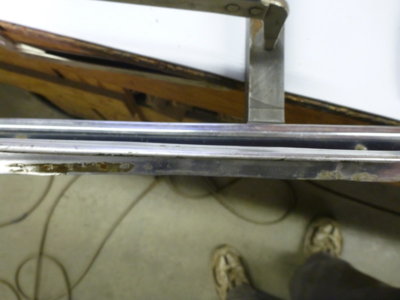
Zip tie is in behind this ugly "jog" in what should be a straight panel. Ready to hold the panel in place on a radius'd bucking bar and gently massage things straight.

Almost there and zip tie is still in there.

It's pretty close to straight so I'll move on to the show face of the panel and flatten it before getting too carried away.

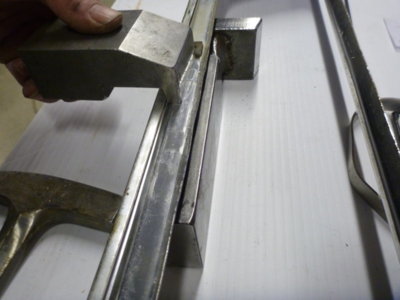
Long flat bar beneath and another shaped bar for the top that will clear the edge detail. Shaped bar held in place and the back tapped with the hammer. 2 hours was spent taking the majority of the jogs and wows out of the entire panel using the tools shown and some old fashion bending with bare hands. Still needs minor details fixed up and another screwed in place check fit on the car before stripping paint and getting everything polished out smooth. Then prep, tape and paint.


beerestoration2019 147.JPG beerestoration2019 151.JPG beerestoration2019 164.JPG beerestoration2019 152.JPG beerestoration2019 153.JPG beerestoration2019 159.JPG beerestoration2019 161.JPG beerestoration2019 162.JPG beerestoration2019 163.JPG beerestoration2019 168.JPG
 
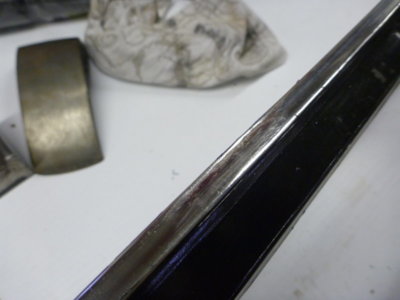
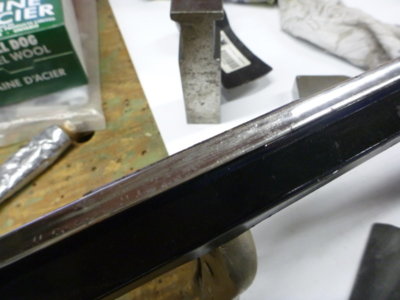
This was my old OE panel that I thought I'd do some experimenting on. It had a spot that I crudely filed some 30 years ago, that removed the edge and concave details. I forgot to get a shot before I started, I'd already done some edge tapping here.

First I hammered the upper edge to get a bit of a "bulb" going. You can see how deep a pocket there is from me filing out material 30 years ago.

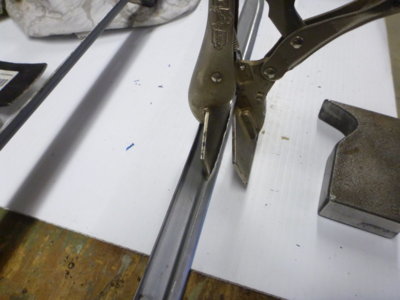
Pair of duckbill vise grips jammed in tight for a backing bar, after bending the flange up somewhat for access.

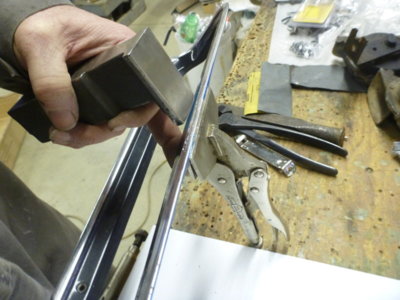
A rounded edge bucking bar swung lightly to put the concave shape back in somewhat.

Getting close to the original shape.

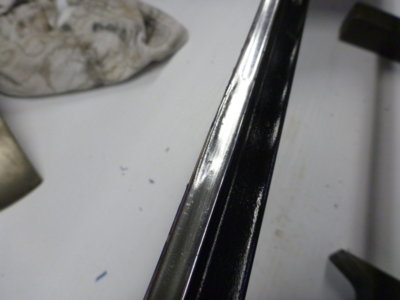
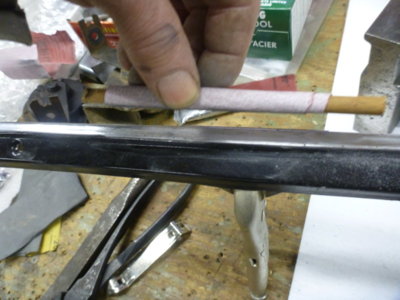
Should have dollied a bit more, but like I said this is a quick experiment. Sandpaper (150/400/800 then 1000) wrapped around a 1/4" dowel to sand the concave detail of the trim back into shape.

I quick cut and polish with rouge and I think I have this game figured out. That process took 15 minutes. If I'd spent 30 it would be perfect with a bit more sanding to remove that nick still showing. I now know I have a back up in this OE panel if my replacements restoration goes South on me. If that fails, there's a $3000US NOS tail panel on Ebay! (that I think looks no better than what I'm working on!)

beerestoration2019 170.JPG beerestoration2019 171.JPG beerestoration2019 173.JPG beerestoration2019 175.JPG beerestoration2019 176.JPG beerestoration2019 177.JPG beerestoration2019 178.JPG
 
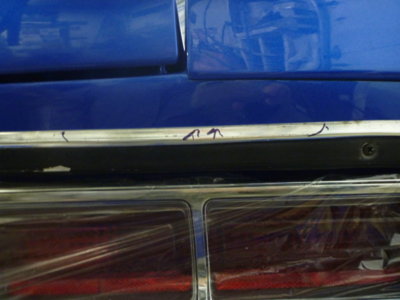
Tail panel screwed in place for a fit check after all the dolly and straightening work.

A couple spots not quite shaped right and marked for tweaking.

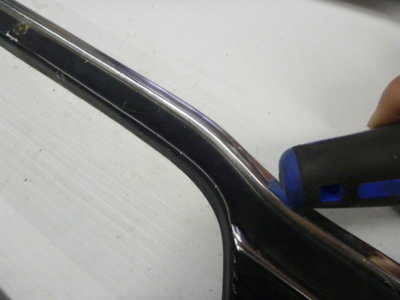
A couple of small dents pushed up.

And then a screw driver handles curved head used to smooth the area back out.

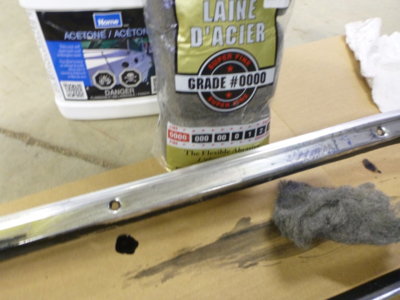
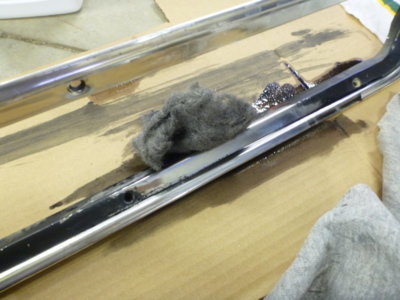
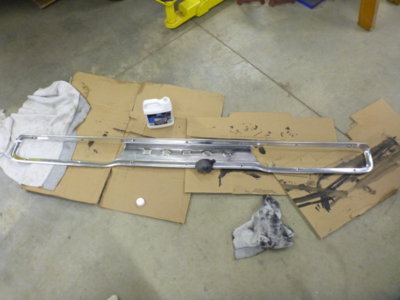
Acetone and 0000 steel wool to remove all the paint

Try to have lots of ventilation. I was stupid and forgot I have a fresh air pump and hood! 2 hours = good buzz.

Almost done. The corrugated area in the center and especially around the DODGE letters hard to get clean of all paint.

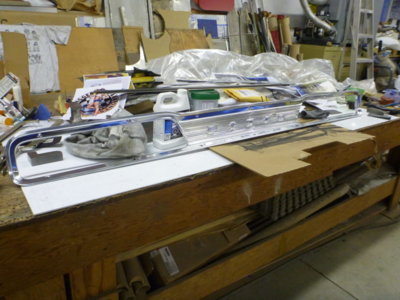
Ain't that purdy... only to repaint it after I smooth, blend and polish the outer perimeter and letters. 5 hours into this tail panel at this point.

beerestoration2019 185.JPG beerestoration2019 188.JPG beerestoration2019 192.JPG beerestoration2019 191.JPG beerestoration2019 194.JPG beerestoration2019 196.JPG beerestoration2019 199.JPG beerestoration2019 204.JPG
 
Last edited:
There is a lot of hours of work right there!
I just went past the 900 hour mark on my end showard. I keep track of actual work time, mainly as a habit of how I do customer work. Not time IN the shop, time actually working on the car. If I added research time the count would be triple. Body and paint was ~ 1200 hours on top of that.

A reminder for those following my thread, the first 30+ pages start here... http://www.dodgecharger.com/forum/index.php/topic,121731.0.html
 
Last edited:
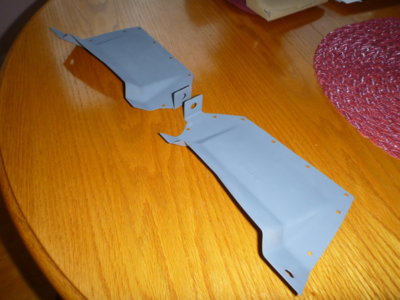
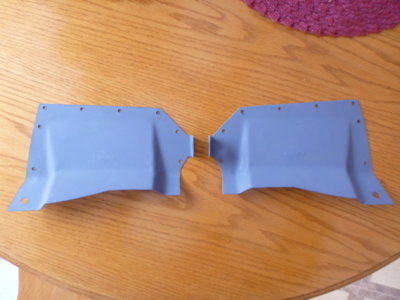
Thanks to @moparsaver for directing me to this wonderful find !! Used, blasted and primed and they look brand new. Couldn't have been on a car for long that's for sure. Thanks to the Ebay seller using the Global shipping system they ended up costing double, but it is what is is, another 150 bucks in the car. WSL05 and WSR05, headlight shields, for the part number collectors.

beerestoration2019 208.JPG beerestoration2019 209.JPG
 
Thanks to @moparsaver for directing me to this wonderful find !! Used, blasted and primed and they look brand new. Couldn't have been on a car for long that's for sure. Thanks to the Ebay seller using the Global shipping system they ended up costing double, but it is what is is, another 150 bucks in the car. WSL05 and WSR05, headlight shields, for the part number collectors.

View attachment 702167 View attachment 702169
wayne where do these shields go,how do they attach to headlight area?
 
They go at the front top of the fenders, as I showed earlier on with the rubber seals and nothing to attach them to. Now I have the steel shields, the rubbers attach via the holes.

beerestoration2019 215.JPG
 
This one has me baffled, so more research required ...or if someone could help me out! Both the ones I bought and my OE are factory blacked out. One is blacked out right out to the center grill and my OE makes more sense only blacked out in the fender area with the rest polished to blend into the mating area of the center sections top edge.
View attachment 700405
I studied few survivor Bees some time ago regarding the grille and bezel paint scheme. I came to the conclusion that they were painted by the factory like the ones you have installed in this picture.
 
I studied few survivor Bees some time ago regarding the grille and bezel paint scheme. I came to the conclusion that they were painted by the factory like the ones you have installed in this picture.
Paint fully across the headlight ring top and then the unblended full step back and just across the attach lip on the center section??
 
Auto Transport Service
Back
Top