• When you click on links to various merchants on this site and make a purchase, this can result in this site earning a commission. Affiliate programs and affiliations include, but are not limited to, the eBay Partner Network.

1969 Dodge Super Bee Coupe Restoration

The one I put in is 128. I have 118, 19 and 39 as spares ! LOL Let me look for a picture.. or I'll go get one shortly. I keep procrastinating about making the 30 foot walk to the shop in -28C..

128 that I installed.
beerestorationfall2018 1296.JPG


118 spare.
beerestorationfall2018 1303.JPG


My OE 19
beerestorationfall2018 1347.JPG
 
Last edited:
The one I put in is 128. I have 118, 19 and 39 as spares ! LOL Let me look for a picture.. or I'll go get one shortly. I keep procrastinating about making the 30 foot walk to the shop in -28C..
No rush Wayne for that frigid walk....the date and the logo are the clarifiers......
 
Here is the best pic I could find of the original rear glass.......Your logo style is the same as the one originally on my X.....My date was 108...
DSC01999.JPG
 
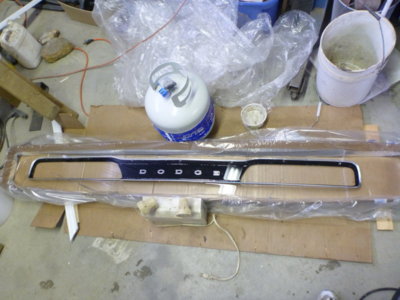
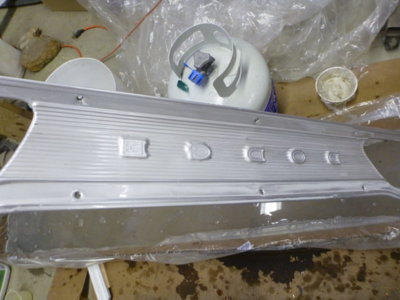
Soak box made from a propellor box and a roll of vapour barrier. If we're going to make hydrogen gas we may as well have some more flammables to help with the BOOM! (My OE panel shown, in just water... I only did the replacement in Lye).

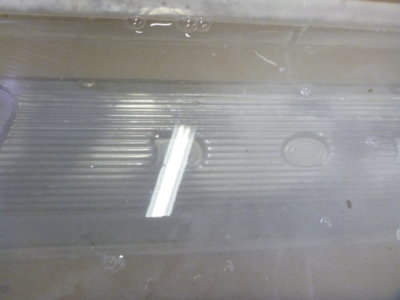
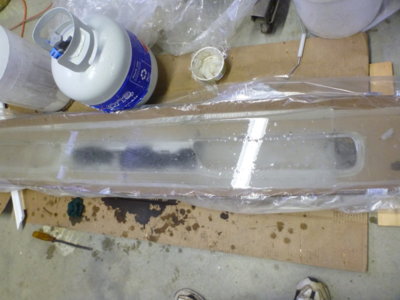
8 gallons of water and a volume measured 48 ounces of Lye crystals. You can see the gray and shiny spots as the anodize starts to come off. Only place I found Lye available was Home Hardware in the septic department. $30 for 3 kg.

Boil and bubble..

Almost there after 25 minutes. Still some anodizing to come off. A light scrub with green scotchbrite and back into the soup.

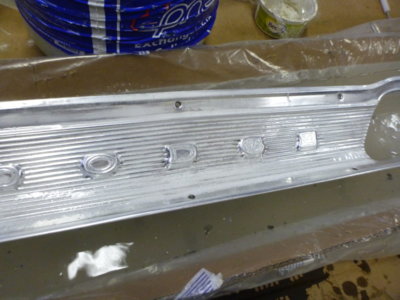
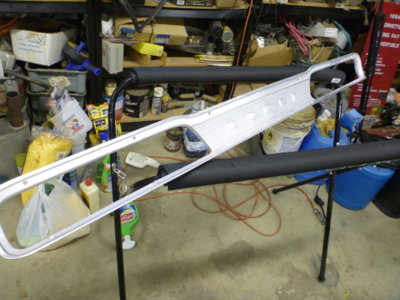
Nice and clean of all anodize.

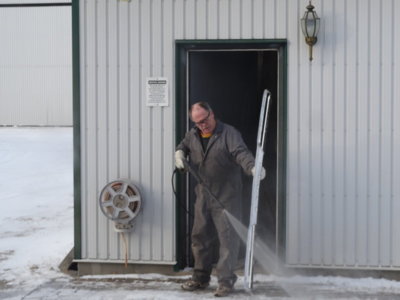
The wife caught the nut with the power washer from the kitchen window. -20C outside. Power washer not only rinsed, it took the blackish/gray sludge off from the process.

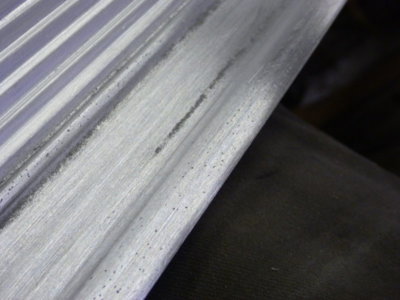
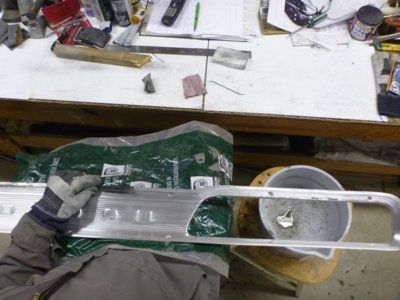
Ready for a LOT of nick removal, sanding and polishing. I ended up leaving it soaking for 45 minutes. I should have pulled it at about 35. The extra 10 minutes was when it really started to fizz. I should have known better and it added some minor pitting in places as it started to eat the aluminum.

beerestoration2019 258.JPG beerestoration2019 261.JPG beerestoration2019 270.JPG beerestoration2019 271.JPG beerestoration2019 279.JPG beerestoration2019powerwashtrim.JPG beerestoration2019 285.JPG
 
Last edited:
Soak box made from a propellor box and a roll of vapour barrier. If we're going to make hydrogen gas we may as well have some more flammables to help with the BOOM! (My OE panel shown, in just water... I only did the replacement in Lye).

8 gallons of water and a volume measured 48 ounces of Lye crystals. You can see the gray and shiny spots as the anodize starts to come off. Only place I found Lye available was Home Hardware in the septic department. $30 for 3 kg.

Boil and bubble..

Almost there after 25 minutes. Still some anodizing to come off. A light scrub with green scotchbrite and back into the soup.

Nice and clean of all anodize.

The wife caught the nut with the power washer from the kitchen window. -20C outside. Power washer not only rinsed, it took the blackish/gray sludge off from the process.

Ready for a LOT of nick removal, sanding and polishing. I ended up leaving it soaking for 45 minutes. I should have pulled it at about 35. The extra 10 minutes was when it really started to fizz. I should have known better and it added some minor pitting in places as it started to eat the aluminum.

View attachment 704717 View attachment 704718 View attachment 704719 View attachment 704720 View attachment 704721 View attachment 704722 View attachment 704723
Doing that work outside......in that weather...

Now that is a true Mopar guy:thumbsup:

Thanks for sharing the details of that process....
 
Man I must be getting old and slow... I remember as a teenager that I could restore a car over a weekend......... with a gallon of varasol and a can of Tremclad! :fool:
 
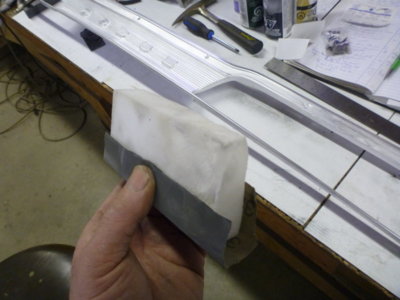
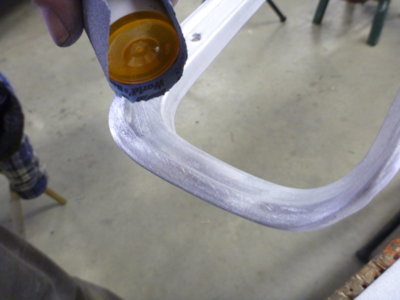
Mr Eraser foam block makes a good sanding block that will conform to the panel profiles.

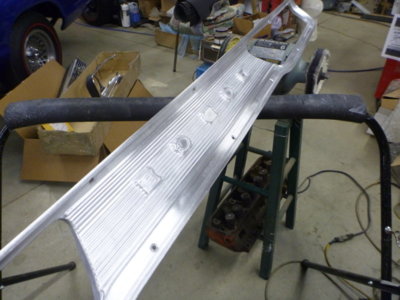
Looks like I'm wasting my time starting with 150. Coarse #60 it is. Just gotta be careful with only .040 thickness to start with.

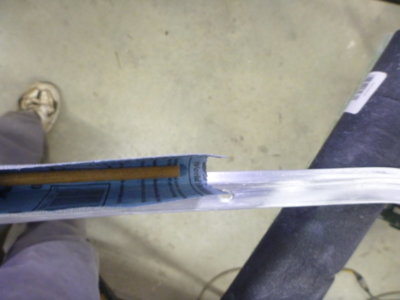
Dowel in the sandpaper for the tight concave areas.

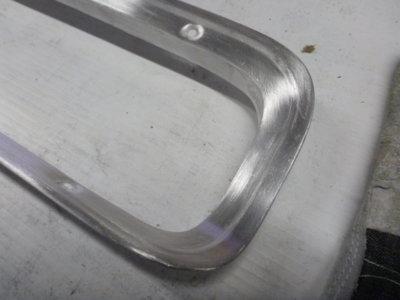
Honing stone works nice to return the sharp edge from profiled to flat sections.

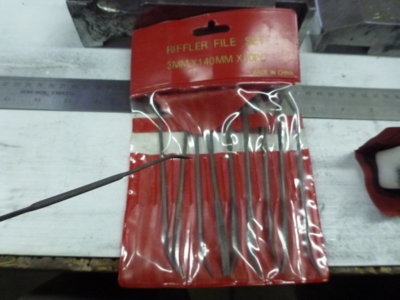
Riffler files. Don't start without a set!

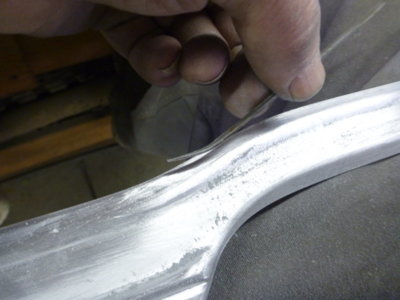
The riffler file allows you to quickly remove any dents you've pushed up, while maintaining the profile.

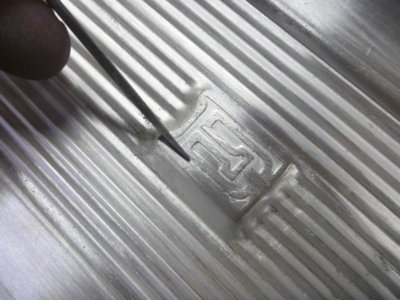
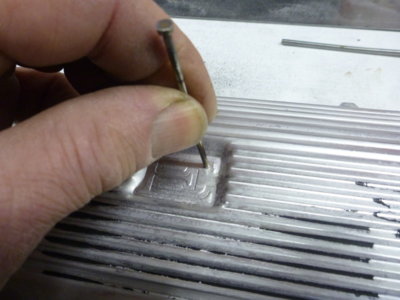
Small file being used to correct the detent area (that gets black paint) in the "E". Almost absent on this tail piece and my OE barely had it there, so an original pressing issue that I am correcting.

Pill bottle has correct profile for the end sections concave area. Easy to hold and works well.

That $3000 US NOS tail panel is starting to look good right about now! Pull up a bar stool and make yourself comfy as you'll be doing this for a LONG time!

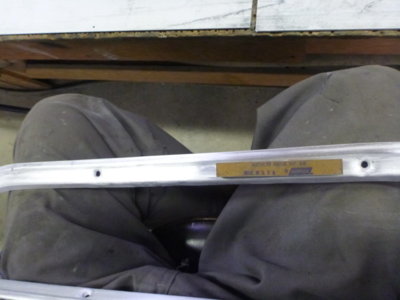
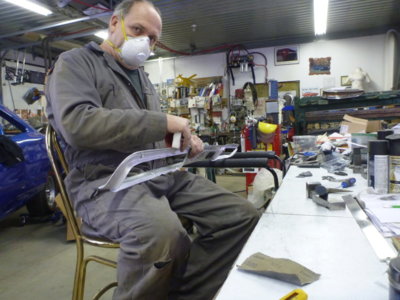
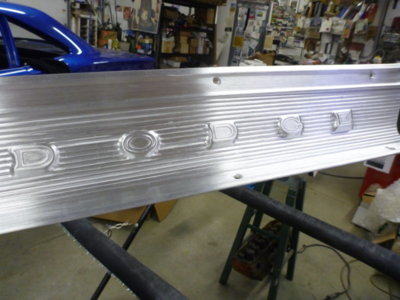
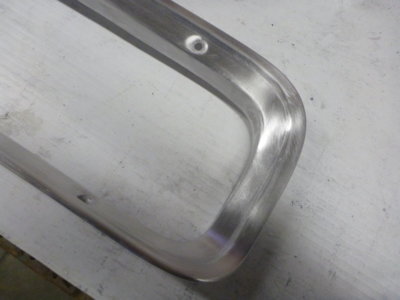
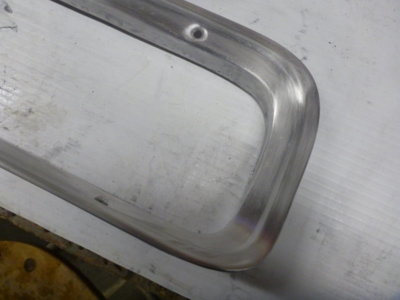
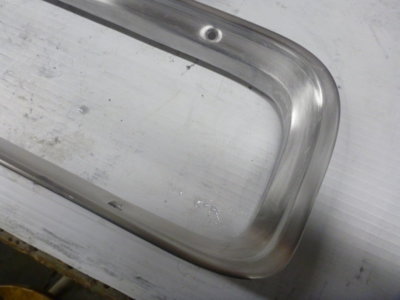
All pits removed, dents pushed up as I went and smooth. Todays work was 4 hours and 45 minutes of filing, minor dent clean up and sanding to this stage. 11 hours and 45 minutes to date on THIS tail panel for paint removal, dent removal, shape correction, anodize removal and todays work! Now you know why the NOS seller has a market at $3000 ! Still have to sand 320/400/800/1000/2000, cut and polish on the wheel, tape and paint...and try to wipe the DODGE clean without f'ng it up.

beerestoration2019 292.JPG beerestoration2019 294.JPG beerestoration2019 310.JPG beerestoration2019 304.JPG beerestoration2019 305.JPG beerestoration2019 307.JPG beerestoration2019 311.JPG beerestoration2019 308.JPG beerestoration2019 302.JPG beerestoration2019 318.JPG
 
Last edited:
What's sad is when this car is all done and at a show people will look at that panel and have no clue the amount of work in just that one piece. Outstanding work!:thumbsup:
 
Realized the E was not only missing the lower indent, they also missed pressing part of the end tip. Upside down on a block of wood and using an old ejector pin that fit the exact width to tap in the shape.

About an hour and a half just spent on letters with the pin and riffler files. Sanding out pits on the letters = less indent for paint and some needed to be added, especially on the D's.

Sanded to 150 dry.

320 dry.

So it doesn't look like you pissed your pants wet sanding with 400 and up.

400 then 800 wet done, now onto 1000.

1000 and then 2000 wet done. (note outer profile is the "show" inner gets painted black)

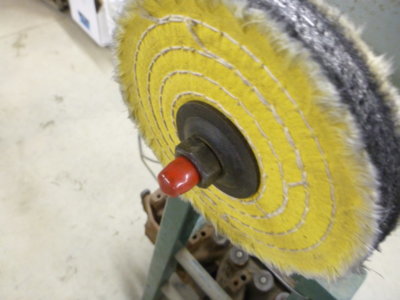
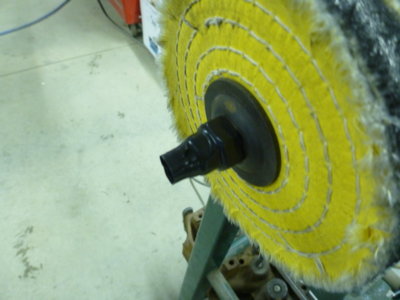
Someone elses restoration comments had me remember to do this! Rubber cap on threads of the polisher.

Then electrical tape. On the very first buff I hit it and DIDN'T have to start over with sanding!!

A quick 5 minute hit with green on the one wheel and rouge on the softer wheel just to see how it's going to come out. Still a few little pits, but better than it's EVER looked on my car. Today adds 5 more hours to this tail panel ! Still needs the remainder cut and polished and then taped and painted.

beerestoration2019 324.JPG beerestoration2019 328.JPG beerestoration2019 330.JPG beerestoration2019 331.JPG beerestoration2019 334.JPG beerestoration2019 336.JPG beerestoration2019 338.JPG beerestoration2019 339.JPG beerestoration2019 340.JPG beerestoration2019 347.JPG
 
Last edited:
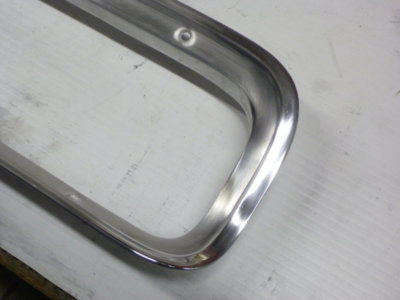
Tail panel power polished on the harder wheel with green compound.

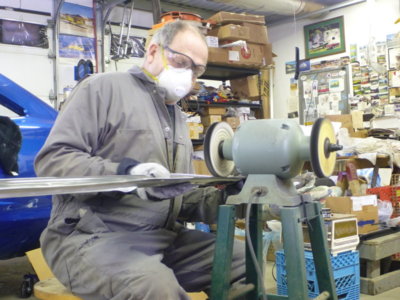
You'll wanna sit down for this and hold on TIGHT. No way I could keep 6' running through the wheel standing up. Lost some gray hair through the day, all the black **** flying off the wheel is on my head!

Power polished with Rouge on the softer wheel and then realized I had forgot to do the upper and lower corrugations as they don't get paint.

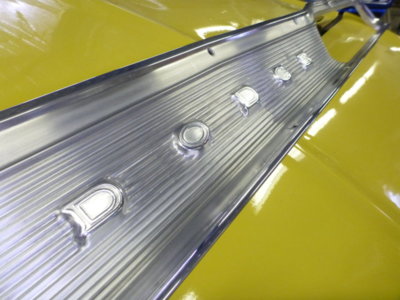
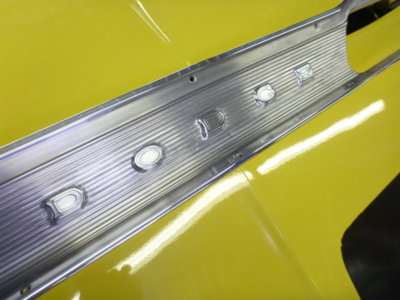
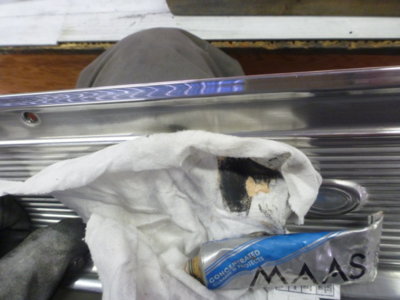
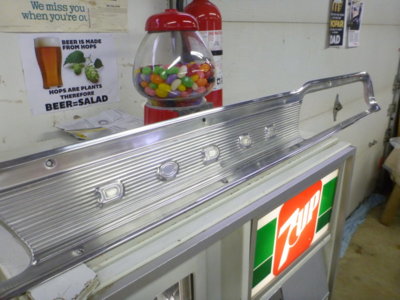
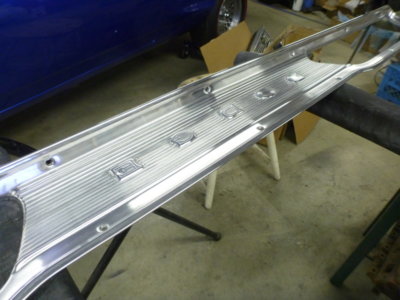
Hand polish with MAAS. You can see both the ceiling corrugations and the blue of my car reflecting.

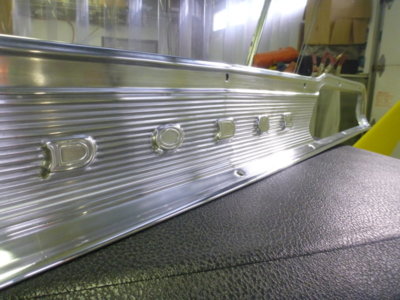
Trying to get a good shot and almost impossible. Looks like chrome in person.

Another try for a good shot here, with Jellybean! Is it perfect.. No.. is it better than when it came down the Lynch Road assembly line.. probably.

Rubbed down with corn starch and then almost an hour to get it cleaned up, to no black on cloth, with wax and grease remover.

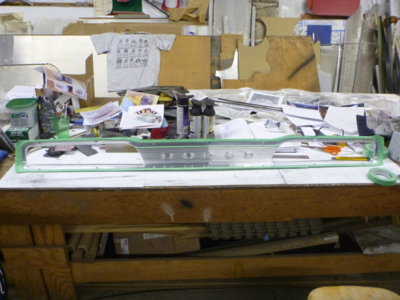
Everything taped off except the lower corrugation. Enough for today. Wish I could find the daily drinker with steady hands,from the paint line, that would have just wiped the details clean after being painted! Ma Mopar sure didn't tape them off... 21 hours - 45 minutes to this stage!

beerestoration2019 364.JPG beerestoration2019 366.JPG beerestoration2019 370.JPG beerestoration2019 392.JPG beerestoration2019 410.JPG beerestoration2019 412.JPG beerestoration2019 415.JPG beerestoration2019 426.JPG
 
Last edited:
Tail panel power polished on the harder wheel with green compound.

You'll wanna sit down for this and hold on TIGHT. No way I could keep 6' running through the wheel standing up. Lost some gray hair through the day, all the black **** flying off the wheel is on my head!

Power polished with Rouge on the softer wheel and then realized I had forgot to do the upper and lower corrugations as they don't get paint.

Hand polish with MAAS. You can see both the ceiling corrugations and the blue of my car reflecting.

Trying to get a good shot and almost impossible. Looks like chrome in person.

Another try for a good shot here, with Jellybean! Is it perfect.. No.. is it better than when it came down the Lynch Road assembly line.. probably.


Rubbed down with corn starch and then almost an hour to get it cleaned up, to no black on cloth, with wax and grease remover.

Everything taped off except the lower corrugation. Enough for today. Wish I could find the daily drinker with steady hands,from the paint line, that would have just wiped the details clean after being painted! Ma Mopar sure didn't tape them off... 21 hours - 45 minutes to this stage!

View attachment 706386 View attachment 706387 View attachment 706388 View attachment 706390 View attachment 706391 View attachment 706392 View attachment 706393 View attachment 706394
outstanding work,better than mopar made back in the day.
 
They're all still there! Been banging aluminum for 26 years, so while its something different than normal it's not "new". Either are my old arthritic hands!
 
They're all still there! Been banging aluminum for 26 years, so while its something different than normal it's not "new". Either are my old arthritic hands!

You don't have to tell me about that. I'm dealing with RA and doing the sanding and polish work on my '62, really flared up all my joints. Gets me in the back also standing or sitting doing that kind of work. But in the end, it's worth it!
 
Tail panel power polished on the harder wheel with green compound.

You'll wanna sit down for this and hold on TIGHT. No way I could keep 6' running through the wheel standing up. Lost some gray hair through the day, all the black **** flying off the wheel is on my head!

Power polished with Rouge on the softer wheel and then realized I had forgot to do the upper and lower corrugations as they don't get paint.

Hand polish with MAAS. You can see both the ceiling corrugations and the blue of my car reflecting.

Trying to get a good shot and almost impossible. Looks like chrome in person.

Another try for a good shot here, with Jellybean! Is it perfect.. No.. is it better than when it came down the Lynch Road assembly line.. probably.

Rubbed down with corn starch and then almost an hour to get it cleaned up, to no black on cloth, with wax and grease remover.

Everything taped off except the lower corrugation. Enough for today. Wish I could find the daily drinker with steady hands,from the paint line, that would have just wiped the details clean after being painted! Ma Mopar sure didn't tape them off... 21 hours - 45 minutes to this stage!

View attachment 706386 View attachment 706387 View attachment 706388 View attachment 706390 View attachment 706391 View attachment 706392 View attachment 706393 View attachment 706394
Wayne.........Outstanding work!.......This is real restoration work at its finest!
 
Thanks Justin.. I really want to get back to the varsol and the tremclad kind though for a break! :praying:

Paint tomorrow, I did a test swipe this afternoon on my OE tail panel about 2 hours after paint and worked well. Hopefully the real deal goes as good!

BTW... Jennifer's "pet" name was Jellybean, why Leah put the machine there for me!
 
I just got caught back up on your thread. Looks like your making some good progress. Trim work is tedious but when it’s done and you did it, it’s very rewarding. Nice job!

I have good luck with PPGs trim black, SXA9000, that you can get in an aerosol. I’ve used SEM but never noticed what you were running into. Your SEM can looks different than what we get here in PA. Maybe they have some VOC laws where you are and you get some other formula. Our SEM cost <$20USD for a can here.

Nothing matches original windows like original windows. Front glass is about the only think you can get that fits and doesn’t vary too much between suppliers. It was all highly produced from good templates. They made and replaced a whole lot more front glass than back.

What are you doing with that 77 truck grill? Polish that bad boy up and send it my way.
 
The SEM trim I have IS USA paint, as I bought it through Aircraft Spruce, one of my regular parts suppliers.

The '77 grill belongs to this.... chopped 6", six sections. ( the things you do when the wife has visitors in the house you don't like and you're in the shop with a bottle of Captain Morgans...)
beepics 020.JPG
beepics 022.JPG
 
Nothing matches original windows like original windows. Front glass is about the only think you can get that fits and doesn’t vary too much between suppliers. It was all highly produced from good templates. They made and replaced a whole lot more front glass than back
Have you used glass from ECS?......... It matched my original glass and I also had zero fitment issues......
 
The SEM trim I have IS USA paint, as I bought it through Aircraft Spruce, one of my regular parts suppliers.

The '77 grill belongs to this.... chopped 6", six sections. ( the things you do when the wife has visitors in the house you don't like and you're in the shop with a bottle of Captain Morgans...)
View attachment 706448 View attachment 706449
Lol....I can relate to the visitor and drink part....but I have never killed time doing that....Thats some serious "visitor" time....

I will say I love the look of that!
 
Auto Transport Service
Back
Top