• When you click on links to various merchants on this site and make a purchase, this can result in this site earning a commission. Affiliate programs and affiliations include, but are not limited to, the eBay Partner Network.

1950 Dodge Panel Van (My Long-Term project that needs to be completed!!!)

My "new" intake is off a truck and will work with my new timing cover and water pump to re-locate the water outlet to the appropriate side for flow with my cross-flow aluminum radiator:

20181113-075808.jpg


It'll look like this when clean:
Intake-06-08-RAM.jpg


Compared to the car intake:
Intake-06-08-CAR.jpg


Car water pump:
Car-Water-Pump.jpg


Car water pump & timing cover:
Timing-Cover-Car.jpg


Truck water pump:
Truck-Water-Pump.jpg


Truck water pump & timing cover:
Timing-Cover-Truck.jpg
 
I only had time to look and evaluate the setup last night. But it all needs evaluating. I came up with questions/observations that I need to answer now, though.

Will I be able to use the fuel rail from the Charger intake on the RAM intake - Or are the fuel connections the same so that I can use a RAM fuel rail? They look quite a bit alike, but the car fuel rail rail connector has to be longer because it has to go over taller runners. If the extra line will tuck nicely under the throttle body on the RAM intake, then I'm golden.

Charger Fuel Rail - Mopar P/N: 4591853AG
05-08-Charger-Fuel-Rail.jpg


RAM Fuel Rail - Mopar P/N: 53032712AE
04-08-RAM-Fuel-Rail.jpg


EGR-Tube-to-Intake-Location-Differences.jpg


Looking at the truck intake vs. the car intake, I realized that the EGR goes to an entirely different location. So, it appears I have a couple different options...

Option1: Continue using the EGR by purchasing the correct EGR tube for a truck.
or
Option 2: Delete the EGR. (Actually, this is a third reason to delete the EGR. First reason was the fact that my full length headers will need to be modified to supply the EGR with exhaust to work. Second reason is the idea that there is a "tick" that appears when you use a cold air intake and retain the EGR. It has been stated and verified by others that the tick disappears when you delete the EGR)​

Pretty sure I'm going to remove the EGR. But this is another addition to the list of things I need to "adjust" in the ECU.


20181113-195704.jpg

Another observation is that I don't seem to have a connector to attach to the green connector on the ECU. Hmm... Am I missing something or is there really nothing that plugs into the Green position?


Will I need to buy a new Alternator, A/C Compressor and Power Steering Pump by going to the truck timing cover and water pump?
Accessory-Comparisons.jpg


REMY 12667 - Charger 160Amp Alternator
REMY-12667-Alternator.jpg


REMY 12563 - RAM 160Amp Alternator - Probably end up going with the RAM Alternator since it will bolt directly to the truck setup. Shouldn't be any different internally. Hoping not, anyway.
REMY-12563-Alternator.jpg


Denso 471-0810 - Charger A/C Compressor
Denso-471-0810.jpg


Denso 471-0398 - RAM A/C Compressor - Probably end up going with the RAM Compressor since it will bolt directly to the truck setup. But I really hate to see what it will mean for my A/C lines. Maybe everything will work great. ...but maybe not. Time will tell.
Denso-471-0398.jpg


A1 Cardone 215445 - Charger Power Steering Pump. I want to use the Charger Power Steering pump because it's meant to go hand in hand with the Charger rack and pinion. Also, because it's got a nifty remote reservoir that will work well with my engine bay.
CARDONE-215445.jpg


A1 Cardone 20269 - RAM Power Steering Pump
CARDONE-20269.jpg
 
Real quick video update... I've just begun to mock up some of the dash components. What do you think about me not running a vent on the door side of the instrument cluster? "Big deal" or "no biggie."

 
Dashboard update.

I think I may have found an instrument cluster that will allow enough space for proper HVAC venting. This one comes from a 2006/2007 Jeep Grand Cherokee with a 4.7L V8 (Mopar P/N: 56054009AH) and will serve as a cheap proxy for me to design the rest of the dash. The one I'd like to get, assuming I can get the electrical to work, is a Mopar P/N: 56054012AH. That one a chrome ring around each gauge and is specifically for the 5.7L Hemi. But, just because it's for the 5.7L Hemi, does not guarantee it will wire up to the Charger/300C wiring harness. The plugs on the back are completely different, so I am now in the market for a set of pinouts for the 06/07 Jeep Grand Cherokee (WK) so I can re-pin the connectors or make adapters.

Unfortunately, I can't really do any more design work on the rest of the dash until I make sure the cluster I found will actually work. If I can't make it work, I'll have to start over with my backup plan... An incomplete set of Stewart Warner gauges I've had stored in a cabinet. The tach was missing when I picked the set up from a swap meet years ago.

Let's talk vents for a second... I've included a few pictures of the vents I'm going to use in this truck. The vents on the left side of the driver and the right side of the passenger came from a Dodge Caliber. I literally cut the dash apart in the junkyard so I could have the entire mount along with the contoured portion of the surrounding plastic. The vents in the center of the dash are from a Jeep Patriot and match the ones on the sides of the dash. I love the way these things look as well as the way they work. I picked up all four vents along with the Patriot radio bezel (two trips the the junkyard because I didn't have the hackzall with me the first day) for a combined total of $40. Here's the kicker... If you go on eBay, each of these four vents goes for $95 from Mopar! And, as it turns out, these vents are used in several different vehicles in the Dodge/Jeep lineup.

Here's the video update:


The cluster I snagged from the junkyard yesterday (actually eBay pic) (Mopar P/N: 56054009AH):
06-Jeep-Grand-Cherokee-Instrument-Cluster3.jpg


The cluster I would like to have (Mopar P/N: 56054012AH):
06-Jeep-Grand-Cherokee-Instrument-Cluster1.jpg


The connections on the back of the cluster I'd like to use:
06-Jeep-Grand-Cherokee-Instrument-Cluster2.jpg


The connections on the back of the Charger cluster (notice Not Even One of the connections is the same as on the other cluster):
06-Charger-Cluster-Back1.jpg


My Backup - just waiting in the wings gauge set:
20190214-072722.jpg

20190214-072710.jpg


A few pictures of the HVAC vents I'll be using:
2011-Caliber-Dash-Vent2.jpg

2011-Caliber-Dash-Vent.jpg

700-19-1.jpg

GOPR7894.jpg

GOPR7893.jpg

Jeep-Vent-On-e-Bay.jpg

Jeep-Air-Vent2.jpg

Jeep-Air-Vent1.jpg
 
Working on identifying and (hopefully) reconciling the wiring differences between the '06/'07/'08 Jeep Grand Cherokee & '06 Charger instrument clusters...

20190216-082905.jpg
 
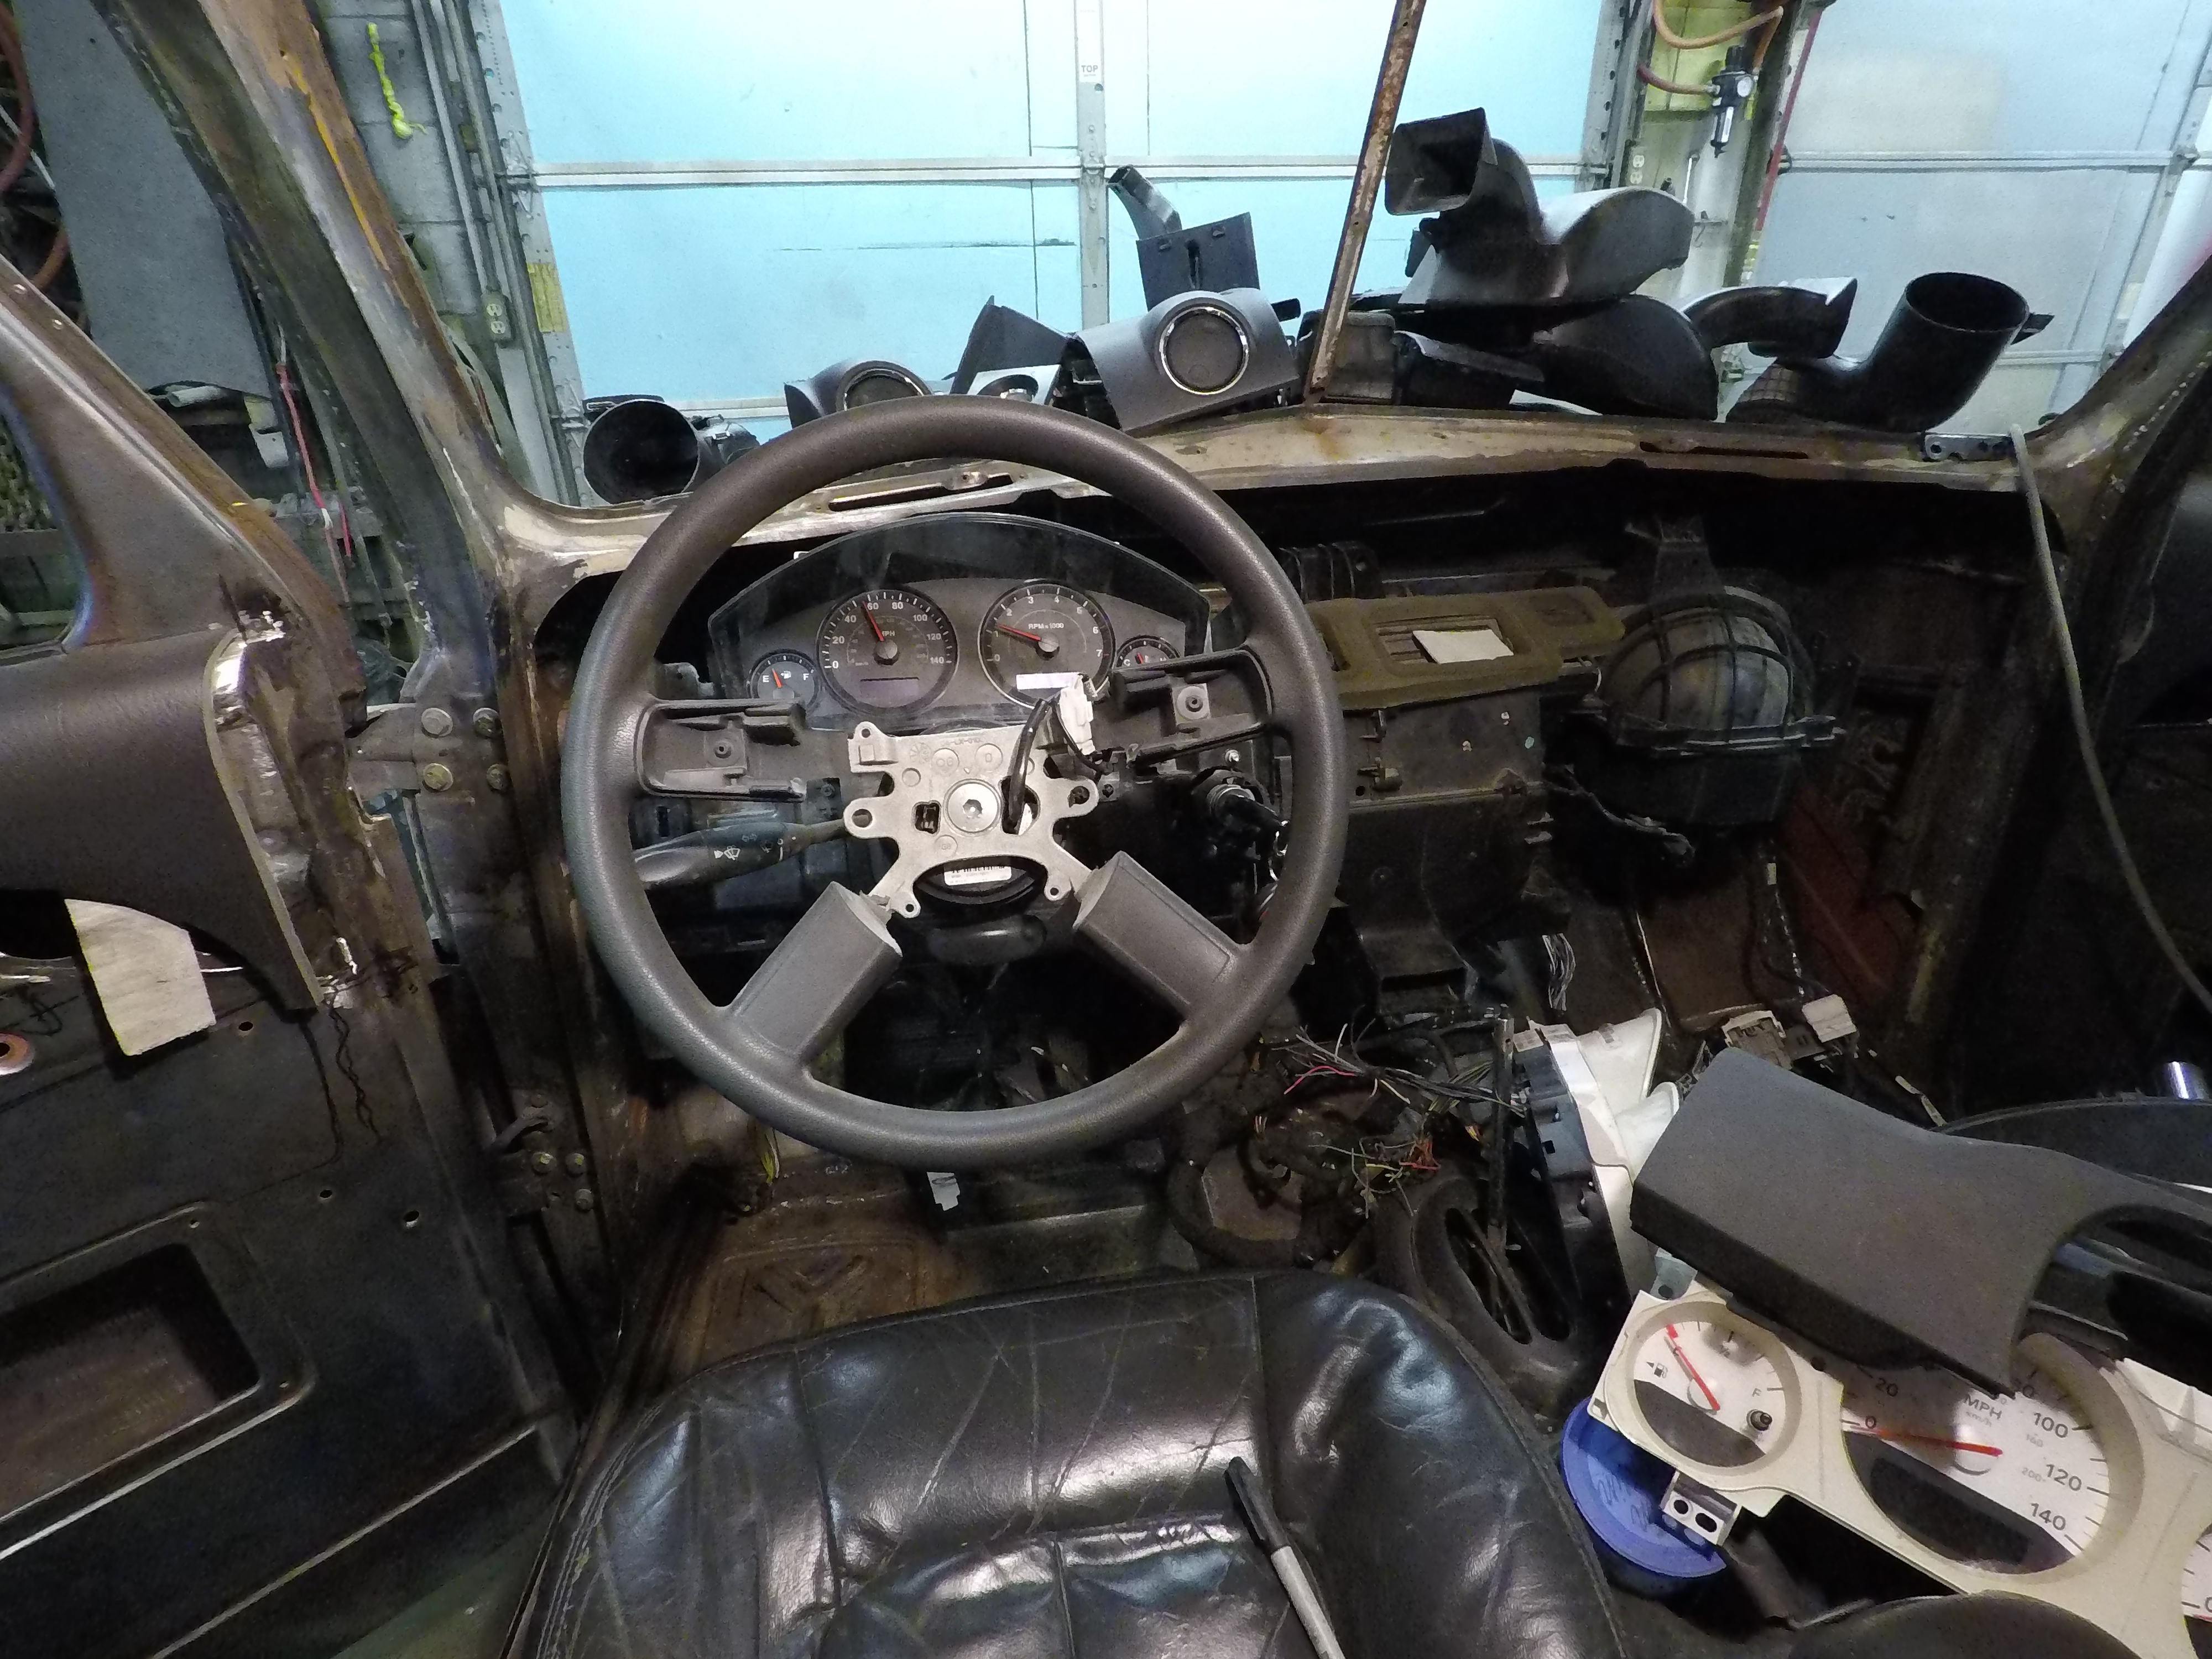
I've come to the conclusion that the '06 Charger wiring was not engineered at the same time as the '06 Jeep Grand Cherokee. Some of the wiring is obviously the same, but there are things that make me want to take a step back.


Here are some of the highlights...


1. The Charger cluster is looking for input from both fuel pumps. I am still using the Charger (saddle bag type) fuel tank, so I will still have two pumps. Does the cluster do more than simply average the two levels and present the output on the gauge? If so, then, I know I can just pick of the two wires and use it to feed the Grand Cherokee (GC) fuel gauge. My worry is that the cluster may actually have some "logic" to turn one pump on or off based on how much fuel is in that side of the tank.


2. The cluster in both these donor vehicles seems to be hub for all the power windows and power locks on the vehicle. So, it's as if the cluster takes the input from the door switches and actually drives the circuitry that actuates door locks and windows. However, there are differences in how they work. The Charger splits out the the "passenger door lock switch return" from the "driver door lock switch return". I am pretty confident I can safely pick one of these to use and it will work. Similarly, the Charger has separate pinouts for the "Door lock driver left doors" and "Door lock driver right doors" while the GC simply has a pinout labeled "door lock relay control." This is actually another difference between the two clusters... While the Charger lists "... driver" pinouts for the door lock and unlock functions, the GC lists "... relay control" pinouts. Presumably (I need to look closer at the connecting wiring schematics to confirm), the GC uses more relays to control these functions than the Charger does.


3. The Charger cluster takes input from the ignition to see if the key is inserted. But the GC cluster doesn't care. The GC sends the "key in sense" info to the steering control module, of all things. This may not be a big deal... don't know yet.


4. Here's a fun one... The GC cluster has no pinout for the "traction control switch sense" What I'm interpreting here is that the Charger cluster tells the canbus system if I want to shut off the traction control system. Um... I always want the traction control system shut off. I need this input to work.


There are other differences too, but nothing insurmountable.

Here's my real question... Can the canbus system handle two gauge clusters plugged in at the same time? Didn't see that coming. Did you?
1f609.png
;) I can make all kinds of changes to the wiring... Or, I could remove the dials and extra plastics from the Charger cluster and tuck it in the dash to act as a module to handle the power door locks, power windows, heated seats, interior lighting, etc. Then, I would simply hook the power, illumination, door ajar sense wires, ground and canbus wires to the GC cluster and put it in place. But would it work???


I know other people have used different instrument Dodge/Chrysler/Jeep clusters for their builds... Anyone care to weigh in with helpful suggestions? Thank you everyone!


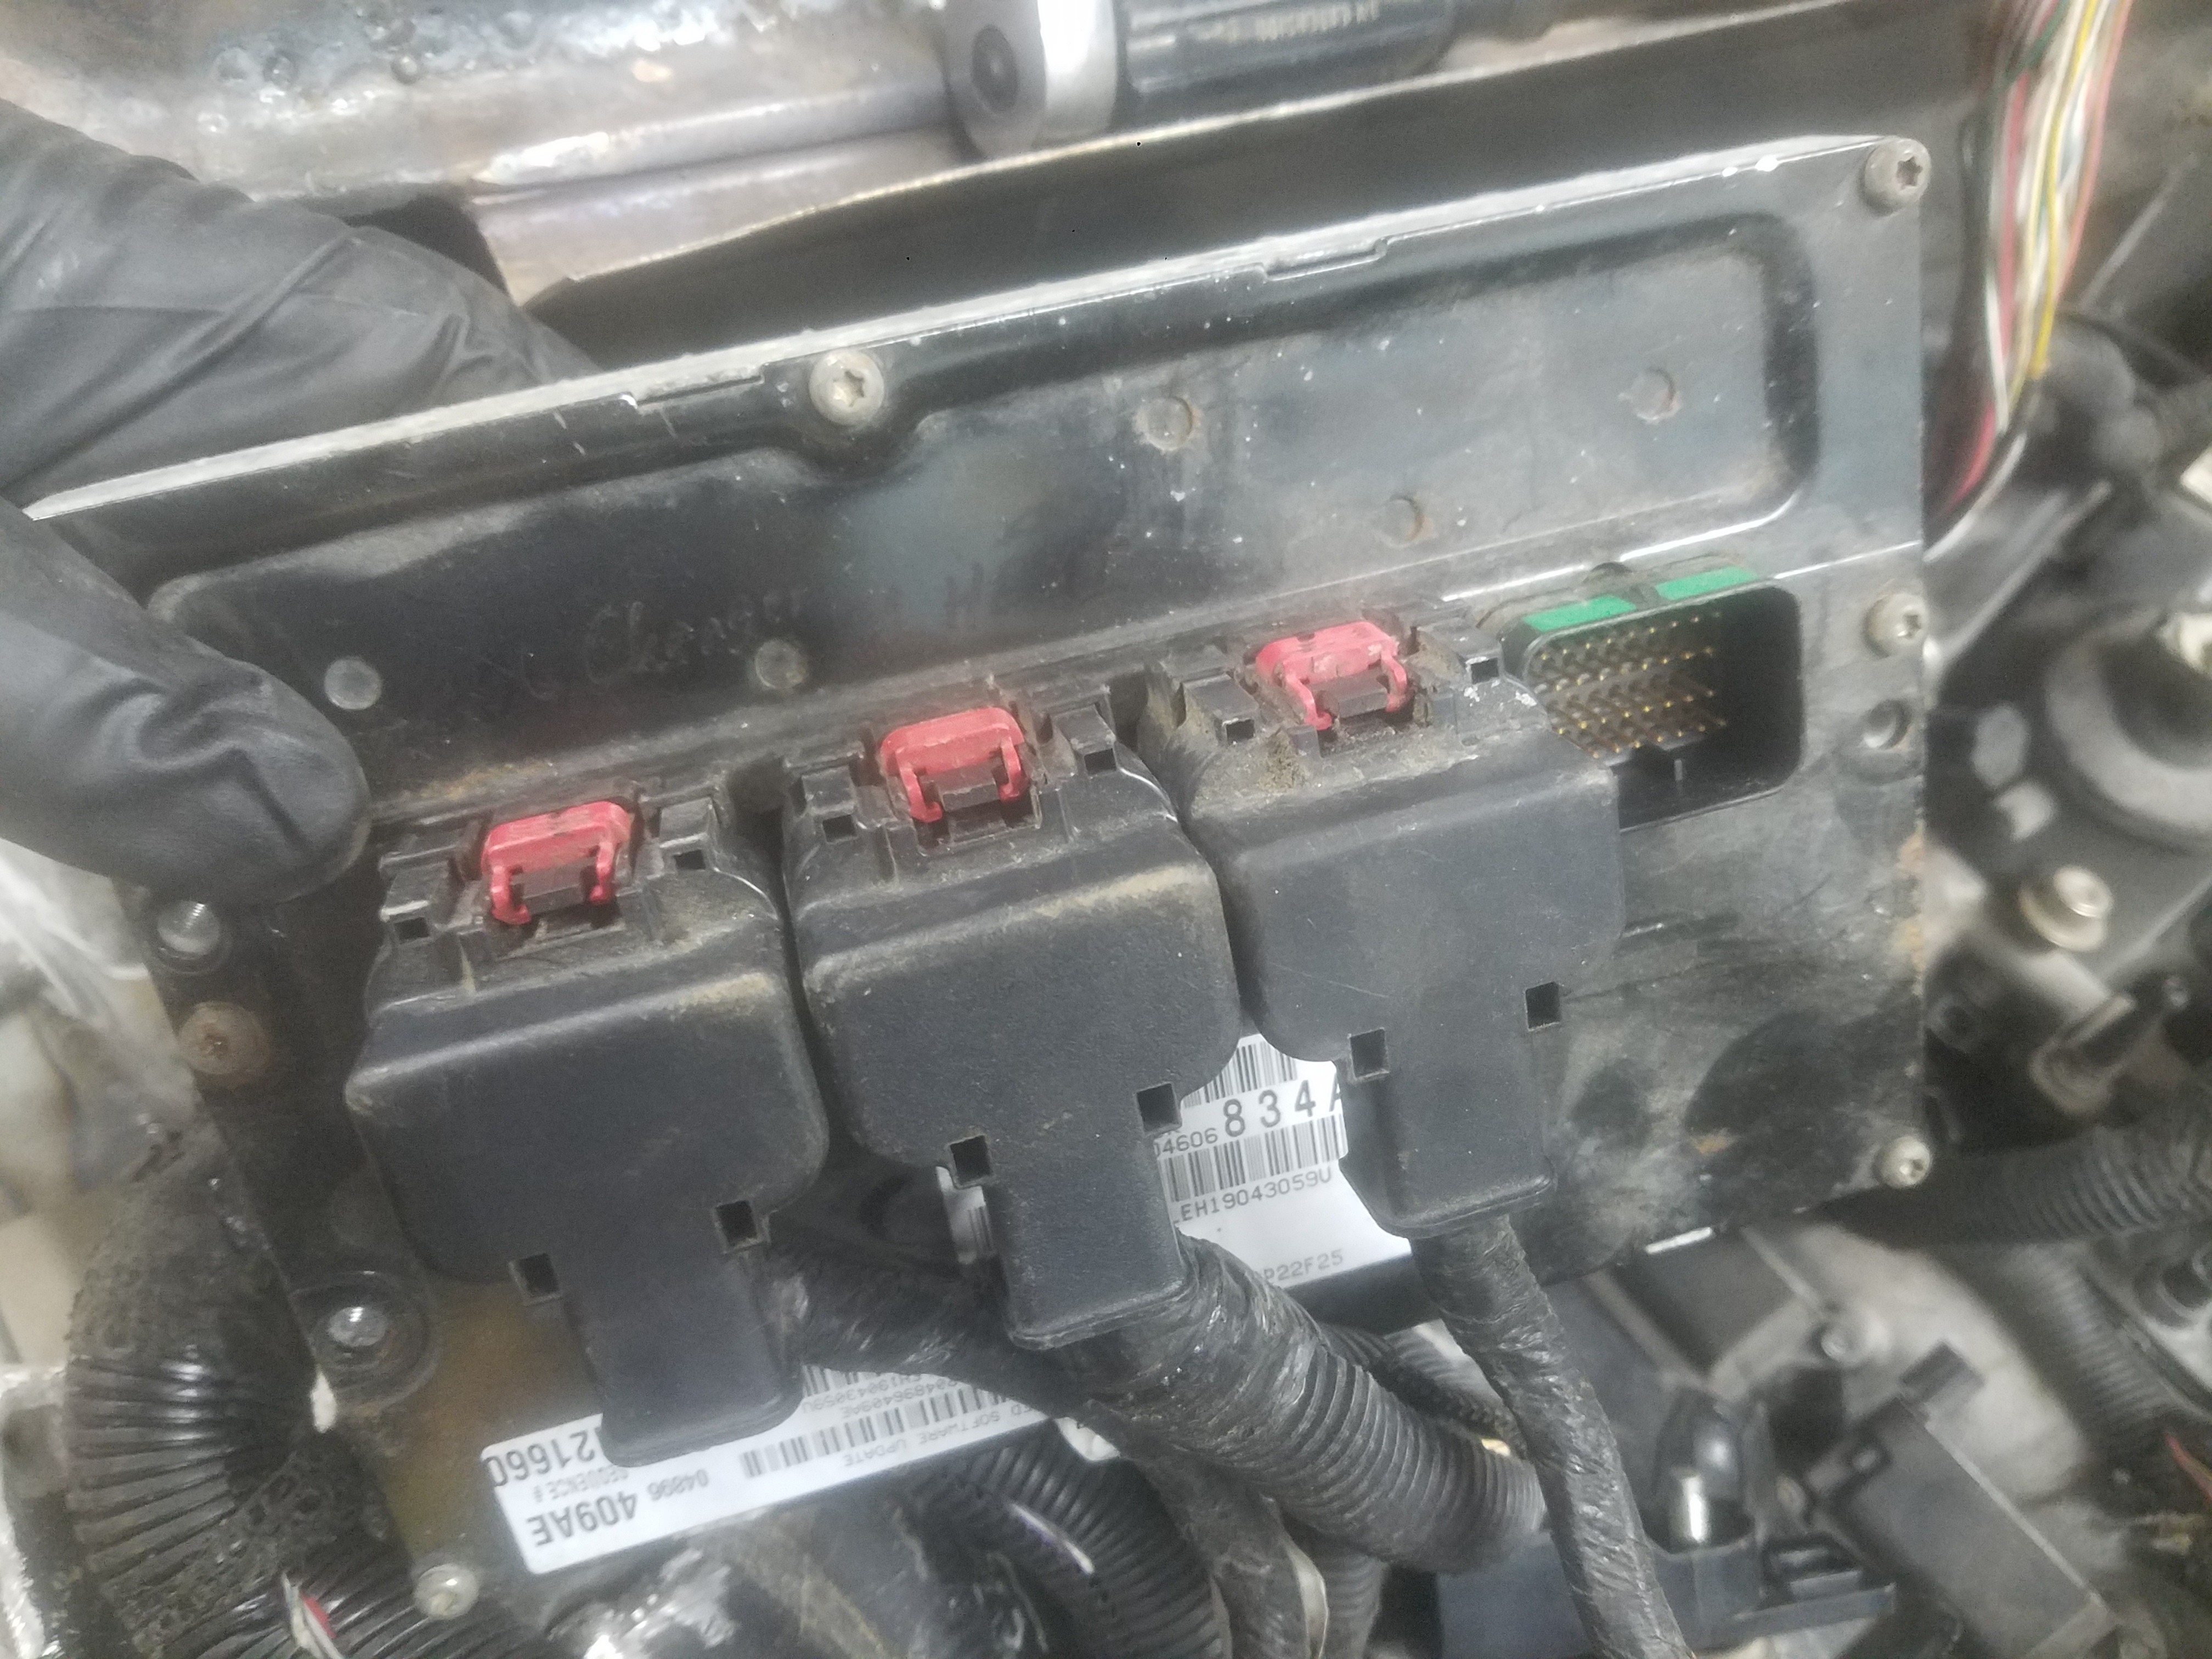
2005-2008 Jeep Grand Cherokee WK Instrument Panel Pinouts
Cluster-C1.jpg

Cluster-C2-C3.jpg


2005 - 2007 LX Platform Instrument Panel Pinouts
20190218-110226.jpg
 
Since it needs the cluster for CANBUS communications, you could have it hooked up but stashed out of sight and do your other setup in the dash. Thats what I did on the F1 that I put on the 04 Explorer chassis with most of the factory, 04, wiring and PCM.

IMG_0241.JPG IMG_0403.JPG IMG_0243.JPG IMG_0396.JPG
 
Since it needs the cluster for CANBUS communications, you could have it hooked up but stashed out of sight and do your other setup in the dash. Thats what I did on the F1 that I put on the 04 Explorer chassis with most of the factory, 04, wiring and PCM.

View attachment 724540 View attachment 724541 View attachment 724542 View attachment 724543

I wondered if that might work. These modern clusters are used as a wiring hub, of sorts, for everything from the power windows to the power locks and even the dome lights. It's a bit ridiculous, if you ask me. Love how your hid your electronics! Nicely done sir!
 
Quick (yeah right... I can't seem to stop talking!) status update video for the Panel Truck. This update is longer than I really wanted to make it, but I walk around the entire truck and talk about all kinds of things that I've been working on. From electrical (biggest part of video) to frankensteining the radio bezel, it's all in this video.

 
Since I clipped off so many wires that would not be needed for some systems, climate control/security/srs etc, it ended up with none of the 04 gauges working but at least the CANBUS communications worked. It charged, set no DTC's, ran fine, shifted etc. I feel I was very lucky. The wiring stuff took me like 3 months to do alone. Lots of back and forth with the factory manual looking at wiring diagrams, seeing who is hooked up with who, lengthening, shortening, eliminating, routing. But it did not go up in smoke!
 
I've made some slow progress on the electrical for the Panel Van. The headlight wiring is getting closer to being pronounced "done." All the electrical needs to be tidied up, so this isn't completely a waste, but it seems I've distracted myself from my goal of getting the dash done. But... How do you eat an elephant?? One bite at a time. Sometimes, I guess, one must jump from one leg to another to whittle it down a bit. Here's a video from Sunday:

 
Working on electrical for the Panel Van as I try to slim down the '06 Charger stock wiring harness that's feeding everything. I don't have the original marker lights that used to be mounted below the headlights. So I found these gems and am waiting with baited breath for them to show up in the mail. I'll post some pictures of them mounted in place as soon as I can. My hope is that they look updated, but not out of place when I get them mounted. Though these LED lights only have two wires, I'll wire them up with a resistor and some diodes so they'll light up with half the voltage for the running lights and full voltage for the turn signals.

Original Marker Lights (Internet pic since I don't have the originals any longer):
1950-Dodge-Lens-5.jpg


The intended replacement LED lights:
Front-Marker-Replacement-1.jpg

Front-Marker-Replacement-2.jpg

Front-Marker-Replacement-3.jpg


Alternative replacement LED':
Front-Marker-Replacement-1alt.jpg


I had also considered replacing the running lights entirely. These projectors w/LED halo combo lights caught my eye. But I decided I didn't like the idea of the fog light being so close to the headlight. Instead, I think it belongs closer to the ground and further out toward the corner. ...and since I need to rework the lower corners of the nose of the truck, I might revisit the idea of adding fogs then.
Projector-Fog-Lights-With-Halo3.jpg

Projector-Fog-Lights-With-Halo4.jpg

Projector-Fog-Lights-With-Halo1.jpg

Projector-Fog-Lights-With-Halo2.jpg


Since, for some reason, it's incredibly difficult to find this wiring diagram all drawn out... Here's the basic diagram for making any two wire (one +, one -) single-function LED into a dual function LED that will allow that LED to be on with half power for running lights and full power for turn signals / brake lights:
Turn-Signal-with-Diode-Running-Light-Circuit.jpg
 
I've been working on thinning out the wiring harness. Gone are the curtain airbag wires, the seat belt tensioner wires, most of the wiring for the rear doors and most of the wiring for the trunk. I need to research whether the seat belt tensioner wires need to simply be soldered together as to send a constant "sense" to the Airbag module or whether they matter at all. The wiring that used to control the windows on the rear doors now controls the exhaust cutouts, temporarily anyway since the exhaust isn't actually installed yet. But I removed the switches on the rear door harnesses and hotwired the cutouts directly to the wiring that will feed them. The wires that led to the door lock mechanism on the passenger side rear door of the car now start to head to the back door of the panel van. I need to extend them and include a lead for the license plate wire to feed the passenger side rear panel van door. I need to continue streamlining the front door harnesses to remove the power mirror wires. I do think I'll change the outside vent to only open & close via an additional power window switch. Not sure where I'll locate that switch... Maybe on the driver door or maybe on the center console. I think a single switch would look out of place on the dashboard. Just a thought at this point. I also mounted the horns.


Some of the wires I've removed from the harness:
Thinnning-the-Charger-Harness1.jpg


Horns:
Horns-Installed.jpg


Hotwired Exhaust cutouts:
Actuating-Exhaust-Cutouts-with-Window-Switches.jpg


What I'm contemplating right now is the connectors I'll need for the three doors that will be fed by electrical. I had not considered that I may want to change the OEM connectors until I tried to re-pin some of the connections last night. There is a very stubborn "removable" piece of plastic on each end of the plug that has proven impossible to remove in one piece. I have destroyed all my spares while trying to do the one for the back door. So... I'll be searching my "harness discard pile" for a set of three weather-tight connectors (I'm a stickler for consistency) with enough of the right sized pins to do everything I need to have done. Worst case scenario, I won't touch the ones for the front doors and just change out the one for the rear door.

So, on modern cars, the wires from the body to the doors pass through a rubber chase that bends into a cavity between the door and the door jamb. Not so on a 1950 Dodge Panel Van. Originally, the front doors didn't have electric feeding them and the rear driver side door had a wire just hanging out on the outside of the body that ran from a hole in the body to a hole in the door and fed the single brake light / license plate light. How am I going to rectify this? Well... A few years ago, I had a Jeep Wrangler Unlimited (back when I thought life was supposed to be lived via credit card - but I digress). Turns out, they have the same type of door jambs as the '50 van. They simply ran the wires out the door panel and through a fabric-wrapped loom to a plug hidden on the body side. I made mental note of it, then, as I said to myself "Well, Hot Dog! This is the ticket." I'll solve my door wiring dilemma the same way.


Original rear door wiring for the 1950 Dodge Panel Van:
Original-Tail-Lights.jpg


(Internet find) Charger door wiring connector:
OEM-Door-ocnnector.jpg


(Internet find) Jeep Wrangler JK door wiring connector:
jk-door-harness.jpg


(Internet find) Jeep Wrangler JK door wiring:
Quadratec-Adjustable-Replacement-Door-Check-Straps-Install.jpg


Video update (actually from Sunday):
 
See if you can get some of the parameters deleted out of the PCM. I had some of the F1's stuff deleted out by JBA in San Diego. Took out the security, SRS, ATC [climate control], cruise and some other non needed programs. I had them leave the engine stuff and emissions alone as I felt that would cause drivability issues, CEL's etc. Since the truck is a 50, no emissions needed but just left that alone.
 
See if you can get some of the parameters deleted out of the PCM. I had some of the F1's stuff deleted out by JBA in San Diego. Took out the security, SRS, ATC [climate control], cruise and some other non needed programs. I had them leave the engine stuff and emissions alone as I felt that would cause drivability issues, CEL's etc. Since the truck is a 50, no emissions needed but just left that alone.

Your comment is ironic because that "list of things to be deleted and tuned" has been on my mind recently. My intent is to keep most of the OEM systems intact for the novelty of it. So, my list is a little different.

· Remove EGR
· Remove second O2 sensors (Could leave these in, but no need for them)
· Remove MDS (Just because I hate the lag in pedal response)
· Remove SRS and Seatbelt monitoring
· Remove Emissions Vapor Canister (at back of vehicle was above passenger rear tire)
· Adjust tune for 1.75” Long Tube Headers
· Adjust tune for Crane Cam’s XFI 268H-13 (or the cheaper option is to get a used stock 6.1 cam)
· Adjust tune for Truck 5.7L Intake
· Keep ABS (nobody keeps it, but my intent is to keep it intact because I like the safety factor)
· Keep OEM climate control setup (works great, no reason to re-invent the wheel here)
· Keep security (including remote keyless entry as it works great)
· Keep cruise
 
Its funny, I did leave the ABS on the 50. If you can get stuff deleted, ask if the emissions stuff will give you drivability issues since you are using a newer setup than I did.
 
I have not yet made the circuitry to convert the single function front running lights to dual function to handle both running lights and turn signals. But, here are a few shots and a video of the way the lights look. You can see I have the LED's on the bottom of the headlights wired to handle both the running lights and turn signals already.


Front marker lights
Front-Marker-Lights-On.jpg

Front-Turn-Signals-Off.jpg


Front marker lights with turn signals in the headlights
Front-Turn-Signals-On.jpg


Here's the video... Though it may not be fully uploaded until later today.


And here's an issue I've been wrestling with for a while. I've been walking through my "no-start" issue little by little. Honestly, I need to start at one end of the engine harness and walk through each connection to ensure everything important is connected properly, but I haven't. I am hoping that there is something simple I missed. Regardless, the fuel pump comes on when I turn the key to the run position, but I get no crank when I turn the key to the start position. After a time goes by, the security light does come on. So, I may be looking at a security issue (but I really hope not). Other odd thing is what happens to the area of the Instrument Cluster that shows the selected gear. Take a look at these two pictures and you'll see what I'm seeing. ........brain fart. I don't have a shifter cable attached to the transmission. I wonder if the transmission is in gear and not in park. Wouldn't that be something! I'll check tonight.

Again, here's a video on the issue. Though it may not be fully uploaded until later today.
 
The harness thinning continues. ...and I now have a working Instrument Panel from a Jeep Grand Cherokee (at least, so far, anyway). The installation doesn't exactly have a "done" stamp yet, but the instrument panel lights up and registers things I think it should register. Who knows what all I've missed, but I AM putting a "done" stamp on the P.O.C. (Proof of Concept). All the dials and extra plastics have been removed from the Charger instrument cluster and it's tucked in to rest behind the Grand Cherokee instrument cluster. I kept the Charger cluster in place so it can handle the door locks, courtesy lamps, reading/rail lamps, window functions, fuel level, ignition switch sense, etc. But I wanted the Grand Cherokee instrument cluster for its looks and size. I still have a no-start issue, so I am yet unable to check for speedo and tach functions. But (again, unless I'm missing something) everything else works the way I have it hooked up.

From the Grand Cherokee harness, I hooked up:
Cluster-C1.jpg

Cluster-C2-C3.jpg


Charger Cluster on a diet:
LXInstrument-Cluster-Dissected5.jpg

LXInstrument-Cluster-Dissected3.jpg


Jeep Grand Cherokee Cluster hooked to the harness:
WKInstrument-Panel-Installed3.jpg


Panel Van Update video:
 
Sometimes, I Just start building. Other times I design on the computer. Still other times, I enjoy getting out the pencil and designing on paper. I thought I went home with a good solution the other day. But, then I talked to a good friend and realized I was going about things the wrong way. I was planning to use a pair of straight-thru mufflers, in previous designs, because I wanted performance. But he reminded me that I'll have cutouts. He suggested I put the quietest mufflers on this thing that I can cram in the space. Then, when I feel like turning it up a notch, I just need to crack the cutouts and have some fun. That way, I don't have to put up with exhaust drone when I don't feel like it. His suggestion really hits home with my aging mind. I know I get fatigued after a road-trip with the exhaust in my '66 Charger and it sure would be nice to build this truck in a way that I can enjoy some peace and quiet. So, with all that in mind, I went searching again for the "right" muffler. The constraints were simple: It had to be big (which should make it quieter); It had to have an in & out as close to 3" as I could get; And it had to be stainless steel. My friend suggested Walker and I cringed. But, I thought about it and checked them out. Turns out, they had just the muffler for me. The part number is 21046 (http://www.walkerexhaust.com/catalog/walker-exhaust-systems/e-catalog-lookup/21046) and the body measures a whopping 7"x9"x24". It's a gigantic OEM style sound magnet that's actually meant as a single unit in a 1996 - 1999 Chevrolet 1500 pickup. In my arrangement, I'll one of these beasts for each side. It seems like extreme overkill, but it's really only modest overkill ;) Doing the math, the OEM setup (muffler + resonator) on an '06 Charger (with the HEMI) had a muffling volume of just over 1000 cubic inches (not subtracting for the oval shape - just taking it as straight rectangular end). One of these bad boys has just over 1500 cubic inches of muffling volume (again, not subtracting for the oval shape - just taking it as a straight rectangular end). Honestly, I like the extra muffling volume. I think it will come in handy since I'll be running headers, too.

Here is my final rendering (along with several little cut-out mufflers I used to get things right) :
GOPR7985.jpg
 
Auto Transport Service
Back
Top