• When you click on links to various merchants on this site and make a purchase, this can result in this site earning a commission. Affiliate programs and affiliations include, but are not limited to, the eBay Partner Network.

Yankee Express RestoMod Project

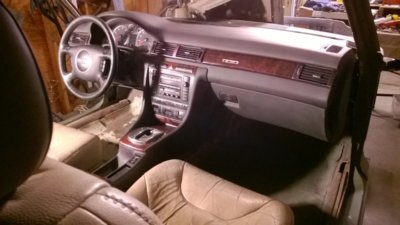
Soo...I have sourced the wood veneer, the polished wire accent line and round chrome AC outlets and the fabric. Should I buy some MDF and build the body of a dash like this and get to covering it? My Audi dash is the same profile across the top.

New%20Continental%20GT%20-%2020.jpg
 
Last edited:
Got out there for a bit and welded up s problem area on the front of the left fender. Slapped some Bondo on it to finish up. Letting it dry. Sanded down and applied filler to the bottom inside panel where I had cut a piece out trying to mount those Audi CD changer/storage bin units. Needed to get that looking presentable again.
 
first pass done on both. Got the door latches and hardware in the mail from FBBO member Mopar_Mike.
1227191527.jpg
1227191527a.jpg
1227191527b.jpg
1227191533.jpg
 
62,000 views and 49 pages!!!

this thing better be done in 2020 :lol:


just kidding...loving the journey yourre on


watermelon
 
I intend for it to be. Been working on it nearly every day for awhile now. Now that the Holidays are past I can get back out there. Thanks for your interest! It's what keeps me interested!
 
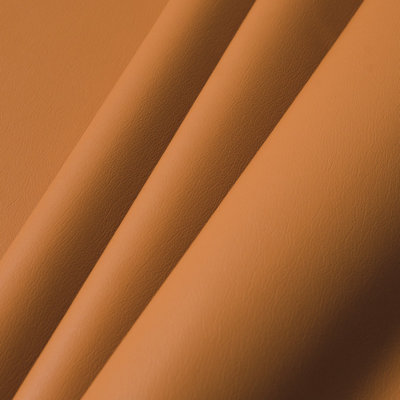
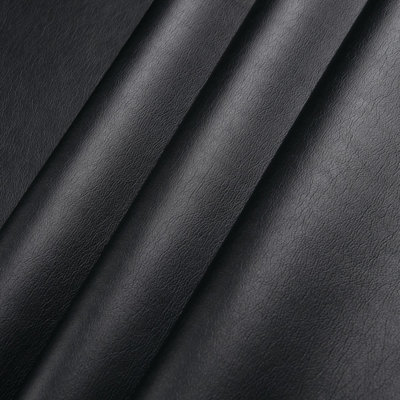
I have settled on the interior colors and styles. Pics attached. The top section of each door panel ( above the door card top edge and the chrome trim) will be black Ultra Leather. The bottom 3" tall section ( below the door card bottom edge) will also be black leather.
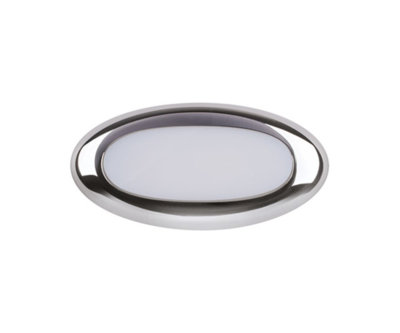
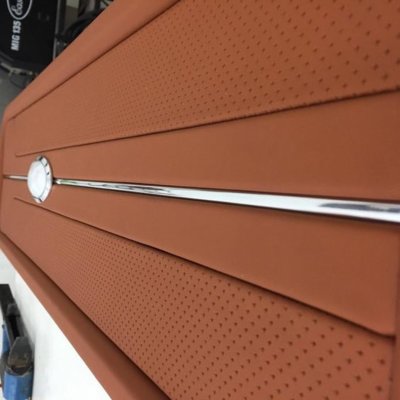
The door card will be split into three sections with the center section being perforated leather. The color is Ultra Leather Adobe. There will be 3/16 depth between each section. the lower section of the three will have a chrome trim line ( reusing the rear door panel upper door card trim) that is indented 3/16" in the center of that panel ( left to right) beginning from the rear edge of the door card and extending towards the speaker grill. About 6" or so along that line of trim there will be a oval Edel Italian Luxury Yacht Deck Light trimmed in chrome that is centered over the chrome door trim.
The pic below shows the idea of how that will look although it has a round light on it. The speaker grill will be black. The door armrest will be recolored in black. The dash top will be recolored in black down to the top of the wood grain insert line. The A/C vents will be removed, the wood trim removed leaving a long narrow 3 1/2" section all across the dash from door to door. This will have a fabricated 3 1/2" panel with a slight curve (bow out) all along it and covered in a wood grain veneer sticker. I will place a "CORONET" script on the right end, centered in that narrow panel.
The narrow panel will continue around into the door and the speaker/door lock/door handle unit and then out into the wood grain insert. Below that narrow panel everything will be recovered in the Adobe leather including the knee panel below the steering wheel, the center console body, the glove box door section and both end pieces. The seats will be in Adobe Ultra leather with black control panels and adjustment knobs. The E brake handle & armrest above it will be Adobe leather with black base. The carpet will be black. Headliner black, Roadster panels Adobe Ultra leather while the Satellite rear seat topper at the head of those roadster panels will get repainted black. The center medallion are in Adobe leather. No headrests. Everything under the Roadster panel ( backseat area) will be black carpet/fabric. The rear quarter panels door cards will be reused without the trim. Steering wheel will get sprayed black. Chrome OEM windshield trim front and back reused.

View attachment 889135 Ultraleather-Fabric-54-Adobe_1.jpg sdfg .png wp_20161106_16_42_31_pro_9ba33ac038d526c3c78498a1f37a62ad347e9099.jpg Ultraleather-Fabric-54-Raven-Wing_1.jpg edel__85953.1516999626.jpg bab4f61183fa189c3a57b00a54e26fa8 (2).jpg
 
Last edited:
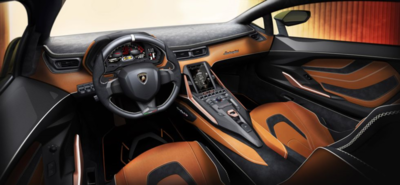
This article & picture of the new 2020 Ferrari GT California interior was my inspiration.

2020 Farrari GT Californis....jpg
 
I have sourced the dash AC vents. I needed a smaller size ( 2" tops) and there are few out there. I found the NANO vent from Restomodair. 1 7/8". Billet aluminum. Sent a request for drawings, pictures installed.
I removed the vents and trim and cut a template to lay in there to see how it might look. I like it...

I also finally worked out the shape and installation of both corners of the dash top. I cut a plate out of 26GA and fooled around till I got it how and where I wanted it, in relation to the A pillar trim. It will look ok when the windshield is in and the dash is recovered. Never know there were holes there. I left the plate about 1/16" lower that the surface of the dashtop so I can smooth over the transition edge to hide it under the new leather when glued down.

0103201404a.jpg
0103201404b.jpg
0103201404c.jpg
0105201049.jpg
0105201054.jpg
0105201055.jpg
0105201055a.jpg
DUAL-VANE-VENT-SIZES.png
 
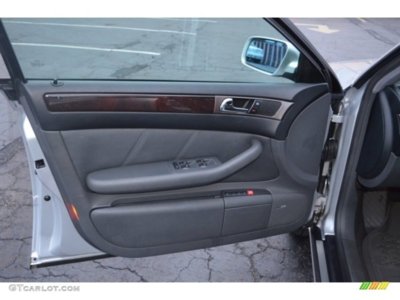
Just ordered these door panels from Nebraska. Going to try again to be creative and get these damn doors right. I may end having to tilt the dash shell down 1/2" to get the door sections lined up with the dash ends AND...AND...have the top of the door panel parallel to the top of the Coronet door. Don't want to, but may have to. Dang it...doing so will rotate the console section down as well and I like it where it is.

s-l140.jpg
 
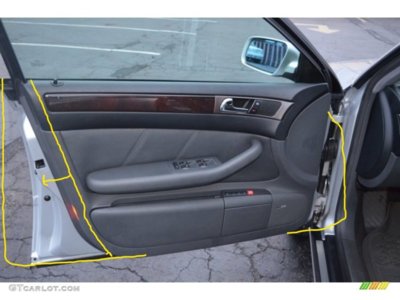
Here's the problem. The top yellow line is the angle the Audi door panel is at if lined up perfect with the dash end. Rotate the dash down 1/2" to bring it in line with the door. Solves a multitude of issues.

1222191219_Burst01_LI.jpg
 
Each end of the dash aluminum frame is mounted by a triangle of 1/2" bolts that anchor it to the welded in supports. Pulling two bolts on each side and rotating down, marking the new hole locations and drilling is the deal. Two reasons I don't want to do it. 1. It's a pain in the *** to take the dash all out to drill those holes. 2. I like it where it is. Although, truth be told if I had done so to begin with it would be done a long time ago...
 
So, I found, finally, a replacement seat bottom upholstery for the Volvo seats. Not a cover, an actual new bottom factory piece. So now I can ditch the used and screwed up ones and proceed to cleaning and prep for a color change dye job. Also, I found two Audi head rests in my local yard that can also be color changed to match and installed on the Volvo seats. There are also Audi buckets in that car but they are just too small. The Volvo seats are spacious and full comfort. So I will be buying the leather dye kit to change to the Adobe color. or as close as I can .

Volvo S60 V70 front seat cover leather upholstery Light Beige oak arena 9478992


Picture Information
Opens image gallery
imgLoading_30x30.gif
s-l400.jpg


upload_2020-1-8_6-52-51.gif upload_2020-1-8_6-52-51.gif upload_2020-1-8_6-52-51.gif upload_2020-1-8_6-52-51.gif upload_2020-1-8_6-52-51.gif upload_2020-1-8_6-52-51.gif s-l64.jpg s-l64.jpg
 
Last edited:
S
Just ordered these door panels from Nebraska. Going to try again to be creative and get these damn doors right. I may end having to tilt the dash shell down 1/2" to get the door sections lined up with the dash ends AND...AND...have the top of the door panel parallel to the top of the Coronet door. Don't want to, but may have to. Dang it...doing so will rotate the console section down as well and I like it where it is.

View attachment 891710
This is how they are supposed to look in order to match up with the dash..I guess what I'll do is slice off the rear vertical edge of the panel top to bottom and move it to the rear of the Coronet door panel. Then strip out the leather panel behind and around the armrest. Then I will build up the space in between the two pieces to the same level across the gap and then lay down fiberglass to join them. The same needs to be done on the front lower corner to match up with the Coronet doors more rectangle shape. This also takes care of the door speaker as it's already in the panel. Everything below the top dark grey section is going to be painted or upholstered in a rich Adobe color so it will all be hidden from view. The thing I don't like about this plan is that the door panel is thick, like 4-5 inches thick and it leaves precious little room between it and the power seat controls. Guess I will have to live with it.

61703537.jpg 61703537_LI (3).jpg
 
That's some serious work you are doing! :thumbsup:

I wonder about rotating the dash down to address the door panel issues if it will screw that up and your console. If you like the fitment of those, shouldn't you just try to adjust the door cards as well as possible?

Hawk
 
That's some serious work you are doing! :thumbsup:

I wonder about rotating the dash down to address the door panel issues if it will screw that up and your console. If you like the fitment of those, shouldn't you just try to adjust the door cards as well as possible?

Hawk
Well, this is exactly what I tried to do, before I cut the original panels apart to then try to incorporate sections of it. They really just don't line up and it's very obvious to the casual eye. The angles are all wrong. I have tried everything else so this has to work, I'm fresh out of more ways to get this doggie roped and hog tied..lol. You are right, this is more work, however, the end result should look like it's SUPPOSED to be there..which is all I want at this point.
To the issue of rotating the dash which changes the position of the console, all I can say is that the console body and frame right now is like 5-6 inches above the tunnel. So there is room to go lower but it will end up with the console at a diminishing angle as it goes towards the rear. I have yet to see how much of an angle. I'm actually dreading it.
 
Wish I had seen this before I ordered those door panels! $700 bucks for the entire running and driving car.

That would give every single part and wire I need to get mine going. jeez.
AND! It's 2 hours away here in Vermont!
01414_eyMqMYYd3ef_1200x900.jpg
 
I rotated the dash down today. Didn't have to go too far. Still looks good across the top. Going to work out! I will wait till I have the panels before I drill new holes though...
 
Auto Transport Service
Back
Top