Hi Jim thanks, yeah the old metal apparently goes through some changes over time not to mention the formulation is different from todays metals. Its been really arduous to not make small holes large ones. Do you have a build thread?Ron, I'm having the same issue on my floor pan ... keep blowing through the new pan cuz it's so thin. I turned my heat and speed way down and it seemed to help. Using a piece of copper is a good idea. PS ,,, I am jealous of your progress ... keep up the good work.
You are using an out of date browser. It may not display this or other websites correctly.
You should upgrade or use an alternative browser.
You should upgrade or use an alternative browser.
1970 Plymouth Sport Satellite from Junk to......
- Thread starter Moparfiend
- Start date
daytona kid
Well-Known Member
I ran into the same problem on parts of the welding on my car also. Mostly areas that I had to grind on, so it got thinner, or spots where a little rust had thinned it. I got better at not burning thru by going on and off with the trigger on the mig, and lots of argon. I will sometimes pull the trigger half way which only lets argon out and cool the weld a tad then continue. I also put small pieces of sheet metal behind the welds in some thin/problem spots also, especially if it was where no one would ever see.Hi Jim thanks, yeah the old metal apparently goes through some changes over time not to mention the formulation is different from todays metals. Its been really arduous to not make small holes large ones. Do you have a build thread?
Jim, I thought you were going to drop your 64 off in Yuma so I could work on her?Ron, I'm having the same issue on my floor pan ... keep blowing through the new pan cuz it's so thin. I turned my heat and speed way down and it seemed to help. Using a piece of copper is a good idea. PS ,,, I am jealous of your progress ... keep up the good work.
")
On sheetmetal, even filling rosette welds, I would be on-off....on-off, nothing continuous on the mig gun to keep the heat down. I practiced by filling 5/16" holes, no backing. Half moon weld repeated until the hole was filled. I was using a Lincoln 135sp with 80/20 gas and .025 wire.
Clean metal is the key. Old metal needs to be 100% rust free or it dissolves.
Starting work on the passenger sail panel.


I need a brake shear. I am using a scoring technique and straight edge and a hammer to bend this stuff. Challenging to say the least but gratifying as it takes shape.
I need a brake shear. I am using a scoring technique and straight edge and a hammer to bend this stuff. Challenging to say the least but gratifying as it takes shape.
How do you eat an elephant, one bite at a time. Keep digging my friend! If it was easy everyone would be doing it. Starting to take shape and I like what you are doing. To keep from blowing thru, angle the tip at a 60 or even 45 degrees instead of 90. I have had good luck with this method, especially where I have ground the metal a little too thin.
Haha thanks Builderguy! I’ll try to angle the tip when I get to that point.How do you eat an elephant, one bite at a time. Keep digging my friend! If it was easy everyone would be doing it. Starting to take shape and I like what you are doing. To keep from blowing thru, angle the tip at a 60 or even 45 degrees instead of 90. I have had good luck with this method, especially where I have ground the metal a little too thin.
Getting knee deep into this complex repair. I will test fit the window tomorrow hopefully all will be good. I really haven’t done much of this type of work before and am using simple hand tools so be nice guys. Also low current welding on old metal requires a lot of patience and technique that I an learning as I go.


- Local time
- 1:13 AM
- Joined
- Mar 28, 2016
- Messages
- 1,700
- Reaction score
- 2,590
- Location
- Green Valley, Arizona
Nice work Ron! I am impressed that you are doing this yourself.....keep on keepin' on! (remember that one?)Getting knee deep into this complex repair. I will test fit the window tomorrow hopefully all will be good. I really haven’t done much of this type of work before and am using simple hand tools so be nice guys. Also low current welding on old metal requires a lot of patience and technique that I an learning as I go.
View attachment 950801 View attachment 950802 View attachment 950803 View attachment 950804 View attachment 950805
Thanks Bart. I am enjoying doing the work. The trunk pan is going to be a big job. Lots of spot welds in a confined space lol.Nice work Ron! I am impressed that you are doing this yourself.....keep on keepin' on! (remember that one?)
Test fitment of the roof is excellent. Rear windshield is good.


- Local time
- 1:13 AM
- Joined
- Mar 28, 2016
- Messages
- 1,700
- Reaction score
- 2,590
- Location
- Green Valley, Arizona
Congratulations on this huge step Ron, nice work!!!Test fitment of the roof is excellent. Rear windshield is good.
View attachment 951016 View attachment 951017 View attachment 951018 View attachment 951019 View attachment 951020 View attachment 951021 View attachment 951022
Great work!!!! Leaves you with a case of the "warm fuzzies" doesn't it?
Yuppers it feels good. Lots more work ahead! I am going through Ar mix pretty fast with my little 55cft cylinder lolGreat work!!!! Leaves you with a case of the "warm fuzzies" doesn't it?

- Local time
- 12:13 AM
- Joined
- Mar 14, 2012
- Messages
- 16,968
- Reaction score
- 28,060
- Location
- Surrey, B.C. Canada
Replying to an old question... I've had a Sport Satellite, and have two sets of SS tail light assemblies and they have that textured argent paint. But every GTX I've seen for the same year had black trim in that area.Wondering about this finish. Its a grit type that I believe was unique to the Sport Satellite and the GTX? Was it always silver for both cars regardless of the exterior color?
View attachment 937238
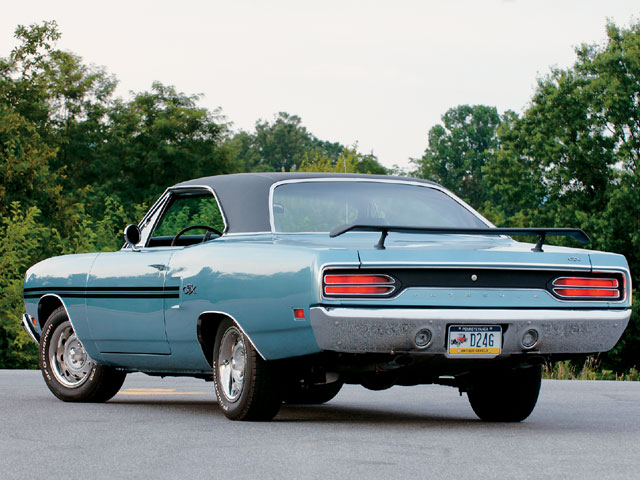
Thanks so the GTX was smooth and black?Replying to an old question... I've had a Sport Satellite, and have two sets of SS tail light assemblies and they have that textured argent paint. But every GTX I've seen for the same year had black trim in that area.
View attachment 951248View attachment 951249View attachment 951250
- Local time
- 12:13 AM
- Joined
- Mar 14, 2012
- Messages
- 16,968
- Reaction score
- 28,060
- Location
- Surrey, B.C. Canada
I think it was Organisol.Thanks so the GTX was smooth and black?
Skin needed some trim to fit in the channel without binding. Took off 3/16 along the edge so it fits flush without binding. Punched all the spot weld holes using the below punch from HF. Beware that this punch needs cutting oil in the side screw hole in oder to work effectively.
Also cleared the paint around the holes for best weld results if I need to drift out of the hole. This probably is not necessary but I thought it would be good to do as my wife said “you didn’t want a convertible did you?”


Also cleared the paint around the holes for best weld results if I need to drift out of the hole. This probably is not necessary but I thought it would be good to do as my wife said “you didn’t want a convertible did you?”
- Local time
- 1:13 AM
- Joined
- Mar 28, 2016
- Messages
- 1,700
- Reaction score
- 2,590
- Location
- Green Valley, Arizona
Looking really good Ron! You are really moving on this project quickly!!!Skin needed some trim to fit in the channel without binding. Took off 3/16 along the edge so it fits flush without binding. Punched all the spot weld holes using the below punch from HF. Beware that this punch needs cutting oil in the side screw hole in oder to work effectively.
Also cleared the paint around the holes for best weld results if I need to drift out of the hole. This probably is not necessary but I thought it would be good to do as my wife said “you didn’t want a convertible did you?”
View attachment 952431 View attachment 952432 View attachment 952433 View attachment 952434
Similar threads
- Replies
- 0
- Views
- 139
- Replies
- 6
- Views
- 420


