My thinking as well. I put one in my Bee and really liked using the arm rest, so decided to throw one in this car also.I have grown to love the buddy seat myself. Helps hold my lard butt upright when on extended
cruises - the ultimate armrest.
You are using an out of date browser. It may not display this or other websites correctly.
You should upgrade or use an alternative browser.
You should upgrade or use an alternative browser.
My 69 Road Runner
- Thread starter hunt2elk
- Start date
What a great story! As I have said many times in the past, stories associated with the cars make them so much better. Yes, they are cool by themselves, but when there is a good story to go with them that makes them awesome!
I also am digging the silver interior. Something different and cool for sure!
Hawk
I also am digging the silver interior. Something different and cool for sure!
Hawk
I also am digging the silver interior. Something different and cool for sure!
Hawk
The silver sure would be something you don't see everyday. Unfortunately, I am not changing it back. I would need to find new door panels, seat coverings, headrests, sunvisors, and armrests - just what I can think of off the top of my head. I know the armrests, sunvisors, and headrests are not reproduced in silver, so that would involve finding good original parts, and I believe those would be very hard to source in that color. And to top it off, all my black stuff is still really nice.
Last edited:
Totally understand. My 73 Road Runner had a parchment interior. At the time, I could only get white and black interior parts like seat covers, so I changed it to black. I'd love to change it back, but it would be very difficult to do that.The silver sure would be something you don't see everyday. Unfortunately, I am not changing it back. I would need to find new door panels, seat coverings, headrests, sunvisors, and armrests - just what I can think of off the top of my head. I know the armrests, sunvisors, and headrests are not reproduced in silver, so that would involve finding good original parts, and I believe those would be very hard to source in that color. And to top it off, all my black stuff is still really nice.
Rock on!
Great story Joel, and looking forward to this thread. Your Charger resto thread helped guide me through my Coronet restoration.
Sonny Black
Well-Known Member
awesome story....your pics are great!
love the 68-69 rear.....

love the 68-69 rear.....
Glad it helped you out Rich. That was quite the project and seems like so long ago already.Great story Joel, and looking forward to this thread. Your Charger resto thread helped guide me through my Coronet restoration.
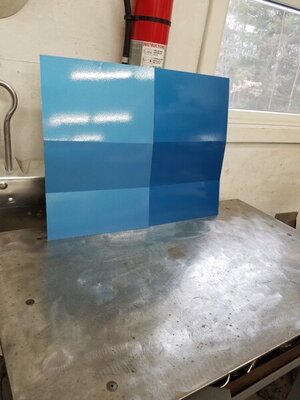
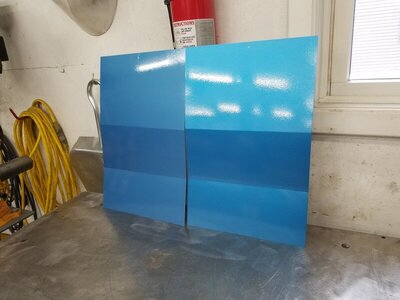
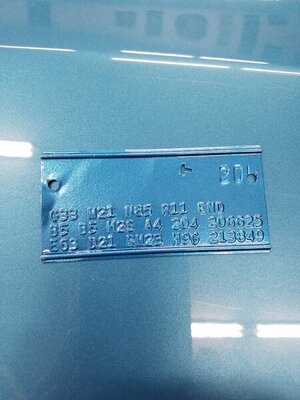
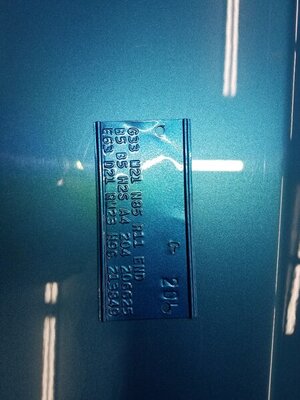
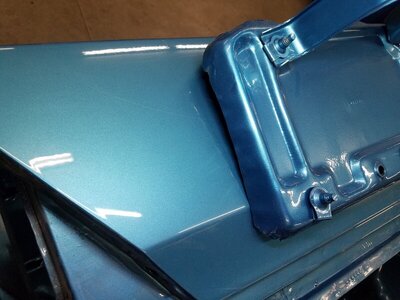
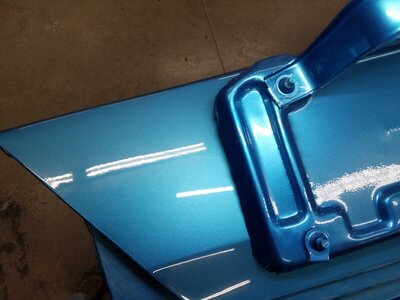
When I had the car painted years ago it was with Martin Senior because that's what the shop stocked and used on everything. I used PPG on my Bee, liked that, and decided to use that on this car as well. PPG has their top of the line Deltron at $900/gallon at well as Shopline at $250/gallon. It is common to spray a couple coats of the cheaper stuff on first before covering with Deltron. I was surprised by the color difference between the 3. The 2 test panels shown are Deltron on the right and Shopline on the left at 2 different angles. Oddly the Martin Senior on the car is closer to the Shopline hue. Couple pics of the fender tag and battery tray I sprayed with Deltron laying on the top quarter of the car. Looks like it will be a more vibrant color than what I had.


moparjohnny
Well-Known Member
joel,you never do anything half *** on these cars,i rank you with justin 69 gtx,wayne with 69 bee and a few others on this site they never do anything half ***.When I had the car painted years ago it was with Martin Senior because that's what the shop stocked and used on everything. I used PPG on my Bee, liked that, and decided to use that on this car as well. PPG has their top of the line Deltron at $900/gallon at well as Shopline at $250/gallon. It is common to spray a couple coats of the cheaper stuff on first before covering with Deltron. I was surprised by the color difference between the 3. The 2 test panels shown are Deltron on the right and Shopline on the left at 2 different angles. Oddly the Martin Senior on the car is closer to the Shopline hue. Couple pics of the fender tag and battery tray I sprayed with Deltron laying on the top quarter of the car. Looks like it will be a more vibrant color than what I had.
View attachment 1070011 View attachment 1070012 View attachment 1070017 View attachment 1070018 View attachment 1070019 View attachment 1070020
- Local time
- 5:40 PM
- Joined
- Jan 29, 2018
- Messages
- 19,381
- Reaction score
- 63,295
- Location
- Midland Ontario, Canada
That's not why my Wife said last night!! 

Well thanks, but that comparison is a heck of a stretch. I have a lot of respect for guys like Justin and the way they restore a car, but it is not my cup of tea. I drive all mine and want to be able to spin the tires and splatter the quarters with rubber if I feel like it. Pretty certain Justin would never do that....joel,you never do anything half *** on these cars,i rank you with justin 69 gtx,wayne with 69 bee and a few others on this site they never do anything half ***.
Well thanks, but that comparison is a heck of a stretch. I have a lot of respect for guys like Justin and the way they restore a car, but it is not my cup of tea. I drive all mine and want to be able to spin the tires and splatter the quarters with rubber if I feel like it. Pretty certain Justin would never do that....
That is my problem. Too many burnouts and hard launches to enjoy to make them mint.

Joel, love the buddy seat! If ya need anything check with me first, I have some new extras from double ordering over the years. When are you planning on having it done? This year? Maybe I can get mine done and we can make a trip to a dragstrip somewhere! My only regret is not thinking and I would put a 26" radiator support in if I had it to do over again.
Joel, love the buddy seat! If ya need anything check with me first, I have some new extras from double ordering over the years. When are you planning on having it done? This year? Maybe I can get mine done and we can make a trip to a dragstrip somewhere! My only regret is not thinking and I would put a 26" radiator support in if I had it to do over again.
My buddy is shooting for getting it to his place for paint in June. In the mean time I am getting all the metalwork done and ready for sand blasting the interior and bottom. I will paint those 2 areas here and he will take care of the rest. Just not going as quickly as I had hoped. Thought I would have a slow winter as far as work goes, but that has not been the case. I'm having a hard time getting out to the garage to work on it. Good news is that all the mechanical, suspension, rear end, heater box, and interior is done and just needs to be reinstalled. So I am hoping to have it back on the road late summer - early fall. I did think about replacing the 22" radiator with a 26", but decided not to. It is the original that Bob at Glen Ray redid for me several years ago. Always runs at 190* with the 451.
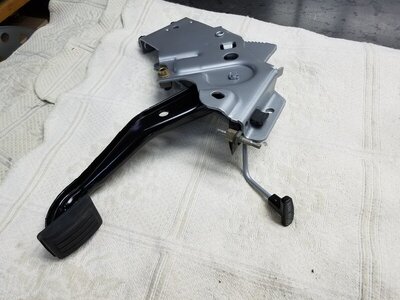
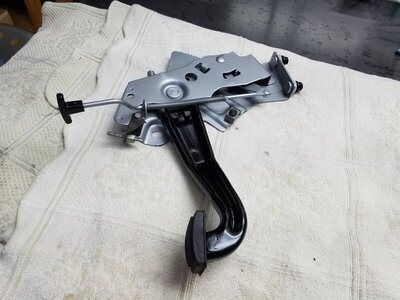
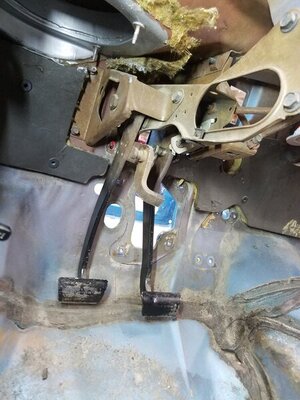
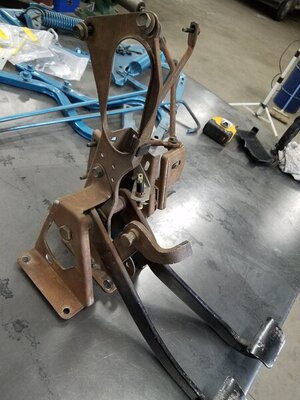
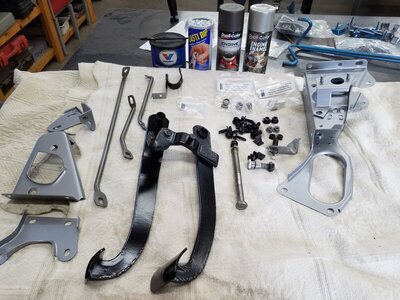
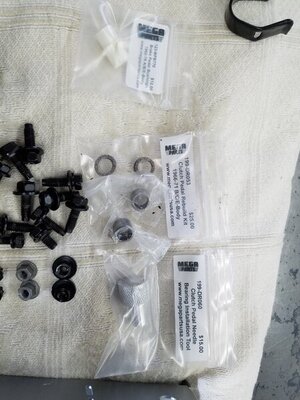
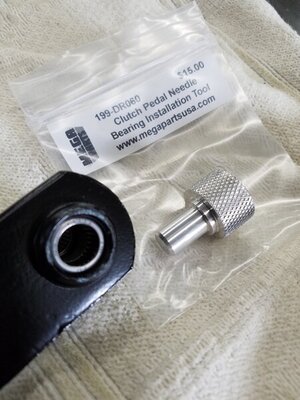
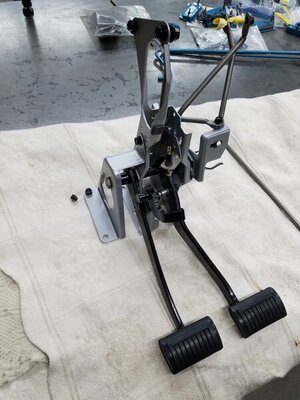
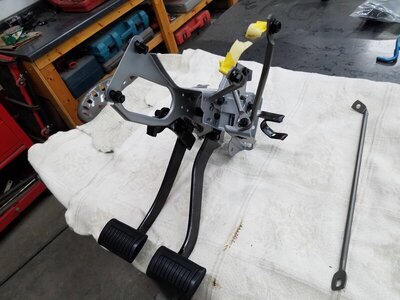
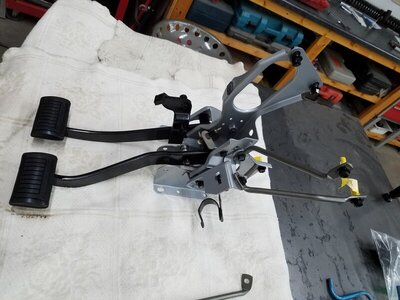
Probably the first time this pedal assembly was out of this car. Original patina, but these are the things that bug me as I dislike the color of rust. Disassembled and blasted all the parts. I use either a black or grey epoxy primer and then on these pieces sprayed with engine enamel. New pedal pads, brake pedal bushings, clutch pedal bearings, and back together. I bought this clutch pedal bearing install tool from Jamie and it sure made life easier. It holds the needles in place and has a shoulder to seat the bearing to the correct depth.


- Local time
- 5:40 PM
- Joined
- May 14, 2011
- Messages
- 17,195
- Reaction score
- 32,315
- Location
- On the Ridge, TN
Wow gorgeous work my friend!Probably the first time this pedal assembly was out of this car. Original patina, but these are the things that bug me as I dislike the color of rust. Disassembled and blasted all the parts. I use either a black or grey epoxy primer and then on these pieces sprayed with engine enamel. New pedal pads, brake pedal bushings, clutch pedal bearings, and back together. I bought this clutch pedal bearing install tool from Jamie and it sure made life easier. It holds the needles in place and has a shoulder to seat the bearing to the correct depth.
View attachment 1072010 View attachment 1072011 View attachment 1072012 View attachment 1072013 View attachment 1072014 View attachment 1072015 View attachment 1072016 View attachment 1072017
- Local time
- 5:40 PM
- Joined
- Jan 29, 2018
- Messages
- 19,381
- Reaction score
- 63,295
- Location
- Midland Ontario, Canada
VERY Nice... I cheated and just stuck mine in the Evaporust bucket. (tip for the lazier ones, like me)


Similar threads
- Replies
- 0
- Views
- 408
- Replies
- 2
- Views
- 617
- Replies
- 3
- Views
- 842

