• When you click on links to various merchants on this site and make a purchase, this can result in this site earning a commission. Affiliate programs and affiliations include, but are not limited to, the eBay Partner Network.

Build Thread- 64 Fury Convertible

More work on the 64's Floors, & Rocker... this car took a pretty good hit in the door at some point.Rocker was pushed in 1 1/2" or so. Quarter was pushed in at the front, and in the middle, the quarter is collapsed over the inner frame, so we have Measured, Trammed, Porta powered, and Jacked, Pried, stretched, beat, heated,& Massaged quite a bit in the past week or so, The replacement door is lining up better with the body, The original replacement floor pans are starting to look like they will "Lay in" to where they should line up with the spot weld positions on the frame and rocker. We are just starting to Fab the Outer Rocker to be the final piece of the puzzle. Probably going to hang fender before we actually weld up floor pans or outer Rocker sections....I also still have to clean, and paint inner frame rails with rust protectant and coat the tops with weld thru Primer etc etc..
1430_n.jpg?_nc_cat=104&ccb=1-3&_nc_sid=0debeb&_nc_ohc=EW2s72pt1h8AX-BGRnJ&_nc_ht=scontent-iad3-2.jpg
0597_n.jpg?_nc_cat=109&ccb=1-3&_nc_sid=0debeb&_nc_ohc=QCYH_dwwbksAX-inmPU&_nc_ht=scontent-iad3-2.jpg
6629_n.jpg?_nc_cat=101&ccb=1-3&_nc_sid=0debeb&_nc_ohc=oOD3mTuTN5wAX_V3I6R&_nc_ht=scontent-iad3-2.jpg
0769_n.jpg?_nc_cat=109&ccb=1-3&_nc_sid=0debeb&_nc_ohc=81e0fhue8TYAX-ZoIZk&_nc_ht=scontent-iad3-2.jpg
7400_n.jpg?_nc_cat=111&ccb=1-3&_nc_sid=0debeb&_nc_ohc=z72OZ8e5MBUAX8zZq05&_nc_ht=scontent-iad3-2.jpg
1520_n.jpg?_nc_cat=107&ccb=1-3&_nc_sid=0debeb&_nc_ohc=fyWoCevuxnkAX_rfkEV&_nc_ht=scontent-iad3-2.jpg
 
Your car is really taking shape and you will know everything inside and out. Great thread and seeing potential problems that can be hidden when looking at a car that is for sale.
Love the early B bodies :thumbsup: :thankyou: :luvplace: :moparsmiley::moparsmiley::usflag:

:xscuseless:

C1FDBEE0-71D6-496C-90D5-FA452C38C08A.jpeg 904053FA-F0E7-4E16-B88A-A455D14E4AFB.jpeg B26137E8-1F7B-45D9-879E-7CEFE6B4202E.jpeg D788ACD9-574B-4A6F-B915-4FCDAEFD1EB5.jpeg 096D1AE9-66AF-4B75-8FDD-2160230FE21F.jpeg 574B252D-DAD1-4EE2-B2E8-12D2945761B0.jpeg 472A3CDD-9881-4735-9DC6-74255B0FDE9C.jpeg E4D83650-1A09-429A-8384-ABBFB90171B2.jpeg
 
Thanks..... I kind of knew when i bought this one it was going to need floors, and the lower quarters repairs were already visible to me... The colision damage was more hidden...There was 1' of bondo on the Passenger Rocker. I knew it had filler buuuuut....No complaints from me. I know what will be under the paint now !!
Youre 64 looks great. I'm going to break my paint where you did on the radiator support. I like the body color on top, and Black through the grill as well.
Earl
 
The magic is when you already see in your mind potential repairs a car will need and being able and willing to jump in and take it wherever it leads you. I always have been ready to commit to projects anticipating trials and learning curves along the way.
Patients and more patients and lots of laughter are always good. :thumbsup:
 
Every time I see floor work being done, "Yabba Dabba Doo" pops into my mind.
 
Yabba dabba do is right !! I'll be glad when im looking at Floor pans insted of the shop floor !
Great day today !! I got all the inner frame rails and inner rocker coated with rust prep, and the tops with weld through primer. Terry then got the new rocker all Tack welded in place !! Sure is great to see a straight rocker panel on this car !!! Last one was crushed and full of Bondo....
8265_n.jpg?_nc_cat=108&ccb=1-3&_nc_sid=0debeb&_nc_ohc=Ugqu-6uJvogAX-Mly80&_nc_ht=scontent-iad3-2.jpg
9226_n.jpg?_nc_cat=111&ccb=1-3&_nc_sid=0debeb&_nc_ohc=oItLtFRSv6cAX9j1A4r&_nc_ht=scontent-iad3-2.jpg
6745_n.jpg?_nc_cat=106&ccb=1-3&_nc_sid=0debeb&_nc_ohc=bQuuXIOt45EAX8--zy4&_nc_ht=scontent-iad3-2.jpg
8986_n.jpg?_nc_cat=100&ccb=1-3&_nc_sid=0debeb&_nc_ohc=1z-7TWIMQ6QAX-XfBlQ&_nc_ht=scontent-iad3-2.jpg
1636_n.jpg?_nc_cat=104&ccb=1-3&_nc_sid=0debeb&_nc_ohc=aBV2qMOgPD0AX8hI_d_&_nc_ht=scontent-iad3-2.jpg
4083_n.jpg?_nc_cat=103&ccb=1-3&_nc_sid=0debeb&_nc_ohc=MufoHFybuEIAX_UGdlj&_nc_ht=scontent-iad3-2.jpg
1824_n.jpg?_nc_cat=107&ccb=1-3&_nc_sid=0debeb&_nc_ohc=EQvQa9-r3ioAX8N8hi5&_nc_ht=scontent-iad3-2.jpg
3464_n.jpg?_nc_cat=100&ccb=1-3&_nc_sid=0debeb&_nc_ohc=cDVDHBOu-bUAX-6pU_8&_nc_ht=scontent-iad3-2.jpg
5492_n.jpg?_nc_cat=100&ccb=1-3&_nc_sid=0debeb&_nc_ohc=mHzTr_k7dEUAX9xF5-k&_nc_ht=scontent-iad3-2.jpg
 
I really feel lucky on my 65. No major rust issues anywhere from what I've found. I do have stress cracks in the floor to weld up from bucket seats being put in when it was bench from the factory. There were no reinforcing pads for backup. No biggie. You and crew are doing a nice job.
 
I havent, I did know it was different...I have a later model 727. couple of questions, My shifter is a 64 and has the places for the shift and park Cable. Can i use it with just a shift cable with a later model trans with the shift lever coming out of the top of the pan/side? I havent gotten that far yet...
If by saying you have a later 727, I take it to mean a 1966 or newer. These transmissions were shifted by mechanical linkage, while the 1965 and older were shifted by cables. If you are trying to install newer trans and still shift it with an original '64 console shifter, A&A Transmissions a kit for that. Part # AACSCC-352, $250.00. Because the newer transmission is shifted by linkage, the detent comb on the valve body has a pretty stiff spring behind it. You need to replace this with the softer spring from a cable shift valve body, because a cable is not as rigid as the linkage. There are likely also issues with transmission mount with this conversion. A&A also has this conversion mount; part # AA107, $110.00.
 
Yabba dabba do is right !! I'll be glad when im looking at Floor pans insted of the shop floor !
Great day today !! I got all the inner frame rails and inner rocker coated with rust prep, and the tops with weld through primer. Terry then got the new rocker all Tack welded in place !! Sure is great to see a straight rocker panel on this car !!! Last one was crushed and full of Bondo....View attachment 1090551 View attachment 1090552 View attachment 1090553 View attachment 1090554 View attachment 1090555 View attachment 1090556 View attachment 1090557 View attachment 1090558 View attachment 1090559

Looks like the shop floor is going to be disappearing in short order. Thanks for posting pictures and allowing us to follow this project. This is going to be a beautiful piece of history and fun to cruise in. :thumbsup: :luvplace: :steering::thankyou:
 
If by saying you have a later 727, I take it to mean a 1966 or newer. These transmissions were shifted by mechanical linkage, while the 1965 and older were shifted by cables. If you are trying to install newer trans and still shift it with an original '64 console shifter, A&A Transmissions a kit for that. Part # AACSCC-352, $250.00. Because the newer transmission is shifted by linkage, the detent comb on the valve body has a pretty stiff spring behind it. You need to replace this with the softer spring from a cable shift valve body, because a cable is not as rigid as the linkage. There are likely also issues with transmission mount with this conversion. A&A also has this conversion mount; part # AA107, $110.00.
Thanks Dave !!
Thats a great source !! looks like What i need... I'll give them a call. Earl
 
Well Gents,
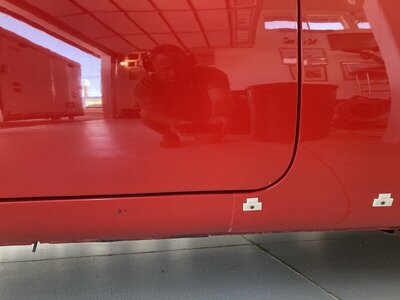
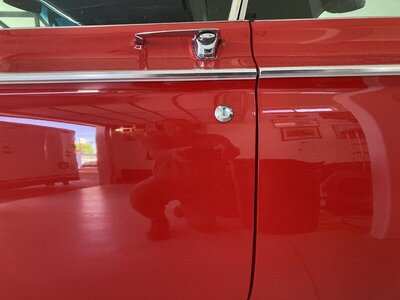
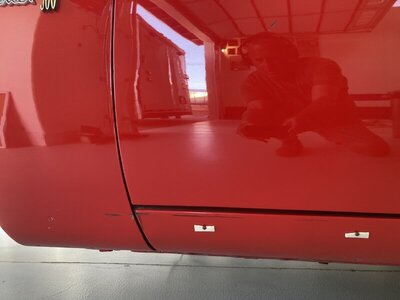
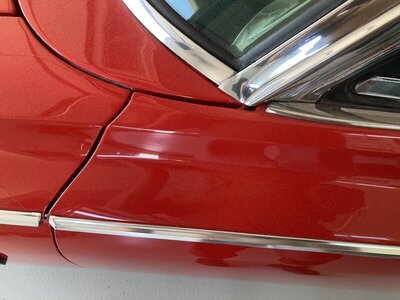
We have come to our first real dilema here on this build....This car was totally whacked out when i got it. Fenders, doors, etc etc didn't line up, Full of Bondo, Obscured Body lines, etc etc. I'm trying to build a Nice driver, key word being "Nice". It wont be a trailer queen,will never be 'Shown" but driven to cruise ins, and big Shows and events like Carlisyle...Key word being driven.... I've driven my other cars including convertibles in miserable rain to Carlisle or Indy, or Daytona from North Carolina. We are trying our best to get this car back to some assemblance of square so everything lines up, Top seals, & Doors open & Close as they should.... With that said,Myself & Terry ( My Best friend & Welder/fabricator) We both Noticed that the rocker we just put in shrunk after it was being Welded in... By that, I mean, We had it all lined up Top square and level, and bottom lining up, etc etc.It all looked great. We tacked it, checked everything, and welded it in. Spot welds across the top to top of rocker support, and spots across pinch welds. Then tacked it on the ends, and then across the bottom last. We used a porta power, and piece of channel Iron to hold the Bottom where we wanted it as we went across welding. As we did this, apparently it was Pulling down on the Outer edge at the top of the rocker right under the door possible from the heat ??. In either case, when it was all said and done, and after we started dressing the welds, it became apparent that the gap now under the door is uneven as the top of the rocker is higher at the front fender end and is trailing downward towards the Quarter panel end....
So, I want honest opinions. How bad does it look ?? its up on the wheel cribs now, so when you sit down....You really notice it. But when the car is on the floor and you're standing, I dont know how much you will... I guess it could be minimized with some filler, but we are not big fans of anything over a skim... I'll take more photo's tomorrow. We still Have to pull a spot out on the quarter edge where its pushed in etc etc, so the gap on the end between Door and quarter should grow a little which will help. Its really bothering Terry, He likes things perfect Right now its a flat blade screwdriver tip at the front, and a fingertip at the back so probably a 3/16 drop/difference in the gap.... It will have to be split, and a rod or welded in to fix it.....
3464_n.jpg?_nc_cat=100&ccb=1-3&_nc_sid=0debeb&_nc_ohc=cDVDHBOu-bUAX-6pU_8&_nc_ht=scontent-iad3-2.jpg
5492_n.jpg?_nc_cat=100&ccb=1-3&_nc_sid=0debeb&_nc_ohc=Wzij__mKtngAX8nsDyf&_nc_ht=scontent-iad3-2.jpg
 
I just looked back at one of my old photos from over the summer, and the door gap on the bottom is very similar to what we have now....closer at the front and widening as it goes back.....We actually have closed the gap up on the back of door adjusting it, and it closes better now.... but not sure i want the bottom Gap uneven...
3016_n.jpg?_nc_cat=111&ccb=1-3&_nc_sid=0debeb&_nc_ohc=zCryrmEPwmIAX9UnoMn&_nc_ht=scontent-iad3-2.jpg
 
It all boils down to personal preference when its that close. If its obviously haywire, time for some fixes. One thing people beat themselves up with is trying to make the gaps perfect like a new vehicle which has way better technology during manufacture of parts and assembly. Unlike our old rides where body lines and gaps were all over the place, compared to new cars. Remember figuring out that you got a Monday or Friday car because of various problems? When I get to the body panels on my 65, I'm going to line up as best as I can without resorting to surgery. Just shimming, pushing, pulling etc. Maybe slot alignment holes a little.
 
See if this helps you for decisions. These are from the lh side of my car.

8DB1F4AD-581B-4189-A05D-3AE4379A905E.jpeg 22CBBAD4-74C7-4FF8-A940-448090AC02BC.jpeg 5E70CA6A-FC57-4EB7-8B9A-1811097516AA.jpeg 019B31B5-76E6-4269-9851-42B3899AF288.jpeg
 
More work on the 64.... door & Jambs stripped, Inside of doors painted with Rustproofing... we still have damage to repair on quarter edge towards door... it’s mashed in.You can see evidence of prior repairs at the top. There was a lot of filler over the very low spot on the skin, and ,more in the jamb.. look how far my finger sinks into a crease right inside the upper door jamb... so the door and body line don’t line up... Got the Pass floor pan trimmed and laid in,Weld thru primer on oll the underneath surfaces, Going to cut, & Butt weld it plus Spot weld to frame rails ...We are going to get the Pass floorpans in,finish quarter repair, Hang the fender. Line everything up & Decide what to do about Gap at Bottom of door....
4861_n.jpg?_nc_cat=108&ccb=1-3&_nc_sid=0debeb&_nc_ohc=lrsVa61ZfwcAX8VhcLd&_nc_ht=scontent-iad3-2.jpg
nc_oc=AQmBNI4kH-HmBNOaQTR3t0Ov_43CCDyn_sCYEorawIDfzQAIFWlVsvguyzMDlI88gb0&_nc_ht=scontent-iad3-2.jpg
3429_n.jpg?_nc_cat=100&ccb=1-3&_nc_sid=0debeb&_nc_ohc=ytgEfx2HNXEAX_Arjrq&_nc_ht=scontent-iad3-2.jpg
9099_n.jpg?_nc_cat=108&ccb=1-3&_nc_sid=0debeb&_nc_ohc=xJku9wp6u3wAX9tBALA&_nc_ht=scontent-iad3-2.jpg
1869_n.jpg?_nc_cat=106&ccb=1-3&_nc_sid=0debeb&_nc_ohc=TpG5HcostBcAX-UlwfZ&_nc_ht=scontent-iad3-2.jpg
8884_n.jpg?_nc_cat=105&ccb=1-3&_nc_sid=0debeb&_nc_ohc=auE2mWKPbT8AX8W4q-D&_nc_ht=scontent-iad3-2.jpg
0680_n.jpg?_nc_cat=108&ccb=1-3&_nc_sid=0debeb&_nc_ohc=mYI3XWefVvsAX_v2jod&_nc_ht=scontent-iad3-2.jpg
 
Since I didn't do a long view shot of the bottom door gap, its harder to see but its wider about halfway going towards the fender. You can make it out in the two shots but its easier to see looking from a ways away from the car.
 
Wow you guys are doing a great job. Jobs like that are tough; you work and work for days on end when it seems it will never progress. But perseverance pays off, your great work is showing!
 
Your car is really taking shape and you will know everything inside and out. Great thread and seeing potential problems that can be hidden when looking at a car that is for sale.
Love the early B bodies :thumbsup: :thankyou: :luvplace: :moparsmiley::moparsmiley::usflag:

:xscuseless:

View attachment 1089919 View attachment 1089920 View attachment 1089921 View attachment 1089922 View attachment 1089923 View attachment 1089924 View attachment 1089925 View attachment 1089926
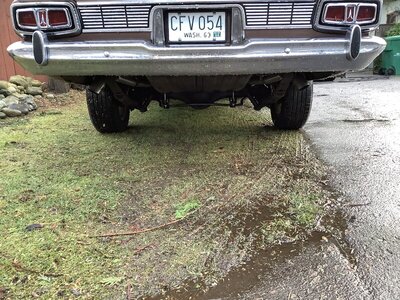
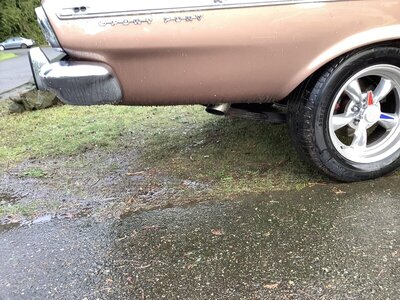
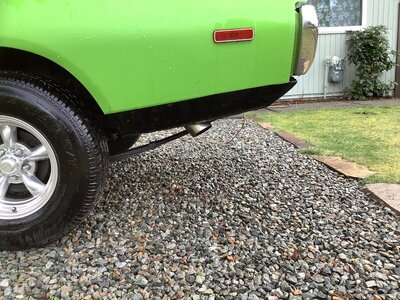
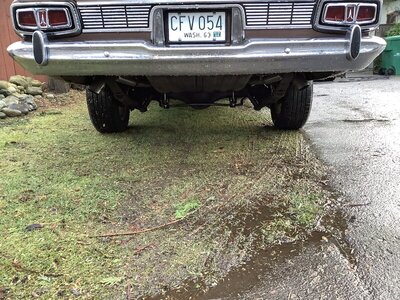
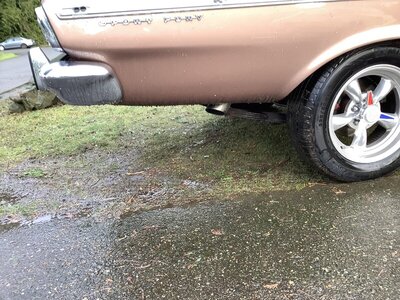
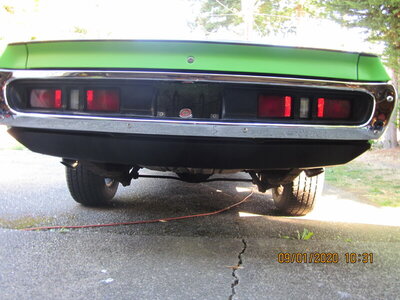
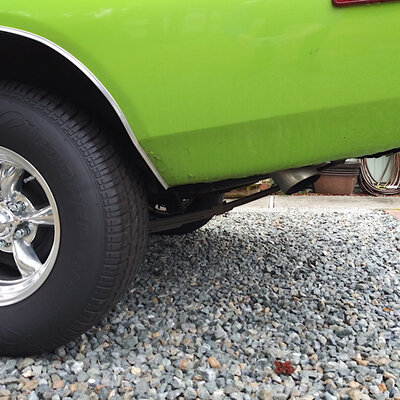
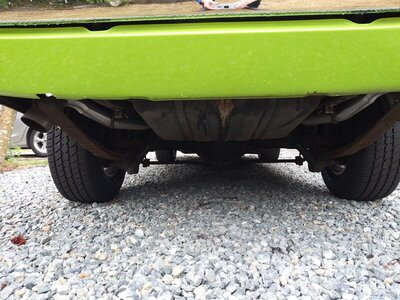
Hey, I would love to see a shot of how your pipes are run in the back ?? I would like mine to exit there as well. Could you take a shot of how they cross the rearend and go through springs? Thanks Earl
 
Hey, I would love to see a shot of how your pipes are run in the back ?? I would like mine to exit there as well. Could you take a shot of how they cross the rearend and go through springs? Thanks Earl

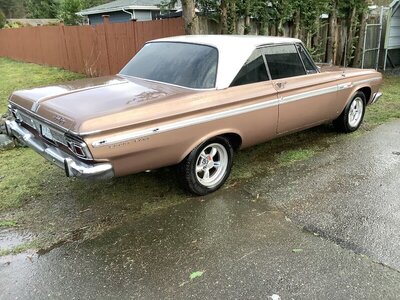
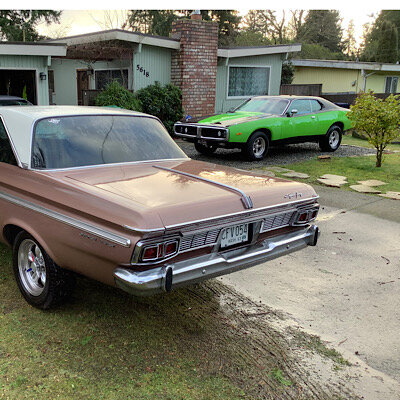
I will try to post some pictures under the car when I get time and this setup was done very well for both cars even with the leaf springs. Many so-called exhaust shops told me that they can’t put the tips out there and then I found one who took the challenge and nailed it x2! :lol:
These pictures are just what is on my IPad for now. Sounds good and keeps exhaust away from the bumper :thumbsup:

:xscuseless:

95AFF57F-9C58-416C-8DD8-7BCE4F8C0602.jpeg 53E4BA6E-D9BF-4126-A875-3C6A43B321DE.jpeg 49EFFAED-0A16-4EEB-BD32-3FB1380A9B8B.jpeg 4C0FE529-9B25-4184-82BB-191C3E806460.jpeg A4A7CEE2-DB4B-4122-9D5A-BE7F7004FB8D.jpeg CC249A17-8208-4DB8-AC4F-111E23D0EDF6.jpeg
 
Auto Transport Service
Back
Top