• When you click on links to various merchants on this site and make a purchase, this can result in this site earning a commission. Affiliate programs and affiliations include, but are not limited to, the eBay Partner Network.

D-man's 72 rr project

IMG_20201128_111057.jpg
IMG_20201127_194732.jpg
A/C blower motor test.
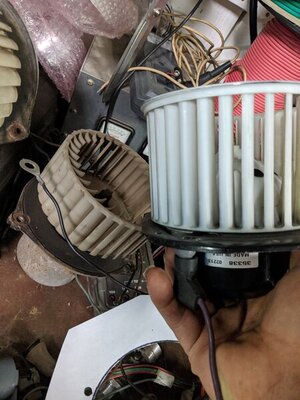
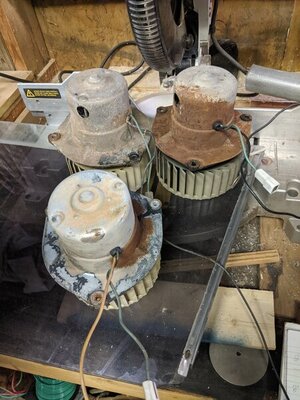
So I have collected four AC blower motor and I've got a spare evaporator heater for under the dash and I got to wondering about a newer blower motor that might be more efficient. So in one of my trips to the pull aparts in Tulsa I looked for a blower motor and fan out of a newer vehicle. And I found one out of a early 2000 Chevy van that looked sort of close.
IMG_20201121_192548.jpg IMG_20201127_194729.jpg

So I decided to do a test. To test the blower installed in my '72 roadrunner and compare it to the motors and the GM motor to see which one is more efficient. So I measured the airspeed out of my vents installed in the car and then I did a bench test with the AC heater box and all of the fans including the GM blower fan. I checked voltage and the amperage with the blower motor head to the battery and then on medium and low and took that motor out and that is motor number one in the chart below.
IMG_20210322_172623.jpg

So the newer gm motor is more efficient with not fan on it but not with the gm fan wheel on it or in the heater box. the shaft is smaller and d shaped making hard to put the mopar fan wheel on it.
I then rebuilt the best blower motor that I tested. I took it apart and sanded the armature down and greased the bearings.
IMG_20201128_101713.jpg

IMG_20201128_103157.jpg

Overall just greasing the bearings did the most improvement as all of the old motors are very similar. It didn't help on hi moving more air but on med. and low the air speeds were up. Every little bit helps.
 
Last edited:
Clutch guts.
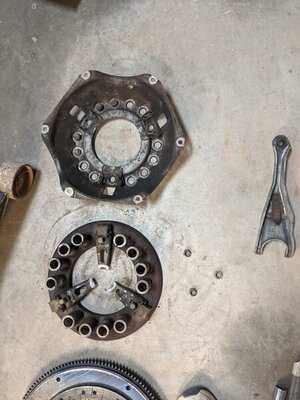
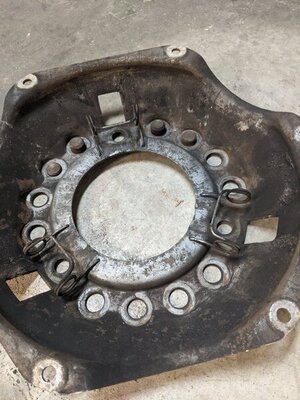
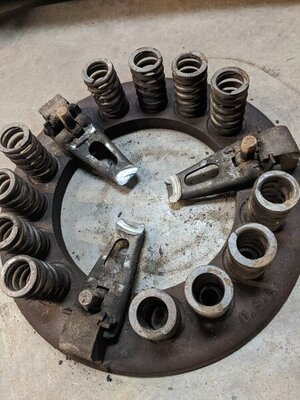
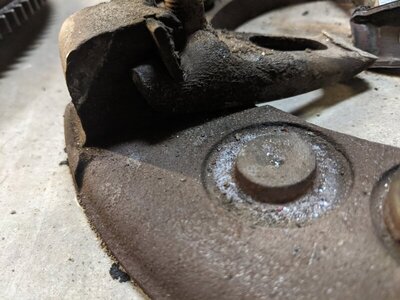
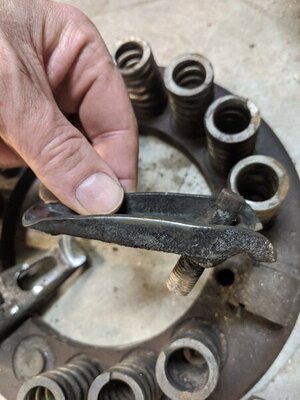
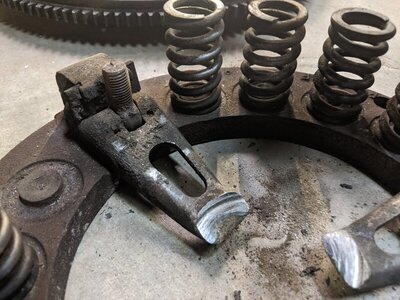
my throw out bearing locked up and took the fingers out on my B&B pressure plate so I thought it would be a good time to look at the guts of it. I've always just replaced them and never tore one apart so here it is:

IMG_20210401_211358.jpg IMG_20210401_211403.jpg IMG_20210401_211409.jpg IMG_20210401_211513.jpg IMG_20210401_211519.jpg IMG_20210401_211522.jpg IMG_20210401_211614.jpg IMG_20210401_211625.jpg
 
Clutch leverage.

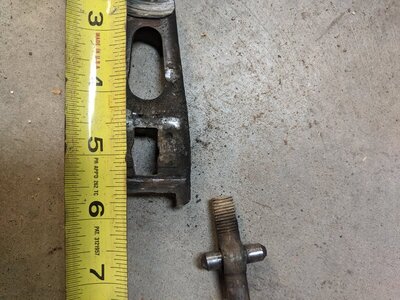
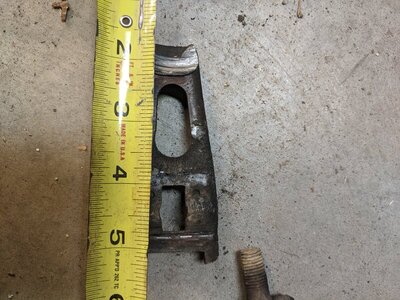
I've wanted a hydraulic clutch setup but I needed to figure out how much movement I would need so one of the missing links was the PP lever arms that are on the previous post. I measured movement of: clutch pedal, pedal rod, z bar in, z bar out, pivot arm inpivot arm TO bearing movment, TO bearing clearance, PP lever in, PP lever out to find PP final movement or clutch clearance. PP to clutch clearance in the FSM is .060" for a B&B. TO bearing to PP clearance is about 1/8". with all of these measurement I could find the lever ratios and this is what I figured:
OEM Clutch movment.JPG

I never measured my PP clearance so I have no way of knowing it seems about right.
Now to get on with the hydraulic setup. So I have the movement that is needed and now I had something to design to. So reading other DYI forums another user suggested a early 90's Dakota master cylinder and bracket fits old firewalls so off to the pull-a-parts to see and low and behold it works out very well. I got it home and measured the piston travel and it was a very close to the pedal rod movement. On to the slave cylinder. I looked at the dorman site and found a 96 jeep CJ7 slave that looked right, got on rockauto and 19$ +shipping later had one. Both of these had the same diameter piston so now I could plug them back in to solve the questions about movement and this is what I got:

hydro Clutch movment.JPG


pretty close so that is what I went with and here is the final results:
IMG_20201018_222206.jpg
IMG_20201019_183956.jpg
IMG_20210401_211640.jpg
IMG_20210401_211656.jpg
IMG_20210404_181840.jpg
IMG_20210404_181850.jpg
IMG_20210404_181901.jpg

this is clear cut path but I have collected cylinders from alot of guys to get to this point. I though the hose would be a challenge but I used the OEM hoses and fittings and heated it up with a heat gun and bent it to shape. One of the hoses had a steel line and that is what I used to the slave.
I little of trial to get the slave mounted but it works very nice.
 
Big brakes.

I've been wanting bigger brake for a while and wondering how to do this and then I stumbled upon Ivan putting mustang brakes on old mopars....so I bit. ordered the set of adaptor for 285$ and found a set of 2015 s550 take offs with 315 mile on them.
IMG_20200725_172744.jpg
IMG_20200725_170512.jpg
IMG_20200725_170517.jpg


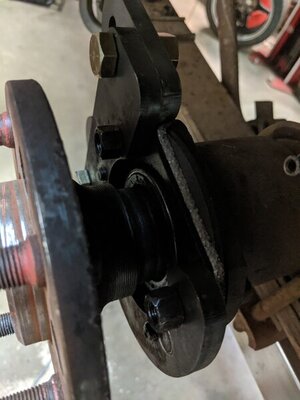
I started at the back because I most concerned with how to get the ebrake to work out. I had to take the rotors to get the ID opend up .029" to fit the hub of the axle. The standard bolt in the axle were not long enough for the 3/8" brakes so I sourced some bolt and nylok nuts. I had to open up the mounting holes but they bolted up fine.
IMG_20200914_211017.jpg

After I found more bolts I got the calipers mounted.
IMG_20200819_212236.jpg
IMG_20200914_211055.jpg


IMG_20200802_210444.jpg


So its on the ebrake cable, I ordered factory cables from rock auto and they are to long. the caliper end fit and suprisingly the housing end fit the mopar factory bracket. That worked out nicely. So I shortended it cut the cable and silver soldered another end on it to fit the factory pull cable.
IMG_20200914_211102.jpg
IMG_20200914_213632.jpg
IMG_20200819_212236.jpg
 
IMG_20200914_214116.jpg

IMG_20200914_214101.jpg


The fronts were a lot easier. I had bearing hub that I turned down to fit the mustang rotor, cuz I'm thinking that the fronts are going to were out faster. Boom the rotors were on. the brackets fit in the factory holes like a champ. I had to grind down a couple of radiuses to fit the calipers but all in all pretty good.
IMG_20200919_190157.jpg
IMG_20200729_204205.jpg

used the factory brake hoses with the mustang banjo fittings
IMG_20200919_190154.jpg
IMG_20200725_172744.jpg
IMG_20200919_191045.jpg


All in all these work alot better than the 12 factory setup. I have a 1.125 MC and I think I'm going to try 1.0625 for less pedal effort but not bad at all.
 
Auto Transport Service
Back
Top