You are using an out of date browser. It may not display this or other websites correctly.
You should upgrade or use an alternative browser.
You should upgrade or use an alternative browser.
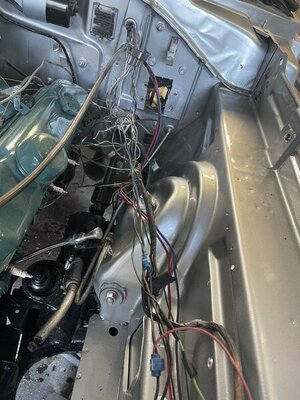
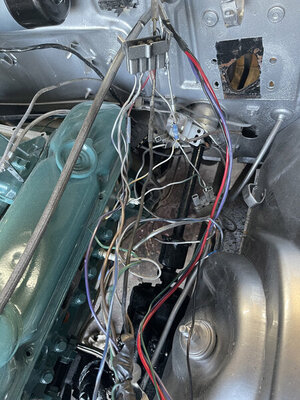
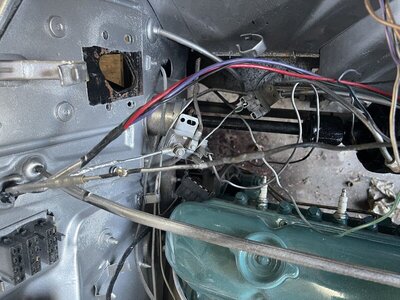
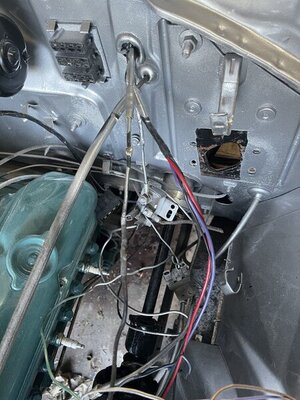
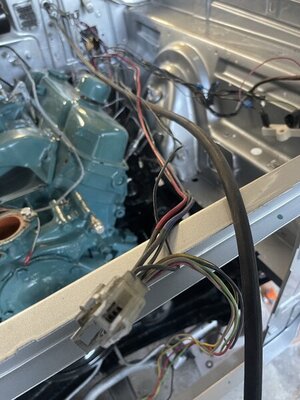
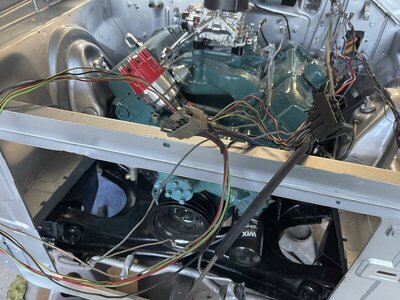
wiring mess for headlight/motors
- Thread starter northeastmoparnet
- Start date
I have a 66 I’m re-wiring and I have the FSM and an aftermarket color wiring diagram. In several instances the installed wiring color did not match either one. I think the aftermarket, laminated, color diagram may have been a little closer. Also had a discrepancy or two with which bulkhead plug bay some circuits were terminated to. Just something you have to cope with.
I think since your harness has been unwrapped, it’s probably been cut and patched some. There are some obvious wires that have been run through a grommet, bypassing the bulkhead, that are obviously not stock - with spliced connections no less.
If you don’t find any melted wire insulation or burned plugs or melted bulkhead ports you might be able to trace it all out, fix any bad splices, re-rout any un-fused circuits back through the bulkhead and fuse box and re-wrap everything back up.
I had a lot of melted stuff so just went with a new harness from M&H - where again you will find some wire color inconsistencies (surprise) and they at least warn you the FSM is not a good guide in this respect. If you go with a new harness be forewarned that the main body/dash reproduction harness is a basic wiring harness and most optional equipment has a separate wire harness that must be re-used and transferred to the fuse box and various plug in connections. So hang on to the old one and don’t disconnect any of the sub-harnesses from the back of the fuse block until you have the new one. Even the accessories fuse position does not come in the replacement fuse block and must be transferred. Some accessory harnesses come off the protected side of the fuse block and some come off the unprotected side and have in- line fuses - so have to keep them straight. It’s a job if it gets to this point. Good luck.
Yes, I noticed the purple and red wires for instance, I cannot find them on the laminated schematic I bought and they are pretty heavy maybe 10 wire? I am thinking they are the power feed for the motors up front? There is also a heavy 10 ga wire coming through the grommet which is by itself and I was thinking it seems to be the bypass wire for the amp guage and it also twins into the engine harness and the starter relay?
Lots of splices in that mess. Those wires are not stock I’m pretty sure - might be some sort of lighting modification for brighter lights - if you found some strange relays in it that look out of place then that’s probably what they are for.
I have a white nylon plug which I think goes under the battery tray. Is there a small harness that plugs into that and actually then goes to the headlights/motors and parking lights because they all have their own separate plugs but I seem to be missing an interim harness??
TN Mopar
Well-Known Member
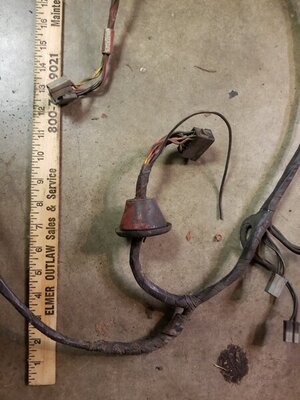
Yes the plug goes under the battery tray and the forward light harness plugs into it and goes through the core support out to the lights and motorsI have a white nylon plug which I think goes under the battery tray. Is there a small harness that plugs into that and actually then goes to the headlights/motors and parking lights because they all have their own separate plugs but I seem to be missing an interim harness??
this isnt the best picture however it is the forward light harness
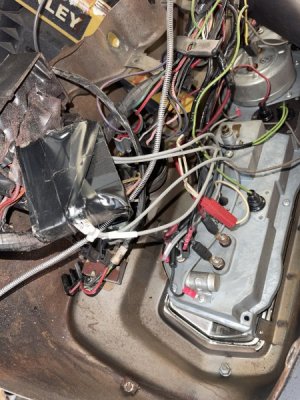
OK, so I decided I am getting tired on my back, so we pulled the windshield and then the fun began. Finally ended up with the dash on a bench so we could view it and fix what needed to be fixed. PO said he rewired the EL and in fact all the lights were working but I am fussy about voltage/amps in a old car. So I have attached a few pictures of what I found. If anyone wants to chime in here, I have no clue what the taped up box is with the 4 gray wires coming off it. The EL transformer appears to be wired correctly with nothing jumped out of spliced as well?? The bezel is pretty worn and I was wondering how the new pepops fit or where to send mine for restoration. This is just the beginning of this thread as I think it will be a process. Thanks in advance for any and all info you can share to get this back to stock.....
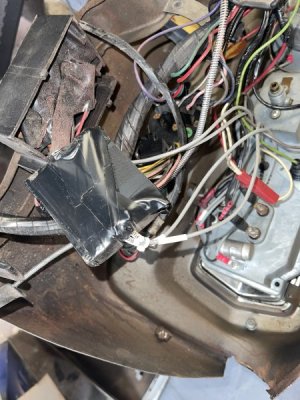
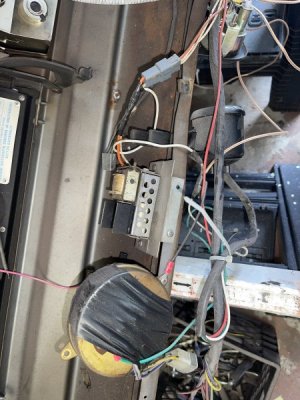
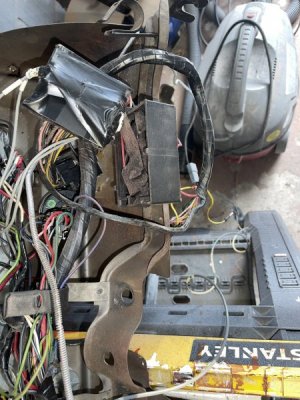


TN Mopar
Well-Known Member
WOW
That is a mess
It is not factory and I would scrap it if it were mine
Buy the under dash wiring harness from YearOne
It is a quality piece and will be color coded correctly for the most part
I wanted no worries about wiring and went with the new harness
Everything fit fairly easy
you will have to keep or make the small section that goes to the blower motor resistor
They make an excellent under hood harness as well
WOW my sympathies to you, an epic mess. With the dash out you'll clean that up. Under the hood a new harness is in order. Evans is one I've seen guys recommend. http://www.evanswiring.com/
Maybe bypass amp meter while working on dash or add a volt meter.
Maybe bypass amp meter while working on dash or add a volt meter.
Last edited:
Similar threads
- Replies
- 4
- Views
- 815
- Replies
- 6
- Views
- 1K

