• When you click on links to various merchants on this site and make a purchase, this can result in this site earning a commission. Affiliate programs and affiliations include, but are not limited to, the eBay Partner Network.

Searching for RUBBER front sway bar bushings - any help?

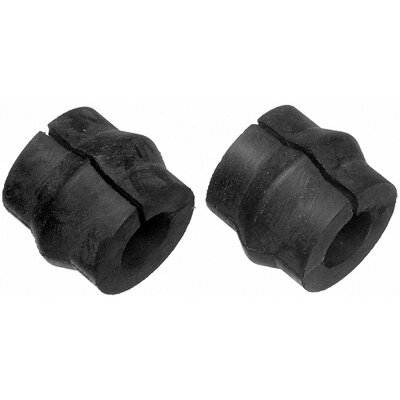
I got these from Amazon:
MOOG K5241
They were not perfect replicas, but fit over the bar and in the bushing retainers. I then just gave up and got a Hellwig 5904 sway bar since most of my rebuild suspension is poly. YMMV...
Hey thanks, but....why did you "just give up"?? What did you give up on, exactly?
 
Hey thanks, but....why did you "just give up"?? What did you give up on, exactly?

So they fit, they worked, but I had spent the past few months starting out a drum brake rebuild (like yours) that turned into OMG my front end is loose. I decided to do my first front end rebuild in 30 years and had to buy many more tools than I'd had to get everything apart. Half of the control arms/ball joint studs were rusted/frozen shut (see other threads I've started where I broke tools) so I got LCAs from another member. But when I got them, the metal sleeves were not pressed out of the LCAs. A friend of mine who is an engine builder told me about the Proforged LCA poly sleeve shaft kit -- so I left the metal sleeves in and pressed in the poly bushings instead of rubber, and used the shaft from the kit. So I then used parts of a Doctor Diff rebuild kit but replaced some of it's components since I was so impressed with some of the Proforged castings on my friend's car (no mopar, but that's another topic). The Doctor Diff sway bushing was the only poly part as he mentioned, but I was originally trying to stay rubber so I found the part I mentioned in my last post here.
I wound up with a rubber Doctor Diff kit, with poly shaft bushings I bought, and moog tie rods that I wound up sending half of them back to amazon until I got some that were not stripped. The Dr Diffs were ok, but I wanted the ones where the neck of the tie rod end is tapered and not a bolt coming out of a flattened edge like in older tie rods. I then got Classic Industries tie rod sleeves since I over torqued the tie rod sleeves in DrDiff kit and frigging bent the clamp (note: foot pounds is not inch pounds).
So, since I'd done all of that, and I'm sticking with drums since I have a strange issue with rallye red drums showing through the magnums, I figured, hey, lets blow more money and upgrade the sway bar. :) I also got Hemi torsion bars from Classic Industries and replaced my stock ones since they looked a little rusty/or that 70's red colored undercoating shops used to use. I also got Mancini Racing Strut Rods with the "improved" Perfect Fit rubber bushings like the Moogs.
So, sorry for the long response, but I basically figured I've almost gone half poly and my sway bar is a little dented (see another post) so I got the Hellwig. I made the post about opinions about the condition of my sway bar, and ordered it soon after I posted since Summit had it for 60 cheaper than other vendors. Everyone told me my sway bar is fine, but I'd already pulled the trigger on the Hellwig. :)
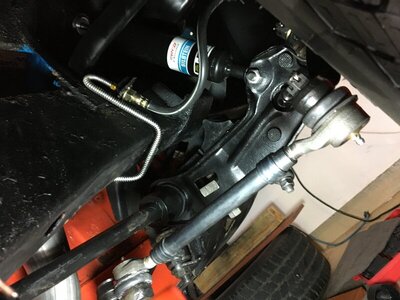
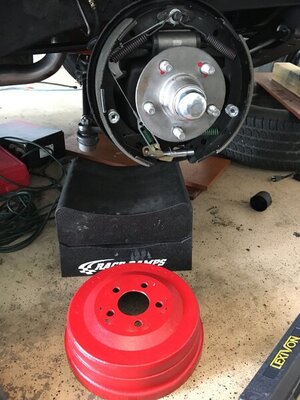
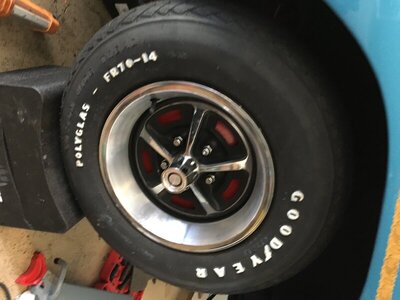
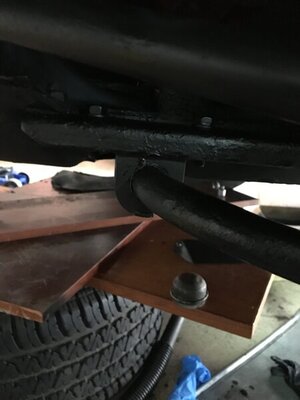
I've included a pic of my "creation" -- I was actually thinking of documenting my work like yours but I actually used a lot of your drum brake thread to find US parts since some of the parts just seems lousy or (see another post), just fell out of the control arm. :) I am only done with the passenger side but the driver side is completely disassembled as of last weekend. Glad I could pass back some help!

Side note: Compared to your thread, most of my brake parts and drums are whatever I could get that worked. Most are from rehrenberg on eBay, the drums are Raybestos, and the hubs I got from another eBay seller. Once this is back on the road, I'll update on how things turned out. :)

034.JPG 064.JPG 036.JPG
 
Last edited:
So they fit, they worked, but I had spent the past few months starting out a drum brake rebuild (like yours) that turned into OMG my front end is loose. I decided to do my first front end rebuild in 30 years and had to buy many more tools than I'd had to get everything apart. Half of the control arms/ball joint studs were rusted/frozen shut (see other threads I've started where I broke tools) so I got LCAs from another member. But when I got them, the metal sleeves were not pressed out of the LCAs. A friend of mine who is an engine builder told me about the Proforged LCA poly sleeve shaft kit -- so I left the metal sleeves in and pressed in the poly bushings instead of rubber, and used the shaft from the kit. So I then used parts of a Doctor Diff rebuild kit but replaced some of it's components since I was so impressed with some of the Proforged castings on my friend's car (no mopar, but that's another topic). The Doctor Diff sway bushing was the only poly part as he mentioned, but I was originally trying to stay rubber so I found the part I mentioned in my last post here.
I would up with a rubber Doctor Diff kit, with poly shaft bushings I bought, and moog tie rods that I wound up sending half of them back to amazon until I got some that were not stripped. The Dr Diffs were ok, but I wanted the ones where the neck of the tie rod end is tapered and not a bolt coming out of a flattened edge like in older tie rods. I then got Classic Industries tie rod sleeves since I over torqued the tie rod sleeves in DrDiff kit and frigging bent the clamp (note: foot pounds is not inch pounds).
So, since I'd done all of that, and I'm sticking with drums since I have a strange issue with rallye red drums showing through the magnums, I figured, hey, lets blow more money and upgrade the sway bar. :) I also got Hemi torsion bars from Classic Industries and replaced my stock ones since they looked a little rusty/or that 70's red colored undercoating shops used to use. I also got Mancini Racing Strut Rods with the "improved" Perfect Fit rubber bushings like the Moogs.
So, sorry for the long response, but I basically figured I've almost gone half poly and my sway bar is a little dented (see another post) so I got the Hellwig. I made the post about opinions about the condition of my sway bar, and ordered it soon after I posted since Summit had it for 60 cheaper than other vendors. Everyone told me my sway bar is fine, but I'd already pulled the trigger on the Hellwig. :)
I've included a pic of my "creation" -- I was actually thinking of documenting my work like yours but I actually used a lot of your drum brake thread to find US parts since some of the parts just seems lousy or (see another post), just fell out of the control arm. :) I am only done with the passenger side but the driver side is completely disassembled as of last weekend. Glad I could pass back some help!

Side note: Compared to your thread, most of my brake parts and drums are whatever I could get that worked. Most are from rehrenberg on eBay, the drums are Raybestos, and the hubs I got from another eBay seller. Once this is back on the road, I'll update on how things turned out. :)

View attachment 1138793 View attachment 1138795 View attachment 1138796
Wow, quite the ordeal for sure. I was blessed when I started the brake thing in that I'd already sorted the front
suspension out at the alignment shop a few years ago, with replacements of the usual ball joints, tie rods, stuff
like that. Once all that was done, the alignment went beautifully and the tech was amazed how the car was so
dang "square" (he had the 4-wheel stuff mounted on the car and "pulled diagonals" on my request).
The car tracks straight naturally, so the previous owners' steel replacements (extensive!) must have been ok.

The brakes you know about and they're still quite good after some miles now; the only future plans on those
are as you say, fetching new drums at some point.
Then....I spotted the sway bar situation and here we go again. :)
Thanks for the help, I appreciate it! :thumbsup:
Oh, almost forgot - Great work!
 
Last edited:
So they fit, they worked, but I had spent the past few months starting out a drum brake rebuild (like yours) that turned into OMG my front end is loose. I decided to do my first front end rebuild in 30 years and had to buy many more tools than I'd had to get everything apart. Half of the control arms/ball joint studs were rusted/frozen shut (see other threads I've started where I broke tools) so I got LCAs from another member. But when I got them, the metal sleeves were not pressed out of the LCAs. A friend of mine who is an engine builder told me about the Proforged LCA poly sleeve shaft kit -- so I left the metal sleeves in and pressed in the poly bushings instead of rubber, and used the shaft from the kit. So I then used parts of a Doctor Diff rebuild kit but replaced some of it's components since I was so impressed with some of the Proforged castings on my friend's car (no mopar, but that's another topic). The Doctor Diff sway bushing was the only poly part as he mentioned, but I was originally trying to stay rubber so I found the part I mentioned in my last post here.
I wound up with a rubber Doctor Diff kit, with poly shaft bushings I bought, and moog tie rods that I wound up sending half of them back to amazon until I got some that were not stripped. The Dr Diffs were ok, but I wanted the ones where the neck of the tie rod end is tapered and not a bolt coming out of a flattened edge like in older tie rods. I then got Classic Industries tie rod sleeves since I over torqued the tie rod sleeves in DrDiff kit and frigging bent the clamp (note: foot pounds is not inch pounds).
So, since I'd done all of that, and I'm sticking with drums since I have a strange issue with rallye red drums showing through the magnums, I figured, hey, lets blow more money and upgrade the sway bar. :) I also got Hemi torsion bars from Classic Industries and replaced my stock ones since they looked a little rusty/or that 70's red colored undercoating shops used to use. I also got Mancini Racing Strut Rods with the "improved" Perfect Fit rubber bushings like the Moogs.
So, sorry for the long response, but I basically figured I've almost gone half poly and my sway bar is a little dented (see another post) so I got the Hellwig. I made the post about opinions about the condition of my sway bar, and ordered it soon after I posted since Summit had it for 60 cheaper than other vendors. Everyone told me my sway bar is fine, but I'd already pulled the trigger on the Hellwig. :)
I've included a pic of my "creation" -- I was actually thinking of documenting my work like yours but I actually used a lot of your drum brake thread to find US parts since some of the parts just seems lousy or (see another post), just fell out of the control arm. :) I am only done with the passenger side but the driver side is completely disassembled as of last weekend. Glad I could pass back some help!

Side note: Compared to your thread, most of my brake parts and drums are whatever I could get that worked. Most are from rehrenberg on eBay, the drums are Raybestos, and the hubs I got from another eBay seller. Once this is back on the road, I'll update on how things turned out. :)

View attachment 1138793 View attachment 1138795 View attachment 1138796
actual good information & progess :thumbsup:
 
I have discovered that there is or was a reproduction of the original rubber bushing.
The only one I found available so far is quite pricey though.
Working on it.
 
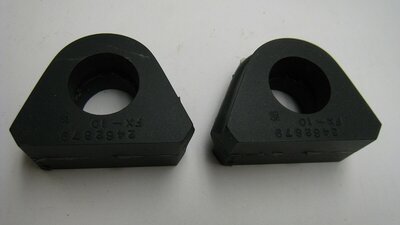
Come to find out, there is a reproduction of the original stabilizer bar (rubber) bushing.
No less a "name" than Bill Rolik Enterprises (BRE) sells it:
http://www.billrolikenterprises.com/proddetail.php?prod=2462879-P
s-l1600.jpg
It's a very detailed piece, complete with "dcp" logo and original part number (2462879).
He's VERY proud of it, though.
It's very hard for me to justify almost $100 for a couple bushings...
but it's obviously meant for those sort of "concourse" resto guys, too.

Moog also sells a more generic, strictly round bushing that is supposedly "OE replacement"
that is also rubber (part #K7064).
AMG_K7064_P04_TOP.jpg

I can't find any other information on anyone ever selling these in rubber anywhere, though -
and even trying to find anything by searching the original part number comes up empty,
no doubt in part due to the fact Mopar's stance on them was to replace the whole bar assembly.
Obviously, that ain't happening, least for me.
One is left with little other choice than one of the poly-whatevers or the strictly urethane ones, other
than ditching the factory mounts and adapting the Energy Suspension get up.

I have always tried to keep Fred the GTX as close to as things were when he was built, whatever I
happened to be working on at the time - but this time, it appears that's not so easy.
It's either do what everyone else seemingly has if sticking with the factory bar - namely, using an
aftermarket set of non-rubber (read: harder, denser material) bushings...or going with one of the
aftermarket bar setups all together.
 
In case anyone is still curious...
The sway bar came off Fred quite easily today; small impact Makita and a 1/2" box end wrench made
quick work of yanking it all off the car.
I found the links to be originals and although quite grungy, in surprisingly decent shape.
They'll be replaced nonetheless.

The two main bar mounts also came off easily and the rubber contained in those was also not bad, just
really old - no slop in it. In fact, some PB was used to get them loose from the bar.
I then drilled/cut/pulled all the rubber out of them - whatever I wind up doing, they are also being replaced.

The moment of truth was trying to determine if the factory bar was bent or warped, so I checked it with
the concrete floor, flipped it every which way - and once it passed that test, I tossed it up on the workbench
and did some rudimentary checking with a contractors' protractor.
Result: If that bar isn't fine, it's damn close.
It will be reused.

Ok, so what was causing the shift in the bar and the contacting of it with the LCA?
I lastly began comparing the two bar mounts to each other....
One laid down flat on the flanges where the bolts pass through; the other had quite the twist and
hunchback to it.
Yep, mounts were the problem - no doubt caused by someone in the past using the sway bar to pull
the car (maybe even when they recovered it out of that field a dozen years ago?).
Since the mounts are mild steel and the bar....isn't....the mounts gave way first.
At this point, I'll be in touch with PST or Energy or whoever to see if their complete mount kits are
compatable and go that route (I'm guessing my chances of finding really nice used original mounts
are between slim and none).
Whichever one turns out to be the easiest to adapt to Fred, I'll buy all the hardware from them including
link kits and be done with it.
 
I surrender:
71X3y+FsiNL._AC_SL1500_.jpg

Energy Suspension 5.5135G conversion kit for 15/16" stock bar.

61Shxeo2haL._AC_SL1500_.jpg

Also Energy Suspension, link kits to match.
It'll all get here by Thursday; until then, I have a bar and other things to scrub and paint. :thumbsup:
 
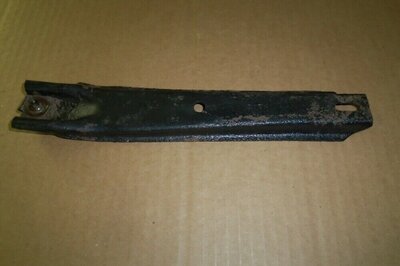
While I'm at it in this area of the car, it's never had the brace from the underside of the radiator
support to k-member since I've owned it. Guess this would be a good time to install it as well.
Anyone happen to have a spare one handy?
(Application is from '66-'70 from what I see in the AMD catalog?)
s-l1600 (1).jpg
(Part number 2530683)
 
That is where I got mine. The old one was rusted pretty bad and bent. Those sway bar bushing's where a real pain. Followed the directions. But what a job. Maybe cutting the bracket and welding it back is a better way. LOL.
 
Give these people a call,they had sway bar bushings for my '66 Imperial.

Quirey Quality Design Co.
3200 Graham Ave
Windber, PA 15963

814-509-6410
 
Give these people a call,they had sway bar bushings for my '66 Imperial.

Quirey Quality Design Co.
3200 Graham Ave
Windber, PA 15963

814-509-6410
Thanks but as I've already posted, the Energy Suspension pieces are already in route. :)
 
Interesting, comparing these Energy Suspension pieces to the original hardware....
new hardware 1.jpg

The term "dwarfs" doesn't really do it justice....

new hardware 2.jpg

The bushing hardware is ludicrously larger - and a double heavier gauge metal to boot.
The instructions say to use the two existing holes in the k-frame and to mark and drill
for a third as well - and all hardware is included.

new hardware 3.jpg

Obviously, the critical dimension here is the measurement between top and bottom middle washers.
The factory used a welded washer top and bottom for this; replacements use the typical sleeve.
Lengths are favorably similar, at least to the nekked eye.

Having limited resources for refinishing sway bars and such (and being lazy, too), I took the bar outside and
we had a session of leftover carb cleaner, then chrome wheel cleaner and finishing up with car wash soap.
That's as clean as I was gonna get it; no attempt was made to beautify the thing, so off it went to the
ceremonial Pop Memorial Paint Booth (with improved coat hanger!), a tree along the road down.

All these years I've lived up here on the ridge, I've always used the first tree along our road to hang stuff from
and spray paint on. It's sufficiently far away enough to keep overspray away from the garage and house and
nobody is going to accidentally bump into it there.
Pop used to call it my "paint booth"...and now you know the rest of the story.
Really, it's just the first of a dozen maples I got a great deal on over 20 years ago ($5 each) that took
off like nobody ever expected.
Stuff just grows out here, even where you don't want it to.


The only black paint left on the shelf was some of this, so I used it (saving a little for the invariable touch-ups):
paint.jpg

We'll see if it's any good for this - but anything is better than what the car had before, right?

I'll get all this slapped together here in the next day or two. Lots going on besides this right now...
 
UPDATE 7-23-21:
This afternoon was the time to try all this Energy Suspension stuff out (and it's sufficiently roasting hot
outside in the afternoons these days), so heck with work - to the garage I went, like I had made an
appointment or something (which is sort of what I have to do).

Instant review:
The Energy Suspension 5.5135G conversion kit for 15/16" stock bar (hopefully this site's search
engine will find that for folks in the future) is a VERY well made piece. Everything was heavy duty, nicely
finished and none of the shiny, polished-looking hardware broke when I put the redneck mojo to it.
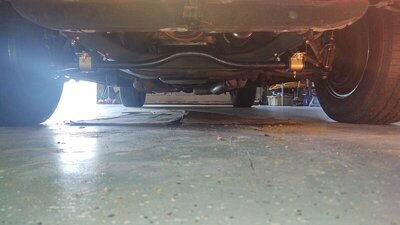
new kit installed 7-23-21.jpg
The adapter brackets in the kit line up sort of catty-corner with the two existing holes in the k-frame on
either side and once you figure out which side is which (they only go one way and they aren't marked
L or R), they locate the stock bar just the way they ought to.

(Note: the directions also say to drill a third hole in the k-frame for a third bolt for each side for the
adapter plates; the hardware got the heavy-gauge adapter and the bushing retainers plenty snug to the
k-frame though, so I didn't do that part - yet. If after driving it a few times it becomes evident that
third bolt is needed, I'll gladly do so - but keep in mind, the factory only had two bolts holding the original
bushing retainer, too).


Next came the link kits, formidable as they were - these things dwarf what was left of the factory pieces.
They are also "adjustable" from Energy Suspension in that they come with two pairs of "short" and two pairs
of "long" bushings - and you're supposed to figure out how to pair them up on the links.
Lacking anything more sophisticated to decide by, I determined that their "short" ones most closely resembled
the factory bushings I had for reference and used those on either side of the middle sleeve, in between
the LCA and the bar:
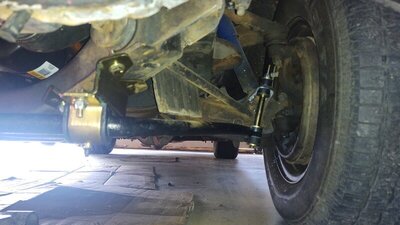
new kit installed2 7-23-21.jpg
That seemed to work out sort of "naturally" within the space given.

Procedure (once I remembered that the hump in the bar goes UP, that is!):
I first loosely hung the bar from the k-frame bushings, then loosely assembled the link kits on either side...
I eyeballed side-to-side things, wiggled things around on their mounts, tried to find where the bar wanted
to rest "naturally" and still remain what appeared to be centered, then lowered the car to its' wheels.

The instructions say not to final tighten anything until the car is resting normally on the ground so once
I lowered it, I made any last minute adjustments, greased where there are fittings (and hosed down the links
with white lithium too, although the instructions say no lube is needed) and then laid the torque to all the
hardware.
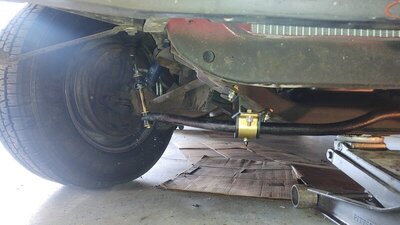
new kit installed1 7-23-21.jpg

While things didn't work out perfectly, exactly equal side to side (there's about a quarter-to-half an inch
difference in something when comparing side to other side), it was pretty darn close considering.
I know the LCA's are snug and good to go; that leaves slight warpage in the bar itself or even the k-frame
not exactly being gnat's-*** perfect, for that matter.
Either way, everything is certainly where it should be now and there's no more slop.
I'll put some miles on it, then in a couple weeks, re-check torque and re-grease whatever decides to squeak.

Conclusion:
If you want to retain your factory sway bar and your own frame mounted bar bushings are shot, snag one
of these Energy Suspension adapter kits. They're quite impressive, least to me. :thumbsup:

(Now that I'm all done with any mechanical work up front - FINALLY - next project is to get under there with
detergent, scrubbing implements and have at it. It needs a good scrubbing!
 
I wanted to update mine since I originally thought I'd go with the Moog bushing and then the Hellwig larger sway bar. After seeing your post I looked for an Energy Suspension replacement for a 1970 since they mount differently than yours. So, I found this on Amazon:
Energy Suspension 5-5113G Front Sway Bar Bushings

It actually fit perfectly so I'm putting the Hellwig on hold for now. Turned out that the Energy Suspension looks and fits perfectly on my 70 RR. It is poly so I'll have to check it now and then, but I think it looks great! Thanks again for posting a thread that helped me out!

258.JPG
 
Auto Transport Service
Back
Top