• When you click on links to various merchants on this site and make a purchase, this can result in this site earning a commission. Affiliate programs and affiliations include, but are not limited to, the eBay Partner Network.

Headlight relays

qkcuda

FBBO Gold Member
FBBO Gold Member
Local time
12:35 PM
Joined
Aug 29, 2019
Messages
1,792
Reaction score
3,603
Location
Jarvis, Ontario
Has anyone ever tried to do the headlight relay conversion on a Charger with rotating headlights? I was going to do it but I can't see how it would work given the limited space.
 
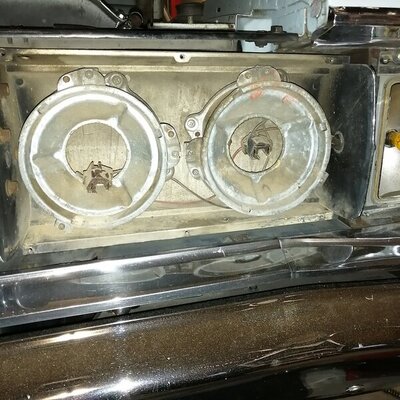
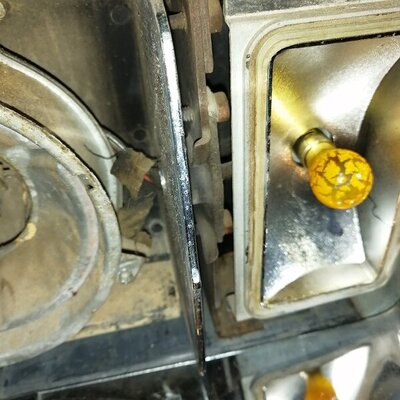
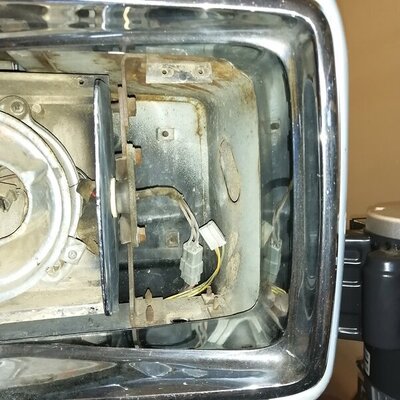
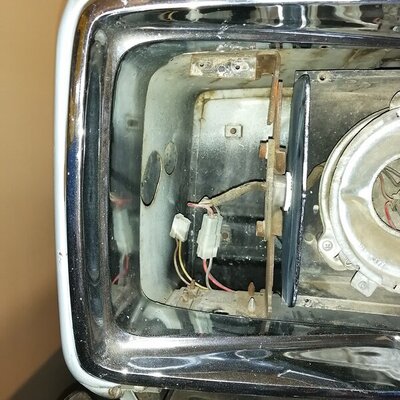
The issue is the only access to the headlights is a half inch hole in the pivot shaft. You can see it here on the right and where the wiring goes in behind the parking light housing

IMG_20211211_155039.jpg IMG_20211211_155341.jpg
 
I don't understand what extra space is required.
For the relays?
They can be mounted most anywhere by cutting and splicing under the hood.
Or are you asking about using that kit and new plugs?

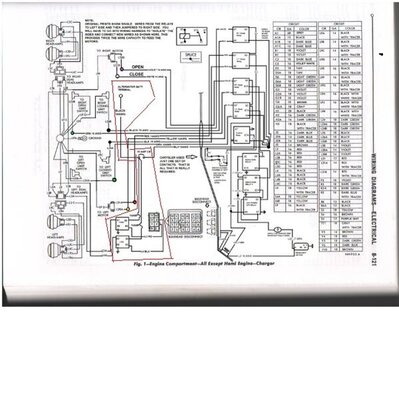
Modified prints using a CB to feed off alternator terminal and eliminating connectors.
You don't have to go that far.
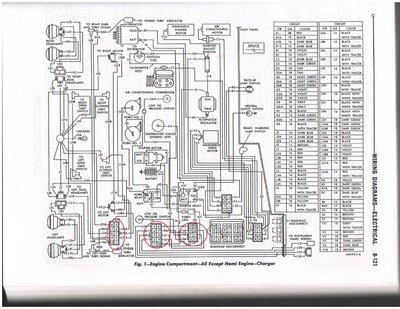
And the factory prints.
L3 and L4 wires for high/low beam to convert to control .
Most people use a fuse on the power feed.
All the wires to the lights remain past the relays.


X and Y bulkhead to 8 and 9 next plug then to left connector and over to the right side.
View attachment 1206510

headlight 1.jpg headlights.jpg
 
Yes, I was referring to the kits that use new wires and plugs and use one of the existing low beam plugs for the trigger. I would like to use the existing headlight wiring, so I see I would need to splice into the wiring harness going through the rad support.
 
I used crackedback's kit on my 68 Charger. He makes kits to order for individual cars. No wires to cut. My 68 Charger headlight doors are vacuum operated so everything works as it always did. The only thing that is altered is when you turn on your light switch, you are no longer running all that amperage through the switch and bulkhead. You are only activating the relays which have now assumed the role of handling the current flow to the lights.
 
I second Crackedback’s kit. I just put one on my 67 charger and it’s great! Super easy to install and worked perfectly. I left the factory harness in place, including the wires in the buckets. It all fit fine and works great. He’s also very very good at staying in contact and responding fast with any questions.
 
The harnesses he makes that fit in the bucket come without a connector. So you feed the end terminals from the inside out and then put the connector on after. I had the same worry you do but it’s actually very simple and there is plenty of room.
 
Thanks for your reply. Yours is the first 66-67 Charger that I know of that used it. Running the wires and then adding the connectors after makes perfect sense...now that you mentioned it. How did you fish the wires through to the headlight pod, up from behind the bumper? I couldn't figure out how to remove the parking light housing for access.
 
I removed the grill and the turn signals. The turn signals have screws at the top and bottom on the front of it, then there is a big screw underneath you have to get under the car to remove. Just remove them and the whole housing comes out pretty easy.
 
I got the other screws. It was the one on the bottom I was missing, thanks.
 
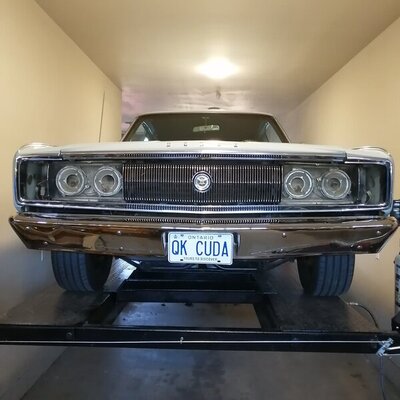
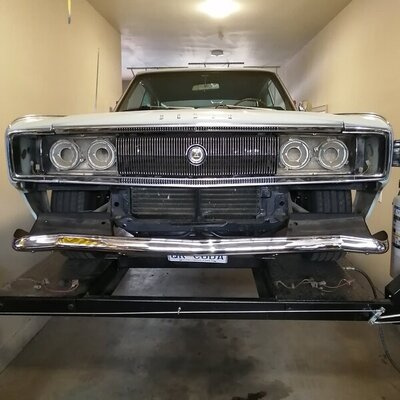
Thanks to bcOH67 I managed to get the parking light buckets removed, and expose the headlight and parking light connectors. I had to loosen the bumper brackets to drop the bumper enough to get a socket in between the bumper and the grill surround. Not sure how I am going to get these bottom screws back in later, the bumper may have to come off. That is an issue for another day.

IMG_20211219_135511.jpg IMG_20211219_135458.jpg IMG_20211219_135704.jpg
 
Glad you got them out! I just used a magnetic screwdriver to get the bottom screws back in, I have flatheads holding mine in- not sure if that’s standard or just what I have haha
 
My bottom screws are 7/16 headed bolts. Just not sure if I will be able to get the started straight when I try to put them back in. There is a splash panel that blocks access from underneath.
 
Glad you got them out! I just used a magnetic screwdriver to get the bottom screws back in, I have flatheads holding mine in- not sure if that’s standard or just what I have haha
Should be a small phillips screw. Many were stripped out, etc due to corrosion. Jeff Intwert in BC Canada makes new ones. He is on FB.
 
The screws through the face are Phillips, I was referring to the self tapping bolt that comes up through the bottom.
 
Oh sorry I misunderstood. I don’t have and splash guards or anything. The screws underneath are Phillips for me so I just used a short screwdriver
 
I decided I would pull the bumper to get access to the headlight wiring harness. I removed the front bolts and loosened the back ones, figuring the bumper would just slide out. It ended up just dropping down, which is actually better. I won't need help to put it back on. I released the Packard connectors and was able to pull out the stock headlight sockets. Next to read the instructions a few times before I start adding the new harness.

IMG_20220226_152152.jpg
 
You can see the splash shields attached to the bumper brackets that prevented me from accessing the parking light bolts from below.
 
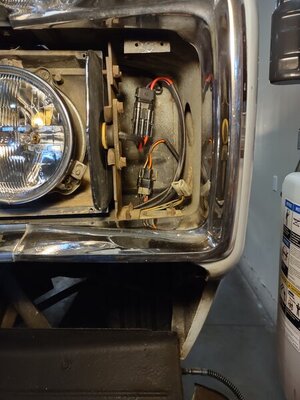
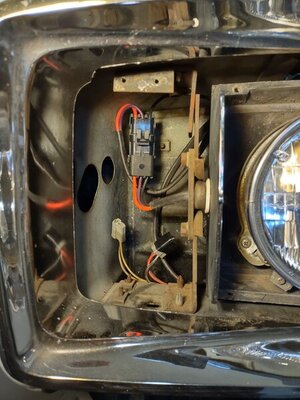
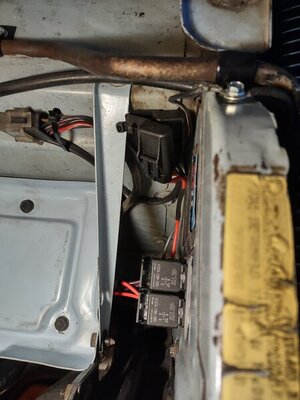
I got the wiring in place today, it all fit in the factory looms. I did drill two small holes in the rad support to mount the relays. The grounds ended up mounting to the A/C brackets on the rad support where the original ground wire for the headlight harness attached.

IMG_20220327_191538325_HDR.jpg IMG_20220327_191625508_HDR.jpg View attachment 1261294 IMG_20220327_191956843_HDR.jpg
 
Auto Transport Service
Back
Top