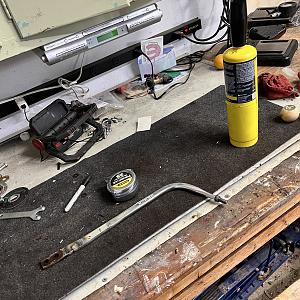
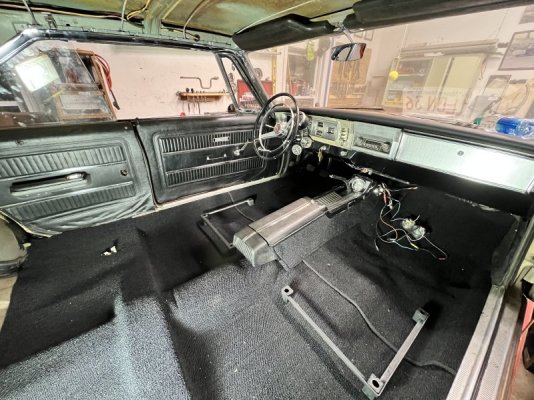
This is a continuation of my 4 speed swap. I ran out of room in the previous garage and needed to create a new one to continue.
About this Mopar:
Please visit Part 1 of this 4 speed conversion here: 65 Satellite 4spd swap I ran out of room in that garage and had to create this one to continue.
2/27/22
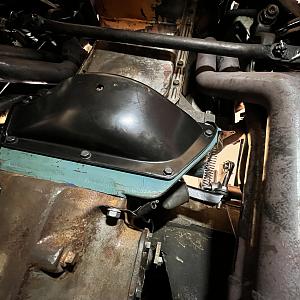
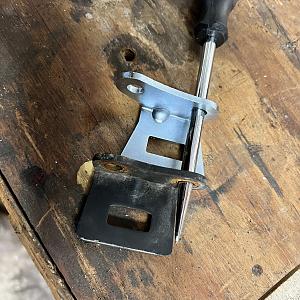
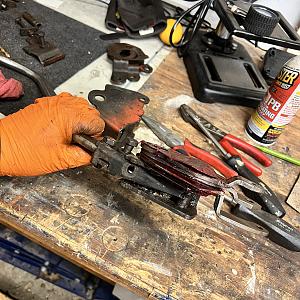
Sometimes you need to go backwards to go forward. That is the case today. I realized after playing around with the clutch adjustment that something was def not right and with the fact that I had to extend the z-bar, it made for a very stiff pedal. Low and behold, the clutch fork pivot bracket inside the bell housing was not for this application and I ended up ordering the correct one. I decided to tackle this today so I removed the linkage and the z-bar from the car. After pulling the dust cover off, it seemed fairly easy to get the clutch fork out. So as not to pry on the release bearing or the input shaft, I used a 2x4 for leverage and put a screwdriver through the fork. Then all I needed to do was pry on the screwdriver using the 2x4 as the support to pry against. Once it popped out of the bearing clips, I was able to wiggle it off the fork bracket and take it out.


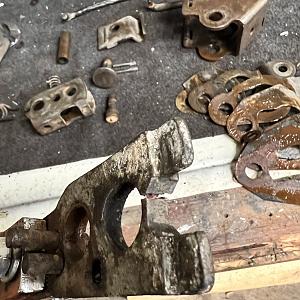
Next I pulled the bracket out and compared it to the new one and can clearly see that they are different and the new one will actually place the fork slightly higher which is what will need to happen to line up with the new z-bar.


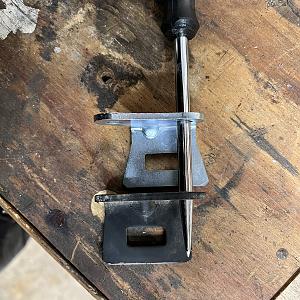
To make the install a little easier, I used a file and de-burred the edge of the new bracket where the fork will slide in. I also greased the fork pivot as well as the tips where the bearing will clip on. I did this with the hopes of making it easier to slide back into place.


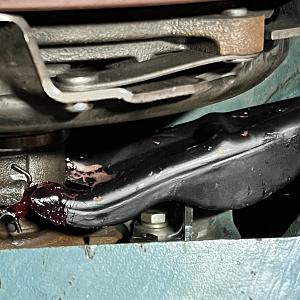
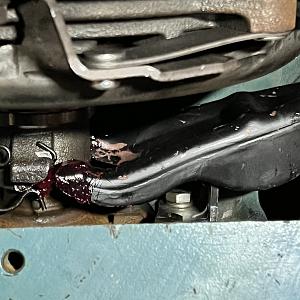
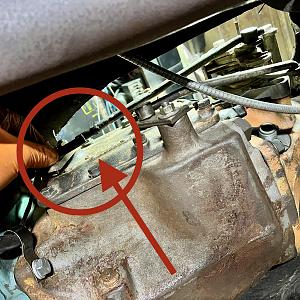
Unfortunately, going back in was not an easy task. I slid the bearing all the way up to the pressure plate but fork would hit the body of the bearing and it needed to go in about a 1/2" to line up properly. I tried for a little while to get it in and then just decided to bite the bullet and pull it all apart to install it rather than potentially breaking something by prying on things. So I ended up pulling the driveshaft out, dropping the crossmember, pulling the starter and removing all the top bell housing bolts. I then backed off the two lower bell housing bolts but left them in the block half way. By doing this, I was able to put a jack underneath the trans, lower it down and then using a pry bar and screwdriver as wedge, back the trans and bell off the block the 1/2" I needed. Once it was backed off, the fork slid into place like butter!
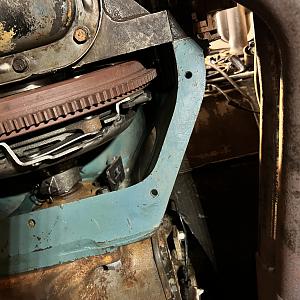
Here is the fork hitting the bearing before pulling the trans back

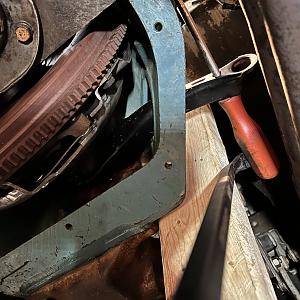
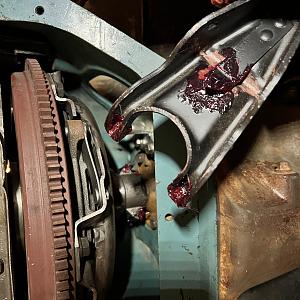
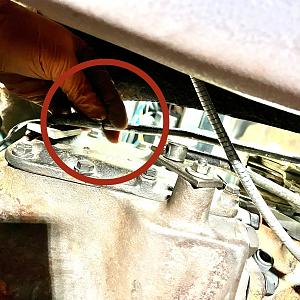
Here is the trans pulled back. You can see that all it took was the width of that screwdriver between the bell and the block to give me the clearance I needed.

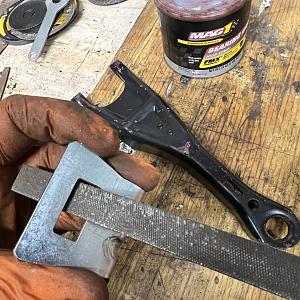
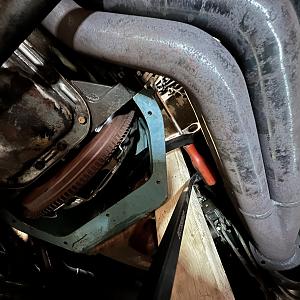
Here is the fork in place and then it all buttoned up with the linkage fully adjusted to keep the bearing close but not touching the pressure plate and to have about 1/2" or so of pedal freeplay.


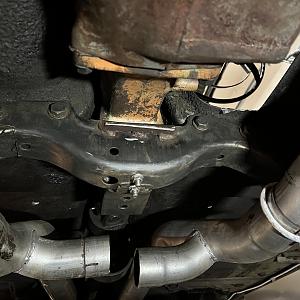
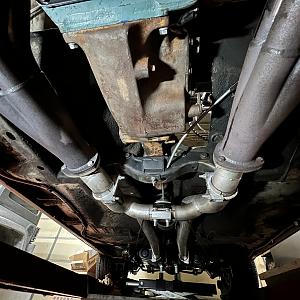
Last issue, I seem to have is that I think using this auto crossmember with the mount, that it keeps everything sitting just a little too high because I went to re-connect my exhaust to the headers and the exhaust now hits the crossmember and does not line up with the headers cause its too high. the trans and engine need to drop down about an inch. Gonna need to figure that out so that I can finally button up the underside. All that's left underneath is the exhaust and adding fluid.

3/1/22
I ended up pulling the crossmember out and reversing the trans mount. Still sat a little too high for the exhaust. Then I realized that the TTI pipes allowed me to pivot the head pipe that bolts to the collector and I was able to get the exhaust connected. I will still need to bring to exhaust shop to have some tweaking done but it should work to get it running again. While I was underneath, I buttoned up the exhaust, re-tightened the passenger side header and re-installed the e-brake cable.

Next I’ll get the shifter mounted and make sure I have the proper clearance. I may end up fabricating my own shifter from a couple of old hurst shifters. We will see.
3/16/22
It’s been a couple weeks and I’ve been picking away at it. These past couple weeks entailed a lot of fabricating, test fitting, fabricating, test fitting, starting over and fabricating some more.
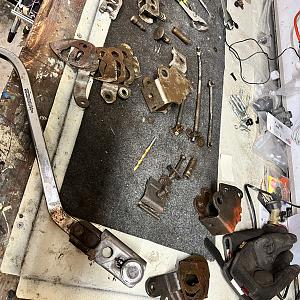
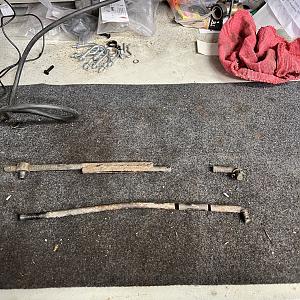
Mounted the shifter and noticed that the shift rods didn’t fit and were too short. Not sure what they were for but since we are stretching the budget, decided to make these work. I happened to have an old shifter rod that was from another project so that became my donor for lengthening my originals. I cut a section of rod from the donor piece and then cut my original in a straight section.

I then cleaned the surface to prep for welding. I welded the donor section to the longest part of the rod first


I then attached it to the shifter and measured and marked where I would weld the other end. I had to cut a little more material off and the was able to weld it up. I did this for both the 1-3 shifter rod and the reverse rod.


After the linkage was all set, I double checked the shifter to make sure it worked and it was jammed. It would go into 1st and 2nd easily but 3-4 was difficult to find and it would not go into reverse. I tried everything. Made sure the shifter was in neutral with the adjustment pin and it was. I played around with a number of things and then decided to take the shifter apart to see if there was anything up with that.


And lo and behold the base was cracked… fortunately I had another Hurst shifter so I took that one apart and used all the best parts from the two of them and made a good shifter.


mounted the shifter and it still wouldn’t go into reverse. At this point I’m frustrated and searching online forums and blogs and they all said the same thing….which wasn’t helpful. So I decided to disconnect the linkage at the shifter and then see if I could get the shifter to go into the reverse gate and I was able to! After looking at it for a while, I realized that the only way to get the shifter to sit in neutral AND be able to go into the reverse gate, was to NOT use the alignment pin because when the reverse lever was lined up with the pin, it was not positioned correctly to go into reverse. Once I played with that, I went underneath and re adjusted the reverse linkage and bingo. It worked. All the gears shifted smoothly and it went in and out of reverse.
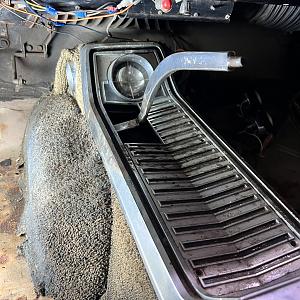
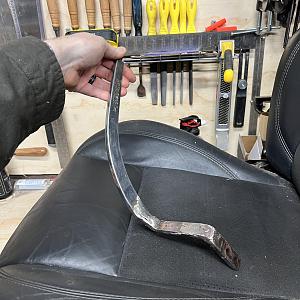
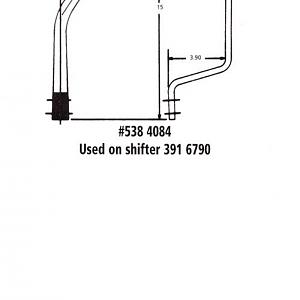
next up was fabricating a shifter since I have a console, I needed the offset “s” shape shifter. Costs are getting tough so made my own. Looked up a diagram for measurements and got started.

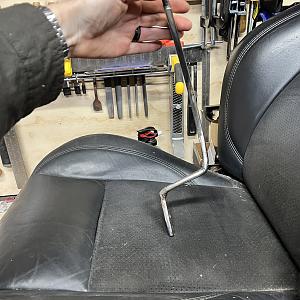
I had an old Muncie Hurst handle that I decided to sacrifice to make my Hurst work.

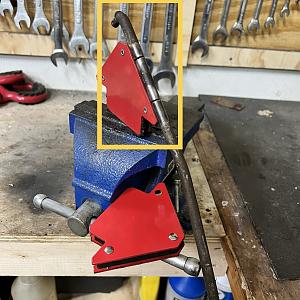
with a little heat and some relief cuts I made my first bend at 90 degrees


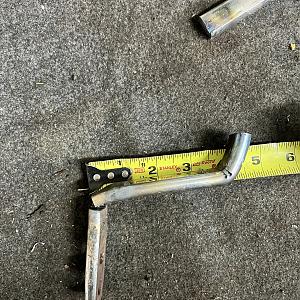
Then I measured using the diagram where the next bend would need to be to complete the “s” shape

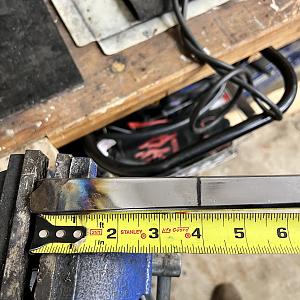
Heated it and bent it. Now I had a rough shape to work with. Cut the rest of the handle off to just have the bend. I planned on cutting the bottom of my original shifter off and welding to this. All the welds and grinds will be hidden under the boot when it’s done so you will never see them

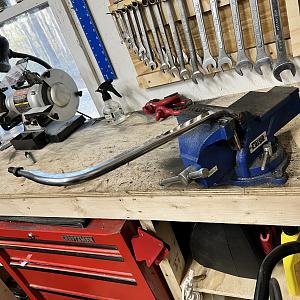
cut the bottom of my shifter (where the mounting holes were) and lined it up with the other “s” piece. Tacked it in place and brought it into the car to make sure it fit right. It did so I then welded all the way around and then welded around and cleaned up the “s” bar. Here’s the finished product. It came out just as I wanted. I just need to do some finish sanding and I’ll hit it with some chrome spray paint even though you won’t see it.


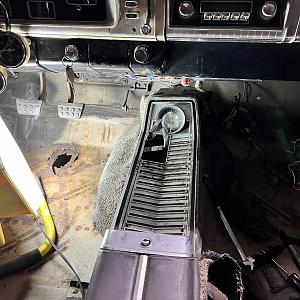
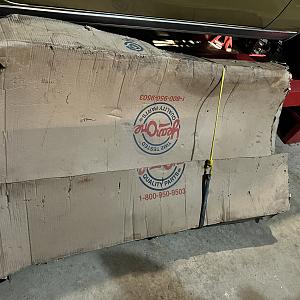
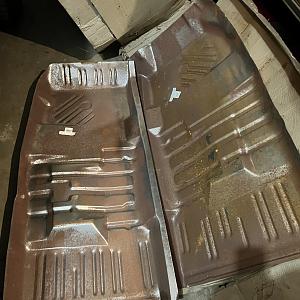
Now I can get to patching the floors then I can weld in the hump.


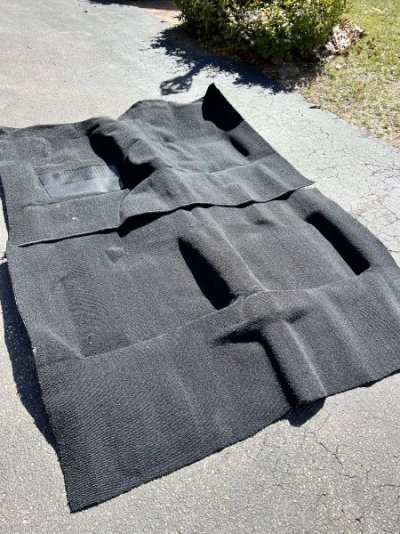
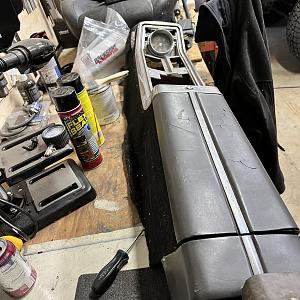
I also bought a new carpet kit with new carpet for the console. Going to use both my 4spd console and auto console and make one nice one. I’ll update this when I do


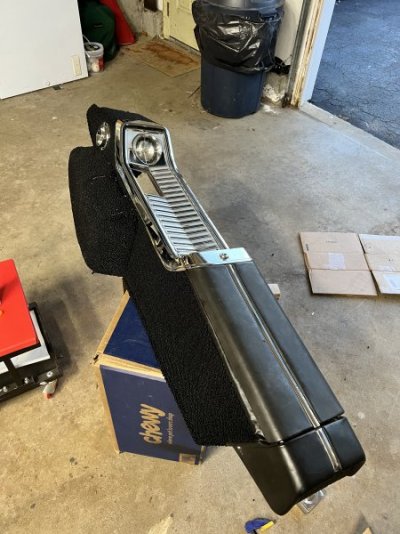
So I didn’t realize that the consoles are actually the same and they both are cut out for a 4spd. Only difference is the auto console has a flat screw on plate on the left side and the 4spd console has the bump screwed on. Other than that, it’s the trim plate on the top. So for anyone looking to use a console, you can get either one and convert either.

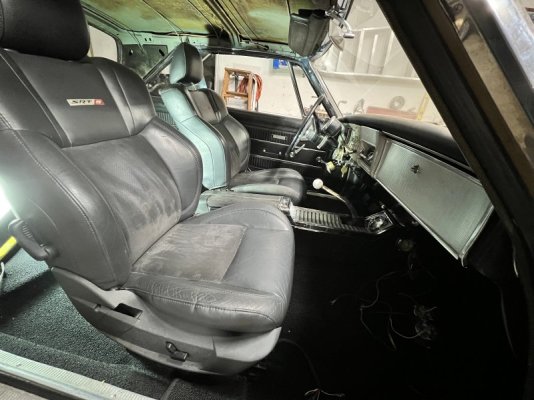
Finished the console and it turned out great. I installed the new carpet, made up some custom seat brackets and installed (I know a lot of folks are gonna be upset) a set of aftermarket SRT8 seats. I did it for comfort and I did keep my original buckets. Now it’s time to enjoy her and bang some gears!


2/27/22
Sometimes you need to go backwards to go forward. That is the case today. I realized after playing around with the clutch adjustment that something was def not right and with the fact that I had to extend the z-bar, it made for a very stiff pedal. Low and behold, the clutch fork pivot bracket inside the bell housing was not for this application and I ended up ordering the correct one. I decided to tackle this today so I removed the linkage and the z-bar from the car. After pulling the dust cover off, it seemed fairly easy to get the clutch fork out. So as not to pry on the release bearing or the input shaft, I used a 2x4 for leverage and put a screwdriver through the fork. Then all I needed to do was pry on the screwdriver using the 2x4 as the support to pry against. Once it popped out of the bearing clips, I was able to wiggle it off the fork bracket and take it out.
Next I pulled the bracket out and compared it to the new one and can clearly see that they are different and the new one will actually place the fork slightly higher which is what will need to happen to line up with the new z-bar.
To make the install a little easier, I used a file and de-burred the edge of the new bracket where the fork will slide in. I also greased the fork pivot as well as the tips where the bearing will clip on. I did this with the hopes of making it easier to slide back into place.
Unfortunately, going back in was not an easy task. I slid the bearing all the way up to the pressure plate but fork would hit the body of the bearing and it needed to go in about a 1/2" to line up properly. I tried for a little while to get it in and then just decided to bite the bullet and pull it all apart to install it rather than potentially breaking something by prying on things. So I ended up pulling the driveshaft out, dropping the crossmember, pulling the starter and removing all the top bell housing bolts. I then backed off the two lower bell housing bolts but left them in the block half way. By doing this, I was able to put a jack underneath the trans, lower it down and then using a pry bar and screwdriver as wedge, back the trans and bell off the block the 1/2" I needed. Once it was backed off, the fork slid into place like butter!
Here is the fork hitting the bearing before pulling the trans back
Here is the trans pulled back. You can see that all it took was the width of that screwdriver between the bell and the block to give me the clearance I needed.
Here is the fork in place and then it all buttoned up with the linkage fully adjusted to keep the bearing close but not touching the pressure plate and to have about 1/2" or so of pedal freeplay.
Last issue, I seem to have is that I think using this auto crossmember with the mount, that it keeps everything sitting just a little too high because I went to re-connect my exhaust to the headers and the exhaust now hits the crossmember and does not line up with the headers cause its too high. the trans and engine need to drop down about an inch. Gonna need to figure that out so that I can finally button up the underside. All that's left underneath is the exhaust and adding fluid.
3/1/22
I ended up pulling the crossmember out and reversing the trans mount. Still sat a little too high for the exhaust. Then I realized that the TTI pipes allowed me to pivot the head pipe that bolts to the collector and I was able to get the exhaust connected. I will still need to bring to exhaust shop to have some tweaking done but it should work to get it running again. While I was underneath, I buttoned up the exhaust, re-tightened the passenger side header and re-installed the e-brake cable.
Next I’ll get the shifter mounted and make sure I have the proper clearance. I may end up fabricating my own shifter from a couple of old hurst shifters. We will see.
3/16/22
It’s been a couple weeks and I’ve been picking away at it. These past couple weeks entailed a lot of fabricating, test fitting, fabricating, test fitting, starting over and fabricating some more.
Mounted the shifter and noticed that the shift rods didn’t fit and were too short. Not sure what they were for but since we are stretching the budget, decided to make these work. I happened to have an old shifter rod that was from another project so that became my donor for lengthening my originals. I cut a section of rod from the donor piece and then cut my original in a straight section.
I then cleaned the surface to prep for welding. I welded the donor section to the longest part of the rod first
I then attached it to the shifter and measured and marked where I would weld the other end. I had to cut a little more material off and the was able to weld it up. I did this for both the 1-3 shifter rod and the reverse rod.
After the linkage was all set, I double checked the shifter to make sure it worked and it was jammed. It would go into 1st and 2nd easily but 3-4 was difficult to find and it would not go into reverse. I tried everything. Made sure the shifter was in neutral with the adjustment pin and it was. I played around with a number of things and then decided to take the shifter apart to see if there was anything up with that.
And lo and behold the base was cracked… fortunately I had another Hurst shifter so I took that one apart and used all the best parts from the two of them and made a good shifter.
mounted the shifter and it still wouldn’t go into reverse. At this point I’m frustrated and searching online forums and blogs and they all said the same thing….which wasn’t helpful. So I decided to disconnect the linkage at the shifter and then see if I could get the shifter to go into the reverse gate and I was able to! After looking at it for a while, I realized that the only way to get the shifter to sit in neutral AND be able to go into the reverse gate, was to NOT use the alignment pin because when the reverse lever was lined up with the pin, it was not positioned correctly to go into reverse. Once I played with that, I went underneath and re adjusted the reverse linkage and bingo. It worked. All the gears shifted smoothly and it went in and out of reverse.
next up was fabricating a shifter since I have a console, I needed the offset “s” shape shifter. Costs are getting tough so made my own. Looked up a diagram for measurements and got started.
I had an old Muncie Hurst handle that I decided to sacrifice to make my Hurst work.
with a little heat and some relief cuts I made my first bend at 90 degrees
Then I measured using the diagram where the next bend would need to be to complete the “s” shape
Heated it and bent it. Now I had a rough shape to work with. Cut the rest of the handle off to just have the bend. I planned on cutting the bottom of my original shifter off and welding to this. All the welds and grinds will be hidden under the boot when it’s done so you will never see them
cut the bottom of my shifter (where the mounting holes were) and lined it up with the other “s” piece. Tacked it in place and brought it into the car to make sure it fit right. It did so I then welded all the way around and then welded around and cleaned up the “s” bar. Here’s the finished product. It came out just as I wanted. I just need to do some finish sanding and I’ll hit it with some chrome spray paint even though you won’t see it.
Now I can get to patching the floors then I can weld in the hump.
I also bought a new carpet kit with new carpet for the console. Going to use both my 4spd console and auto console and make one nice one. I’ll update this when I do
So I didn’t realize that the consoles are actually the same and they both are cut out for a 4spd. Only difference is the auto console has a flat screw on plate on the left side and the 4spd console has the bump screwed on. Other than that, it’s the trim plate on the top. So for anyone looking to use a console, you can get either one and convert either.
Finished the console and it turned out great. I installed the new carpet, made up some custom seat brackets and installed (I know a lot of folks are gonna be upset) a set of aftermarket SRT8 seats. I did it for comfort and I did keep my original buckets. Now it’s time to enjoy her and bang some gears!