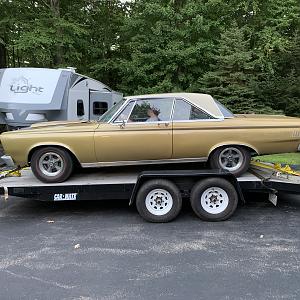
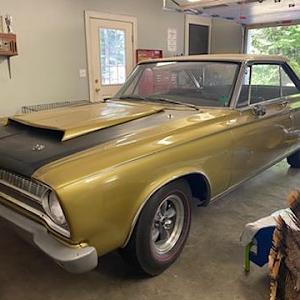
65 Satellite spent most of its years at the track and I’m putting her back on the street
About this Mopar:
Hey Mopar friends. I wanted to use this to keep my progress documents along with a place for photos. Hope you all enjoy.


I picked up this car a year or so ago after selling my old 65 Belvedere almost 18 years ago and missing it ever since. This car has been in New England all it’s life and as best as I can track it, it’s been a weekend drag car since the 80’s. Previous owner bought it from the gentleman who raced it and planned on making a street driver out of it but it sat in his garage and never got done. I brought it home and started making a list of what needed to be done.....being an old drag car, I soon found out.....it needed everything!
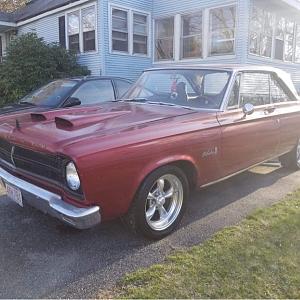
My old 65 Belvedere II - sold this to a guy and Im happy to say he still owns it and is taking great care of it!

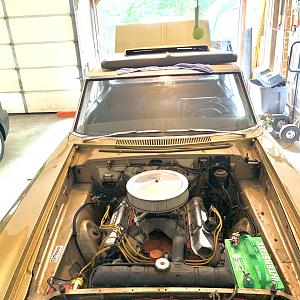
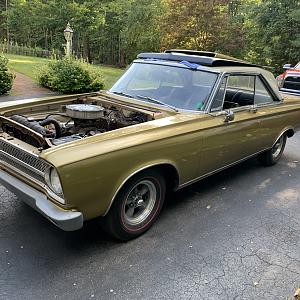
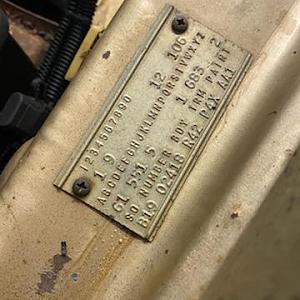
When I decoded the car, I learned it was an original big block, PS, PB, power window car. Original color was the Gold Poly

This car fortunately was not cut up or altered for the track in any way. Inner fenders weren’t clipped, no roll bars, no rear suspension alterations. Only thing added was a driveshaft loop and fiberglass panels. Hood, front fenders, front bumper, rear bumper and decklid were all fiberglass.
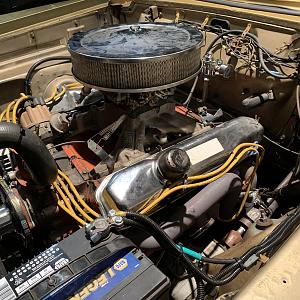
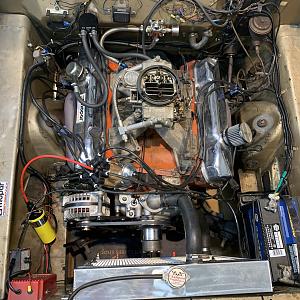
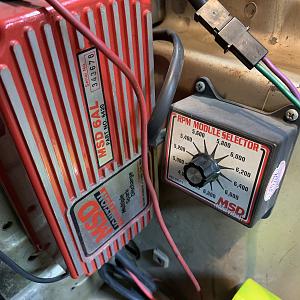
The car has a 69 factory .020 over 440 that’s been bored another .010 over. Mopar .528 lift cam. Ported heads. Torker II intake. Balanced crank. Full 3” TTI exhaust from headers back. MSD ignition with rev limiter. Trans is a 727 with cheetah reverse manual valve body and 3500 stall converter. Has a 8 3/4 with a solid spool diff and 4.10 gears. Car would do low 11 seconds in the quarter and ran on pump gas.


I’ve been collecting parts for it and slowly putting her back together. This is what’s been done so far.
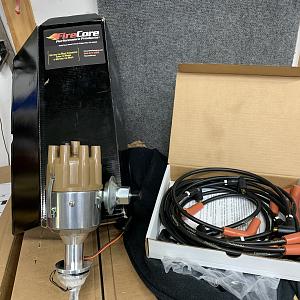
- replaced race locked mopar distributor with a new Firecore distributor and wires


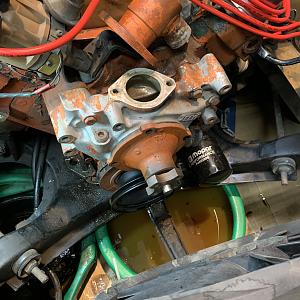
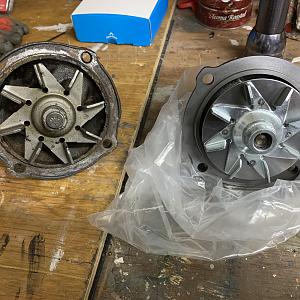
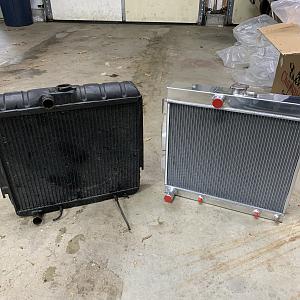
- replaced old radiator with 4 core aluminum radiator and took out the block off plate in the thermostat housing and added a 160 t-stat along with a new high flow water pump


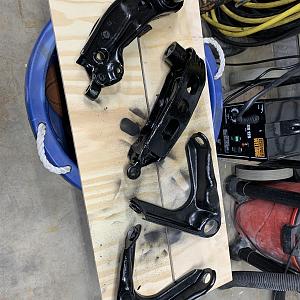
- replaced entire front end with PST poly graphite bushings
- new ball joints
- new tie rod ends with PST solid tie rod sleeves
- replaced bent strut rods with QA1 adjustable strut rods


- converted front drums to discs with The Right Stuff Detailing conversion kit


- added PST front sway bar

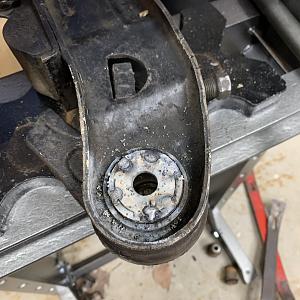
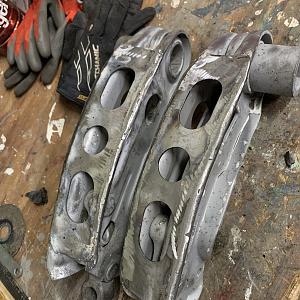
- welded on lower control arm stiffening plates when I was replacing the bushings


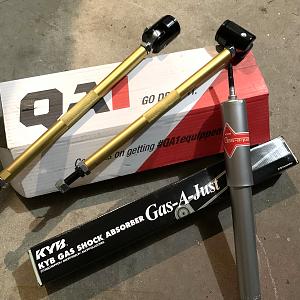
- new KYB shocks
- replaced glass in doors and replaced all the power window units with manual regulators
I HAVE READY TO GO AND INSTALL
- chassis stiffening kit (torque boxes and frame connectors)


- rear shocks
- complete new steel brake lines front to back

- complete emergency brake kit

- rear drum rebuild kit
- steel hood to replace fiberglass one
- steel bumpers to replace fiberglass ones
- steel decklid
- new headliner, door panels, armrests, window seals, door weatherstripping and carpet
- window trim
- trunk seal and hood seal

- complete 4spd swap from a 65 donor car (next winters project)

CAR STILL NEEDS
- gas tank and sending unit
- rear springs
- replace solid spool rear with sure-grip
- wheels and tires (14’s don’t fit anymore with disc brakes)
- a little sheet metal work - upper and lower cowl rust in the typical spot, lower quarter extensions where it rolls under, and the cross support behind the rear bumper.
I’ll update as I go
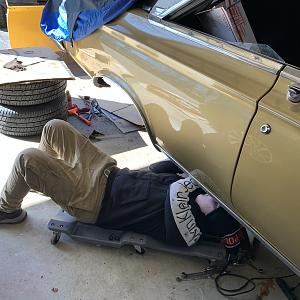
Ran some of the new brake lines today, bench bled the master cylinder and hung the sway bar. Need to drill a couple holes in the k-frame for the sway bar brackets but can’t tighten anything up until the car is resting on its own suspension to make sure I don’t have anything binding......can’t set it down until the new wheels come in this week so we will have to wait to finish that. Guess I’ll keep working on replacing the rest of the brake lines.

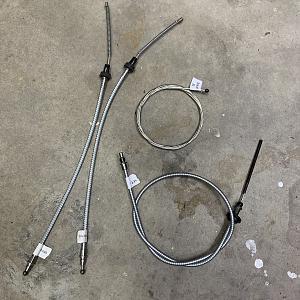
I went back and forth for a while over what to put on the car since my 14” wheels didn’t fit the new brake upgrade. Well.....Picked up the new shoes today. Ended up going with new TT's. 15x7 fronts and 15x8 rears. 225/70 Mickey Thompson S/T's on front and 275/60 Mickey Thompson S/T's for the rear. Here’s the new ones next to the old ones. You can tell a slight difference in the wheel design from the older version of the TT’s to the new ones. Biggest thing I noticed is the stamping on the back says the new ones are made in China. The spokes on the new ones are more rounded vs the older ones that have a slight “edge” on the face of the spoke.


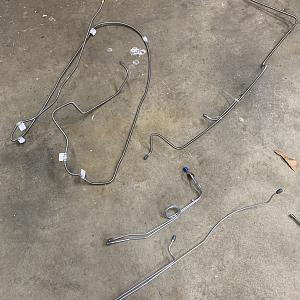
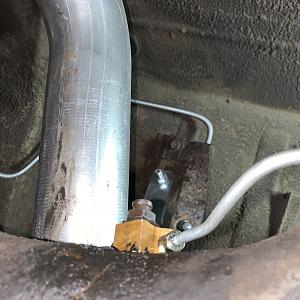
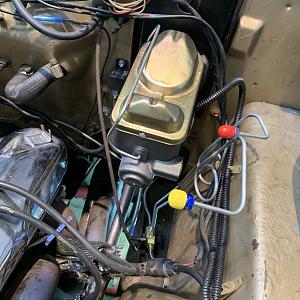
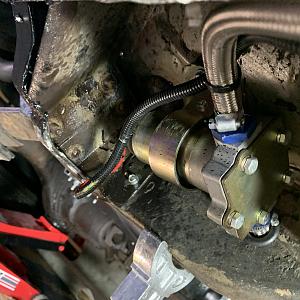
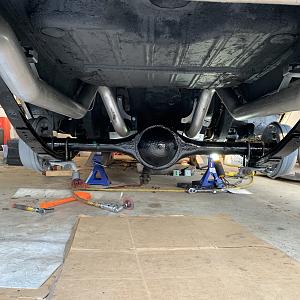
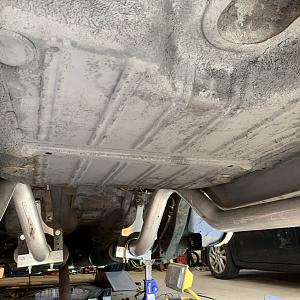
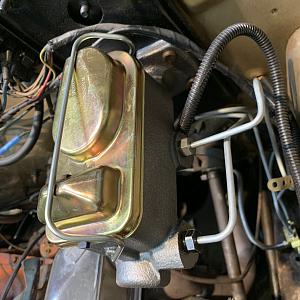
Today I spent the better part of the day replacing all the brake lines front to back. I ordered the complete pre-bent line kit from Inline Tube. For the most part, they were pretty close to the factory bends. The only one that wasn’t the same was the one that went across the firewall to the passenger front wheel. I made it work with a little tweaking here and there. Now everything is new from the new dual master, the master lines to the distribution block, from the distribution block to both new front calipers. New steel line from the distribution block along the underside of the car (managed to save all the factory clips) to the rear axle. Replaced both steel lines to the rear wheel cylinders and dist block on rear axle. Unfortunately, I didn’t realize I needed a new rubber flex hose for the rear axle so had to order that. Won’t be able to bleed the system til that comes in. This pic shows the lines disconnected from master because I am taking it back out to bench bleed it. I put it in just to get all the lines adjusted. I have a brand new adjustable proportioning valve but not sure if I need it. If so, I’ll splice it into the rear line coming from the master and attach it to the inner fender.


3/9/21
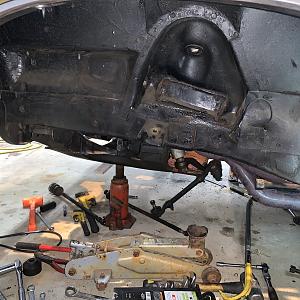
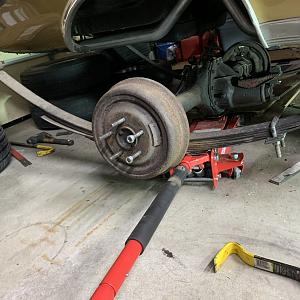
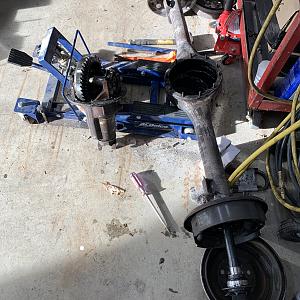
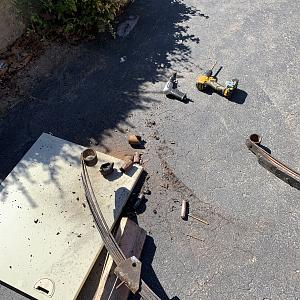
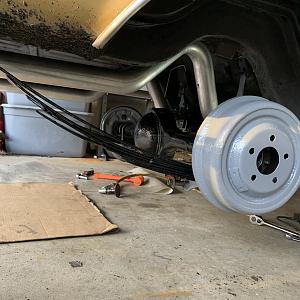
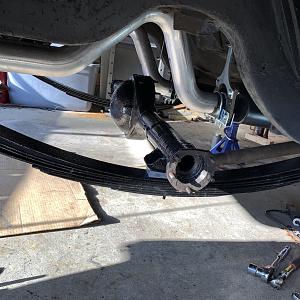
Well since I was still waiting for the rear rubber brake flex hose that goes to the rear end to come in, I decided to pull the axle and springs out. I was planning on replacing the leaf spring bushings so figured why not just take it all out

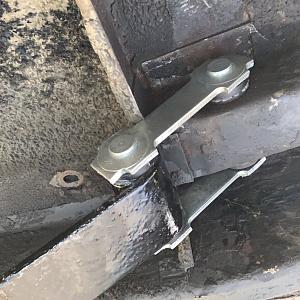
Couldn’t get the front bolt that comes through the leaf spring mount to move so decided to unbolt the whole bracket from the frame. Drivers side nuts came off no problem and passenger side was the same until I got to the very last nut and **SNAP** it broke off.
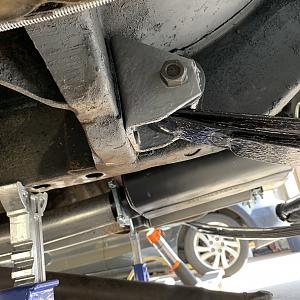
Oh well, that’s to be expected with a car this old right? After I got all the spring bolts out, I unbolted the upper shock bolts and started to lower the whole assembly

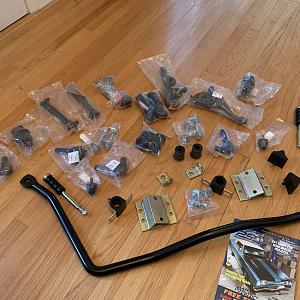
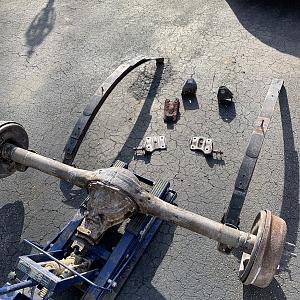
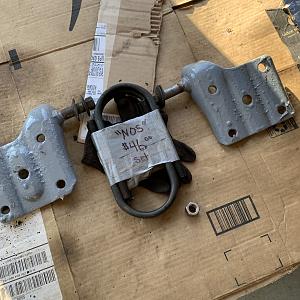
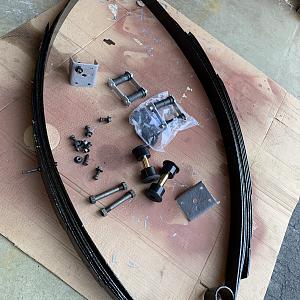
Now it’s out and easier to take apart, change the bushings and clean and paint it. I’m also thinking of swapping out the 4.10 locker unit with a sure-grip unit.....need to get my hands on one first. I was anticipating having some issues so I was pro active and bought some used front brackets and picked up some new rear shackles and leaf spring u-bolts


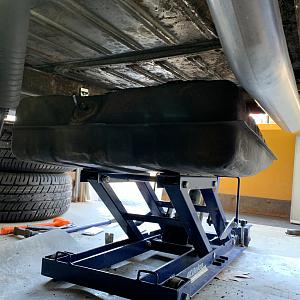
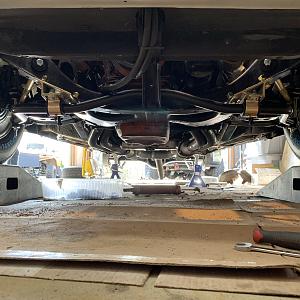
While there is a whole lotta room in the back, it’s now the time to change the fuel tank sending unit and get that gas gauge working again. When I pull the sending unit out, I’ll take a peek inside the tank and see if it is ok or if I should replace that as well. I did have an issues last fall when I ran out of gas (cause the gauge didn’t work) and it sucked up a ton of crap and rust from the bottom of the tank and plugged my filter. Guess we will see hopefully this weekend

3/11/21
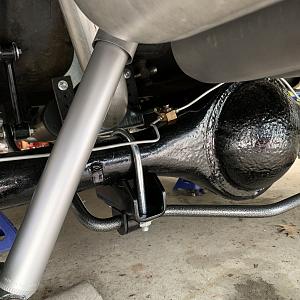
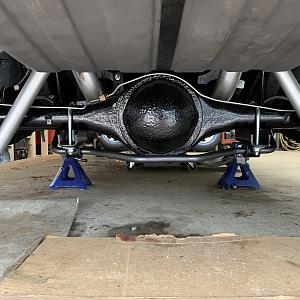
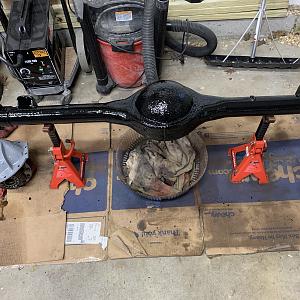
Took the rear suspension / rear end apart today. Degreased and cleaned and degreased and cleaned and degreased and cleaned and prepped it for paint. I use the KBS Coatings 3-step chassis paint. If you haven’t looked into it, def do. It’s a great product and I like the results.

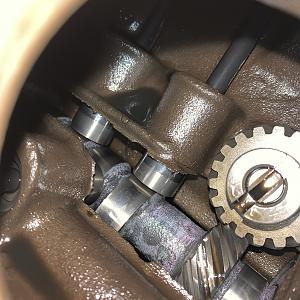
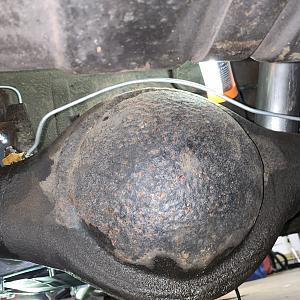
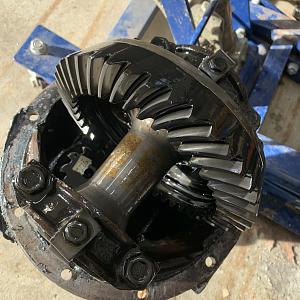
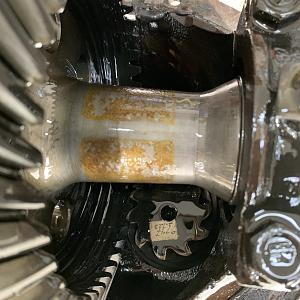
Once it was all cleaned I pulled the 3rd member out. Confirmed it is def a solid spool 4.10 setup. Great for the track.....not so great for the street. Need to get a nice sure-grip unit and I’ll keep this for playtime at the track.


Next step will be to get the diff housing and the leaf springs painted up. Waiting on new leaf spring bushings before putting it back together. The new fuel tank sending unit should be in next week and once that’s in, I can start putting it back together. I may assemble it without the gear set in so I can keep moving along while I find a unit I can use. Til next time guys....thanks for following this
3/13/21
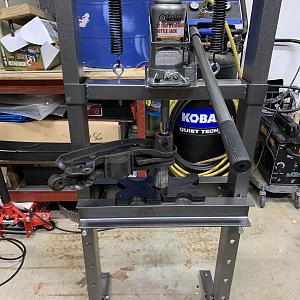
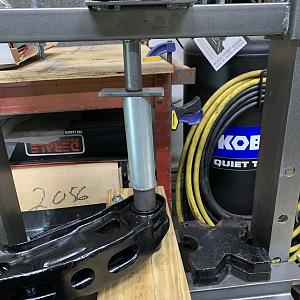
The majority of today was spent prepping the rear end and rear suspension for paint. Started off with what I thought was going to be an easy job of getting the front spring bushings out......boy was that a b**ch to do. Tried to press them out but didn’t have the right size receiver to fit around the outside of the leaf spring. Tried heating the outer spring and using the air chisel....nope that didn’t work either. Tried to drill a bunch of holes through the rubber and try to knock out the inner metal sleeve...nope that was a fail too. Sooo brought them outside, and torched them on fire and let them burn. Once the rubber was soft, used the air chisel and out they came. Used the air chisel to get the outer sleeve out as well because I’m replacing with poly urethane bushings instead of factory rubber.


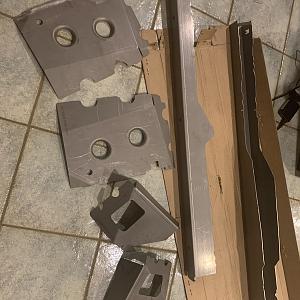
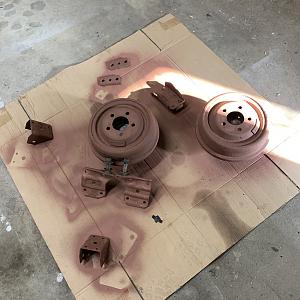
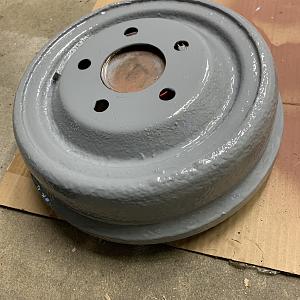
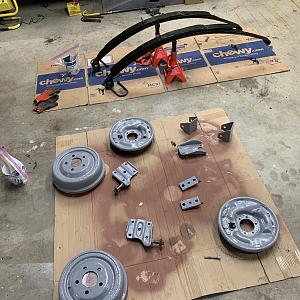
Once that was done I finished cleaning the springs up and set them aside. After using the KBS Clean and KBS Blast on all the parts, I gave the backing plates, rear drums, leaf spring hangars, pinion snubber and shock plates a coating of rusty metal primer and will let that cure tonight.

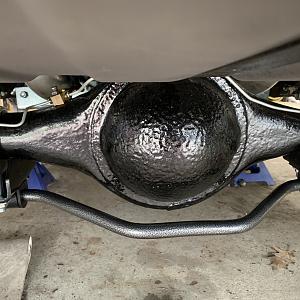
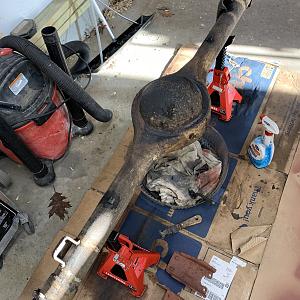
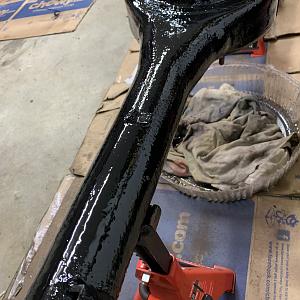
Lastly I finished scrubbing down the axle housing and getting the rest of the dirt and grime off of it. This was the most tedious but I’m happy with how it looks now. Finished up with a hot water rinse and the KBS Blast. Letting it dry overnight and should be ready for some paint tomorrow.

For those wondering what KBS Coatings is, I am a huge fan of it. My a rear end housing and springs will be KBS black and the backing plates, drums and misc items will be with the KBS gray. Check them out KBS Coatings - Rust Prevention - Stop Rust Paint - Gas Tank Sealer - Clear Coat Paints
Hopefully tomorrow is paint day!
3/14/21
Happy Pi Day!!
Got the painting done today. 2 coats of KBS and it looks awesome. This stuff dries to look almost like powder coating. Once the gasket kit comes in I’ll start putting it together. I have a sure-grip with 3.55’s being built now so I’ll put it all together and once the gears are done, I can throw the center section in. I’ll start piecing things together tomorrow


3/20/21
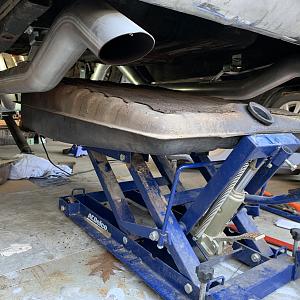
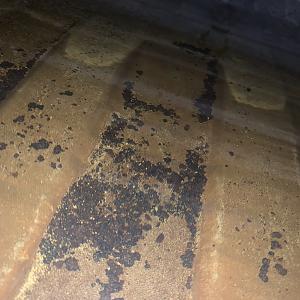
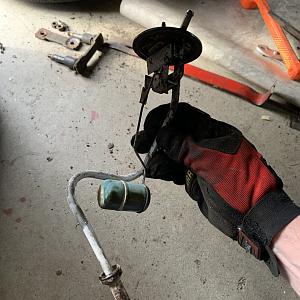
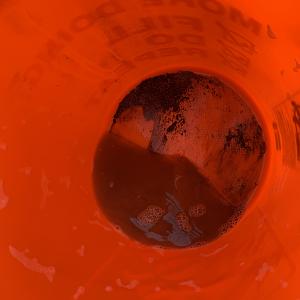
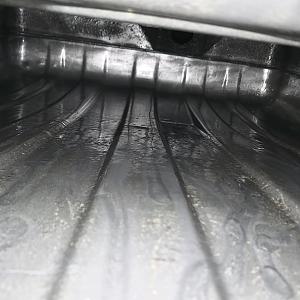
Very productive day! It’s always nice when you can finally open the garage door and let the sun in. I may have mentioned before that my fuel gauge wasn’t working and I tested the sending unit and found out it was bad. The float had a pin hole in it that filled with fuel preventing it from doing its job.

After pulling out the sending unit I noticed the sock wasn’t on it and when I looked in the tank...... it was a mess

The outside of the tank was in good shape and the cost of getting a new one plus the freight charge was a little more than I wanted to spend so since I’m a fan of KBS Coatings, I opted to order up their tank sealer kit and refinish the original tank. I should get it next week and I’ll restore the inside and outside of the tank.

I figured we may as well just pull the tank now and get it out of our way. One screw from inside the trunk for the filler neck and the one tank strap and it was out.


With the tank out of the way, it was time to start putting the rear suspension back together. To start, I installed my new poly bushings into the springs. I purchased new rear hangars and they came with rubber bushings but I opted to swap them out for the poly bushings back there as well.

My 13 year old wanted to help today so we started with installing the leaf springs. I had him attach the front hangars to the frame and then we installed the rear spring shackles and then lifted the springs into the front hangar and secured with new hardware


Once we got it all tightened up we then lifted the empty axle housing up over the springs and set it in place. I’m still waiting for my sure-grip to be built so we will install that and the axles later. Once the housing was in place we mounted it with new u-bolts and nuts using the original lower shock bracket that I refinished earlier.


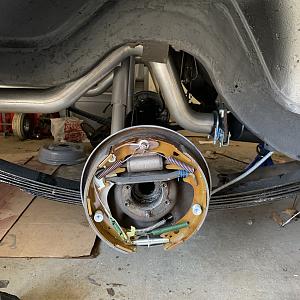
In order to keep moving forward, I put the backing plates on the housing and just held them there with a couple nuts on each side to hold them in place so I can finish running the brake lines to the wheel cylinders and button up the rest of the brakes on the car. Put the drums on and called it a day today. Tomorrow I’ll finish the brake lines, install the new rear shocks and run the new e-brake cables. She’s coming along nicely.


3/23/21
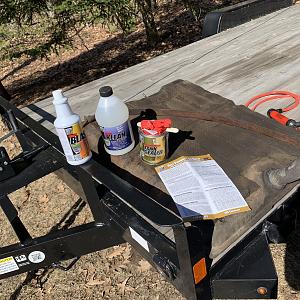
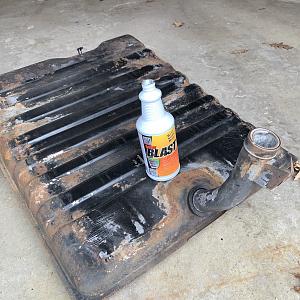
Waiting on some parts for the rear end, rear brakes, new fittings for the master cylinder and a couple other pieces so sorta at a stand still for finishing some of the loose ends......but got home today to my package from KBS with the fuel tank sealer kit so figured I could at least knock out step 1.

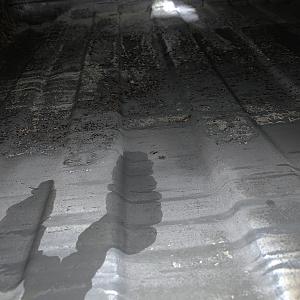
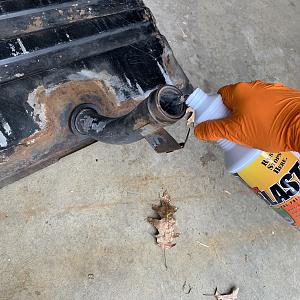
I drained all the fuel out of the tank and threw a handful of nuts and bolts in the tank to aid in knocking down the rust and corrosion. I used a 50/50 mix of the KBS Clean and kept shaking and flipping the tank and letting it sit. I did this for about 30 minutes and drained out crap. Lots of rust and dirt and grime came out.

I had to use this mixture and drain it out several times until no more rust and dirt came out. Once that was done, I flushed it with hot water and kept flushing until all the solution was out of the tank and it was clean. After the inside was done, I used the last bucket of solution that I drained and scrubbed the outside of the tank and got that nice and clean. Blew it out with the air gun and now going to let it sit and fully dry overnight before going to the next step.


3/24/21
Nothing too exciting today. I did the second the treatment of the tank sealer. This consisted of using the etching acid solution and rolling it around and mixing it into the tank for about 20 minutes or so then draining and flushing and letting dry for a couple days.


3/28/21
So took a few days off as I’m still waiting for parts. Been having some issues with the master cylinder brake lines leaking. No matter what I did the front line wouldn’t stop seeping when pumping the pedal. Called both The Right Stuff company and In-line Tube. They are sending me out new parts as they think they may be defective. Won’t have them til mid week. I’m still waiting on the rear brake drum rebuild kit as well the sure-grip to get finished. Hopefully everything is ready this week and I can have a productive weekend.
I was able to do the 3rd and final step of the gas tank sealer. Came out great. Needs to fully cure for several days. I ordered a new filler neck and rubber gasket that came in. Going to finish painting the outside of the tank and the tank strap then reinstall with the new sending unit.

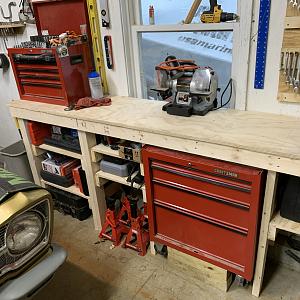
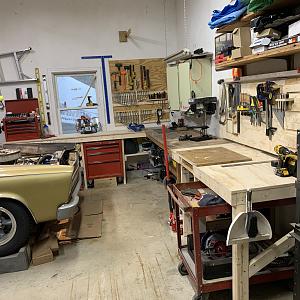
In the meantime, I had this weekend to do a little garage cleanup which ended up being a full blown workbench rebuild and organization.....at least we have more space to work now!!


4/2/21
Its not always fun working on these things. Sometimes you just need to put the tools down, shut the lights off and just walk away............ brought the fuel tank outside to give the outside a coat of paint before installing in the car. Put the first coat on and an hour later, I hear thunder and look outside and its raining!!! I quickly open the door to see a nice puddle of wet paint and beautiful water streaks running down the tank..... brought it inside and when it dries, I will have to sand it all down again and start over. So back to the brake saga. I got the new master cylinder lines in after I ruined the first set. Went to go put them in and got them to tighten up in the master cylinder this time. Went under the dash to re-attach the brake rod which doesn't work correctly and does not even come close to the factory brake switch. Anyway, installed it and pumped the brakes and looked at the master and watched fluid dripping from the fitting...... I think the master cylinder is defective so called to see if I can get a replacement. So I decide to install the new rear brake hardware that came in.....dam springs flew off and across the garage and the whole assembly falls apart. Yup... thats enough for today... lets try again tomorrow
4/3/21
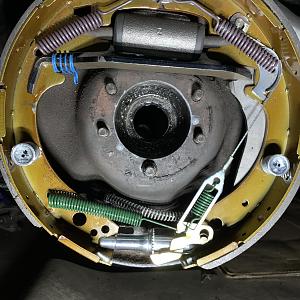
Today was a better day. Got a good nights rest and went back to it this morning and things just happen to fall into place and go together smoothly. I scuffed up the gas tank from the rain debacle yesterday and gave it another coat of paint. Once it dries tonight, Ill see if it needs one more or if it looks good enough. Once thats done, I can install the new sending unit and put it back in.

While the tank was drying, I went back to rebuilding the rear brakes. Put both sides together on the bench and then just hung them on the axle housing for now. Still need to pick up the new center section next week and once thats in, I can bolt the brake assemblies in. Everything went together nicely. Had to buy all new parking brake levers and actuators because when I took them apart, there was nothing in there. The whole parking brake assembly from the drums to the cables to the pedal in the car was removed. I somehow managed to snap the little spring that holds the self adjusting lever in place on the passenger side so have a new once coming next week and that will be good to go.


4/7/21
Finally got the gas tank RE-installed today. Installed the new sending unit and gasket, and new filler rubber grommet. Got it all mounted back and connected. Ran out of time to go to gas station so we will do that this weekend and then fire her up and let her run for a little bit


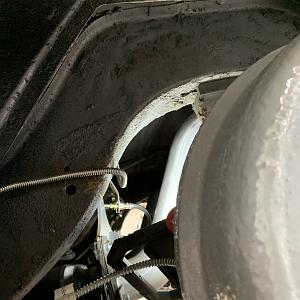
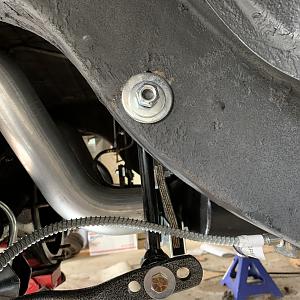
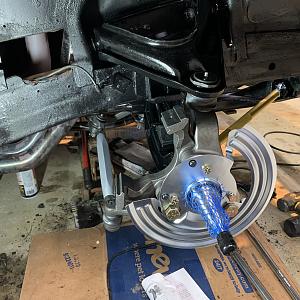
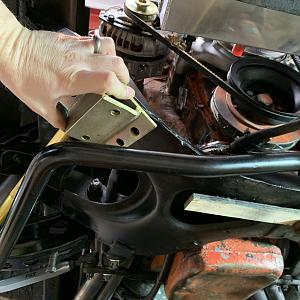
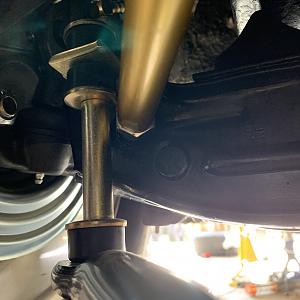
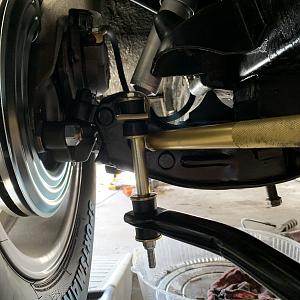
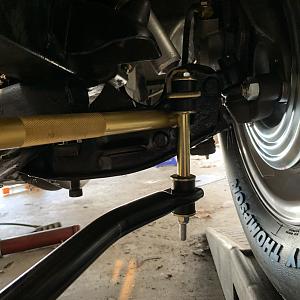
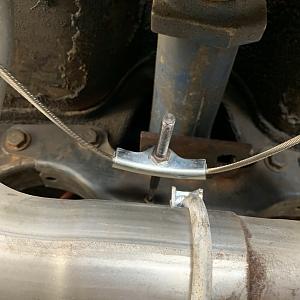
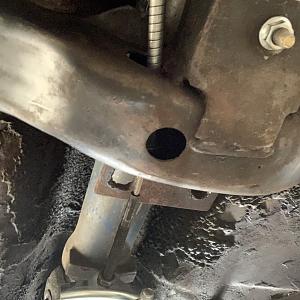
After the tank was installed, finished mounting the front sway bar. Had to line up and drill holes in the k-member. Everything bolted up but I’m a little bit leery about the clearance of the sway bar links to the strut rods. Once the car goes on the ground and I bounce it a little and turn the wheel back and forth we will see how it looks. Maybe it will settle in and seat better.


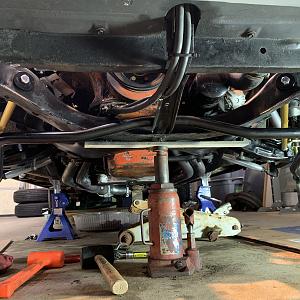
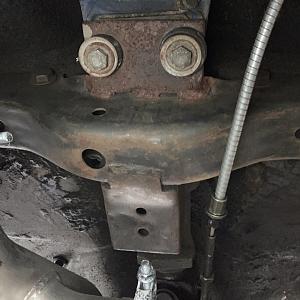
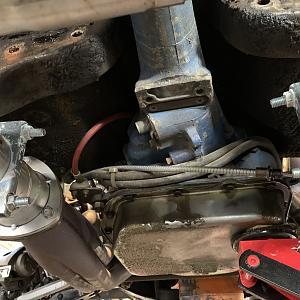
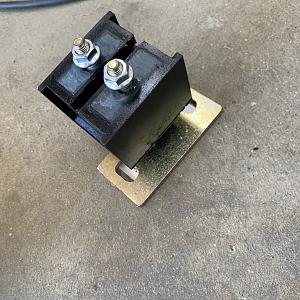
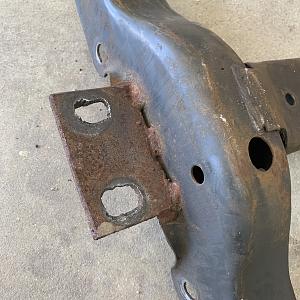
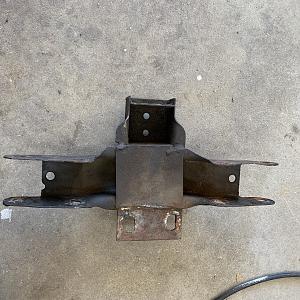
Lastly today I wanted to finish running the parking brake cables. After staring at the trans crossmember for about 10 minutes, I realized it’s mounted backwards! The previous owner installed a newer 727 and the original mount would not work so they removed the mount, flipped the crossmember and welded a new mount in place. Then bolted the trans directly to the new bracket. That’s not working for me so I ordered the correct conversion mount made specifically for adapting newer trans into early b body. Once that comes in we will reverse the crossmember and then the parking brake cable will line up again.

Taking the kids on vacation next week so I’ll update you all in a couple weeks. I have more parts on the way so I should have them when I get back; tranny mount, my rear diff, a replacement master cylinder, another set of master cylinder lines, electric fuel pump controller, and some misc hardware.
5/1/21
well I’m back from vaca and wanted to get back on this. It’s car show season around here and I want to at least roll through a couple this year. Since I was away I had to spend a little time looking everything over to see where I was at. I had a bunch of stuff come in while I was away. For starters, I had an issue with the front port of my master cylinder leaking at the fitting. I tried several fittings and nothing worked. The Right Stuff Detailing sent me a replacement master cylinder and new master cylinder lines at no cost so today I swapped out the master and lines. Attempted to bleed the brakes and found every fitting was seeping so had to snug everything up. The passenger caliper kept leaking at the banjo bolt. I took it apart several times and re tightened. I ended up heating the copper washers with a torch and the re installing and cranking them down well more than the 25 foot lbs of torque and that seemed to work.

After getting the brakes all tightened up I bleed it for over an hour going from the right rear to left rear to right front to left front. When we pump it and crack the bleeders, no more air comes out of any of the bleeders but for some reason the pedal is very spongy and goes to the floor. I can watch the rear brakes operate when pressing and releasing the brake pedal but I can’t see the fronts move. It’s really hard to spin the wheel when not touching the brakes but when hitting the brake pedal it def locked the front wheels from being able to be turned. It almost seems like the calipers are sticking. I was frustrated and walked away. I’ll have to see what else is going on here.
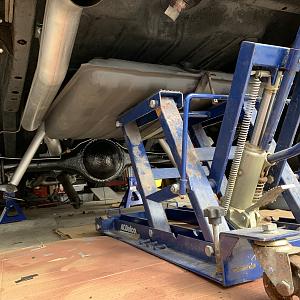
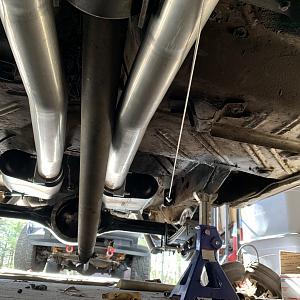
from there, I went under the car and pulled the crossmember out and the makeshift trans mount the previous owner made. I bought the conversion mount for the newer 727 and installed the new mount. Fit like a glove.


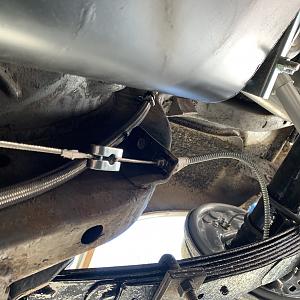
once I finished the mount and was able to reverse the crossmember, I could finally finish attaching the new parking brake cables.


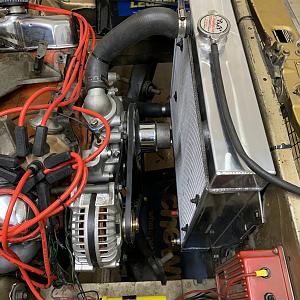
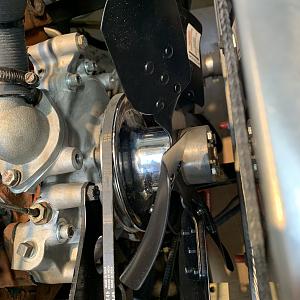
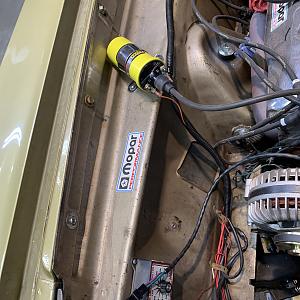
Last little odds and ends today I installed the rigid fan, relocated the coil and cleaned up some of the MSD wiring.


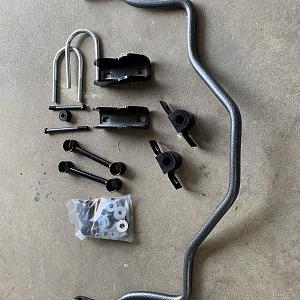
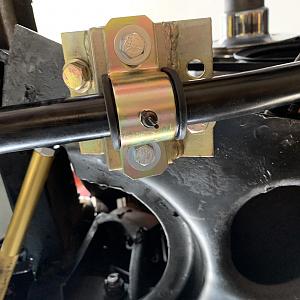
I have a new rear sway bar that came in today that I’m going to try and tackle tomorrow. I’ll keep you all posted
**so apparently, these garages weren’t meant to have a continuous post more than 25,000 characters and I ran out of room. I will be creating a part 2 for all of you who have been following my progress. You can find Part 2 here: Getting the 65 back on the street ~ PART 2
I picked up this car a year or so ago after selling my old 65 Belvedere almost 18 years ago and missing it ever since. This car has been in New England all it’s life and as best as I can track it, it’s been a weekend drag car since the 80’s. Previous owner bought it from the gentleman who raced it and planned on making a street driver out of it but it sat in his garage and never got done. I brought it home and started making a list of what needed to be done.....being an old drag car, I soon found out.....it needed everything!
My old 65 Belvedere II - sold this to a guy and Im happy to say he still owns it and is taking great care of it!
When I decoded the car, I learned it was an original big block, PS, PB, power window car. Original color was the Gold Poly
This car fortunately was not cut up or altered for the track in any way. Inner fenders weren’t clipped, no roll bars, no rear suspension alterations. Only thing added was a driveshaft loop and fiberglass panels. Hood, front fenders, front bumper, rear bumper and decklid were all fiberglass.
The car has a 69 factory .020 over 440 that’s been bored another .010 over. Mopar .528 lift cam. Ported heads. Torker II intake. Balanced crank. Full 3” TTI exhaust from headers back. MSD ignition with rev limiter. Trans is a 727 with cheetah reverse manual valve body and 3500 stall converter. Has a 8 3/4 with a solid spool diff and 4.10 gears. Car would do low 11 seconds in the quarter and ran on pump gas.
I’ve been collecting parts for it and slowly putting her back together. This is what’s been done so far.
- replaced race locked mopar distributor with a new Firecore distributor and wires
- replaced old radiator with 4 core aluminum radiator and took out the block off plate in the thermostat housing and added a 160 t-stat along with a new high flow water pump
- replaced entire front end with PST poly graphite bushings
- new ball joints
- new tie rod ends with PST solid tie rod sleeves
- replaced bent strut rods with QA1 adjustable strut rods
- converted front drums to discs with The Right Stuff Detailing conversion kit
- added PST front sway bar
- welded on lower control arm stiffening plates when I was replacing the bushings
- new KYB shocks
- replaced glass in doors and replaced all the power window units with manual regulators
I HAVE READY TO GO AND INSTALL
- chassis stiffening kit (torque boxes and frame connectors)
- rear shocks
- complete new steel brake lines front to back
- complete emergency brake kit
- rear drum rebuild kit
- steel hood to replace fiberglass one
- steel bumpers to replace fiberglass ones
- steel decklid
- new headliner, door panels, armrests, window seals, door weatherstripping and carpet
- window trim
- trunk seal and hood seal
- complete 4spd swap from a 65 donor car (next winters project)
CAR STILL NEEDS
- gas tank and sending unit
- rear springs
- replace solid spool rear with sure-grip
- wheels and tires (14’s don’t fit anymore with disc brakes)
- a little sheet metal work - upper and lower cowl rust in the typical spot, lower quarter extensions where it rolls under, and the cross support behind the rear bumper.
I’ll update as I go
Ran some of the new brake lines today, bench bled the master cylinder and hung the sway bar. Need to drill a couple holes in the k-frame for the sway bar brackets but can’t tighten anything up until the car is resting on its own suspension to make sure I don’t have anything binding......can’t set it down until the new wheels come in this week so we will have to wait to finish that. Guess I’ll keep working on replacing the rest of the brake lines.
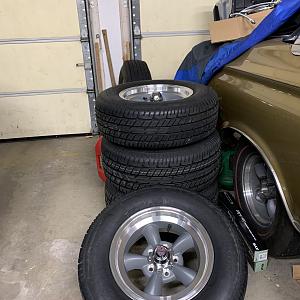
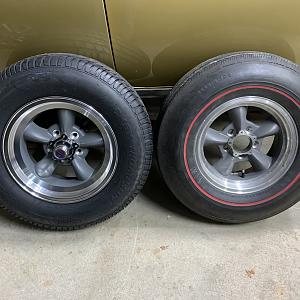
I went back and forth for a while over what to put on the car since my 14” wheels didn’t fit the new brake upgrade. Well.....Picked up the new shoes today. Ended up going with new TT's. 15x7 fronts and 15x8 rears. 225/70 Mickey Thompson S/T's on front and 275/60 Mickey Thompson S/T's for the rear. Here’s the new ones next to the old ones. You can tell a slight difference in the wheel design from the older version of the TT’s to the new ones. Biggest thing I noticed is the stamping on the back says the new ones are made in China. The spokes on the new ones are more rounded vs the older ones that have a slight “edge” on the face of the spoke.
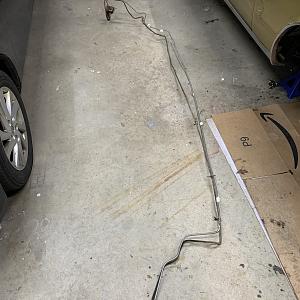
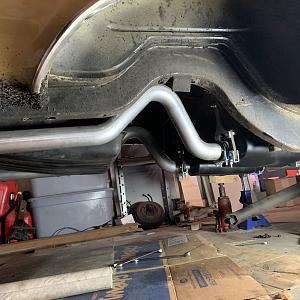
Today I spent the better part of the day replacing all the brake lines front to back. I ordered the complete pre-bent line kit from Inline Tube. For the most part, they were pretty close to the factory bends. The only one that wasn’t the same was the one that went across the firewall to the passenger front wheel. I made it work with a little tweaking here and there. Now everything is new from the new dual master, the master lines to the distribution block, from the distribution block to both new front calipers. New steel line from the distribution block along the underside of the car (managed to save all the factory clips) to the rear axle. Replaced both steel lines to the rear wheel cylinders and dist block on rear axle. Unfortunately, I didn’t realize I needed a new rubber flex hose for the rear axle so had to order that. Won’t be able to bleed the system til that comes in. This pic shows the lines disconnected from master because I am taking it back out to bench bleed it. I put it in just to get all the lines adjusted. I have a brand new adjustable proportioning valve but not sure if I need it. If so, I’ll splice it into the rear line coming from the master and attach it to the inner fender.
3/9/21
Well since I was still waiting for the rear rubber brake flex hose that goes to the rear end to come in, I decided to pull the axle and springs out. I was planning on replacing the leaf spring bushings so figured why not just take it all out
Couldn’t get the front bolt that comes through the leaf spring mount to move so decided to unbolt the whole bracket from the frame. Drivers side nuts came off no problem and passenger side was the same until I got to the very last nut and **SNAP** it broke off.
Oh well, that’s to be expected with a car this old right? After I got all the spring bolts out, I unbolted the upper shock bolts and started to lower the whole assembly
Now it’s out and easier to take apart, change the bushings and clean and paint it. I’m also thinking of swapping out the 4.10 locker unit with a sure-grip unit.....need to get my hands on one first. I was anticipating having some issues so I was pro active and bought some used front brackets and picked up some new rear shackles and leaf spring u-bolts
While there is a whole lotta room in the back, it’s now the time to change the fuel tank sending unit and get that gas gauge working again. When I pull the sending unit out, I’ll take a peek inside the tank and see if it is ok or if I should replace that as well. I did have an issues last fall when I ran out of gas (cause the gauge didn’t work) and it sucked up a ton of crap and rust from the bottom of the tank and plugged my filter. Guess we will see hopefully this weekend
3/11/21
Took the rear suspension / rear end apart today. Degreased and cleaned and degreased and cleaned and degreased and cleaned and prepped it for paint. I use the KBS Coatings 3-step chassis paint. If you haven’t looked into it, def do. It’s a great product and I like the results.
Once it was all cleaned I pulled the 3rd member out. Confirmed it is def a solid spool 4.10 setup. Great for the track.....not so great for the street. Need to get a nice sure-grip unit and I’ll keep this for playtime at the track.
Next step will be to get the diff housing and the leaf springs painted up. Waiting on new leaf spring bushings before putting it back together. The new fuel tank sending unit should be in next week and once that’s in, I can start putting it back together. I may assemble it without the gear set in so I can keep moving along while I find a unit I can use. Til next time guys....thanks for following this
3/13/21
The majority of today was spent prepping the rear end and rear suspension for paint. Started off with what I thought was going to be an easy job of getting the front spring bushings out......boy was that a b**ch to do. Tried to press them out but didn’t have the right size receiver to fit around the outside of the leaf spring. Tried heating the outer spring and using the air chisel....nope that didn’t work either. Tried to drill a bunch of holes through the rubber and try to knock out the inner metal sleeve...nope that was a fail too. Sooo brought them outside, and torched them on fire and let them burn. Once the rubber was soft, used the air chisel and out they came. Used the air chisel to get the outer sleeve out as well because I’m replacing with poly urethane bushings instead of factory rubber.
Once that was done I finished cleaning the springs up and set them aside. After using the KBS Clean and KBS Blast on all the parts, I gave the backing plates, rear drums, leaf spring hangars, pinion snubber and shock plates a coating of rusty metal primer and will let that cure tonight.
Lastly I finished scrubbing down the axle housing and getting the rest of the dirt and grime off of it. This was the most tedious but I’m happy with how it looks now. Finished up with a hot water rinse and the KBS Blast. Letting it dry overnight and should be ready for some paint tomorrow.
For those wondering what KBS Coatings is, I am a huge fan of it. My a rear end housing and springs will be KBS black and the backing plates, drums and misc items will be with the KBS gray. Check them out KBS Coatings - Rust Prevention - Stop Rust Paint - Gas Tank Sealer - Clear Coat Paints
Hopefully tomorrow is paint day!
3/14/21
Happy Pi Day!!
Got the painting done today. 2 coats of KBS and it looks awesome. This stuff dries to look almost like powder coating. Once the gasket kit comes in I’ll start putting it together. I have a sure-grip with 3.55’s being built now so I’ll put it all together and once the gears are done, I can throw the center section in. I’ll start piecing things together tomorrow
3/20/21
Very productive day! It’s always nice when you can finally open the garage door and let the sun in. I may have mentioned before that my fuel gauge wasn’t working and I tested the sending unit and found out it was bad. The float had a pin hole in it that filled with fuel preventing it from doing its job.
After pulling out the sending unit I noticed the sock wasn’t on it and when I looked in the tank...... it was a mess
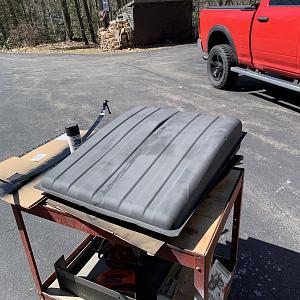
The outside of the tank was in good shape and the cost of getting a new one plus the freight charge was a little more than I wanted to spend so since I’m a fan of KBS Coatings, I opted to order up their tank sealer kit and refinish the original tank. I should get it next week and I’ll restore the inside and outside of the tank.
I figured we may as well just pull the tank now and get it out of our way. One screw from inside the trunk for the filler neck and the one tank strap and it was out.
With the tank out of the way, it was time to start putting the rear suspension back together. To start, I installed my new poly bushings into the springs. I purchased new rear hangars and they came with rubber bushings but I opted to swap them out for the poly bushings back there as well.
My 13 year old wanted to help today so we started with installing the leaf springs. I had him attach the front hangars to the frame and then we installed the rear spring shackles and then lifted the springs into the front hangar and secured with new hardware
Once we got it all tightened up we then lifted the empty axle housing up over the springs and set it in place. I’m still waiting for my sure-grip to be built so we will install that and the axles later. Once the housing was in place we mounted it with new u-bolts and nuts using the original lower shock bracket that I refinished earlier.
In order to keep moving forward, I put the backing plates on the housing and just held them there with a couple nuts on each side to hold them in place so I can finish running the brake lines to the wheel cylinders and button up the rest of the brakes on the car. Put the drums on and called it a day today. Tomorrow I’ll finish the brake lines, install the new rear shocks and run the new e-brake cables. She’s coming along nicely.
3/23/21
Waiting on some parts for the rear end, rear brakes, new fittings for the master cylinder and a couple other pieces so sorta at a stand still for finishing some of the loose ends......but got home today to my package from KBS with the fuel tank sealer kit so figured I could at least knock out step 1.
I drained all the fuel out of the tank and threw a handful of nuts and bolts in the tank to aid in knocking down the rust and corrosion. I used a 50/50 mix of the KBS Clean and kept shaking and flipping the tank and letting it sit. I did this for about 30 minutes and drained out crap. Lots of rust and dirt and grime came out.
I had to use this mixture and drain it out several times until no more rust and dirt came out. Once that was done, I flushed it with hot water and kept flushing until all the solution was out of the tank and it was clean. After the inside was done, I used the last bucket of solution that I drained and scrubbed the outside of the tank and got that nice and clean. Blew it out with the air gun and now going to let it sit and fully dry overnight before going to the next step.
3/24/21
Nothing too exciting today. I did the second the treatment of the tank sealer. This consisted of using the etching acid solution and rolling it around and mixing it into the tank for about 20 minutes or so then draining and flushing and letting dry for a couple days.
3/28/21
So took a few days off as I’m still waiting for parts. Been having some issues with the master cylinder brake lines leaking. No matter what I did the front line wouldn’t stop seeping when pumping the pedal. Called both The Right Stuff company and In-line Tube. They are sending me out new parts as they think they may be defective. Won’t have them til mid week. I’m still waiting on the rear brake drum rebuild kit as well the sure-grip to get finished. Hopefully everything is ready this week and I can have a productive weekend.
I was able to do the 3rd and final step of the gas tank sealer. Came out great. Needs to fully cure for several days. I ordered a new filler neck and rubber gasket that came in. Going to finish painting the outside of the tank and the tank strap then reinstall with the new sending unit.
In the meantime, I had this weekend to do a little garage cleanup which ended up being a full blown workbench rebuild and organization.....at least we have more space to work now!!
4/2/21
Its not always fun working on these things. Sometimes you just need to put the tools down, shut the lights off and just walk away............ brought the fuel tank outside to give the outside a coat of paint before installing in the car. Put the first coat on and an hour later, I hear thunder and look outside and its raining!!! I quickly open the door to see a nice puddle of wet paint and beautiful water streaks running down the tank..... brought it inside and when it dries, I will have to sand it all down again and start over. So back to the brake saga. I got the new master cylinder lines in after I ruined the first set. Went to go put them in and got them to tighten up in the master cylinder this time. Went under the dash to re-attach the brake rod which doesn't work correctly and does not even come close to the factory brake switch. Anyway, installed it and pumped the brakes and looked at the master and watched fluid dripping from the fitting...... I think the master cylinder is defective so called to see if I can get a replacement. So I decide to install the new rear brake hardware that came in.....dam springs flew off and across the garage and the whole assembly falls apart. Yup... thats enough for today... lets try again tomorrow
4/3/21
Today was a better day. Got a good nights rest and went back to it this morning and things just happen to fall into place and go together smoothly. I scuffed up the gas tank from the rain debacle yesterday and gave it another coat of paint. Once it dries tonight, Ill see if it needs one more or if it looks good enough. Once thats done, I can install the new sending unit and put it back in.
While the tank was drying, I went back to rebuilding the rear brakes. Put both sides together on the bench and then just hung them on the axle housing for now. Still need to pick up the new center section next week and once thats in, I can bolt the brake assemblies in. Everything went together nicely. Had to buy all new parking brake levers and actuators because when I took them apart, there was nothing in there. The whole parking brake assembly from the drums to the cables to the pedal in the car was removed. I somehow managed to snap the little spring that holds the self adjusting lever in place on the passenger side so have a new once coming next week and that will be good to go.
4/7/21
Finally got the gas tank RE-installed today. Installed the new sending unit and gasket, and new filler rubber grommet. Got it all mounted back and connected. Ran out of time to go to gas station so we will do that this weekend and then fire her up and let her run for a little bit
After the tank was installed, finished mounting the front sway bar. Had to line up and drill holes in the k-member. Everything bolted up but I’m a little bit leery about the clearance of the sway bar links to the strut rods. Once the car goes on the ground and I bounce it a little and turn the wheel back and forth we will see how it looks. Maybe it will settle in and seat better.
Lastly today I wanted to finish running the parking brake cables. After staring at the trans crossmember for about 10 minutes, I realized it’s mounted backwards! The previous owner installed a newer 727 and the original mount would not work so they removed the mount, flipped the crossmember and welded a new mount in place. Then bolted the trans directly to the new bracket. That’s not working for me so I ordered the correct conversion mount made specifically for adapting newer trans into early b body. Once that comes in we will reverse the crossmember and then the parking brake cable will line up again.
Taking the kids on vacation next week so I’ll update you all in a couple weeks. I have more parts on the way so I should have them when I get back; tranny mount, my rear diff, a replacement master cylinder, another set of master cylinder lines, electric fuel pump controller, and some misc hardware.
5/1/21
well I’m back from vaca and wanted to get back on this. It’s car show season around here and I want to at least roll through a couple this year. Since I was away I had to spend a little time looking everything over to see where I was at. I had a bunch of stuff come in while I was away. For starters, I had an issue with the front port of my master cylinder leaking at the fitting. I tried several fittings and nothing worked. The Right Stuff Detailing sent me a replacement master cylinder and new master cylinder lines at no cost so today I swapped out the master and lines. Attempted to bleed the brakes and found every fitting was seeping so had to snug everything up. The passenger caliper kept leaking at the banjo bolt. I took it apart several times and re tightened. I ended up heating the copper washers with a torch and the re installing and cranking them down well more than the 25 foot lbs of torque and that seemed to work.
After getting the brakes all tightened up I bleed it for over an hour going from the right rear to left rear to right front to left front. When we pump it and crack the bleeders, no more air comes out of any of the bleeders but for some reason the pedal is very spongy and goes to the floor. I can watch the rear brakes operate when pressing and releasing the brake pedal but I can’t see the fronts move. It’s really hard to spin the wheel when not touching the brakes but when hitting the brake pedal it def locked the front wheels from being able to be turned. It almost seems like the calipers are sticking. I was frustrated and walked away. I’ll have to see what else is going on here.
from there, I went under the car and pulled the crossmember out and the makeshift trans mount the previous owner made. I bought the conversion mount for the newer 727 and installed the new mount. Fit like a glove.
once I finished the mount and was able to reverse the crossmember, I could finally finish attaching the new parking brake cables.
Last little odds and ends today I installed the rigid fan, relocated the coil and cleaned up some of the MSD wiring.
I have a new rear sway bar that came in today that I’m going to try and tackle tomorrow. I’ll keep you all posted
**so apparently, these garages weren’t meant to have a continuous post more than 25,000 characters and I ran out of room. I will be creating a part 2 for all of you who have been following my progress. You can find Part 2 here: Getting the 65 back on the street ~ PART 2