You are using an out of date browser. It may not display this or other websites correctly.
You should upgrade or use an alternative browser.
You should upgrade or use an alternative browser.
69 Super Bee restoration
- Thread starter BAFRAID
- Start date
exhaust? torque converter? starter&wires?
BAFRAID
She’s looking like a Super Bee again!!
All wires, exhaust are off. I don't see that it is splitting from the tranny even with a little lift from the hoist.
Mopars & Missiles
Well-Known Member
- Local time
- 3:15 PM
- Joined
- Nov 22, 2010
- Messages
- 2,072
- Reaction score
- 3,275
- Location
- Northern Indiana
You planning to use headers when you reassemble? Just curious cause those cast manifolds are probably not going to survive lifting that engine out.
As previously mentioned, torque converter BOLTS.
Also, 1/4 ton rating is marginal for what you are doing.
As previously mentioned, torque converter BOLTS.
Also, 1/4 ton rating is marginal for what you are doing.
BAFRAID
She’s looking like a Super Bee again!!
All good to know! I plan on original exhaust. Besides the bolts around the outer edge of the tranny, where else are there bolts(torque converter). I'll move the beam back to 1/2 ton.
Thank you.
Thank you.
BAFRAID
She’s looking like a Super Bee again!!
Any specific location I should
Use on the engine to bolt on the lifting chain?
Use on the engine to bolt on the lifting chain?
BeeKool
Well-Known Member
Motor mounts could be seized to know member. It may help to lighten the load removing intake and exhaust manifolds as well as water pump and housing. Use a chain bolted securely to 4 corners of the heads.
Good luck with project. Keep us posted
Good luck with project. Keep us posted

barbee6043
Well-Known Member
- Local time
- 2:15 PM
- Joined
- Sep 28, 2008
- Messages
- 2,554
- Reaction score
- 2,474
- Location
- S E Texas. Shepherd, texas
uhhhh those engines are heavy. might I ask bout those straps? a good heavy log chain bolted to intake bolts or other suitable bolts is good. those oem exh man are worth a few bucks , careful with them..
BAFRAID
She’s looking like a Super Bee again!!
Thank you all very much for the input. The straps are military grade 1inch that we use to use to tow and lift some heavy equip out in the field. I will remove some more of the external parts to lighten the load. This is my first full size, real muscle car project. All small air cooled VWs prior. I use to carry those little engines around in my arms. Lol
BAFRAID
She’s looking like a Super Bee again!!
Nice car, the 69 Bee is probably my favorite body style.
If you are pulling the engine without the transmission, the 4 converter bolts need to come out and you should be able to seperate the two a few inches to clear the converter nub. Just go back around and insure all bolts are out.
As for where to start, it depends. Are your frame rails good? What do you intend on replacing? I did mine piecemeal and never had too much undone at once. I started with the front framerails and dog house. Then moved to the rockers, then did the rear end (tailpanel, trunk and rockers), then replaced the dutchman panel and window corners, then replaced the roof.
I think the big thing is to brace the car when removing large chunks or subframe rails. Read through a few restoration threads as there are some great ones which should give you an idea. Best of luck, I'll be following this one.
BAFRAID
She’s looking like a Super Bee again!!
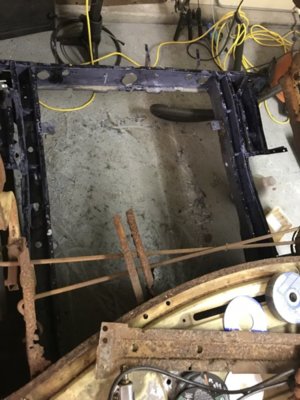
Thank you Threewood! Frame rails and torsion boxes are good. It's just the lower edge of the rear quarters, trunk, and lower end of the wheel wells. I hate to remove all that metal, although it may be easier than piecing in sections. Just hate to remove so much original metal. I will take it little by little. Maybe start in a less affected area, build confidence and then hit the larger areas. I have done metal work on a 1964 land cruiser so I have some experience.
I did pretty much what you are going to do. My outer wheel housing lips were rotted so I patched in the outer section from AMD pieces. More fitting but the rest of the metal was good so I wanted to save it plus I didn't want to disturb the roof support. The seam is hidden by the quarter panel so I hit it with body seam sealer and top coated with rust bullet. After I patched in the outers, I patched the lower wheel house sections that were rotted (the flange area that spot welds to the floor pan.) I then fit the floorpan. If you fit the entire piece I have seen guys cut around the roof support and notch the new piece to fit it.
Just take it one section at a time and don't skip around. It is real easy to feel overwhelmed.
Here is a picture
 of mine sectioned in... I used the rotted out piece as a template.

Just take it one section at a time and don't skip around. It is real easy to feel overwhelmed.
Here is a picture
BAFRAID
She’s looking like a Super Bee again!!
Thank you again Threewood! It good to hear from others who have done the same thing.
BAFRAID
She’s looking like a Super Bee again!!
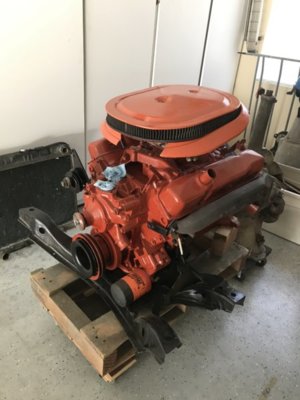
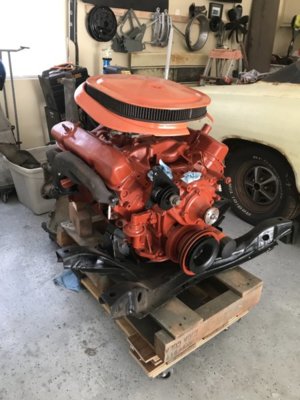
On these engine pictures I realize the air cleaner base is supposed to be black. You’ll also notice on the front edge of it there’s a square section cut out. The previous owner had the a/c compressor mounted on the block which didn’t allow the air cleaner base to sit down flat so he decided to cut a chunk out.


BAFRAID
She’s looking like a Super Bee again!!

BAFRAID
She’s looking like a Super Bee again!!
Moparstyle
Well-Known Member
Nice build cant wait to see her finished
Similar threads
- Replies
- 13
- Views
- 1K
- Replies
- 1
- Views
- 570
- Replies
- 12
- Views
- 938


