• When you click on links to various merchants on this site and make a purchase, this can result in this site earning a commission. Affiliate programs and affiliations include, but are not limited to, the eBay Partner Network.

'71 Super Bee - resto mod

moper

Well-Known Member
Local time
12:52 PM
Joined
Sep 25, 2014
Messages
1,044
Reaction score
642
Location
Eastern CT
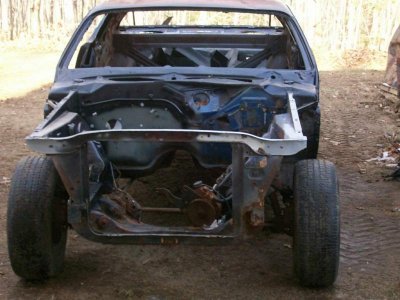
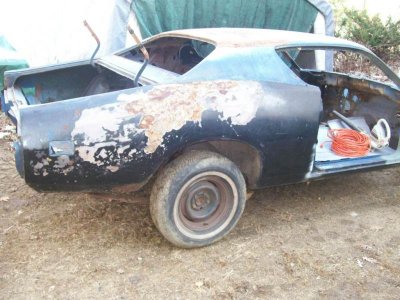
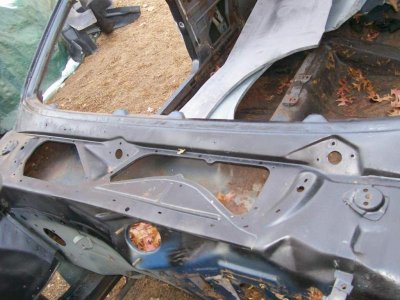
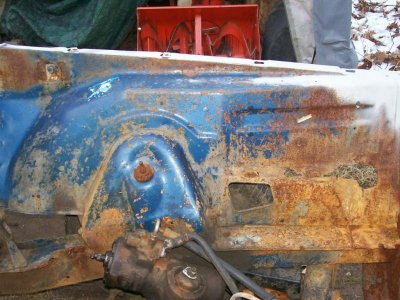
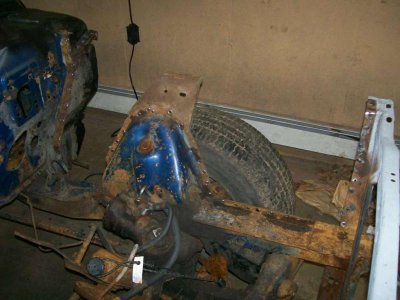
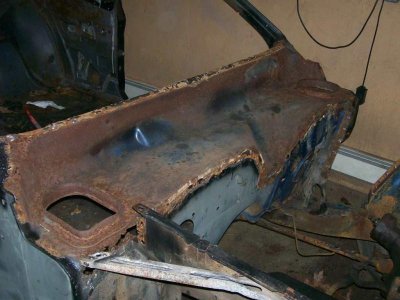
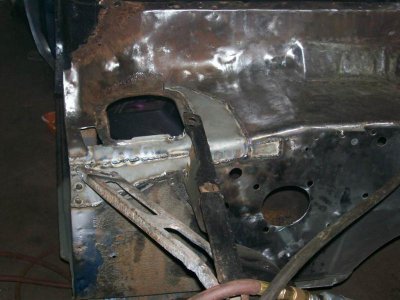
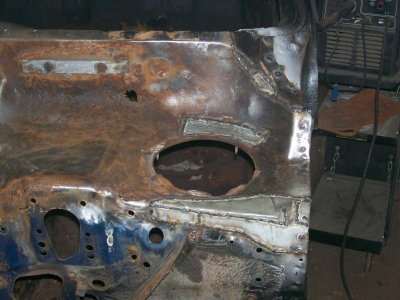
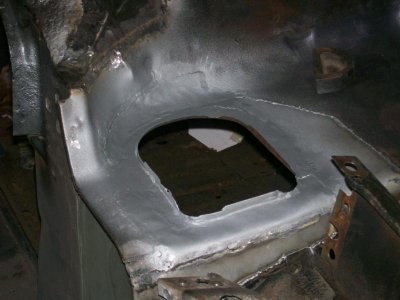
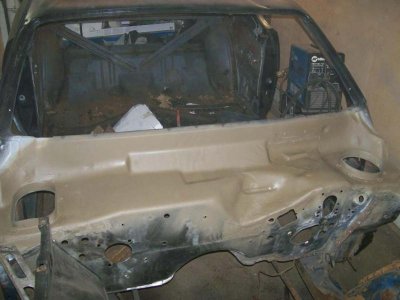
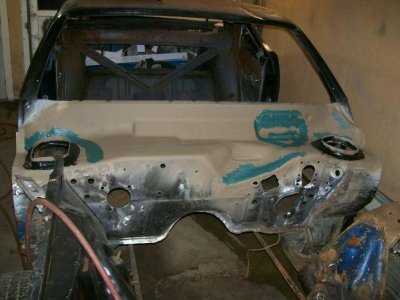
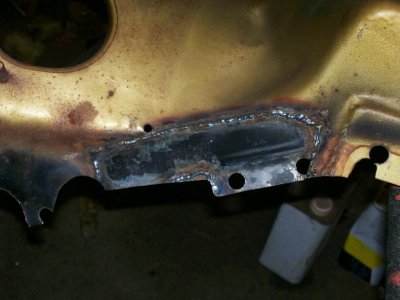
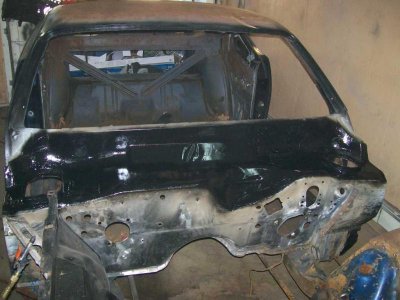
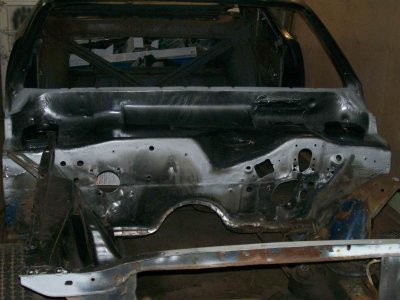
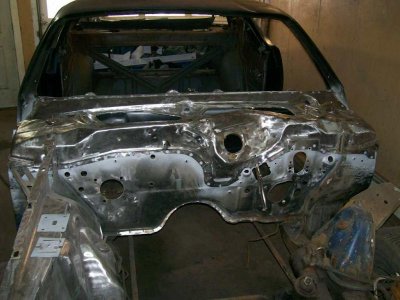
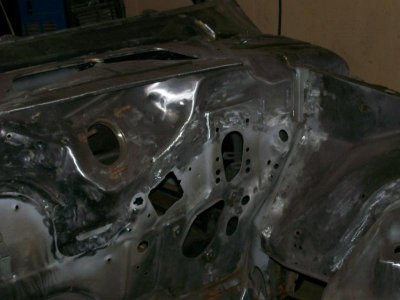
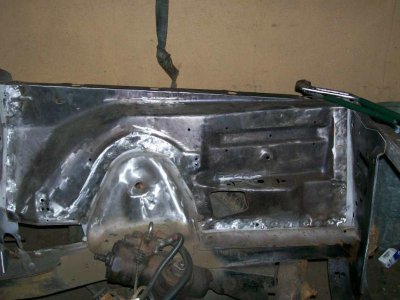
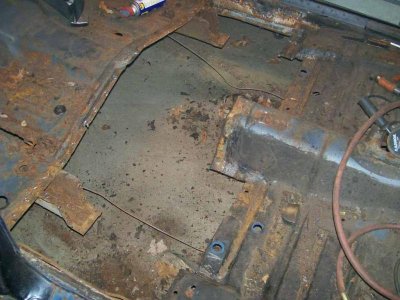
I'm not one to normally do a resto thread - but you guys helped me source the right parts and I figured it might be fun to do as this one's not a huge amount of work. So - this one is my buddy Tom's car: '71 Super Bee, 383 4sp car. He's going through it with the goal of making a G machine type of deal out of it with a 440(at the moment) and A-833OD in it. Historically it's not numbers matching and was painted blue different from the OEM blue. Someone swapped in a 400/auto (cut a hole in the floor hump for the aftermarket shifter...), and then proceeded to bounce it off a truck and a pole I think. It's not really that bad. Front end damage was limited to the bolt ons, the quarter was hammered out and mudded. I've got the unibody to "do it right", but on a strict budget. So "right" and "cheap" are already butting heads. I quoted based on resto-quality and used parts. At least in the case of the quarters he's bought "other"...lol. But - we're working through it. I located and he bought a pile of cut up B body for the cowl areas, inner well, floor issues, and trunk filler. Plans are to make it rust free, remove the dents (tree branch fell accross it), fix the floor mods, replace the badly mudded quarter, and mini-tub it. Possibly install an adjustable rear suspension. For now I'm supposed to get it solid, as straight as possible, and in epoxy prime.
Stay tuned!
 
Staying tuned here! Really sounds like a good project and wish you the best!!! Cool car...
 
OK - first pics... How she arrived, then after removal of the left inner fender and cowl cap....
 

Attachments

  • 100_3106.jpg
    100_3106.jpg
    69 KB · Views: 613
  • 100_3111.jpg
    100_3111.jpg
    79.1 KB · Views: 612
  • 100_3114.jpg
    100_3114.jpg
    72.1 KB · Views: 603
  • 100_3116.jpg
    100_3116.jpg
    88.1 KB · Views: 612
  • 100_3118.jpg
    100_3118.jpg
    61 KB · Views: 602
  • 100_3119.jpg
    100_3119.jpg
    63 KB · Views: 612
That'll keep you busy! Keep us posted on the progress.
 
Yup. Can't take too long though - I have a '70 Cuda and a Chevelle waiting. This one definately needs the firewall/cowl. That was something the owner hoped we could patch but it's just too far gone to save. The interesting part is the parts car was an AC car - this Bee is non-AC. So I'll have to graft in the non AC firewall, and add the driver's side cowl vent flange to the replacement parts now too. I ordered more cut off wheels and roto-broach cutters...lol.
 
Yep, this one is going to be fun watching it go thru the transformation.
 
Well, as usual with rust repair - the best laid plans will go to waste...lol. The parts firewall, and the OE firewall, both have rust. Albeit in somewhat different areas. So - looks like the factory firewall is staying in the car and I'll be repairing and patching it to make it solid before I replace the cowl cap. The cap will be from the parts firewall, but also will need a few patches from the OE cowl cap. I'm getting a new mig bottle today, hoping to have the wholee cowl part of this done by the end of this weekend.
 
Update after the week & weekend... The OEM firewall/lower cowl are goign to be about 20% new metal. I've got most of the worst areas done. Probably another few hours to finish welding, a bunch of dressing the welds, and the lower cowl's ready to be primed, seam sealed, and painted.
 

Attachments

  • 100_3132.jpg
    100_3132.jpg
    51.8 KB · Views: 523
  • 100_3133.jpg
    100_3133.jpg
    61.9 KB · Views: 530
  • 100_3134.jpg
    100_3134.jpg
    68.3 KB · Views: 500
You sure are making good progress bud! I hope when i get this far up on mine i can do as well, looks really good...
 
Well - after looking like the first Ironman welded suit it's been ground and primed. Next steps are glassing over the welds and seam sealing the cowl vents. Then painting it and getting the replacement cowl cap in place.
 

Attachments

  • 000_0001.jpg
    000_0001.jpg
    50.2 KB · Views: 484
  • 000_0004.jpg
    000_0004.jpg
    50.1 KB · Views: 479
Always makes you feel good cutting out bad metal and then have the new metal go in that nice, good job on the patches.
 
Yes looks good. I guess I'm pretty lucky to live in southern Ca. We don't have much rust here.
 
Yeah - you've got fires, earthquakes, and hippies. I'd rather have rust...lol.
 
Updates as of today.. .Firewall and lower cowl are all set and the repaired cowl cap is in place. Only thing left is grinding my welds and applying the seam sealer inside the cowl cap and that whole journey is done. I'm working on the parts-car left inner fender now. Apparently a Plymouth '72 inner is different from a Dodge '71 so I've got to replace a little bit of it above the battery tray area, along with repairing a little rust before it goes on the car. I've got a few areas of the cowl sides to fix, then the front floorpan and 4spd hump repairs...
 

Attachments

  • 000_0001.jpg
    000_0001.jpg
    59.6 KB · Views: 401
  • 000_0002.jpg
    000_0002.jpg
    49.2 KB · Views: 401
  • 000_0003.jpg
    000_0003.jpg
    64.3 KB · Views: 403
  • 000_0007.jpg
    000_0007.jpg
    56.8 KB · Views: 394
  • 000_0018.jpg
    000_0018.jpg
    66.3 KB · Views: 406
Well - made a little more progress between snow storms. I'm about a month behind on it now, but it is what it is...lol. I finished the engine bay and driver's cowl side/rocker, patched the driver's floor, and the 4sp floor hump, and latest is removal of the rear footwells. The '72 parts car floor is different due to the seat belt mounting spot - so that will need to be fabricated as the original is rusted badly. With some luck the foot wells and spots on the front floorpan will be done this weekend...
 

Attachments

  • 000_0003.jpg
    000_0003.jpg
    45.7 KB · Views: 351
  • 000_0002.jpg
    000_0002.jpg
    60.1 KB · Views: 370
  • 63.jpg
    63.jpg
    76.7 KB · Views: 340
Update: Still behind but catching up. PIctures will be posted later. I patched some other areas on the front floor pan and the rear seat pans. The rear floorpan sections are ready to go in after converting the '72s to '71s and fixing the seatbelt reinforcement areas. All that's left is some dressing of the overlap areas, the weld through primer, and welding them in. Once the floors are all done I've got a dent & rust in the RH door mounting post to fix, then the minitubbing, trunk filler, and quarter repairs. Then it's shooting etc primer and she's done. Need to get moving on it though - the next guy's already calling me to bring his over...lol.
BTW - anyone that says '72 parts will work on a '71 with minimal fuss is a damn liar...lol. Find yourself a '71 parts car or buy '71 parts.
 
Nice work.

Maybe someday I'll have the nads to do that.
 
Auto Transport Service
Back
Top