• When you click on links to various merchants on this site and make a purchase, this can result in this site earning a commission. Affiliate programs and affiliations include, but are not limited to, the eBay Partner Network.

Aluminum Restoration Complete

19Fury63

Well-Known Member
Local time
6:43 AM
Joined
Jun 2, 2010
Messages
112
Reaction score
0
Location
Rochester, NY
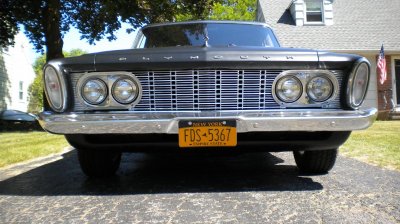
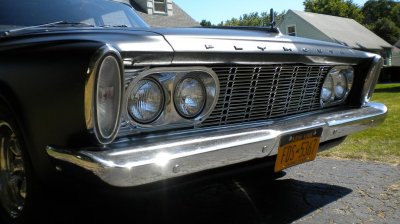
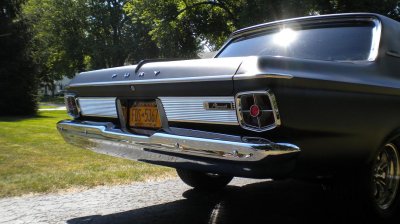
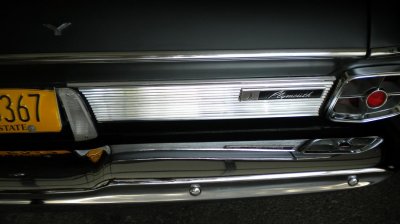
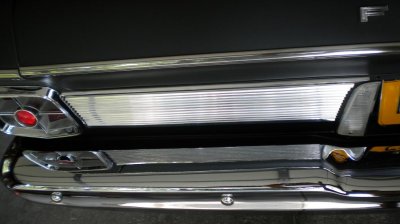
Wanted to post some pictures of my finished product for the front end (headlight housings, side panels, and grille), and also the rear panels (each side of the license plate). ALL of these pieces were badly pitted and oxidized prior to my work, and for being my first time "refinishing" metal, I really think they turned out great...the work was all done by hand sanding/polishing the parts. All of the black "accents" have been removed as well.

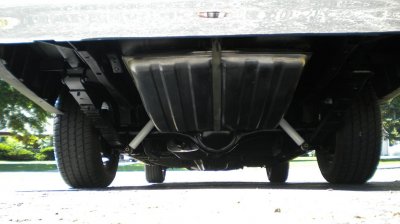
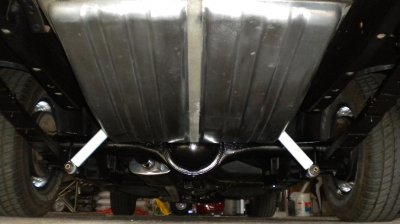
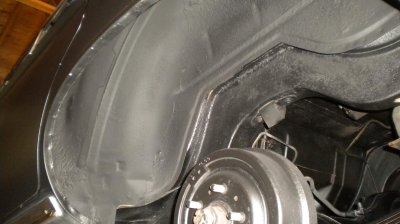
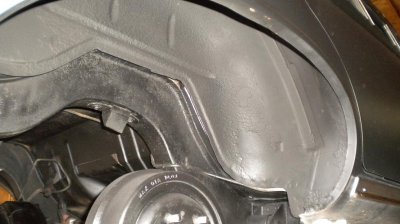
Also have a few pictures of what I did the last 2 days, stripped, rust-proofed, and painted the entire rear end (axle, leaf springs, etc...), under-coated the wheel wells. and put on new shocks (KYB's).

Sorry for the number of pictures, had to get numerous angles.
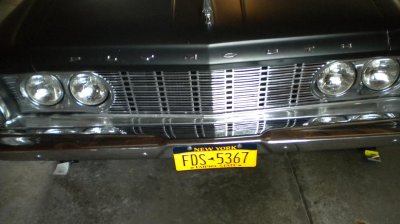
Front End Complete 3.JPG

Front End Complete 1.JPG

Front End Complete 2.JPG

Rear Panels Complete 2.JPG

P-Side Rear Panel.JPG

D-Side Rear Panel.JPG

Rear End Complete.JPG

Rear End Complete 2.JPG

D-Side Rear Wheel Well.JPG

P-Side Rear Wheel Well.JPG
 
Wonderful results.
Care to share with us the equipment/products/procedures you used?
 
Thanks, hard work for sure. The process for the aluminum was to dry sand with 220 grit to remove all the oxidation and pitting (believe me after you do this there is no reason at all to go to the gym haha). Following that, I wet-sanded (in a cross-hatch pattern) with 400, 600, 800, 1000, 1500, and 2000....followed up with Meguiars Mag & Aluminum Polish using the power ball. I have been working on these pieces about 20 hours a week since around the middle of October..along with re-dying/painting the interior.

For the wheel wells and rear end, I used typical degreaser (Simple Green) and a loose brush to get all the "junk" off...followed up with a coarse sanding Scotch Brite pad. Cleaned everything really good with standard brake cleaner, then sprayed the Rust Tough Rust Fix semi-flat paint/primer over everything. Once that dried, I used Duplicolor Gloss Black engine enamel on the springs and axle, and Duplicolor UnderCoat in the wheel wells.
 
How did you do the grille and head light surrounds??They look great!!I want mine to look that good:icon_salut:
 
Thanks, hard work for sure. The process for the aluminum was to dry sand with 220 grit to remove all the oxidation and pitting (believe me after you do this there is no reason at all to go to the gym haha). Following that, I wet-sanded (in a cross-hatch pattern) with 400, 600, 800, 1000, 1500, and 2000....followed up with Meguiars Mag & Aluminum Polish using the power ball. I have been working on these pieces about 20 hours a week since around the middle of October..along with re-dying/painting the interior.

For the wheel wells and rear end, I used typical degreaser (Simple Green) and a loose brush to get all the "junk" off...followed up with a coarse sanding Scotch Brite pad. Cleaned everything really good with standard brake cleaner, then sprayed the Rust Tough Rust Fix semi-flat paint/primer over everything. Once that dried, I used Duplicolor Gloss Black engine enamel on the springs and axle, and Duplicolor UnderCoat in the wheel wells.

Dear Lord!
You did all that to the grille even? I can't imagine the finger cramps one would get sanding away at all those tiny horizontal bars.
 
Hard earned:icon_thumright: It looks nice,well worth the effort.
 
Nice job, it really looks good. You must have a lot of patience. As far as I'm concerned there are never too many pics. Pics like that can be very valuable to others.
 
Thanks a lot guys, I really appreciate all the positive feedback...it definitely took a lot of time and patience...thankfully I'm not really into watching a lot of TV. I had all the parts in my basement and spent hours after work every day, and a majority of my time on the weekends doing this work.

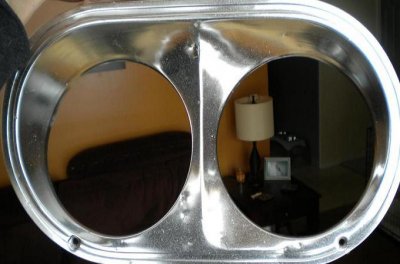
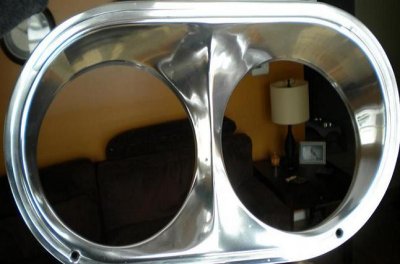
HEMI-ITIS: The same process was used on the headlight surrounds, sanding off the oxidation and pitting, then just working it up through the finer grits until I got the results I needed. Here is a before and after on the headlight surrounds:

Fury Headlight Bezel - Before.JPG

Fury Headlight Bezel - After.JPG

moparedtn: yes, all the bars were done by hand....numerous hand and wrist cramps along the way but honestly it was more an issue with my lower back being bent over my work bench...I'm a little taller than most, so it was somewhat difficult.
 
I have no problem polishing aluminum,I was wondering about the factory type coating on the grille:tongue9:Also,how did you work out the dings in the headlight surrounds??
 

Attachments

  • Snouts 001.jpg
    Snouts 001.jpg
    182.4 KB · Views: 283
  • Snouts 002.jpg
    Snouts 002.jpg
    102 KB · Views: 306
  • Snouts 003.jpg
    Snouts 003.jpg
    105.2 KB · Views: 282
  • Snouts 004.jpg
    Snouts 004.jpg
    104.7 KB · Views: 299
  • Snouts 005.jpg
    Snouts 005.jpg
    100.6 KB · Views: 291
Yeah, getting off the factory anodized coating was definitely part of the challenge for sure, lots and lots of elbow grease with 220 grit sand paper....once that was off it was more "workable" for sure.

For the dings and dents, I went to Harbor Freight and got a set of sheetmetal hammers/dollies for about $20 and just lightly worked them out. They aren't completely gone, but down enough were I could sand out the anodizing. I do have another set of headlight surrounds with zero dents in them, but not sure if I want to go through that process again...I may save that set for when I save up enough money to get everything chrome plated.

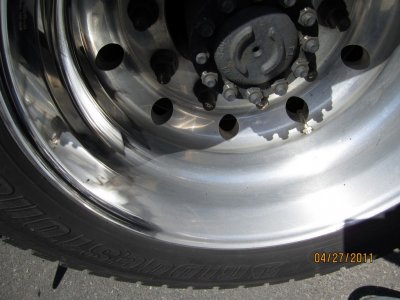
The wheels turned out great by the way, I did the same thing to the rear wheels on my car while they were off during the shock replacement. The powerball with metal polish provides amazing results.
 
I had thought about chrome,but I was told it did not look right.I have several grilles & h/l surronds.I will try on a crappy one.For polishing,I have an die grinder set up with several "wheels" for different compounds.I have lotsa BLING to maintain:icon_winkle:
 

Attachments

  • garage 3 022.jpg
    garage 3 022.jpg
    98.4 KB · Views: 289
  • garage 4 054.jpg
    garage 4 054.jpg
    144.4 KB · Views: 294
  • 113-1328_IMG.JPG2R2.jpg
    113-1328_IMG.JPG2R2.jpg
    156.5 KB · Views: 271
Your car makes me extremely jealous....all that power, and a beautiful car (slightly bias). I had thought about reversing the theme on the front end....where the black accents are, I wanted to chrome them and powder coat everything else black....I suck with photoshop so I really don't know how it would look, don't want to pull the trigger on something like that without knowing for sure it will look ok.
 
Excellent work! Seeing this makes me believe the trim companies like Anobrite deserve every penny they get.
 
Without a doubt this raised my level of appreciation for the companies that specialize in this type of work. Being my first attempt at re-finishing any sort of metal, it was a learning experience to say the least...props to those who do it day in and day out, year after year.
 
Did you have the pieces re anodized again to keep them bright?
 
No I didn't, this is my budget re-build/re-work so I haven't got the cash to get that done...eventually I will, or get them chromed. Possibly have everything powder-coated to match the body, and reverse the "theme".

All I did was apply 2 coats of wax to the parts to help somewhat protect them.
 
Some people use clear on them but since they are back on the car thats pretty hard to do. I wonder how long the shine holds up with periodic waxing? Excellent job on the trim parts by the way. Car looks great.
 
Auto Transport Service
Back
Top