• When you click on links to various merchants on this site and make a purchase, this can result in this site earning a commission. Affiliate programs and affiliations include, but are not limited to, the eBay Partner Network.

Assembly Line question

VFilms

Well-Known Member
Local time
7:55 AM
Joined
Nov 12, 2014
Messages
1,420
Reaction score
2,740
Location
Saratoga NY
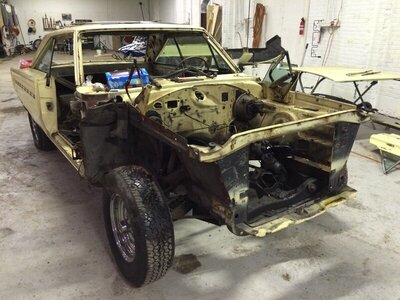
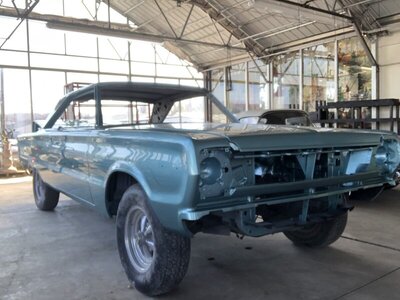
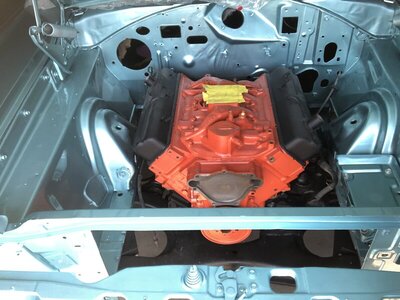
After 30+ years I finally have enough time and money (sort of) to rebuild my '66 Belvedere. Gone from yellow to turquoise. Solid Florida A/C car with the normal rust - quarters. Stroked the 318 (thanks to Gary Pavlovich) and found a cast iron 4 brl intake and WCFM carb.
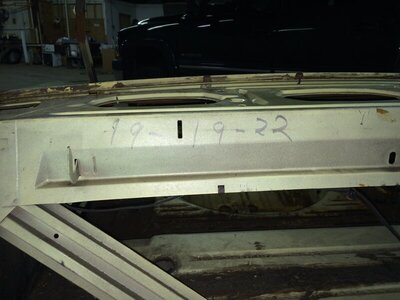
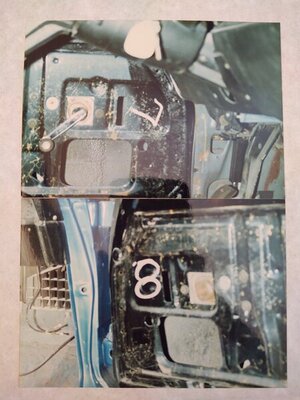
Question is, behind the rear seat are assembly line markings 19-19-22.
Anybody know what these markings are and/or what the numbers represent.
Thanks
IMG_1268.jpg IMG_1598.jpg IMG_3007.JPG IMG_3045.JPG
 
Sorry dont know the answer to your query, but gotta say, thats gonna be beautiful!! I assume you had dark green interior (plus Citron) originally?? What are you going with now? Black? Was there a Silver Special for '66? or did that start in '67?? Nice car!
 
Sorry dont know the answer to your query, but gotta say, thats gonna be beautiful!! I assume you had dark green interior (plus Citron) originally?? What are you going with now? Black? Was there a Silver Special for '66? or did that start in '67?? Nice car!
Thanks. Original black interior going back in.
 
Guessing assembly employee / inspector #'s like my door.. or possibly just part # for assembly.
beerestoration2015 681.JPG
 
Was this car built at the St. Louis plant?
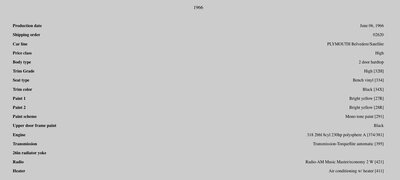
According to the VIN the car was built in St. Louis. I also decoded the fender tag. Easy to remember when the car was built 6-6-66. Maybe that's why it's given me a devil of a time to restore.

Fender Tag Decoded.jpg
 
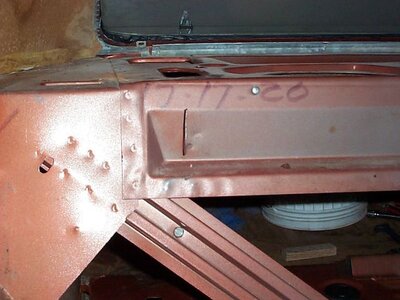
My 70 Charger has the same type of #'s there. St. Louis also.

0000000000000000000000000000000000000000mystrey.jpg
 
Love that color.

I see the side trim is removed.

I generally don't like side trim but I do like the 66 trim on both Coronet 440's and Bel II's (as well as the awesome gas cap).
 
Love that color.

I see the side trim is removed.

I generally don't like side trim but I do like the 66 trim on both Coronet 440's and Bel II's (as well as the awesome gas cap).
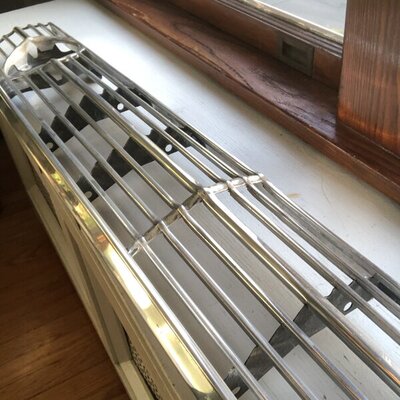
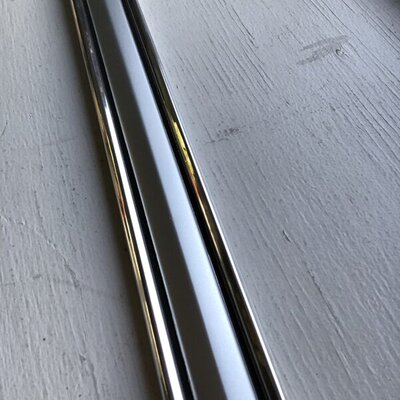
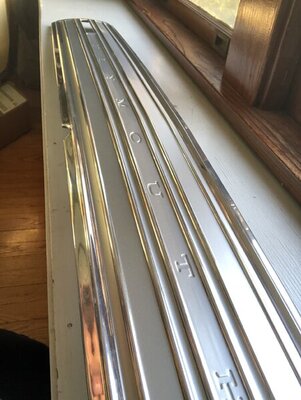
All the trim, including the side trim, has be de-anodized. I tapped out all the dings and polished everything. It will be going back on the car in the spring. I'm lucky enough to have 2 complete sets including 2 gas caps. Problem that I found is keeping the trim clean and shinny. I'll have to polish it a couple times a year.

FullSizeRender-1.jpg IMG_1648.jpg IMG_1650.jpg IMG_1646.jpg
 
I'd consider adding a tether to that gas cap.

Super high theft item.
 
That's going to be nice. How did you de-anodize trim and polish? Thanks.
 
I'd consider adding a tether to that gas cap.

Super high theft item.
I have a standard cap that will be used whenever the car is out of the garage. Tried a wire tether years ago and found a guy near the car with wire cutters. It never ends.
 
That's going to be nice. How did you de-anodize trim and polish? Thanks.
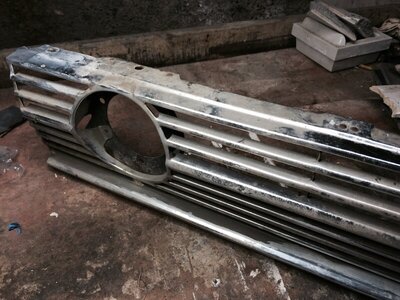
I took some house rain gutter and separated it to fit the longer pieces. Made a bath of caustic acid, or Draino, and water and let them soak. Tapped out all the dings. Sanded down to 1000 grit then polished on a wheel. It was a lot of work but I think they turned out alright. (Grill repair before polishing)
Grill Before.jpg
Grill 2.jpg
 
Great looking car! Not to steal your posting, but this is from my first Superbird, back in the 90's, while restoring it:

IMG_20201112_120042047.jpg
 
I took some house rain gutter and separated it to fit the longer pieces. Made a bath of caustic acid, or Draino, and water and let them soak. Tapped out all the dings. Sanded down to 1000 grit then polished on a wheel. It was a lot of work but I think they turned out alright. (Grill repair before polishing)
View attachment 1025780 View attachment 1025779
Nice job man! Thanks.
 
Great looking car! Not to steal your posting, but this is from my first Superbird, back in the 90's, while restoring it:

View attachment 1025782
Happy to see the photos. Now if someone can tell us what these markings are. I’ve searched online and all I could find were the normal markings on the rear end, etc. just wondering if the line workers were screwing with us. “Honey, today at work I wrote some numbers on a car. They don’t mean a thing and they’ll probably drive some guy crazy 50 years from now.”
 
Those markings had something to do with the paint from what I recall. I was reading a post on another site that had all the info.
 
Stroked the 318 (thanks to Gary Pavlovich) and found a cast iron 4 brl intake and WCFM carb.
I look forward to seeing this all together and how the stroker runs. Did you go 390 or 402 cu in? Gary is a great guy to deal with and supplied all the parts for my rebuild. I nearly went the stroker route but decided on standard stroke due to the complexities of getting the custom pistons and being overseas, but I wish I'd persevered with it.
 
Auto Transport Service
Back
Top