• When you click on links to various merchants on this site and make a purchase, this can result in this site earning a commission. Affiliate programs and affiliations include, but are not limited to, the eBay Partner Network.

Filler Secrets 101

Bladecutter

"Pursuit of Shape"
Local time
11:22 AM
Joined
Nov 9, 2014
Messages
6,112
Reaction score
7,029
Location
USA
Want to cut filler costs by 2/3?
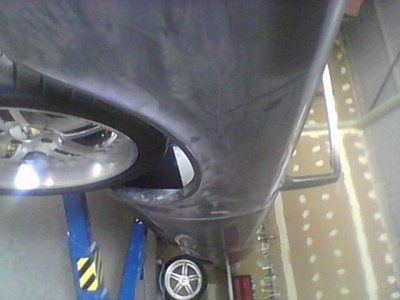
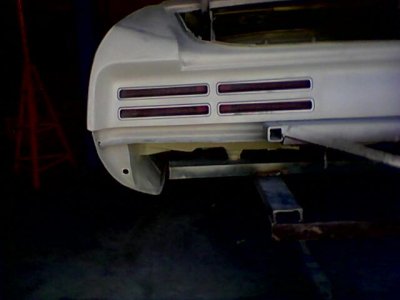
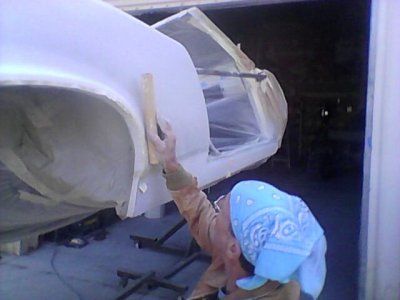
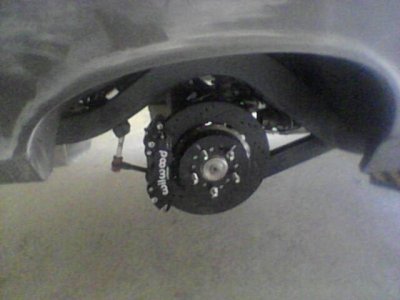
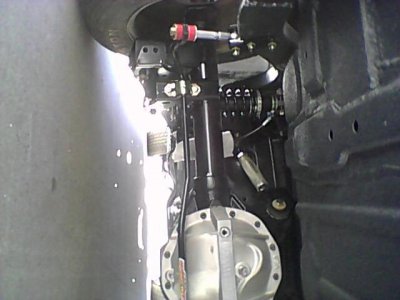
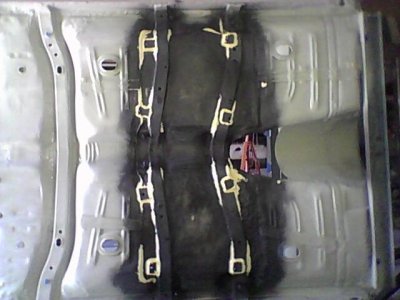
want a filler that allows more work time for doing big skim coats, want a filler that remains spreadable right to kick time? Want a filler that is structural & waterproof? Want less 'tack'. want a filler that you can mold onto a vertical surface like modeling clay? Want a spread as smooth as adams peaunut butter? Wat a filler that you can have full range of adjustment on Coarse builds to fine, thin spreads & dabs...wanna give the finger to the corporations....hint all pre pkg'd fillers are usually poly resin based....a qt of evercoat kitty hair is 50.00 + $ now. i can make a qt. in about 10 min for little more than 5 $. This is a little tougher sanding and will wear out a80 grit pretty quick...but a material that sands too easy IMO is indicative of too much talc...too much contributes greatly to shrinkage...i'd rather sand on a brick before, than to have try & color sand post cure shrinkage out after the paint. So if this gets Your curiosity, stay tuned....if You're Really curious. shoot a PM @ me.View attachment 260791View attachment 260792View attachment 260793 GTO seat pans.JPGGTO side in 400.JPGGTO tail.JPGGTO whl open.JPGGTO Raptor coat.JPGGTO rear brakes.JPGGTO rear end.JPGView attachment 260801GTO 2.jpgGTO profile.JPGcamera dates are wrong....2013-14
 
He wants you to send him a PM.....and if enough respond, he'll post it here because his PM box will fill up rather quickly.
 
Howdy Howdy,, Top of the Day to You All. sorry for the delay. i do haveto get some work done, but i got 5 hits in PM's so i'll post my ruminations here now

The materials are just common fiberglass materials..one can be a bit more exotic and opt to use an epoxy resin, or vinyl-ester as opposed to poly-ester...regular glass matting is actually better than cloth for making the fill
to do kitty hair type compound(long hair chop) for building strong, foundations....simply pull the mat apart. so the hairs become individual strands. then mix with your resin to a stiff consistency, you want plenty of glass in it for structural integrity *note* though vinyl-ester is superior to poly in terms of being able to expand & contract w/o fracturing, i think it shrinks worse than poly. but at any rate You don't want the mix too resin rich. just enough to get workability out of it...rule of thumb the thicker the foundation build the higher the ratio of glass to resin must be. If You're working a small area and don't want to wait a 1/2 hour for kick. as well as the liqid resin haredener, You can accelaerate it by adding creme hardener..this will also help reduce the initial tack that clogs up expensive abrasive papers. *note with glass, amount of mass has to do with how fast it will kick. more density, it holds it's own heat more while kicking...thinner spreads will take longer to kick (i used to work @ Warlock Boats, fast off shore cat & vee bottoms) so that's the long hair mix. for dressing the craters, pinholes etc, next step would be a short hair chop. so this you can adjust by how short you chop the hairs, my self, 1st spread, i cut the chop to approximately 1/2" strands, this time you can up Your resin ratio to get a smoother spread and to help keep it from rolling out of pinholes and craters as You spread across. this a mix that still allows generous build too, the the next time, if You still need a build out of it but not more than another 1/16"
thick after sanding, then kick resin ratio up a little more....when You think You are ready for bondoe skims....there is a product called cabasill, used commonly in boat industry...all it really is is very finely ground glass...looks like snow. moisture will make it clump. so run it through a fine strainer and keep it in sealed container. if you want some build property from it, stay high on the cabasill ratio to resin.... to the consistency of modeling clay. it will spread smooth but allow You to control far easier the amount You are applying to a given area. so far all of these mixes described can be applied on vertical surfaces and hold the shape as applied, won't run, IF the ratio is right *always watch out for too resin rich* but if You don't mind getting your hands goopy, You can litteraly slap on surface and mold the desired shape as You apply. top surface, vertical surface, it will hold the shape You put to it. Also if You want, add cabasill as an extra binder to the long and short hair mixes. Now me. i cut every material open after kick and give it some time to breathe off some solvents before i grind it out and put anything on top of that...time is the best assurance against post-cure & solvent lock. now when You're at a point to start filling tiny flaws, want real thin wipes and dabs. then reduce the cabasill ratio by a good percentage and You can fill the smallest of pins w/o it trying to roll back out....myself i add creme hardener to all of these ratios, along with liquid catalyst...if im building and doing full skims on a panel, i lay off the creme so i've got plenty of time to work it. another *note* as i referred to mass determining how fast the kick comes. a can half full of resin with just a few drops of catalyst will go off much faster and hotter than a can a 1/4 full with the same amount of hardener. If You've ever been frustrated that after so many spreads, that filler begins to get dry and uncooperative, not kicking, but the talc begins to dry and roll into balls instead of spreading out smooth, say goodbye to that problem, you can keep spreading and distributing right up to kick ready. i think there is less shrinkage w/ the absence of talc..whch all pkg'd fillers have...everything is water proof....sands harder, but in my book that is a good thing...too easy sanding..too much talc, more post-cure. Just keep in mind that the thicker of a build You need the higher the glass ratio must be. so by how coarse or fine You chop up the glass is how to regulate spread, but even with the long hair. the spreadability is there....Kitty Hair Long chop doesn't have talc, it's just resin and long strand. the short chops do have talc. Anyway, like i posted, kitty is 50 bones a qt on the avg now, using the bulk materials, a qt shouldn't be more than $7.00 to make, i add cabasill to the long chop mix as well, which the shelf product does not i don't think.

Please experiment on stuff that doesn't matter first, let water seek it's own level and develop Your feel and instinct for mix ratios by working on samples first...a person here who is very knowledgable of the science and art of glasswork is Photon440.. i'm hip-shot eyeball...Photon can give You hard technical information about the science. enjoy, i think You will be ecstatic. i certainly have been for the last few days...just astonished that i lost track of this method in the 80's....it's a vacation now and lets me enjoy the work,not being pressured by kick times allows me to do tighter applications that i don't have to do as much shaping on each time. Peace Everybody, i Hope this works for You, it will certainly save a considerable amount of money....bondoe. i never use. it's not waterproof, nor structural. all of these mixes from thick to thin have structural value. as well as being 100% waterproof. Sail on SailorsTexas Tornadoe.jpgI've been working a Jeep PU fender with this method right now and am as giddy as a schoolgirl with the progression. The cabasill mix at good ratio makes it very hard to snap a piece that is 1/8" thick....the chop mix is near impervious....remember that the glass is what lends the strength, resin is just the binder, so the thicker the build. the more glass neccessary.
 
Last edited:
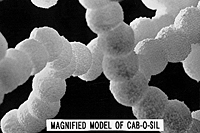
Those are some good ideas - I've never liked regular talc/clay filled Bondo because of the way it absorbs water and can swell. While there are a lot of waterproof fillers out there ranging from the glass strand product you're giving us the recipe for, metal fillers and glass microspheres, making your own sounds like a money saver. The Cab-O-Sil you're using is indeed glass, but it isn't ground. It's called fumed silica, and it comes from passing silica sand through a flame. The glass evaporates, then forms tiny droplets that form into clumps, like threads. It's a great way to have a light-weight bulk product. It's non-toxic too, but shouldn't be breathed any more than any other dust should be breathed.
cabosil.jpgthis is what a bit of the powder looks like under magnification.

The thing to remember is that resin alone has very little strength, so the more filler you use, the stronger the layer will be.

Starting up this DIY page on body fillers is pretty well timed...good weather is here and more people should know about these options when starting a project.

If you can afford it, using epoxy resin instead of the usual polyester resin will give you a bond that simply will not come off. It will be like it grew roots into the steel itself, but it is four times the price.
 
progression of rediscovery

Great Post Photon.....the micro picture is insightful...i did not know the process of how cab was made. i was dead wrong in my assumption it was ground glass. Anything that i put out here i'm not trying to claim as bible..it's just what i've put together through trying to figure stuff out....i've redone a lot of jobs in my time, but the mistakes are the greatest teachers, learning what not to do is key and unfortunately mistakes are often times the only way to achieve that. Please add any more thoughts to this discussion.

At this point have the entire edge of wheel opening, cascading into runnig board entirely built with a new crown, in 80, few little pits to dab & i'm ready to 120 & prime. it is impervious...not a chance of digging Your thumbnail into it...nada.....any pre packed fills, i can penetrate with my thumbnail...not this mix....it is also uniform in substrate, because of the good working time i was able to cover whole area in same batch each time. **note when i fill, i like to work in full skims because, when different batches of fill are feathered into each other, unless hardener ratios are exact each time, each of those batches are going to expand and contract at different rates, which opens of the possibility of seeing shrunken feather line impressions under top coat after 6 months or so, if the substrate is kept consistent, then less movement. IMHO.
As told, i'm sanding on bricks right now. wears 80 out fast. and i think that is what werx for the bottom line....this stuff is not going to shrink & move near as bad. Also,, i have always been partial to the polyester two part primers for same reason, they're pretty hard...similiar in make-up i believe, to gel coat and hold out properties pretty good, not a terrible amount of shrinkage. how ever the poly prime product's i'm familiar with are NOT waterproof, and this worries me about wet sanding....i would recommend being sparing with water when sanding. don't keep surface saturated. use a bucket and stay on top of wiping down sanding runoff too..it stains when left unattended. On the GTO i came into contact w a primer i had not used before, so i don't have a whole lot of experience with it...it's AXIS two part urethane, one thing i think i can safely say at this point of a long project...the hold out is the best i've ever seen in terms of shrinkage, it seems to stay put pretty doggone well, it's hard(stands up to thumbnail dig, can't, if properly catalyzed)and it is waterproof, it's rougly 135.00 a gal for the two components, plus reducer. must be gravity applied or pressure pot i think would be better. now incongruous to some of what i've said. the material sands pretty effortlessly.. that's new to me, to not see shrinkage in something that sands as easy.

So that's where i'm at with my rediscovery @ present.....i am very pleased with result so far......and it is a tough substrate. I think that the savings of mixing bulk filler, justifies the extra cost of the superior epoxy resins....Hey Photon is the epoxy to which You refer the same as the Vinyl-ester i speak of?

Anybody out there in this game is certainly invited to come & share their takes, make corrections to any inaccuracies they think i'm making....i don't know it all, never will...and that is the Beauty of life. there is always the new to be learned...Peace Everybody. The pictures of the Grand Prix. we started out using feather fill poly prime, but have since moved to the AXIS urethane tinted black, when we topcoat, we will use a waterborne non-sanding sealer just prior....water born simply will not let any solvent of any type penetrate, so not worried about solvent penetration screwing with the two different primers and they themselves when gone off well have a very slow penetration rate. Adeu'
Photon...more tech Please
 
That's a good question Blade, actually the vinyl-ester you mention falls between Epoxy and ordinary polyester resins. You can find a good article on the differences here:
http://www.multihulldesigns.com/pdf...ster and both are Preferable to Polyester.htm

Out of curiosity, you might try some flex tests with your mix. Using a strip of 20 gauge (2 X 10 inch is fine) treat the surface as you would for a car body, then apply a skim coat. Try it with your Cab-O-Sil mix in different ratios and regular store brand filler. Then give each one a bend...10 degrees, 15 degrees, 45, 90 etc. and find how much they'll take before breaking at the bend. Most regular filler breaks, if you've seen a car in an accident and there was previous putty, it'll be shattered at the impact point. All-Metal has stuck really well in my experiences on this test. Then again you can get special flexible metal fillers for parts that move or are in a vibration area...not cheap either. http://www.parasolinc.com/Products.asp?ProductID=ALSIFLEX

I'm wondering what brand and type of waterborne sealer are you using. I might give it a try. Some primers are not sealers, just wondered which was in the shop.
 
Pretty cool ideas! The biggest benefit I see to this aside from cost and strength is the waterproof part. Some may be thinking "who cares if it's waterproof it's getting painted anyways" but if you live somewhere like I do in Ohio it's a huge issue if you don't have a shop with climate control. My garage is only heated or cooled when I'm in it and get's to 85 percent humidity all the time, what this means is you either save the bodywork for the winter, seal everything up with a good primer-sealer after every session or build a sealed paint area that can be dehumidified (your best to do it in the winter). This has caused me more problems then anything else "humidity".

There were times that I'd go to the shop and find my car literally dripping in water and have even seen bubbles develop in primer that when popped water would come out "no crap". This was from water being trapped in the filler from just sitting in the garage so yes waterproof fillers are a good idea. I now have a 25'X15' insulated room with a dehumidifier for doing my work that works wonders.
 
I strongly recommend to follow the links Photon has posted...i'm learning things i didn't know. The epoxy resin has properties that allow better insurance....even if it's 100.00+ a gallon, still make a qt of long hair chop for 25.00 - 30.00, a generous savings over evercoat and other brand of long chop and they are polyester....poly & vinyl apparently have a post cure problem that epoxy does not...the information from the resin tech Photon posted tied in with something that i never have trusted with composite aircraft....in part 81 General Aviation..F.A.R. mandates that the major base color of composite aircraft can only be white...maybe very light pastels, but no dark colors at all....read the resin tech to see why this is a rule....yup. gonna be another ten years of watching Cirrus and other plastik birds to get a better idea of the longevity....other thing i don't like about composite A/C is that being unitized...inspections(which are out the yin yang) are much more difficult to achieve.....meanwhile, any composite that i get in is going to be less than ten years old. and if it's tied down outside(not hangared) for it's life in an arrid zone such as Arizona....i'll think a little harder about getting in it.

Definitely strain the cab-o-sil before mixing with resin, i'm making a firm batch right now, i'd estimate it's plenty safe to build to a 1/3 of an inch after sanding. meaning it's not all going to be a 1/3. but in the lows that You bridge over there may be that depth, but on the other hand, if the entire skim was a 1/3, i have confidence it would hold....i'm mixing it so it will hold it's shape and not sag, run on vertical. pretty high cab content, but it still will spread smooth....straining the cab prior to resin mix will give a silkier mix in the end and insure there are no little balls that didn't get saturated. The stuff is tough as nails...almost out of resin, so next step is to go get some epoxy res.
Good Day all....nice to see the activity here...as Photon said earlier, the ideal working weather is approaching...it would be nice to have a think tank going here...i Learn from the input of others as i have learned a great deal from Photon i was not privvy to.

747mopar..Good Man. waterproof is crucial.....all the bubblig, blistering that You see on re-do/s. cheap rust repairs in rockers, or any areas that are traps for sediment, leaves etc. that stuff builds and when air gets wet, debris gets wet. if those cheap, stuff it repairs are done with bondoe type ,non-stuctural, non- waterproof. then in a couple years<> the blisters are going to start rising...do stuff-it rust repair with long chop. as long as some finesse is applied in cleaning an prepping areas on BOTH sides, chances are very good that the car will deteriorate around the repair before it lets go. jsb
 
Adding as i go, just thought of something....if Your spread or laminate. is taking to long to kick for yo, You can take wax paper and lay it over the goop, Gently so as not to disrupt...put the shinier side against the goop...this will accelerate the kick by not letting the heat built disapate as much....there is a solution called PVA which is a water soluble wax. laminates, mix i'm describing and gel-coat can all be accelerated by spraying PVA on....very similiar to a product 3-m was pushing some years back that really never caught on..they called it spray mask...was nice for doing spot jobs...You would blouse out your area with 18 or 24" masking paper. then spay the surrounding area with the spray mask, out far enough to catch hot overspray...can save a considerable amount of time in hard masking...the 3-m was expensive(of course, 3-m products go up twice a year) PVA can be had considerably cheaper. jsb ** when the chemical kick is done, the wax paper will peel off...wax is a release agent**
 
Good point about the wax Bladecutter, but the wax paper isn't really holding much heat in. Rather, it's keeping air out. Resin doesn't like to cure in the presence of oxygen, so air-dry wax is usually added to the last coat of a 'glass build, usually the gel coat. Not needed when gel coat goes down first, as in a mold. The wax additive is basically just parafin, dissolved in a styrene solvent which rises to the top and 'air-proofs' the resin. This eliminates the slightly sticky feeling that you get with most 'glass work as it allows the surface to fully cure.

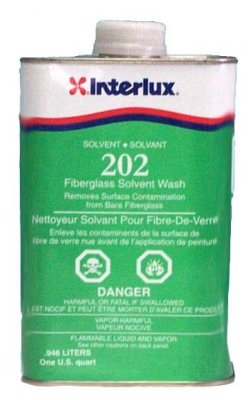
Of course then you have to remove the wax for any subsequent top coats to follow. Due to the popularity of 'glass boats, marine supply shops have the best array of products for this type of work. You'll want something like this after you've had wax on your resin.
Interlux 202 Solvent.jpg
Definitely do not try to just sand the surface clean; you will end up embedding wax particles into the surface and make it even harder to clean.
 
Right...On...Pho-ton! And again You refine the tell...You told me You're not an Expert...too self deprecating Photon. again the Scienctific overview from a hands on.....this is teamwork Boss. @ Warlock, btw i was never in Lam Room, i did do gel-repair jobs, or refinishing of partial repairs....they used P.V.A. ( One vet had my dog on PVA for incontinence y-yikes....found another vet) So again i don't know if i'm repeating brand name or type of material....anyhow, after gel application, which as You know. looks something akin to sprayed mortor. would spray it w PVA....i repeated about heat , what was told me, it made sense since once kick begins, it's sort of perpetual, as the heat builds in the material. that heats acts accordingly with the catalyst to um, exponentiate the kick/heating process...so i've always believed. Are You saying that all the heat is Purely a by product and does not contribute to firing off process? They told me to merely rinse with distilled water and wipe dry(w/ clean, constantly turning, uncontaminated toweling of some sort)the PVA'd areas.. which i did, but my nature was uncomfortable with that, from all my headaches w/ wax & silicone, so i took it upon myself to acetone it, or RM 900 pre-kleeno after breaking down PVA with water and drying. want it well dry before solvent I Feel so that the water can't interefere w/ solvent evap. Man i'm really glad You're here w the Facts Dude...do it, have to do it as right as can be done and armed w/ as accurate of info as possible.

Reason i opened up was to add another observation /benefit, the feather is gorgeous. the feather to itself and the feather to the metal....par excellant', and this is just poly resin......so in accordance with Your higher approval of epoxy resin......i am going there soon, i'm about out of resin & need to get more mat. The other thing is i didn't scour the metal out w/ 24 or 36 grit, just good sharp 80 manually, since it's not a ton of real estate......and the feather is very good where it reaches to bare spots.....the majority is over already primed & blocked in 120, w/ the axis urethane, which those feather lines are excellent also. So i see win win and then some so far.

Amazingly enough, after years of trying, the shop i was at in Tucson where i was originally turned on to Cab-O-Sil..... last Evening i finally managed to track Marty down......My Really Good Friend Marty who owned Fancy Colors, taught eachother, but He taught me some trix about graphic layout, that the one handful of layout job's i did on my own, his mentoring became invaluable, invaluable, the extra edge. Been trying to find him since 98,when we last spoke. haven't seen Him since 92.....worked with Him off and on all through 80's....pretty unusual that i would bring up this subject, a pratice we employed in His business, that i misplaced for 25 years, and within 48 hours,,, i'm in contact with Him....THAT is GOD...there are no coincidenences.....we're all Marionette's Halleluyah, i found my Friend!! jsb
Photon's warning to not sand until contaminants are well cleaned is absolute Golden rule....Food grease is a bastard too , worse imo that automotive greases. I always rinse my hands with solvent before going back into. and i doesn't hurt to ittemittently do it....lot of acids and crap in sweat....fingertips worst.
 
Quick answer - yes, the internal heat caused by the reaction helps with the cure. Unless there's too much catalyst, then it can burn or crack. But that's usually a problem to look out for with large resin castings, not thin body filler quantities.

PVA (polyvinyl alcohol) is a common enough mold release and is fully water soluble. It's often used on new molds that haven't been overly waxed, or temporary molds (I used it quite a lot for one-off parts) and itself isn't a wax so the advice you received to use distilled water was fine. I didn't even use distilled, but the water in my area doesn't have minerals in it. Not to be confused with the other PVA, Polyvinyl Acetate which is related to polyester resin.

Going back to epoxy resins, you'll find another bonus. One of the main reasons for keeping coats so thin with polyester resin is the shrinkage factor. Unless locked in place with glass fibers or mechanical means, the resin will shrink on average 6%. If you ever do a pour into something large, like a half bleach bottle full of resin and let it set, you'll see that the surface is concave after it hardens, and it has pulled away from the sides. Epoxy has only half the shrinkage in comparison.
 
Hi....Photon...Top of the Day...couple additions What i've been calling, tack, is the "sticky" top of any uncut area...the stuff that bogs expensive coarse grit papers............Do NOT overcoat tack uncut with Anything!! Unless You want to lay outa welcome mat for solvent lock separation.....uncut tack hidden in layers of spreads, same with uncut primer, will gas up when skin gets HOT in sun.......so when building, and ready to apply another spread/build of filler, the low spots that are left, make sure to take 80 or 120 & Gently go into the valleys,crags and Graze the uncut tack.

Observation i made a moment ago....the edge l have now is very sharp, will be radiused to desired radius after it's decently straight, all along the sharp edge, little hairs are infintesimally protruding from edge. pleased with that! It means the mix is nowhere near too resin rich and the strength will be on the high end. Too bad i'm not getting any potos yet. i'll upload something before i prime, once the shape is right......What i've seen so far is Great, ....one gripe i've always had with body work materials is they were not hard enough....so to get definition & KEEP it throughout process is a BITCH!.....Why i Love the aluminum.....hard enough to hold a definition without having to walk on eggs while stroking the cut......cutting on this is a good step towards the resillience of the alloy cut...make sense? Yes the tiny hairs are standing at attention, closely grouped like domino rows, end to end.

Photo's point about Poly Resin Shrinkage is perfectly in line with the practices that i do.....why i say to cut things open and let them breathe off solvent some prior to working and re-coating. Coast to Coast, in all production collision insurance shops....shrinkage of materials is every day reality and a problem where the problem is never addressed & cured....they just do a monthly budget of 20-30 percent comebacks...live with fixing symptoms rather than root. Photon's Point about Poly resin should hit home fully when You take into account that most fillers from coarse to fine are Poly resin based...that could have a lot to do with why shrinkage is such a problem in rapid fire body work....skinning a car in Fiberglass is making a whole lot of sense to me.....spot fills will stay put and not shrink towards center, revealing feather rings under paint after a bit of time as badly...i can already determine that...there will still be some movement, but by taking talc out of the equation, and adding the Cab-O-Sil glass strength....that's a safe bet at this point. jsb........I'm going to start looking into what availability there may be of EPOXY based....new road for me.....Thanks for pointing the path Photon.
 
I've gotta read this a few times more as a lot of what's being said is going over my head. Once I get my head wraped around it I'm going to run with it. Thanks for posting.
 
I'll admit I have little experience with using epoxies for fillers but have used it a ton for fabbing my own parts and like vacuum forming it (heavy trash bag and an old refrigerator pump) which also does a great job helping the cure without the tack. Doing this lead me to using thick plastic anytime I'm using fiberglass, it makes it so much easier to manipulate the fiberglass without the mess holding everything in place and helping kick it off at the same time. I cut my teeth watching my dad build a KR2 plane that never got finished do to life and eventually heart problems meaning no license (he just bought an ultra light haha).
 
Definitely some good info here. It would be nice to here from some other experts who have used this method.

1) Would the ends of the strands not want to poke out and become exposed?
2) How short can the strands be or is there an optimum length?
3) What grists of sandpaper works best (start to finish)

Thanks in advance
 
Yikes this is some complicated stuff - but good learnings for those of us less learned in the field which I'm going thru right now with my gtx. Thanks to both bladecutter and photon for schooling us on the finer points of body work.
 
re-cap

Morning, i movin' fast right now, so typos will be.
Bigblock, Superfreak, GetX'd, 747. thaanks for putting in.....the recipe that i'm making covers a full spectrum fro 1st spread/build to end, where finish putty comes into play. For foundation type builds, You want to do the Long Strand 1st, achieve your shape with it...that is made by pulling glass mat apart into individual strands. leave them uncut. then it's all progressive from there...adjusting your strand length where ever you want. as You progress towards a smooth, flat substrate The Cab-O-Sil is glass in a fine state of powder. as Photon pointed out before..it is fumed silica, made from sand...it's glass. All of the spreads i'm making on this job are Ca-o-Sil mix....cab content high...firm mix...firm enough that a little heap on the mixing board will support a paint stick standing upright.. Like pudding, yet it will spread as thin as you want, or control your pressure and it will spread a mass of depth. I would have no problem with this mix a 1/4" thick in spots after being blocked. Photon made the point about , multiple, thin coats, instead of trying to hog everything on at once, will go a long long way to insurance against post-cure shrinkages & solvent lock,....i've got 4 spreads on and worked off now,, getting ready. to do another with same mix. this one should get surface to level i want...work this one down and then i will finish up in two part polyester finishing putty for pinholes, flaws.....i like to have things in 120 grit before i prime....the cab-o-sil fill here is smooth in 80...should be an ice rink in 120. Also, i will repeat myself a lot......having hardener ratios consistent, and being able to cover Your real estate in one application, per time. with the same mix,...worked in multiple skims..will give a more consistent substrate, less prone to moving around under paint....when you have several different patches of fill feathered into one another, at different hardener ratios...they expand & contract at different rates...invites movement imo....i came up in Arizona...120 degree summers. i'll try to get some pics up in a week or so. back to it jimi
 
Auto Transport Service
Back
Top