• When you click on links to various merchants on this site and make a purchase, this can result in this site earning a commission. Affiliate programs and affiliations include, but are not limited to, the eBay Partner Network.

Finally getting momentum on the getting the 1962 Plymouth Savoy back on the road

John Keyburn

Well-Known Member
Local time
5:13 PM
Joined
Mar 24, 2021
Messages
95
Reaction score
107
Location
Bucks County, PA
Copied from my FBBO Member Garage Photo post orig created early 2021, updates to come soon.
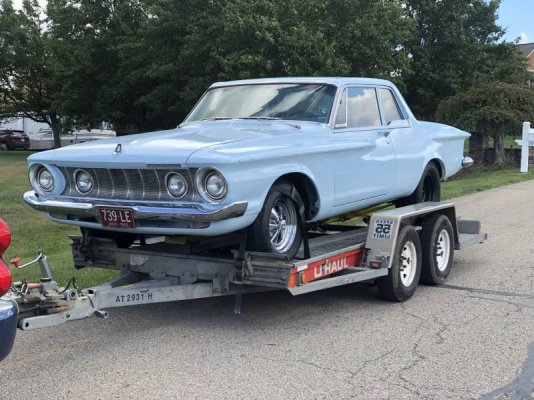
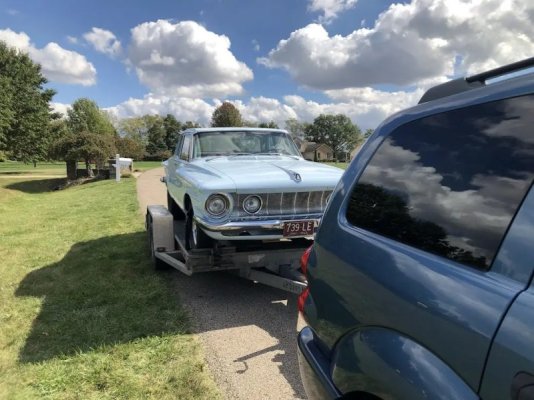
Hello fellow B Body lovers and owners. Below is the current state of my recent purchase, a 1962 Plymouth 2 Door. I hope this will give someone some enjoyment or inspiration to get their project started/going again! Thanks to my Dad for coming along to pick it up with me and providing the tow vehicle, also a Mopar(2004 Durango) It was a fun time.

Exterior: 95% done
Pale Blue repaint some years ago, very good condition
Needs:
  • Right Front Fender Trim (not wheel well trim)
  • Right and left front trim pieces (approx 1" pieces)next to the headlights
  • Rear Plymouth logo reconfigured from "Plum Hot" to Plymouth - I do have the Y!
  • Both Right and Left Plymouth Script emblems that are located on the doors

Interior: 10% done
going to be 103 Interior Trim Code - Cocoa (was orig Blue but I LOVE the Cocoa colors)
Needs
  • Front and Rear Floor pans to be installed. Have all 3 pieces from AMD
  • Carpet - Still deciding on color for Cocoa interior(suggestions welcome) will likely order from SMS Auto Fabrics
  • Gas Pedal - Have
  • Seats Have Front 60/40 bench and rear bench - Frames in good shape
    • Needs re-cushioned
    • Needs Recovered - recently ordered from SMS Auto Fabrics
  • Seat Belts
  • Door Panels - On order, sent out to SMS for recovering
  • Front Kick Panels - On Order from SMS Auto Fabrics
  • Steering wheel - Need (have temp)
  • Wind Lace - Need, deciding on color will order from SMS Auto Fabrics likely
  • Door Seals - Need, deciding on color(Tan-Gold OR Palomino-Tan??? will order from SMS Auto Fabrics likely
  • Window Sweeps(Cat Whiskers)
  • Dash Board/Instrument Cluster, Have almost all parts
    • Needs repainted to 103 Color scheme
    • Need Cluster reconditioned/rechromed (looking for suggestions)
    • Need heater controls repaired and reinstalled (relocate aftermkt Tach)
    • Radio Delete Panel is installed
    • Have radio
    • Speaker Grill - Have, needs installed (relocate aftermarket Oil Pressure/Water Temp gauges
  • All Interior plastic windshield metal trim repainted to match 103 Color Scheme, Cocoa Interior)
  • Window Cranks and Door pulls cleaned, Have
  • Window Crank Escutcheon(large black plastic washer)
  • Door Arm Rests repaired/repainted to match 103 Cocoa Color Scheme
  • Package Tray - On order from SMS Auto Fabrics Will repair/repaint current
  • Head Liner - On order from SMSAuto Fabrics
  • Visors repainted recovered to match 103 Cocoa Color Scheme
Drivetrain: 85%
440 Stroked to 493 (is my understanding)
Dual Quad Cross Ram Carbs and Intake
Edelbrock Performer RPM Cylinder Heads (60925)
TTI Headers
727 Trans, 8 3/4 Rear, 3.91
Needs:
  • Hard to start, needs 2000 RPM then 1500RPM for a few mins to idle OK, Idle is a bit too low too
  • Have not driven anywhere but from trailer to garage in Oct since there are no seats installed, rusty floor and no gas pedal since there is a hole in floor where it would be bolted.
  • would like to set Transmission back to stock Automatic Shift Pattern, currently Manual Reverse Valve body 727 from AA Transmissions
  • Repaint Cross Ram Intake, orange paint is flaking off
  • Install Superstock Valve Covers if possible
    • Update: 2022-11, A set has been prepped, painted and stickered (see photo in update)
  • Install Super Stock Cast Iron Headers at some point possibly
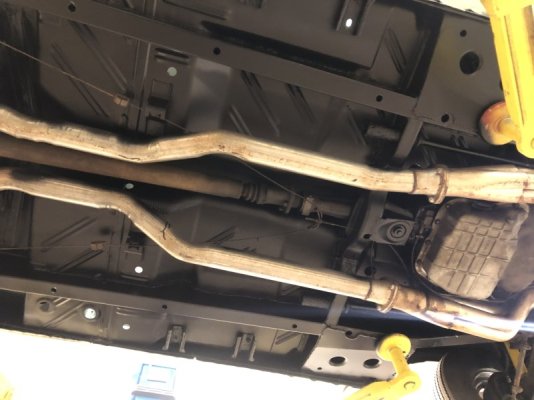
    • Update: 2022-04, Purchased Cast Iron headers and full stock exhaust (with 1962 style tips)

Pickup Day
October 12th, 2021

1962 Savoy on Trailer.jpg1962 Savoy on Trailer 2.jpg

Wish me luck
 
Last edited:
Originally posted 2022-01-01
Pickup day was mid Oct 2021

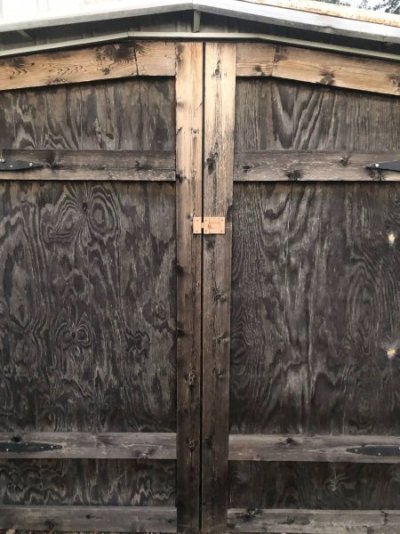
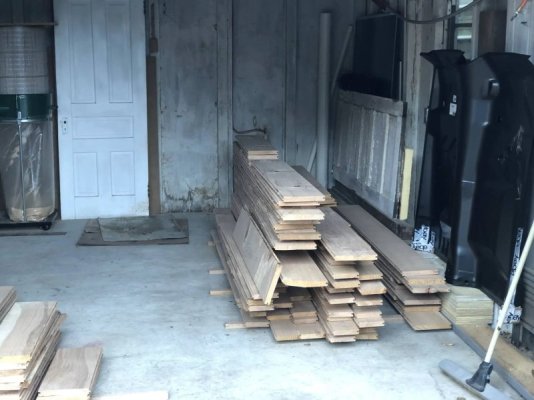
Now to get the car under cover

Garage Doors Garage clean out almost done
Garage Door.jpgGarage.jpg

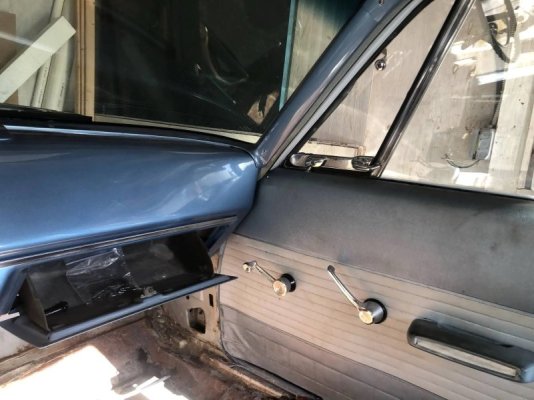
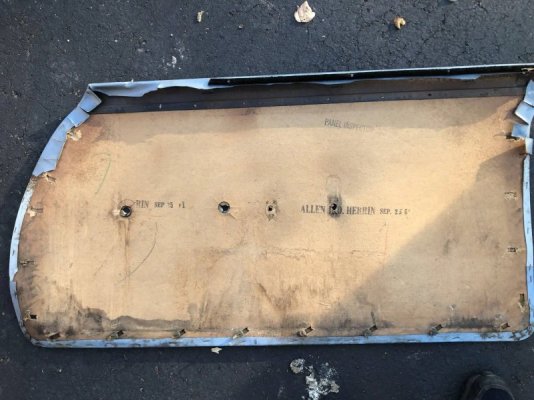
Removing Door Panels to send to SMS Auto Fabric for restoration.
They only need the curved metal tops of each.
Sending all 4, but here is a photo of an original

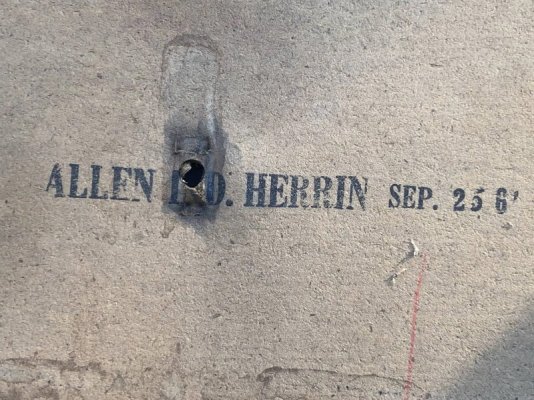
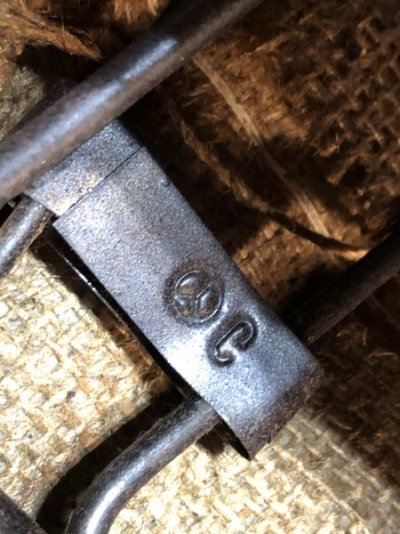
Interior Back side of Door PanelCloseup of Door Manufacturers Stamping
Original Front Door Panel.jpgFront Door Panel back side.jpgFront Door Panel back side, stamp detail.jpg
 
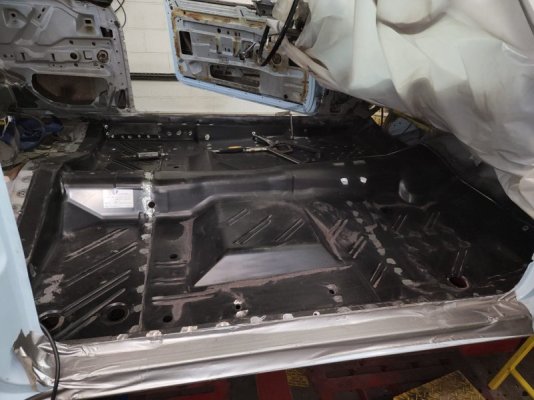
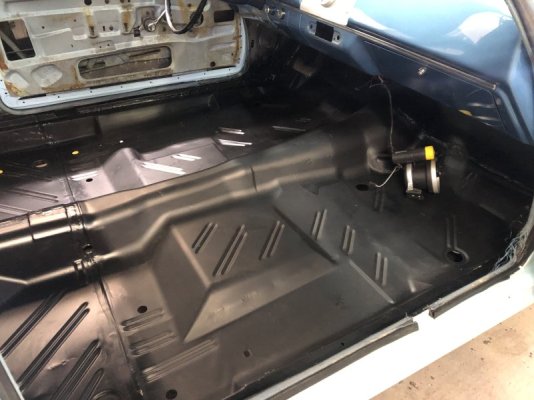
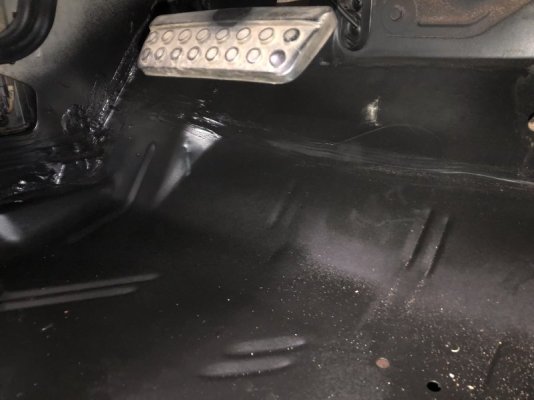
Floors put in around the new year.

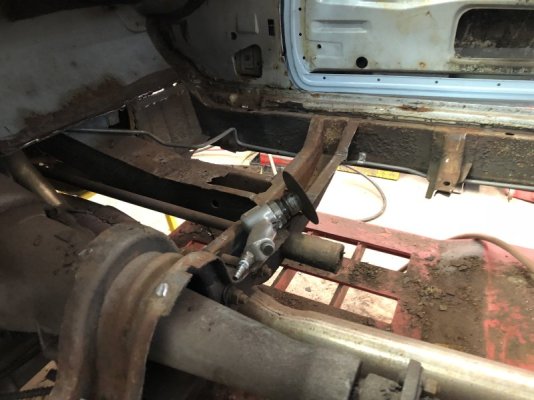
Looking for a better photo showing the amount of rot on the floors.
the car came with a AMD full floor pan, minus the parking break bravkets(existing ones will be reused) and minus the gas pedal support. Anyone with a photo of one please send a pic my way so I can recreate, thanks
330F47A7-34F2-4D75-A707-61E4D84B8ADF.jpeg


Thanks to Walts Auto Body for the help! My Dads ‘63 Dart Station Wagon is mid restoration, so I bit the bullet and had this big task handles by someone else(Walt’s did a great job, PM me if your in PA and would like him info)

1AA111C0-A0A6-439C-919C-494D75158F72.jpeg72BBF9FD-52EB-4990-8B54-3BBF30A79AAE.jpegDDAC2C8C-8400-4989-9EA4-F4E0DBA37A64.jpeg93F5CA2A-1390-43DA-BDAF-E412C6048801.jpegBB392C2C-B3D4-417A-B051-DE9F9B0BC734.jpeg

710BDF85-00B2-474F-AA4A-1489E5ECA0F7.jpeg


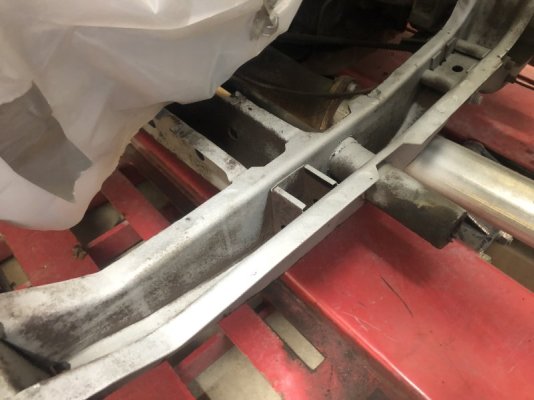
Frame Connectors and a torque boxes(Front and Back) from US Tool

111DF080-0AFA-4979-B3DD-1DCB1B252C96.jpeg
 
Last edited:
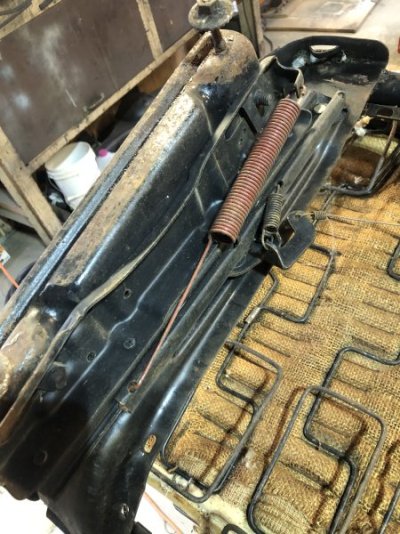
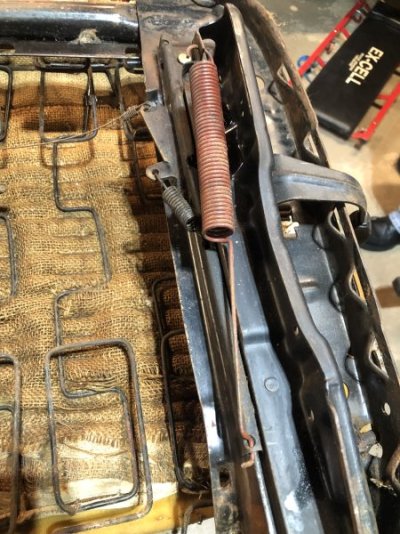
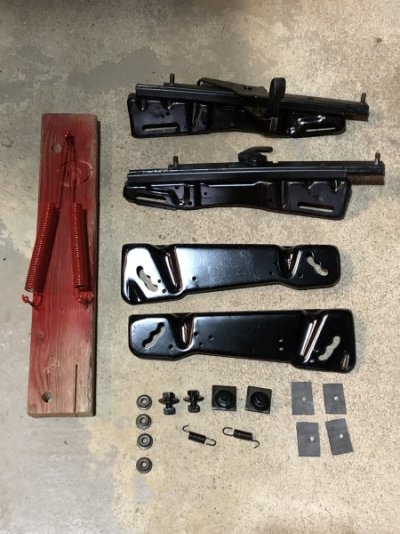
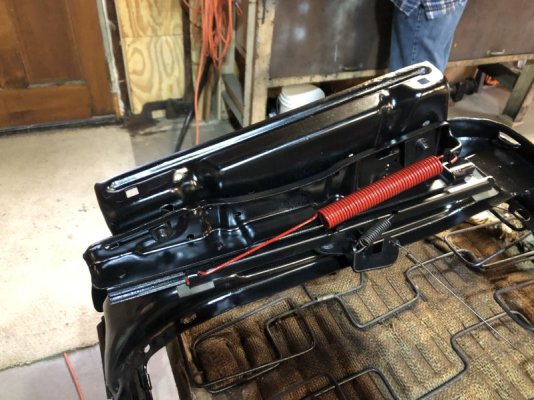
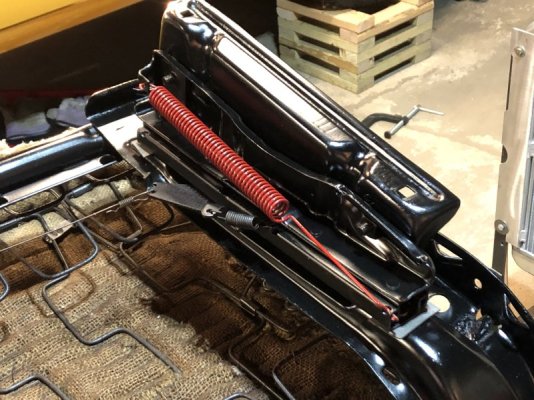
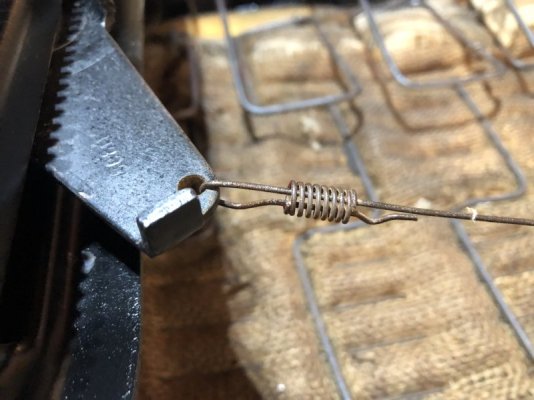
Getting the front seat frame ready for upholstery
Part 1


60A35872-1601-4660-AB7B-C33BFF880545.jpegAA722FA2-9E43-4624-8D7E-92EAB955A7C0.jpegFAC4C787-FF2C-4AAC-9EF7-21270A7676F0.jpeg


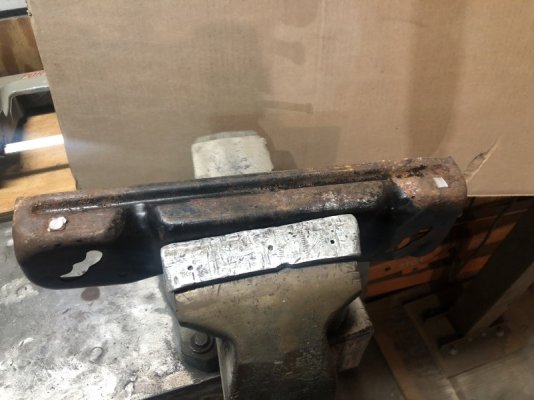
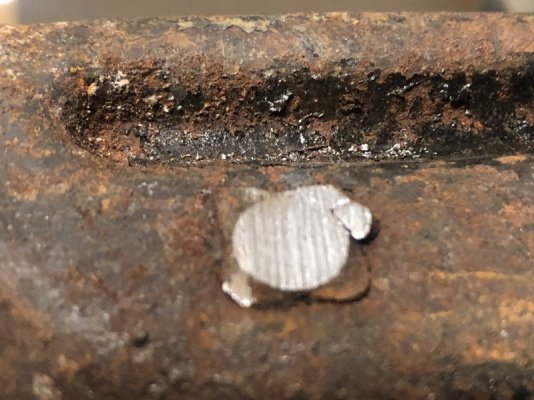
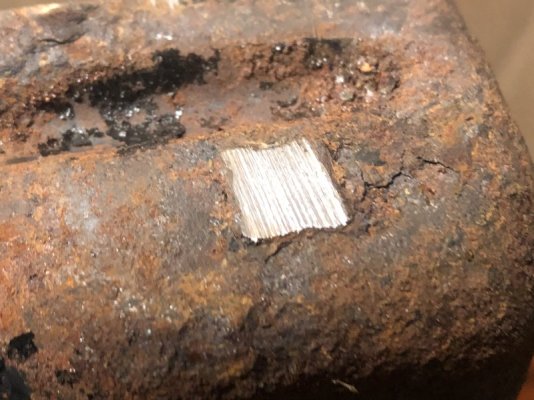
Removing the old studs:
- Cut off with PortaBand
- Grind flush
- Punch out

F186CB4C-6B03-493B-A1BD-F39015ED0251.jpeg

Pretty neat how they were installed back at the seat frame line... looks like the square end was expanded/flared out instead of a more expensive weld.

12A44679-7E13-41FF-9879-2DBCA1CDE2E6.jpegFE7DB853-7499-442A-A4F7-4E5D54F7CE4C.jpegBD0B13A9-8725-4BD4-83E7-4926EC6457B4.jpeg


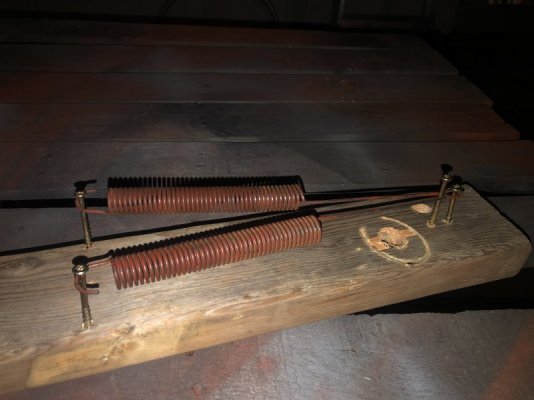
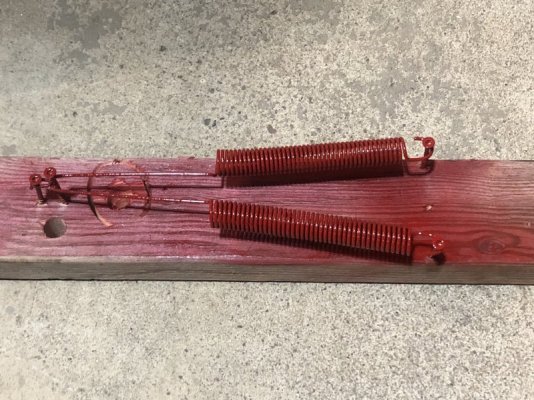
Experimenting with painting the springs red: Stretched so the paint completely covers the coils and doesn’t bridge.

2F7F8DA2-BD27-4853-BECB-21CA879CF5A9.jpeg
 
Last edited:
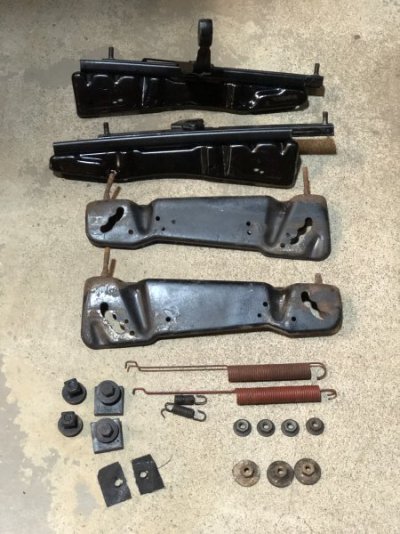
Getting the front seat frame ready for upholstery
Part 2

82092082-B87B-457D-AF7A-29221E65E74D.jpeg396B3ED4-9FEE-47C3-B913-38506F1B6E65.jpeg


The tracks were caked up pretty good with 60 year old dried up cosmoline(?)
Plenty of heat, thinner and Hising off with HOT water in the utility sink.

To regressed I used Red Mobile 1 synthetic grease(bought for greasing the bolt of an even older M1 Garand)

Used a thin wire to draw that thick grease thru/into the bearings.

59BFCBB5-F982-499B-BADD-D3A3F0995A62.jpeg


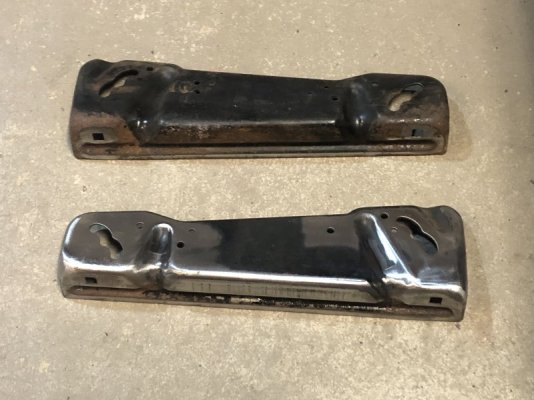
The frame turned out pretty good. I was joking with my son “even though we’ll never see this part of the car it’s good to get it looking nice… actually we’ll have to have every passenger lay down on the floor and look up underneath to see the work :lol: )

2D96E3CA-A796-49FA-A3A2-32E85E13FEB6.jpeg52812A2C-F096-4CA6-99F9-E04C930976D2.jpeg941C5600-0784-45F3-837D-93462A7A32E8.jpeg89BEF238-371E-4E97-BCAF-4AA077988C37.jpeg

Not mine… here’s what I hope these frames will look like soon enough.

1C9F16D8-EDCC-4ACF-A67A-7B2B1B796380.jpeg
 
Last edited:
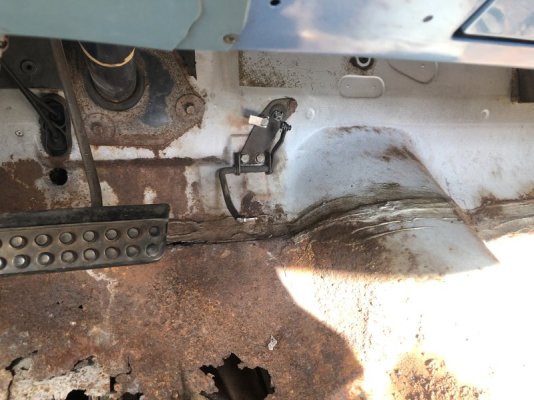
On the floor there's just two holes. The pedal has the studs.
Thanks for the info, I like what you did to secure your push button cable and Park break cable, I plan to copy that! Regarding the pedal, That is correct, I should clarify, I was asking about what is antlything is on the underside of the floor pan in the was of a reinforcement to the pan under the pedal.


On my iPhone, I drew an arrow by hand and thought “that’s the best arrow I’ve ever drawn on my phone!”

Tech tip # 187, if you long hold on the screen after freehand drawing a line or arrow(in the iPhones built in photo editor, the iPhone will insert a straight line or arrow. It may work for circles and squares too, didn’t try.

Anyhow, Here’s the bracket I’m talking about, now that I’m looking at it I see it looks like it may have “wings” to secure both the shift cable and parking brake cable
645FAF5A-0D84-4C27-B811-8C7C248ABDF1.jpeg
 
I like what you did to secure your push button cable and Park break cable

The one is the front e-brake cable that goes through the trans cross member. Clamping the cables to the studs is the way the factory did it.
Anyhow, Here’s the bracket I’m talking about, now that I’m looking at it I see it looks like it may have “wings” to secure both the shift cable and parking brake cable

If you look closely on my underside picture, there is only a rectangular piece spot welded there for reinforcement, no wings. Now if it was a revision I wouldn't know.
On my iPhone, I drew an arrow by hand and thought “that’s the best arrow I’ve ever drawn on my phone!”

I'm on one of the latest Samsung androids and those features leave a lot to be desired along with a crappy camera. My last Samsung phone was ten times better. You only have the option to draw with your finger, no stylus comes with it.

Your floor replacement looks great :thumbsup:
 
Looks like you have headers. This is how I routed the pushbutton cable through mine to keep it from melting.

Post in thread 'Taking Up New Residence' Taking Up New Residence
Thanks, I remember that post of yours from before, I’m definitely going to do the insulated sleeve, even though the headers will be gone soon in favor of the max wedge manifolds.

I head fireplace stores are a good source for sleeve insulation.

I just repaired the push button cable with the Raychem rigid, glue lined heat shrink tubing (thanks to the many recommendations from other members for that tip) I didn’t take many pics of that task but I’ll post something soon on it.
 
Hello all,
Preparing for finish trim of the carpeting soon. Does anyone know what these are called? I'm imagining they are mounted in a few locations under the decorative door sill.

I assume these screws are for the carpeting as there is a nice shoulder at the to prevent the grabbing and pulling of the carpeting threads.

Looking for the name of this piece and where to buy and how many for both sides of a 2 door 1962
1679339377580.png


Thanks!
 
Hello all,
Preparing for finish trim of the carpeting soon. Does anyone know what these are called? I'm imagining they are mounted in a few locations under the decorative door sill.

I assume these screws are for the carpeting as there is a nice shoulder at the to prevent the grabbing and pulling of the carpeting threads.

Looking for the name of this piece and where to buy and how many for both sides of a 2 door 1962
View attachment 1436687

Thanks!

I guess you would call them carpet hold down clips.
20180312_153749.jpg


I can't remember how many. Maybe 5 per side, maybe 6. Take your sill plate and lay it where it goes. Mark the holes that it uses and the remaining holes should be for the clips.
Screenshot_20230320_204353_Gallery.jpg
 
Small surprise “setback” today

Request: does anyone have a front wheel hub for a early B Body I could buy?

Front passenger wheel hub has a crack in it.

This side was still swaged to the drum but has one updated but loose stud installed. Sorry no pictures.

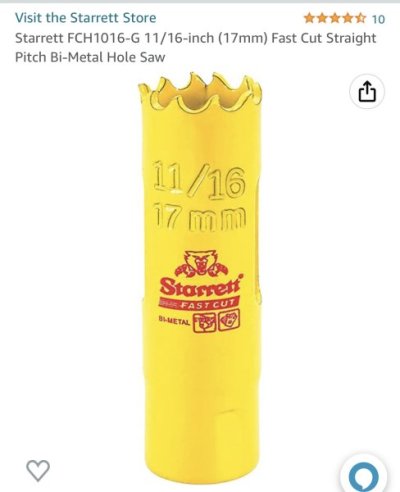
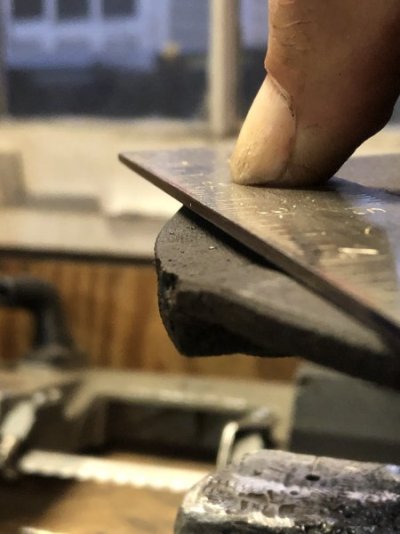
I followed the procedure of using an 11/16 hole saw to cut the swages off the remaining 4 studs, took just a few mins. Bought an 11/16 Starrett from Amazon.

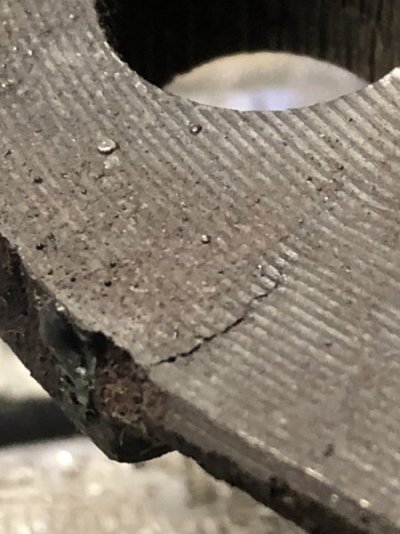
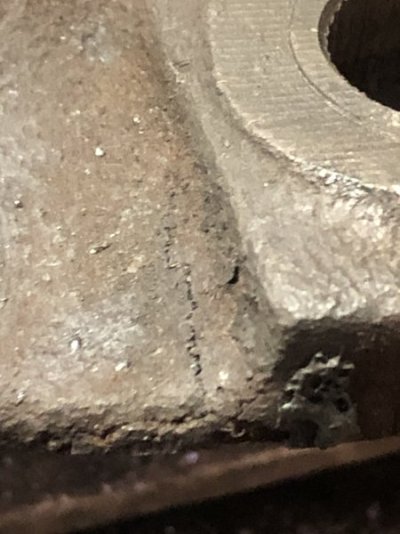
After easily separating the hub from the drum and while cleaning the part I noticed the flange at the missing stud location is slightly lower/bent vs the other 4 locations. Upon a closer look the casting is cracked:(

I guess whoever had the car before tried pounding the original stud out without supporting the flange and not removing the swedge.

F4C17EE7-764A-467E-83D6-CEF6F634D672.jpegFB5AB369-ACEA-4A47-82E0-A1872632C5E7.jpegE9C34480-1F55-41CE-B1BF-E34F8FD617CA.jpeg37F7F789-2827-4CCF-AC17-574CDA7195CD.jpeg
 
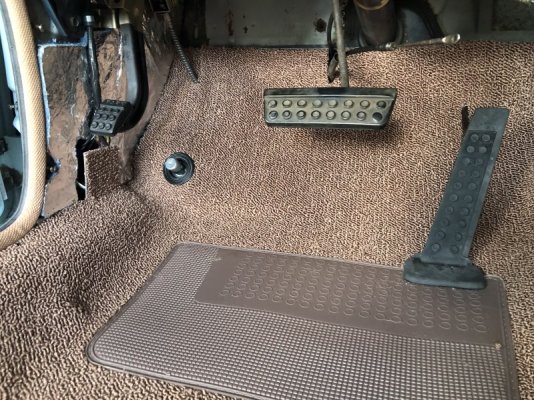
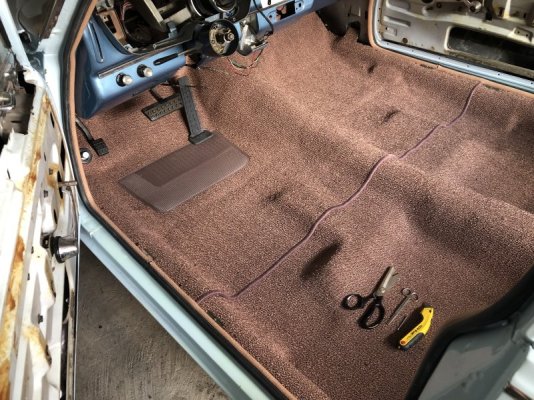
Finished trimming and fitting 98% of the carpet. Once the firewall insulation is in I’ll put the finishing touches on the top of the carpet under the dash

919AF1F8-58DE-4507-B578-7A3861382269.jpeg


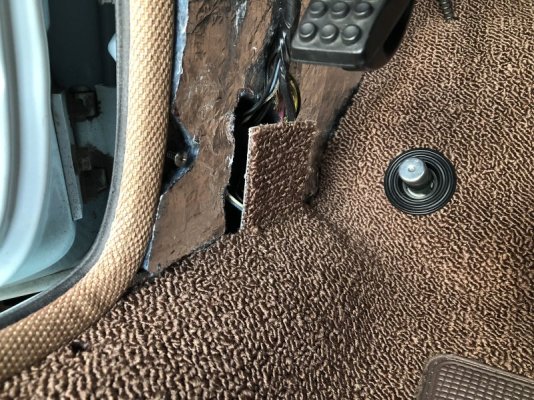
Leaving this tab of carpeting for now, may have to trim it when the kick panel goes in

067C0928-AB3C-4615-A320-590AF270F6E4.jpeg
614DDE90-69FD-4965-A49F-46D7D86E2686.jpeg


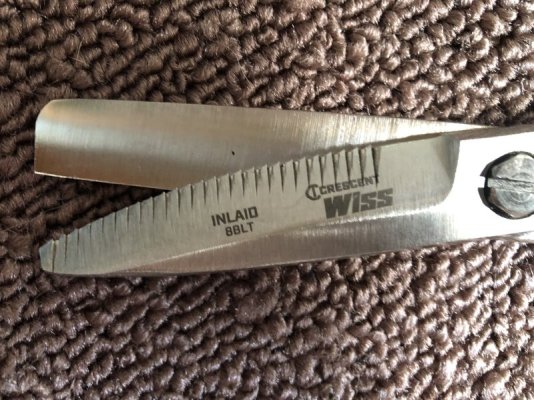
Good heavy duty scissors
Crescent Wiss 3-3/8" Belt and... https://www.amazon.com/dp/B008BYKJPI

FAECEB1E-B9BD-4B5F-893A-74F5DC2AF35D.jpeg
 
Last edited:
After installing the carpet I installed the cloth covered door jamb moldings

Question: The door is very hard to close now, have to slam it into next Tuesday to get the door to latch. Does anyone else also have problems with the new stuff? Seems like the weather stripping at the hinge side is a major part of the problem.

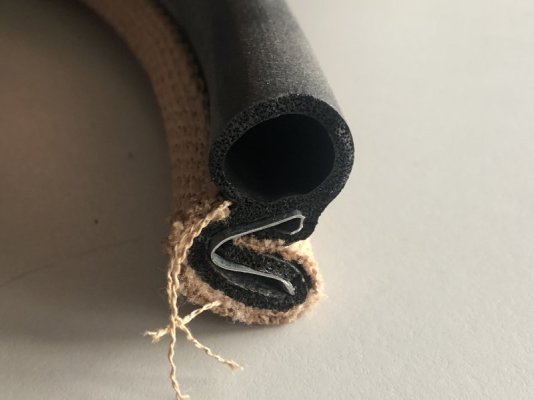
Here’s the trim

03A279D9-8E9C-4D17-9B1E-C4ACB9D461AF.jpeg


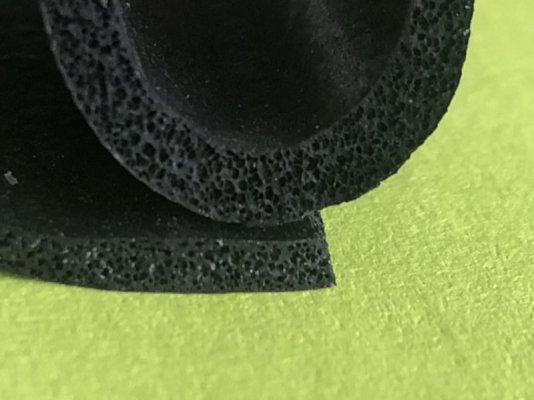
Below is a cross section of the new(top) and the old(bottom). The foam rubber if the new stuff looks 50% thicker in cross section.

5EDC6F96-095E-4988-86B8-2CC8756208BF.jpeg
 
Just curious where you got the carpet? My car came with new carpet the last guy put in but it doesn't fit well at all.. are 62-65 all the same for carpet?
 
Just curious where you got the carpet? My car came with new carpet the last guy put in but it doesn't fit well at all.. are 62-65 all the same for carpet?
Icetec, it’s ACC carpeting. I ordered it from Don at AutoMatStore.com ( [email protected] ) super nice guy and super helpful. I paid the extra for mass backed, not sure if I’d opt for thatiagain, however I have nothing to compare it to as I never installed the non-mass backed before either. He helped me customize the order. With his help we have ACC some special instructions: We asked ACC factory to let the carpet cool before boxing it up and asked them to leave the jute padding loose and unglued.

I purchased matching Floor mats from Don too.

Hope this helps.
 
Icetec, it’s ACC carpeting. I ordered it from Don at AutoMatStore.com ( [email protected] ) super nice guy and super helpful. I paid the extra for mass backed, not sure if I’d do it again as I never installed the non-mass backed. He helped me customize the order. We asked ACC factory to let the carpet cool before boxing it up and asked them to leave the jute padding loose and unglued.

I purchased matching Floor mats from Don too.

Hope this helps.
Thanks, ACC is what i was looking at, i just did dynamat last night so no mass needed, thanks
 
Auto Transport Service
Back
Top