• When you click on links to various merchants on this site and make a purchase, this can result in this site earning a commission. Affiliate programs and affiliations include, but are not limited to, the eBay Partner Network.

My New 1976 Fury Sport Project

1778ppr

Well-Known Member
Local time
1:09 PM
Joined
Jan 14, 2014
Messages
176
Reaction score
116
Location
South West Wisconsin
20140711_074843.jpgfury11.jpgFuryF1.jpgFuryFL2.jpgFuryFR1.jpgsfury3.jpgsfury6.jpg

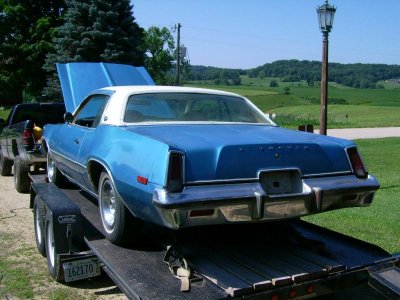
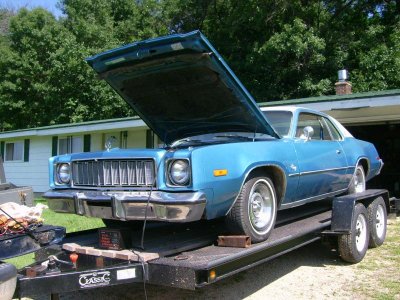
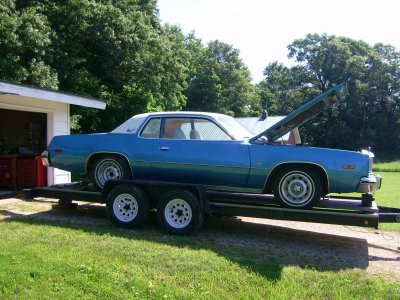
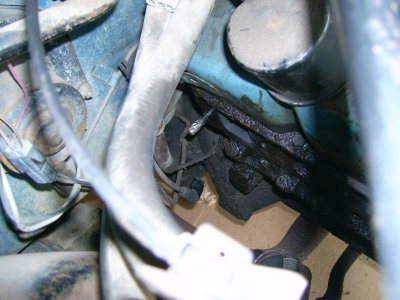
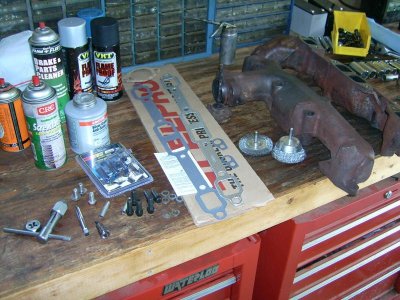
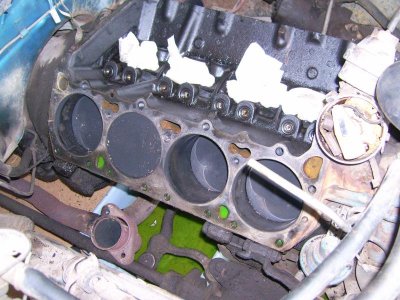
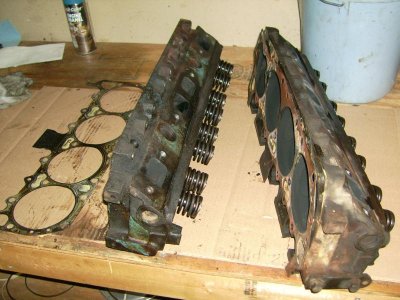
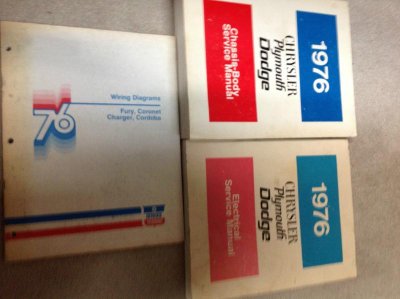
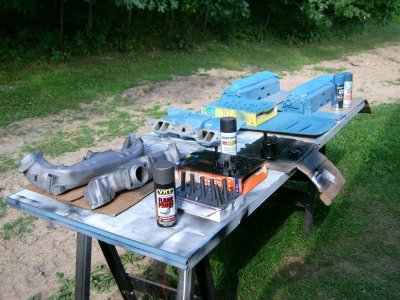
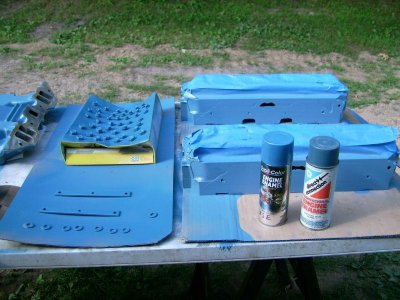
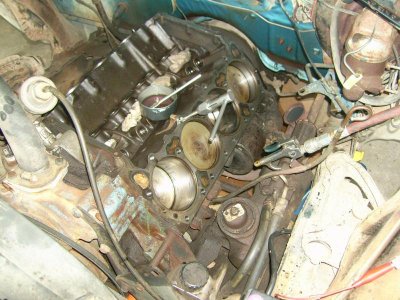
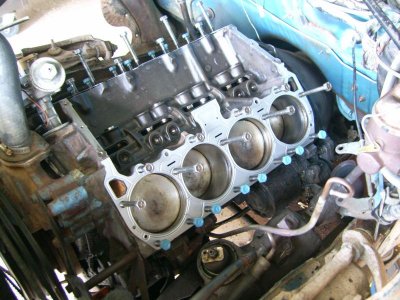
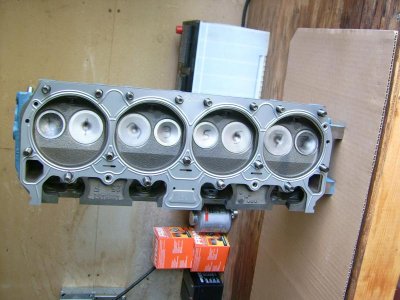
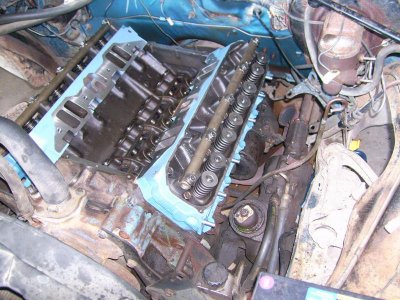
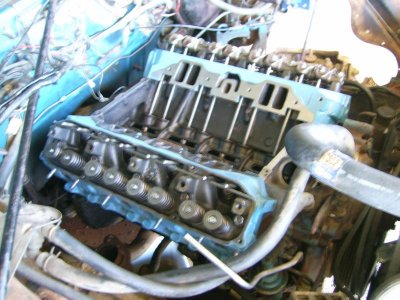
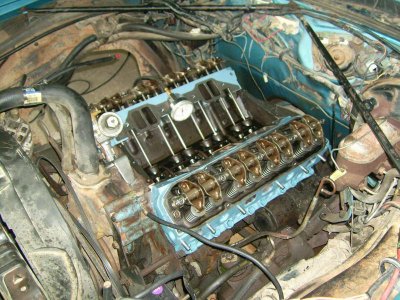
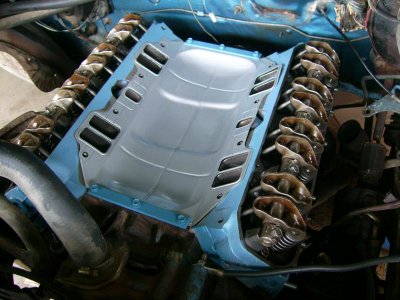
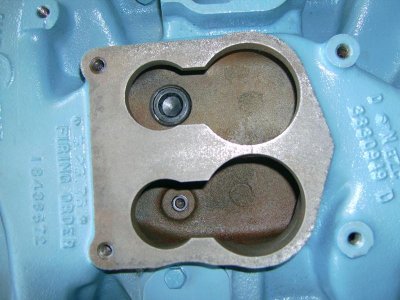
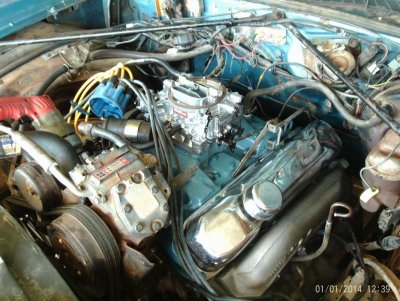
This car followed me home this last Sunday. It has a 400 CID 727 Torque Flight 8-1/4 rear end. My first Mopar back in 1981 was a 1973 Dodge Coronet 400 AT which was B5 blue and a white vinyl roof also. My Coronet had the 9-1/4 rear end though. I’ll have to post pictures of that in the forgotten B bodies thread. I wish this had the 9-1/4. I like the B5 blue and white vinyl roof but the vinyl roof and trim is going to go. I plan to make it a 1975 road runner clone. Most of the trim is dented and dinged up anyway. The body needs a lot of work. It also needs some mechanical work. My intention is to keep this a running drivable project as I go along as much as possible. It does run but needs a whole new exhaust system first. The manifolds were removed by the PO to replace the gaskets and were slapped on with just 2 bolts each just to see and hear it run. So the coolant runs right out of the exhaust manifold bolt holes from the head meaning I can’t run it long.

I’m hoping I can get some help from you all for support, parts, and mostly knowledge. I know Mopars pretty well but not very much about the 1976 B Body.

First up; titling and plates. I hope I don’t have any problems there. I read that horror story with that guy and his ’70 Satellite titling nightmare on another thread.

Then on to the exhaust.

I would have put this under member’s projects except the 1975 to 1979 years seem to be the forgotten years (read scorned). I figured I may get more support here. Your questions, comments, and advice is welcome.
 
Looks like a good project....good luck and keep us updated.
 
Those are rare as hen's teeth!!!! Welcome to the 75-78 Sport Fury club!! (sorry, no 75 Road Runners allowed) Mine is red and white. There aren't too many of us so we'll have to stick together!! Looks like yours is in great shape. I am jealous of your totally ripless seats, and glossy paint. Many members here are very jealous of my original factory mags and desirable color scheme. Needless to say I am drooling looking at your car, and if I was near it I don't think I could resist the temptation to snatch a part or two that I need. Can I come over? Just want to take a look-see.

- - - Updated - - -

photo 1.jpgI think a red and blue one look good side by side. Maybe we can join up at the Mopar nats this year and bully a few GTX's and Super Bees.

To hell with being scorned!!! These later B bodies will rise to a level that earlier B's could never have imagined. We're here!! and We're NOT queer! But we ARE B bodies!! Accept US!!

I also say, be PROUD of your Sport Furiness!! You don't need a road runner decal package to be proud!! The Fury moniker has a long and proud history....probably safe to say that it was the first real performance oriented MOPAR that started it ALL!! Hell, at least its not a dodge monaco brougham!
 
FuryTrunk1.jpgFuryTrunk4.jpgFuryBottom5.jpgFuryBottom8.jpgFuryBottom10.jpgd9103365 your Sport Fury looks great and I bet it has a better body than mine. Mine looks better in pictures than up close. There is a lot of rust and it had a quickie patch and paint job put on it. The interior isn’t too bad. The driver’s side seat seams have pulled apart and the carpets are worn. All in all it’s not too bad. But, thanks for the compliments. I like the 400, console shift, color, rally wheels, bucket seats, ac, etc. And you are right, they are unique. I also like your raised while letter tires. I’m looking into a set of Cooper Cobra GT’s. They seem to be the cheapest G70-15 (P225/70R15) RWL tires I can find. This is my cruise night, ice cream, burger and fries car. I don’t need $200.00 a piece tires on this car.

I’m working on getting the exhaust manifolds back on it now. Hopefully I’ll have it running soon (this weekend). Wish me luck. I’ll post pictures of the exhaust manifold progress/project.

Here are pictures of the trunk, and underside. The pictures of the trunk are pretty much typical of the whole car below the belt line. The bottoms of the doors have holes like that too. These pics don't show the expanding foam sealant some one used to fill the rear quarters.:mad:
 
I like the Fury. You could put Fury on it with the roadrunner stripes and even do the deck lid like a runner but have it say Fury. Just an idea. I love that interior. I wondered if the seats were from another car till I saw the door panels. Another idea, maybe since you need exhaust anyway you might be able to score some earlier HP manifolds and use them. I've seen some for 72-3 BB lately that were reasonable. Scorned cars! You ought to have one of them ugly 74 SE's with the opera windows! Their words, not mine.
 
Nice score!! I say forget the RR clone and just fix it up like Ma Mopar built it in 76. You just don't see these cars out in public very often.
 
very nice fury blue white combo nice ,buckets too ,keep us updated on your build thanks for sharing :headbang:
 
More work needed

I received my 1976 FSM(s) in the mail today and the 2 missing rally wheel centers.

The exhaust manifold project is turning into major surgery. The last stud closest to the fire wall on the passenger side was stripped and stuck. I had to use a stud removing tool to get it out. No big deal and then… I tapped out all the stud holes and discovered that the driver side stud closest to the fire wall was broken off in the hole. I tried to use a right angle drill but it would not work (read cut). One thing led to another and I pulled the head. Then I discovered that the DS has a steel head gasket and the PS has a composite gasket. So off came the PS too. I have ‘906 heads I can put on there for now, but I’m thinking I should fix the heads I have and do a valve job as long as it’s out. I should have known this was not going to be a “bolt up” deal.

Now I’m trying to get the broken stud out. I think it has a broken easy out in it which is why I can’t seem to drill it out. This is going to take some work. I've got a carbide drill bit I can try.

So much for this being a “drivable” project car. LOL

I’ll check the block and ‘906 heads for “flatness” and slap the ‘906 heads on there and try and get it running. The composite gasket scrapped right off the block deck but I’m having trouble scrapping the steel side block deck clean.

Here’s some pics.
 

Attachments

  • 006.jpg
    006.jpg
    79.1 KB · Views: 879
  • 007.jpg
    007.jpg
    105.8 KB · Views: 868
  • 008.jpg
    008.jpg
    109.2 KB · Views: 876
  • 013.jpg
    013.jpg
    63.4 KB · Views: 885
  • 014.jpg
    014.jpg
    85 KB · Views: 891
  • 016.jpg
    016.jpg
    96.2 KB · Views: 887
  • 024.jpg
    024.jpg
    92.1 KB · Views: 861
  • 025.jpg
    025.jpg
    78.3 KB · Views: 841
  • '76FSM.jpg
    '76FSM.jpg
    49.1 KB · Views: 871
  • WheelCenter.jpg
    WheelCenter.jpg
    41.5 KB · Views: 839
What style of dash does it have??? Does it have the round gauges or the standard sweeping speedo across the whole dash??? I know the police counterparts came with 140mph speedometers. I have one in each of my 77 Cordobas. Pics. in profile.
 
I saw your speedo and tach pics....I've got to get those!! These sport furys had the round gauges just like the cordobas....basically the same dash....

by the way, I have a matching green doba that goes with my red fury.DSCN1663.jpg
 
Love the Doba, got any more pics??? Im trying to get my hands on a better camera so I can put up some better pics of my own.
 
I have a bunch of random dash in strument cluster pieces, speedo, tach, gas, oil, map light. PM me if you need anything.
 
gdennis400, nice ’77 Cordoba. Yes, it does have the round instruments, but no tach. I would like to get a factory tach like yours. The 140 mph speedo would be nice also.

The heads are at the machine shop, the intake and exhaust manifolds are at the blaster, and I’m in the process of cleaning the block deck still. I’ve actually been working on my shop project. So, many projects so little time. I have too many interests.
 
’76 400 head CC volume?

Does anyone know the nominal combustion chamber volume of a 1976 400 head casting number 4006452? Is there a reference for factory spec combustion chamber volumes and deck heights above or below piston top?

The shop said that the head combustion chamber is now 91cc (after valve job). The advertised compression ratio (CR) for this engine is 8.2:1. With an 89cc head, .022” head gasket, -.080” deck height, 4.342 bore, and 3.375 stroke the compression ratio works out to be 8.199:1. The deck height came from one of my books and a quick measurement (read not very accurate) backs that up. The head cc is a guesstimate on my part. With the 91cc heads my current CR is about 8:1. I’m looking for a CR of 8.5:1 to 9:1. According to the Direct Connection engine book for every .0042” that is milled off the head the combustion chamber volume drops 1cc. I plan to have .040 milled off the head dropping the cc about 10cc. This should put the CR at about 8.7:1 if my numbers are correct. After the heads have been milled I will cc them again and recalculate my actual CR. 75cc combustion chambers work out to be about 9:1 CR.
 
Thanks for the complement on the Cordoba. Its still original, paint, interior, and drive train. The tach is factory and the speedo I got from e-bay. I rolled the odometer on the 140 to match the factory speedo, then it was installed.
 
76headsmanifolds.jpg76manifoldsblast1.jpg76heads1.jpgHere are some pics of the heads back from the machine shop and manifolds back from the blaster. I’m chasing all the threaded holes with a tap to clean up and check. I’m still cleaning parts and prepping for paint.

Next up CC the heads.
 
CCing the heads

76headcc2.jpgThe heads are now cc’d and they come out to 82.6 on average. The highest cc was 84.5 and the lowest was 81cc. My compression ratio works out to be 8.6:1. The heads now have bronze wall valve guides and a 3 angle valve job. Again heads were milled down 0.040”. With a fresh valve job and slightly higher compression it should gain a little HP and run better.

I used windshield washer fluid for the cc fluid and a measuring cup to fill the burette and to catch the fluid from the burette to set it at zero. I used Vaseline as the grease to seal the clear chamber cover. The burette came from Summit.

Painting is just about done. I hope to be re-assembling by next weekend. I need to finish cleaning/prepping the block deck. I’m pretty sure I’ll need to do some carb work.
 
Progress

Parts were painted with both an old can of DC engine paint and a new can of Duplicolor Chrysler blue. The Duplicolor is a little darker than the factory stock paint and the old DC blue matched much better. The exhaust manifolds were painted with high temp paint VHT cast iron. While waiting for paint to dry I tapped the cylinder head bolt hole threads to clean them up and check the thread depth engagement. I bought an ultrasonic cleaner and it works pretty good to clean up parts. Checked head gasket on the block and the head to double check hole and all passages alignment. The heads were installed using the bare rocker shafts as grab rails for my hands for easer installation. Once the heads were torqued down I removed the rocker shafts to install the rockers and spacers. The FSM give a tip to use a rod to support the push rods while installing the assembled rocker shaft. Great tip! After installing the heada and with all spark plugs out I primed the oiling system and did a compression test. I’m getting about 130 PSI per cylinder IIRC. I wrote it down somewhere. The intake floor jets were tapped for 9/16 and 1/8 inch pipe plugs. Then the intake valley pan gasket was installed and finally the intake and carb. I went with the Edlelbrock AVS for now because the original TQ needs a rebuild.
 

Attachments

  • 76 eng paint 1.jpg
    76 eng paint 1.jpg
    96 KB · Views: 694
  • 76 eng paint 2.jpg
    76 eng paint 2.jpg
    74.8 KB · Views: 692
  • 76 thread chase.jpg
    76 thread chase.jpg
    94.8 KB · Views: 659
  • UltraSonic.jpg
    UltraSonic.jpg
    82.4 KB · Views: 671
  • 76 head gasket 1.jpg
    76 head gasket 1.jpg
    87 KB · Views: 659
  • 76 head gasket 2.jpg
    76 head gasket 2.jpg
    69.1 KB · Views: 688
  • 76 head 1.jpg
    76 head 1.jpg
    103 KB · Views: 654
  • 76 head 2.jpg
    76 head 2.jpg
    81.8 KB · Views: 640
  • 76 comp oil.jpg
    76 comp oil.jpg
    110.5 KB · Views: 637
  • 76 intake 1.jpg
    76 intake 1.jpg
    72.5 KB · Views: 671
  • 76 intake 2.jpg
    76 intake 2.jpg
    73 KB · Views: 657
  • 76 carb 1.jpg
    76 carb 1.jpg
    101.1 KB · Views: 641
Auto Transport Service
Back
Top