• When you click on links to various merchants on this site and make a purchase, this can result in this site earning a commission. Affiliate programs and affiliations include, but are not limited to, the eBay Partner Network.

Progress on 69 Coronet...one day ata time!

Mocajava

Well-Known Member
Local time
6:19 PM
Joined
Jun 2, 2015
Messages
964
Reaction score
448
Location
Brighton Colorado
IMG_0518.JPGIMG_0547.jpgIMG_0548.jpgIMG_0549.jpgIMG_0550.jpg
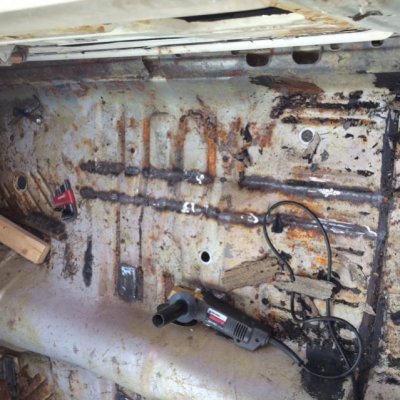
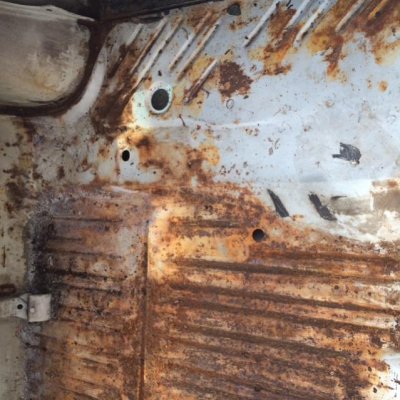
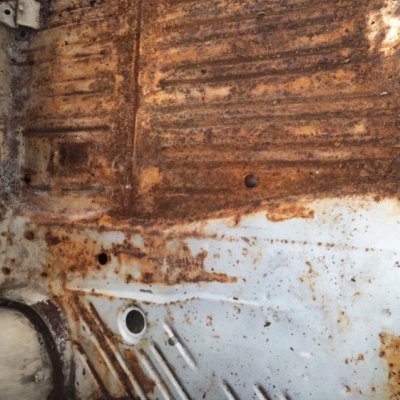
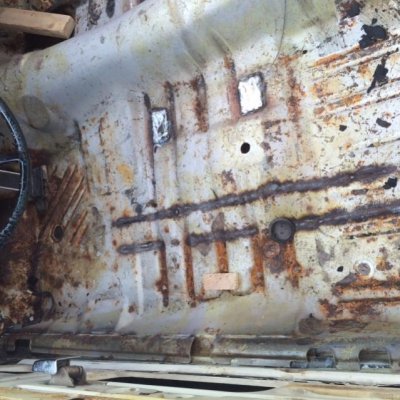
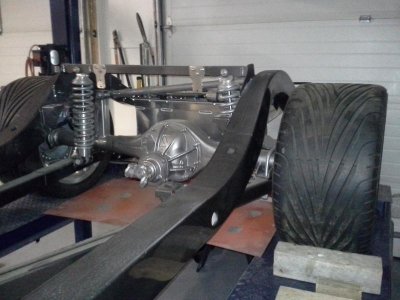
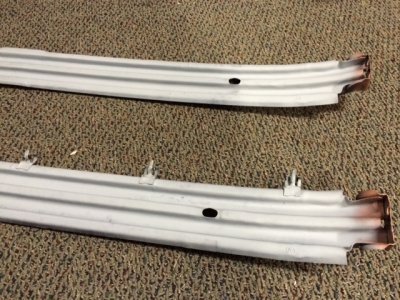
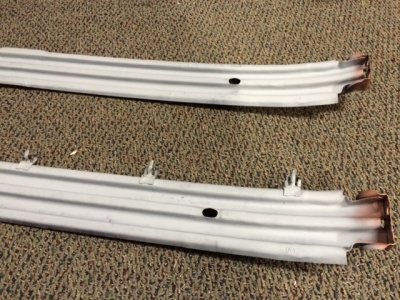
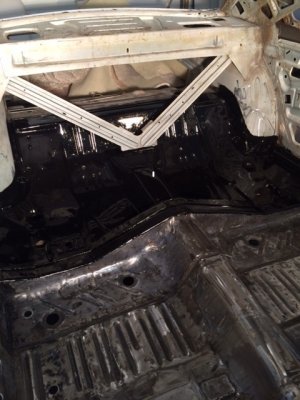
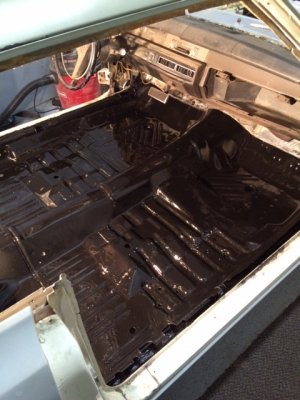
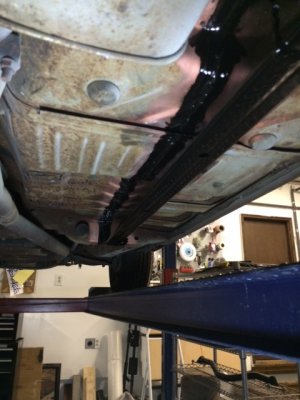
Well, sub frame connectors are in and look pretty good. Did the POR15 treatment on just that area and will address the rest of the underside once I get the sandblasting fine tuned. Had issues with the pot/grade of media and pressure needed...took some experimaenting to get it worked out. Added the picture of the interior floor boards and trunk to give a perspective on the "before and after". Not sure which direction I an going with a sealing coat, the POR15 or good primer for the interior floors and trunk. Leaning for the POR15 underside and interior gets the primer...I think. Hope I can get the surfaces cleaned well enough to make a permanent cap for both, time and level of "learned" experience will tell. More to come.....

- - - Updated - - -

Never having done a resto to this extent, I am searching for the best methods. Trunk floor (in part) needs to be replace. Been welding for 30 years so that part is easy for me...BUT how to preserve it is the big question. Not a painter other then home remodel and leery of the permanance of a primer plus a top coat as total metal protection. Am I being too **** in mandating that ALL the rust be gone or at best nuetralized? My thinking is that if it isn't totally gone, it will come back. I am told there are chemicals to spray on that will totally stop the rust and turn it into a paintable substance, just have no confidence in my own judgement along those lines. How much rust (even treated) can you leave and be assured you have stopped it's growth? What do you use to neutralize it and how far in removal do you go before you apply it? Would love to hear some feedback and instructions on this subject from the Professors at Mopar U. to keep me on track. I hate having to do things twice, and learning from others experiences is the easiest way to keep from screwing it up in my mind. Thanks in advance.
 
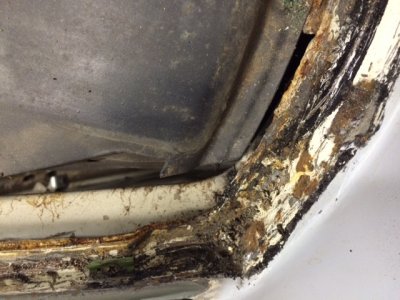
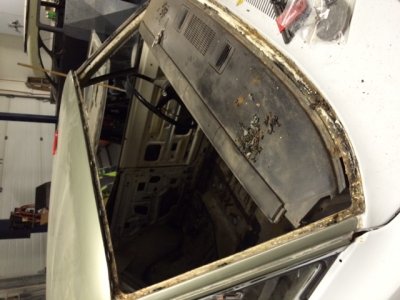
Had a young guy moonlighting from one of the glass shops come over to help pull the front and rear glass last night. Didn't work out that great as he broke the front window trying to remove. Dang! It wasn't perfect but could have worked for a while. The rear came out good as I made him slow down and helped cut all the sealant out before we tried it. As I understand, the back is the harder one to find...I think? Cleaning out the remaining sealant and then removed the headliner. What a shock I had then, with a fair amount of surface rust as well as the middle roof brace welds had broke and the piece was hanging slightly. Not sure how to address this, thinking of removing brace, making it rust free and reweld it in place after I "buff" all the rust off the surface. I will try and get some pictures posted before I attack it. Seems the more I dig the more work I create on this lady. Hoping to get her to a clean base level where I can start resurrecting her with a clean conscience. The last thing I want to do is bury something that will come back to haunt me in a year or so. Off to work!
 
You can get new glass for the whole car, clear or tinted. So much for that guy working in a glass shop, don't let him help you install glass when it is time.
 
How far are you going with this car, driver/cruise night/show car?

I would have it blasted then see where you are.

As far as the glass, I have never done a resto on any level and reused the windshield, they are cheap and the old ones arent worth the effort of reinstalling them, I pay $150 installed for windshields...
 
Seventy
I am going all the way with this it appears. Like an onion, every time I start peeling I find another layer that I can't ignore ...and won't. Last night was stripping head liner, and started on dash removal. Appears there is some rust in cracks under there that I will remove and seal. I agree with you about the windshield, the plan was never to try and keep that permanently...just as a backup if I couldn't get them readily. Please remember that EVERYTHING I need to rebuild her is in the lower 48. The shipping up here doubles the price of every component we deal with as well as the major delay in time. As an example: Eastwood had a great deal on a 100#pot sandblaster, so I ordered it plus sand and a couple extra nozzles...$162.00, then I put in my zip code...$167.00 in shipping alone, on the slow boat! Not starting a b%#$* session here, just the reality. We have no swap meets or nearby states we can run over too to trade or garnish parts, just the way it is. Alaska is always excluded from the "free shipping!" and we pay from point of origin, can't even get a deal on just from Seattle on up.
I am going to do most or all of the "brainless" labor myself for the experience and to save money. So I am learning as I go and enjoying the education I am getting from all of you professors at Mopar U/ FBBO. Never tried body work and painting but will to a limited degree for the prep work. Rust removal, patch and priming on the hidden areas and let a professional do the finish work. Will be removing doors and then the drive train pretty soon as I am in the stripping mode and about to get a rotisserie. I have been bagging and tagging every component and screw to rework or replace as I go. Once I am happy with rust removal, structural integrity and all the body panels, off to a painter she goes! The mechanical and engine/drive train are an aspect I am versed in and should be easy for me. I will try and put a picture or two of the work I did on my 55 Belair, which is ALSO waiting on the body work. Thanks for all the help and comments as I try and keep my bow into the waves.WP_000458 (2).jpg
 
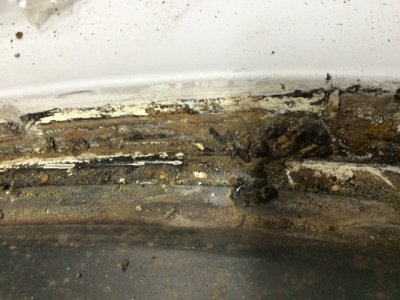
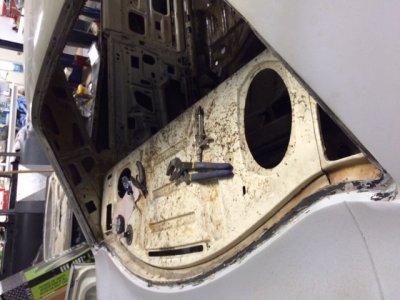
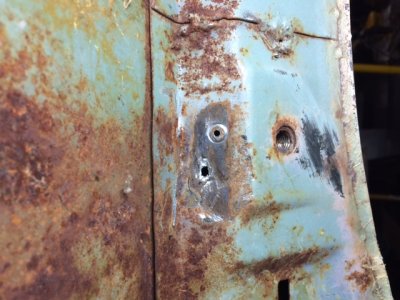
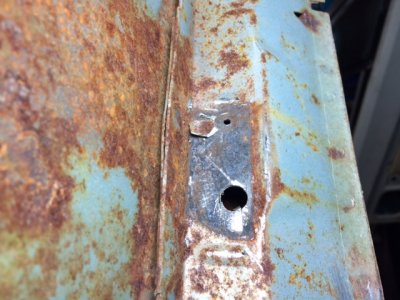
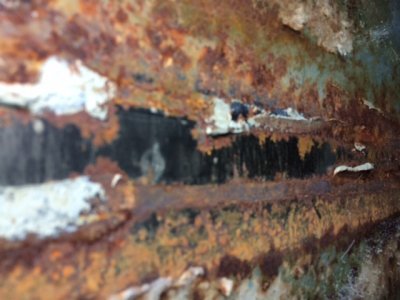
It has been a while since I updated this thread so I will try and catch up..I have stripped everything out except for the dash at this point. Front and rear glass, removed hood and trunk and attacking the crud and rust in corners and hidden spots.IMG_0570.JPGIMG_0571.JPGIMG_0572.JPGIMG_0573.JPG I was amazed at the body filler and even brazing that appears to have been done at factory UNDER the windshield sealer. Having fun getting that stuff out, scraped and wire wheeled and now going to use lacquer thinner for the last of it. Pictures when I get it cleaned up.
The next are I stripped out was headliner and the bows. I numbered each and have them boxed away. Both braces seem to be pulled down so I purchased a spot weld drill and made first attempt with that. Not so pretty but they did come out without marring the roof or braces. Straightened them out, brushed and blasted the braces then put primer and paint on them.IMG_0575.JPGIMG_0576.JPGIMG_0577.JPG
Will get pictures of "like new braces" when done and the roof after I get it cleaned up. Going to look for the 3M glue to get it nailed back to the roof. Pictures coming soon!
 
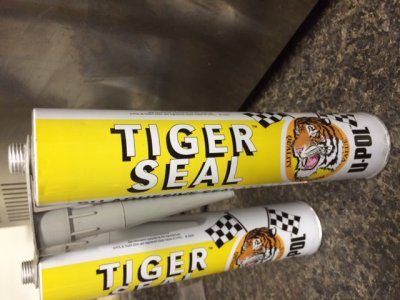
Been a few weeks since I updated, been working on house projects trying to get ahead of the snow. Stripped the roof supports out, blasted,primed and painted the roof side and use the copper coat spray in the areas where I will tack weld back in place. Cleaned off all the rust scale and old "caulk"off roof, sprayed with phosphoric acid and let dry. Getting ready to remount/weld supports back in place and put Tiger Seal between roof and support. This is the stuff that most of the local builders recommended since I don't want it rigid, just well stuck with a dampener effect.IMG_0592.JPG This is the pic of the supports after straightening, priming and getting them ready. To be continued .....
 
Nice project Moca. I know what you mean about peeling back the onion skin; it was the same thing I my Coronet resto, although not as bad as yours. I had the car sandblasted (except the rear quarters, did them by hand) and then essentially used POR 15 on the entire chassis, C pillar, roof, etc. Had the dash frame blasted too and used POR on the inside. Keep in mind that POR can not be subjected to prolonged exposure to sunlight, it will turn chalky grey. For parts that are painted and visible I used Rust Mort, worked it in with a red Scotchbrite.

Love those Coronets; I'll be following your thread.
 
CoronetDarter
Thanks for the insight, I do have a couple questions. Since you POR15'ed (most) of your car, did you get every spec of paint off prior to the POR15 treatment. What I am wondering is, will POR15 adhere to areas where paint/primer are well stuck to the metal and in good condition? I do have rust area in the cab floor inside, but mostly in the low spots. I have sanded / wire wheeled the rust areas down to clean metal to remove the rust and wondering if I can POR15 over the whole thing...including the roughed up painted surfaces? It sure would make it alot easier if I didn't have to remove the good paint and could count on POR15 staying in place for years. The other alternative is to just primer the inside at this stage and let the painter do the entire car in the color I want. Planning on a heat/sound deadener application on the floor,doors and roof anyway, color doesn't matter in those areas. Thanks for the help and the hints!
 
That "brazing" is probably the Lead. The rear quarters are leaded half way up the rear on sides window. and the front window by the bottom corners if I remember.. Use protection if grinding or melt it out with a torch.
 
IMG_0592.JPGIMG_0599.JPGView attachment 280573View attachment 280574IMG_0606.JPGIts October and some progress made, most of it on pre-winter TO-DO"S! Got the roof braces back in which was more of a project then I first imagined. Had to rebend them to a proper curvature as they had been pulled down (reverse bowed). After prepping them with primer, paint and weld thru copper spray first, I coated the roof side with Tiger Seal. Getting them pushed back in place, holding them there with braced up 2x4's and then tack welding them was a real balancing act. Finished that and then started sanding and grinding the entire floor inside to get it ready for a coat of primer. SEVERAL afternoons later, it looks great and all the rust/pitting areas have been addressed with Phosphoric acid and left to dry. Hoping to get a sunny day this weekend so I can bust the garage door open and shoot trunk, floor and roof with 2 part epoxy primer! This will be a major accomplishment with my painting talents...NONE. Will be cleaning paint gun, hooking hoses to the dryer and maybe make a test spray with a small batch to use on some old sheet metal I have. Wish me luck and scream at me if I am missing anything. More to come.....
 
Update.... Have everything ready to shoot but informed that I need to wait it out. Not being familiar with painting and how precise the preparation needs to be, I found out the humidity is too high. I guess i will be shooting my Coronet after the freeze hits and knocks the humidity down, raining for the last few days here. Leaving in a few days for an annual Pheasant hunt in South Dakota and will have to wait till I get back. The rain has shut me down but didn't stop the trucks from delivering my Power Bulge hood from Boise! More to come.....
 
October update.....

Back from the pheasant hunt in South Dakota, a blast with a great group of guys. Been doing it for 10 years and never plan to stop. Trying to get back in the grove with work and the fall-out from layoffs and cut backs for programs in the Oil industry. The coronet is waiting in the garage for me to address the primer I keep promising her. I catch myself LOOKING for other projects to do and force myself to rethink the steps I have takedn. I am very hesitant as this is a step is outside of my comfort zone even though it's not rocket science. The sheetmetal has been sanded, the rust treated with phosphoric acid and the plastic is hung from the ceiling to keep in the overspray. I need to do a final elimination of all dust with tack cloths and a vacuum to get her spotless before I paper and tape.
I keep putting this off and have a giant knot in my stomach just thinking about this step. I have NO EXPERIENCE shooting with a gun and not much confidence that I have done all the steps required to make this a professional application. The thought of having to strip it all and redo it gives me chills. I know it isn't the end of the world if I screw this up, I just keep having a feeling I am forgetting to do something critical. If any of you who are reading my long-winded posts have any words of wisdom or advice...please jump in!
 
Just a quick note as a catch up. Finally started back on the Coronet after finishing the remodel aspect. Scoured off the floors, phosphoric acid and a rinse, will be POR15 ing them over the Thanksgiving holiday. A little side note on POR 15... I used 1/2 of the 4 oz can of POR15 to do my frame tie-ins back in July. I took plastic wrap and pushed it down in the can leaving an edge hanging out all around, removing all or 90% of the air, wiped off the lid/ seal area and tapped lid back in place. After allmost 6 months, the stuff is still good! This is a way to keep it from drying up which seems to be a big problem as I have read. Will post pictures when done with cockpit floor.
 
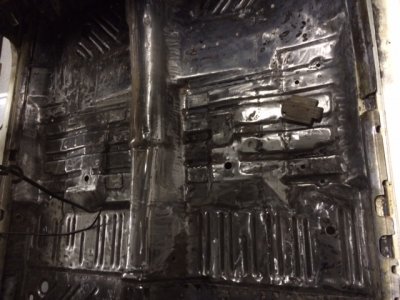
Update as of 11/30/15. Put the POR 15 on entire floor and trunk area, except for the bad spot which I will cut out and replace later. My next step is to pull out the entire dash and start that revamp. My service manual doesn't really tell me much about pulling that and I could use some help. Any ideas where I could find a step by step for that procedure gentlemen?IMG_0677 floor1.jpgIMG_0678floor2.jpg
 
Auto Transport Service
Back
Top