• When you click on links to various merchants on this site and make a purchase, this can result in this site earning a commission. Affiliate programs and affiliations include, but are not limited to, the eBay Partner Network.

Thomas 1968 Charger project

#soarertompa

Well-Known Member
Local time
3:09 PM
Joined
Dec 8, 2018
Messages
98
Reaction score
261
Location
Sweden
file23.jpeg
file22.jpeg
file16.jpeg
120099.jpg
sendbinary_med_loggo.jpg
Building my dreamcar with classic body and modern muscle.
Car was originally sold new in Texas as triple green with slant six and manual 3-speed on the column. From what I understand one of very few Chargers made in 68 with this combo.
Yes, I still have the matching numbers engine but the trans is gone.
Have no plans to return it to its original form because the restoration was already to far gone when I took it over.
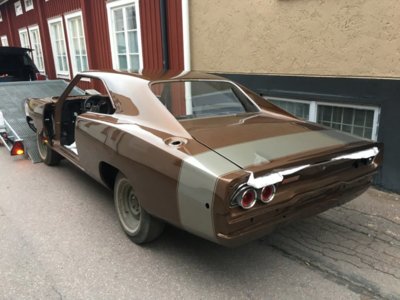
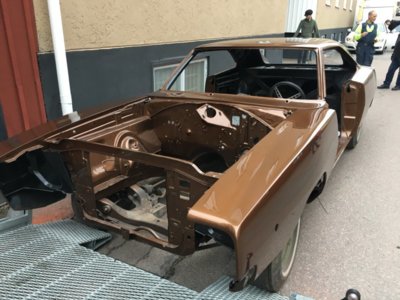
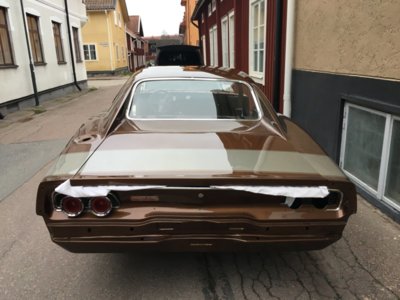
Exported to Sweden in 2004 in a pretty sad state and painted white (see pictures).
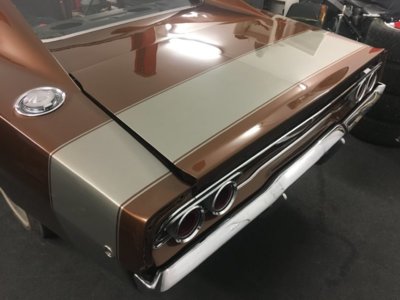
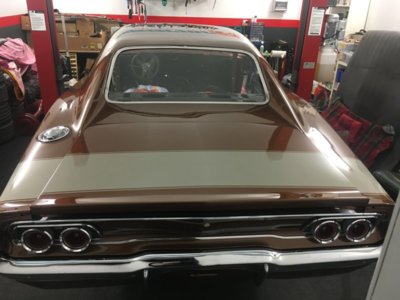
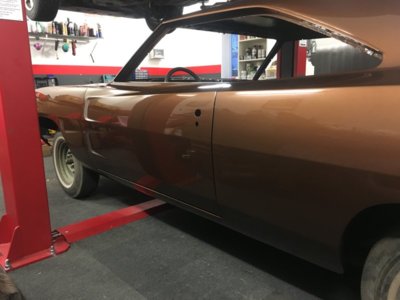
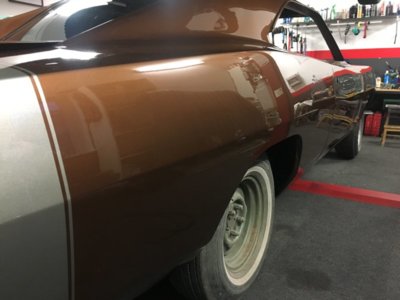
Former owner ordered a complete rotisserie body and paint restoration with new floors, quarters and a lot of other body panels. Painted chassis black underneath and brown metallic with a bumble bee stripe in champagne metallic.
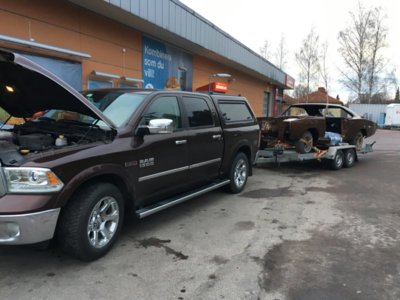
So the body is finished and "only" needs to be assembled but the car needs everything else.
Bought the car "in boxes" and I think most of you guys know that's a giant jigsaw puzzle.
Only had it for a month and just started to order parts needed.
 
Last edited:
Very nice. I'd like to find a 68' at a reasonable price myself, but reasonable price for one of them doesn't exist. Good luck with you project.
 
One of the first thing to arrive at my garage was a

file3.jpeg

file1.jpeg


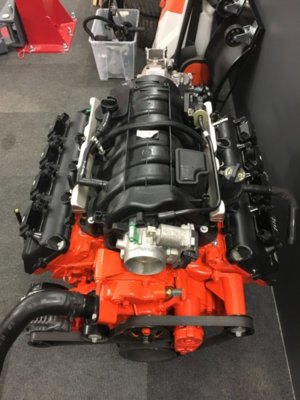
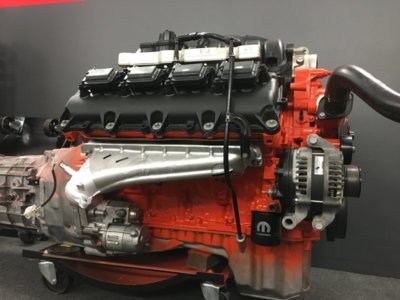
5.7 gen 3 hemi with a Tremec 6060 sixspeed from a 2016 Challenger R/T that was rolled over with only 1600 miles on the odometer.
 
Very nice. I'd like to find a 68' at a reasonable price myself, but reasonable price for one of them doesn't exist. Good luck with you project.
Thanks :) I know exactly what you mean. I think I bought this car at a reasonable price ,although not cheap. This car har been a project for 14 years since it arrived in Sweden. It took me 3 months of talking the former owner into selling it to me.
 
Congrats on your purchase. Enjoy:thumbsup: and welcome to the forum.
 
Glad to see you created a build thread.....

Really, love that color choice......
 
I like that color.
Thanks! I have considered many colors on my future Charger but never considered brown. But now that I found this car already painted I really fell in love with it.
 
The first thing that needed to happen was to paint and detail the engine a bit. Went for hemi orange because its a hemi, although not an oldschool elephant, but still a hemi!
The OEM oilpan is going to be replaced by an Milodon unit made to fit my old chassie and K-member

file4.jpeg file6.jpeg
 
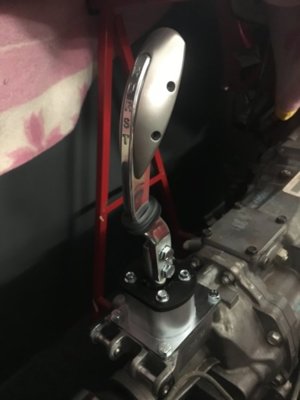
Also managed to find a nice Hurst shifter from Core Shifters. The feeling in this stick is to say the least GREAT :)

file26.jpeg
 
Very cool love the color keep the build thread going as you progress .Very cool car to drive I imagine where you live .
 
You got the best year of chargers in my opinion. Great looking car! I am looking forward to watching this build.
 
Very cool love the color keep the build thread going as you progress .Very cool car to drive I imagine where you live .
Thanks Pete! Well in Sweden were I live we have winter and cold from November until march, so this is the time to BUILD :)
Although restoring American cars and building hot rods is quite a big hobby in Sweden with the summer months filled with meetings and venues.
I think the biggest meeting of them all (Power Big Meet) had something like 15.000 classic American cars of all shapes and forms attending. And yes there is a big interest for musclecars and the second gen Chargers of course.
 
One of the first thing I did was to order the following parts from the states.
- Mopar Performance PCM Kit for the gen 3 hemi
- Mopar Performance 45 degree Oil filter adapter
- Milodon mid sump oilpan
- TTi Motor mounts
- Front disc brake conversion kit including spindles
- Headliner(Black)
- Carpet (Black)
- 15 x7 Magnum 500:s
- F70-15 Firestone Red Line tires
- 3" Flowmaster Super 44:s
So while waiting for these parts I thought I´d start with assembly on the body to assess what parts are missing.
Started by test fitting rear bumper, tail lights, chrome and fuel filler cap.
Rear bumper is not perfect but its ok for now. Also refurbished tail lights before mounting.
All the chrome seems to be in really good shape!
New quarter extensions and a new lock for the trunk was included.
Everything seems to fit ok although the trunk lid needed some alignment.
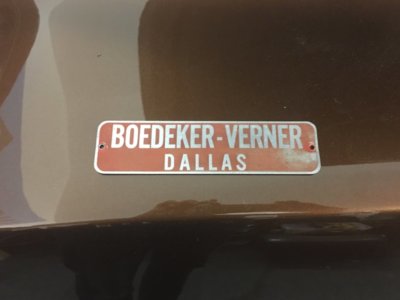
Also found a nice little aluminum sign that I think was screwed to the rear panel by the original dealer (Boedeker/Verner) in Dallas? I think I will put this back on the car to :)
Need to black out the panel between the taillights.

file12.jpeg file11.jpeg file24.jpeg
 
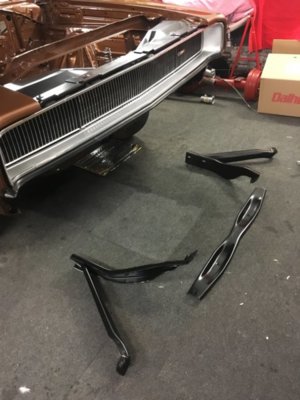
Mounting brackets for the front bumper today.
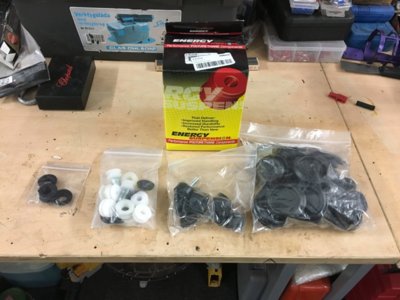
Also received some stuff in the mail, new bushings for the rear leaf springs and 3 compete sets: body plug kit, hood bumper kit and roller kit for the rear quarter windows.

file29.jpeg file30.jpeg
 
Progress and disaster in the Charger project this weekend
When I picked up this project many parts was carefully wraped for storage/transport and since I did not want any damaged parts I left everything as it was.
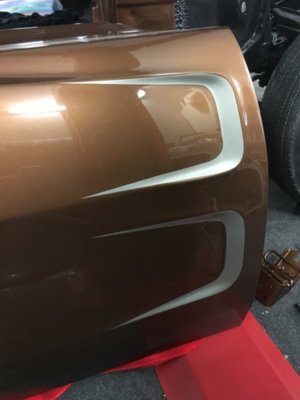
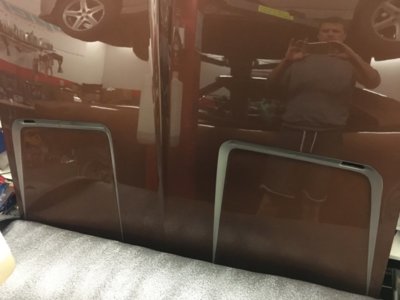
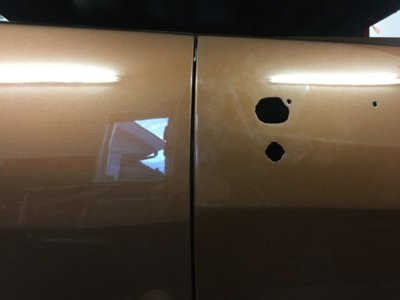
Thought Id start fitting the doors today and almost had an heartattack when I discovererd that the former owner had the extremely bad taste to ad scalops to both doors and the hood
Scalops might look good on a custom car but on this bulid its a big NO NO!!
Had I discovered this earlier I would have cut the price by a big chunk.
Have to figure out a way to get rid of these terrible things one way of another.
But went ahead with fitting both doors anyway and they fit quite good.
Not perfect but defenetly OE spec.
EXCEPT for the body centerline on the passenger side.
When all the other lines on the door fits perfectly there is a difference on the centerline by 1/2 inch
Have to get a hold of the shop that made the prep work on this car and obviusly show them the basics of body panel alignment
Not sure how to handle this yet

3CB80812-ABFE-49BE-AA01-F3B044CAADD7.jpeg 6438D31A-2BBE-4CDB-B0E3-99BD87D794E3.jpeg 5D935878-496E-4B0D-945B-78E1AE6E793A.jpeg C4B0202B-D911-4AAA-BB53-FD8689AD39AA.jpeg EEAB6E71-C6D9-49DF-8131-9EEDA52FCCB5.jpeg
 
Auto Transport Service
Back
Top