• When you click on links to various merchants on this site and make a purchase, this can result in this site earning a commission. Affiliate programs and affiliations include, but are not limited to, the eBay Partner Network.

Tips/Tricks For Removing Oil Pressure Sending Unit On Installed 440

Don67Satellite

Well-Known Member
Local time
2:06 PM
Joined
Dec 16, 2021
Messages
995
Reaction score
1,386
Location
Abbotsford, British Columbia, Canada
Hello, I searched around but not seeing any matches.

Installing an electrical oil pressure gauge (SunPro) and it comes with the 1/8 NPT bell shaped sending unit.

My 440 currently has just the smaller "light sender" in the drivers side port.

As is obvious, not much room for working in there. So I am wondering from those who have done this swap with the motor in the car, what tools came in handy here? The factory sender doesn't seem to have the ability to put a wrench on it like the bell shaped unit. The body seems almost like a socket would fit.

I am already aware that there is a 2nd port there, but it is, to my understanding 1/4 NPT.

Anyways, love to hear what others have done.
 
If I recall correctly (IIRC), I installed it on the opposite side on the rear of the block. The gauge came with adapters.

There's a socket to remove the factory oil pressure sensor.
 
I believe there is a specialty socket for that sender. I may have had one, but it was so long ago, I am not sure any more. Probably long gone.....
 
I bought the Snap -On socket for the oil sender about 46 years ago, and yes I still have it. Another fine purchase from "the truck". I was 16, maybe 2 years into my apprenticeship. I remember being shocked at the price, my $2.25 an hour plus 15% not leaving me a lot for tool purchases some weeks. My 70 Super Bee was ALWAYS very thirsty and I was ALWAYS very broke it seems...
 
Last edited:
Well it is good to know that it is a socket, and now I know why I wasn't having much luck as my current pack of Stanley's top out at 1", and that Craftsman socket is deep and 1 1/16". I was close, but no cigar.

Now I know what I need! Thanks everyone. :thankyou:
A 6 or 12 point socket will not work. Notice the shape of the inside of the special socket; it's rounded, not square.
 
Still have my socket also. Must be 50 years old.
 
I just put a leather glove over it and grabbed it with slip joint pliers. They aren't really tight and are well oiled inside.
 
I am already aware that there is a 2nd port there, but it is, to my understanding 1/4 NPT.
Anyways, love to hear what others have done.
Ain't no hill for a stepper.
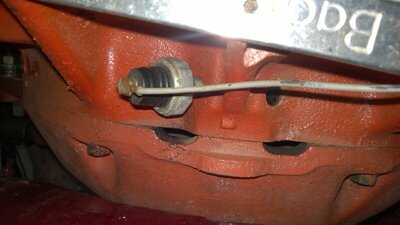
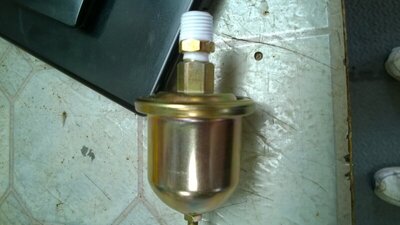
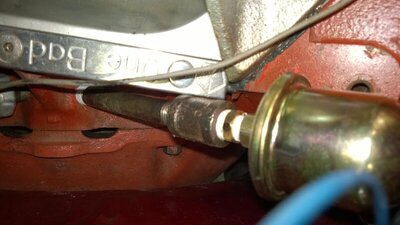
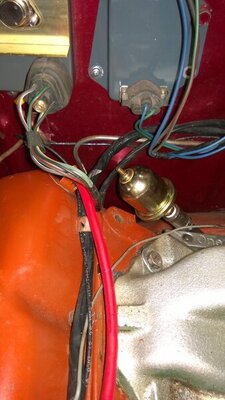
On this forum somewhere is my own exploits at "custom" sending unit installation in the 1/4"NPT side:
WP_20160722_002.jpg
I left the factory idiot light sender in place and pulled the plug out of the other 1/4"NPT side...

WP_20160722_003.jpg
Used a brass bushing to get the new sender up to 1/4" NPT...

WP_20160722_004.jpg
To combat the fact there is no room down in there for the new sender, out came a 1/4" brass pipe nipple
and coupling...

WP_20160722_005.jpg
Got it installed so that it clears everything. Looks funny, gets questions at local shows. :) :thumbsup:
 
You got the right socket, good! I have 2 senders also. I ended up just getting an about 4" angled extension tube (Edelbrock I think). That basically extends the hole high enough up so your aftermarket sending unit will clear the block. Put a regular hardware store "T" on top of that and you can keep your factory "idiot light" sending unit too. You might need a short extension on the factory sender side of the "T" also. I did that on my car (basically)
 
Auto Transport Service
Back
Top