• When you click on links to various merchants on this site and make a purchase, this can result in this site earning a commission. Affiliate programs and affiliations include, but are not limited to, the eBay Partner Network.

How to rebuild steering coupler on '73 RR

UKPlymouth

Well-Known Member
Local time
6:04 PM
Joined
Nov 11, 2012
Messages
233
Reaction score
28
Location
England
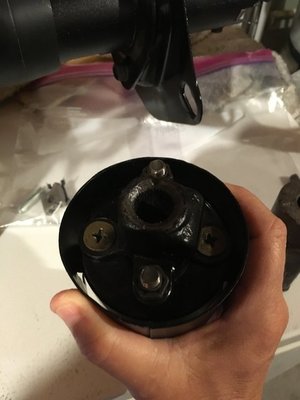
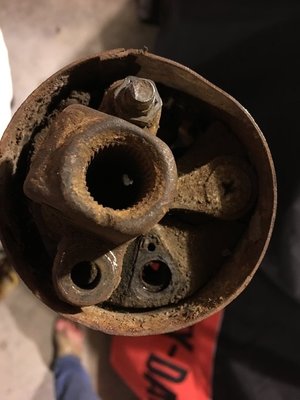
Hi guys, my steering coupler is flopping around as the internals must be worn out. Not the tag joint which is fine, but the metal coupler above that as seen in the pics
Can anyone tell me what parts I need as I keep getting pre 73 options which I suspect are different.
On a separate note, I started to undo the rubber rag joint nits today and two of them just span around and I couldn't undo them.
Any advice appreciated
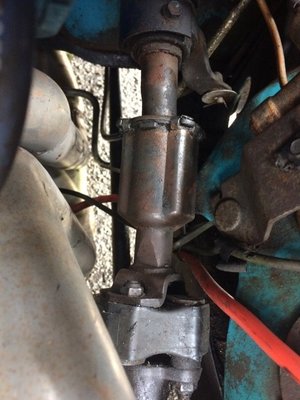
IMG_0367.JPG
 
I recently rebuilt the coupler and the rag joint on my '73 Charger.

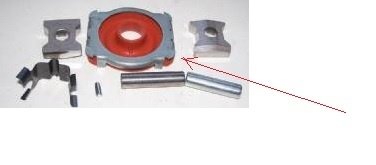
I used Mopar steering coupler rebuild kit. The kit is $25 to $35 off eBay. Taking the coupler apart was easy but putting back together was another story. We spent a bit of time trying to figure out how the blocks, pin, and spring fit in the block. Then, we had a hard time folding the tabs on the cap over. We finally put the coupler in a press to hold the cap in place. That helped a lot to folding over the tab. The other issue we ran into was the new steering pin included in the kit is very soft steel. We used the original pin as it was much better steel.

I used a Dorman 31005 kit that I picked up for $10 from Autozone for the rag joint. However you have the OEM huge spacers, so that kit might not work for you. Those screw heads and locking nuts are a pain to work with. I might have a few of the screws that I can send you if can't find them anywhere else.
 
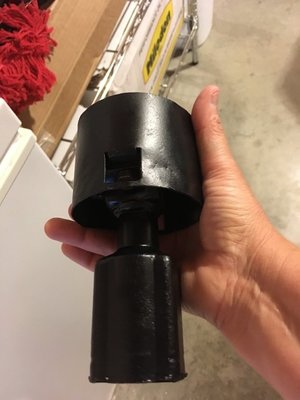
Regarding the steering "rag" joint, which is a hockey puck on the 73 RR, I made one out of steel to replace the rubber one, and it works great. I also replaced the bolts, because the design is bad with the Philips head, and a total pain to get them off, so I used standard grade 5 nuts and bolts.
Here is a picture of the steel and also just for fun, and actual regulation NHL hockey puck "rag" joints next to the original that was falling apart that I made for my car! Steel on was under 40 bucks, hockey puck was under 10 bucks. Steel on has the extra large holes just to reduce the weight.
Steering Coupler.jpg
 
Recently went through this myself.

With the assembly out of the car it's easier to work on it. Use a good penetrating oil like Aerokroil on those lock nuts and let them sit for a while. Even after that, I had to use an impact driver to break loose one of the bolts.

Bouchilon Performance makes a replacement for the rubber coupling. It is solid aluminum, however, and not rubber.

View attachment 496530 IMG_1500.JPG IMG_1501.JPG IMG_1355.JPG
 
Thanks guys, really appreciate the pics, links and advice. One thing that is confusing me at this early stage is, how is the steering column shaft retained in the coupler (the box like thing) and what keeps it centred? Does it just slide out once the rag joint is removed?
 
The pot coupler has a pin on the flat, open side that you must drive down into the pot coupler in order for the shaft to slide out of it.
 
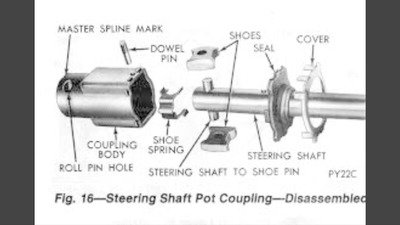
Also, pay special attention to the orientation of the shoes in the diagram that 73Redrnner posted and make sure to get them installed as shown, because the shoes can be installed in about 3 different positions, and that will make a difference once the column is back together.
 
Thanks guys, but I'm missing something. On the 72 down cars I can see the pin, however on my car there is no visible pin in the steering coupler. There is one below the rag joint where the steering box is, but what happens when I remove the rag/rubber joint, how is the coupler actually removed.
 
If I recall, the pin is very close to the top section where the cover goes, and in between two of the cover tabs, and may be hard to see, and if there is rust, you may not see the outline of the pin either.
 
Idrivemopar is quite right. Paint, grease, grime, and the cover can make the pin very hard to see. It's rather small in diameter.
 
Thanks guys, most helpful. Just one more query on the order of the job.
Locate dowel pin and remove.
Then remove rag/rubber joint
Remove coupler for rebuild.

..and finally, what collapses/wears/fails that allows the steering column to flop around in the steering coupler?
 
Last edited:
Aside the rubber puck, what commonly fails is the shoes springs getting broken. Without this piece the shoes won't keep its position against the coupler walls, and they get to spin into the assembly.

Would be great we could get the spring separatelly along with seal and seal bracket ( they are but no with the spring ) on a special kit. Shoes and pins can be reused unless they weared really bad ( hard to believe )
 
Last edited:
By the way, the steering coupler kit is available by Dorman on rockauto in less than $10... i think on $6 rate or so
 
I redid mine and on the repo kits the cover popped back off because the tabs never quite took hold. Even though my original was worn out I could see it's tabs were slightly longer than the repo ones. I got this clamp from Detroit Technologies for extra insurance and you don't have to bend those tabs. Also idrivemopar is spot on with the way those shoes should go in.https://www.detroitmuscletechnologi...steering-column-coupler-cover-clamp-retainer/
 
Yes, definitelly the curved face of the shoes must be outward ( against the coupler walls ) to allow the articulation. Thats the deal on this coupler design. Pin shaft allows the shoes movement in one direction, the curved faces on shoes allows the movement 90 degrees off. All this design was made to allow the column shaft play in and out into the coupler along with the unybody flex, thing that a regular crossjoint wouldn't allow, adding strees on column shaft and steering box worm.

A broken spring will add room between shoes face and coupler walls making the shoes being out of the walls side limits allowing play on that axis, and also makes spin the shoes individually instead simetrical at the same time, which adds play on the 90* off axis
 
Last edited:
That is such helpful stuff guys, I'm schooled now and understand a lot more. Just one of those jobs I hadn't tackled nor heard of until now.
:thankyou:
 
Here is the coupler kit available from megapartsusa.com, i used this on my 73 RR, $20 bucks, http://www.megapartsusa.com/proddetail.asp?prod=123-SCK436


Just an FYI, these "orange" seals are junk. The rest of the kit might be fine but the black seals are way much better.

DMT sells quality stuff and they have these parts with lightning fast shipping. Class act business all the way. And no I do not work for DMT or profit from their sales.

zzzzcvxzbj.jpg
 
Auto Transport Service
Back
Top