You are using an out of date browser. It may not display this or other websites correctly.
You should upgrade or use an alternative browser.
You should upgrade or use an alternative browser.
Thrust Button Removal Help - 8 3/4 - 489
- Thread starter PaveFE
- Start date
- Local time
- 9:22 PM
- Joined
- Oct 18, 2008
- Messages
- 2,639
- Reaction score
- 1,682
- Location
- Kindersley,Saskatchewan, Canada
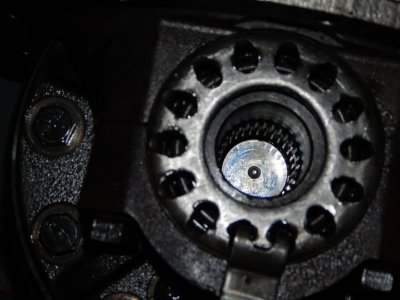
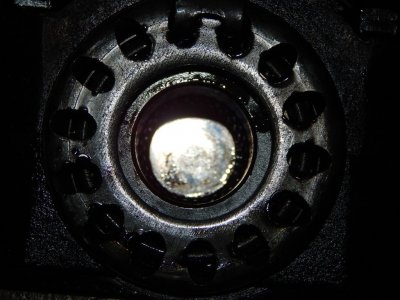
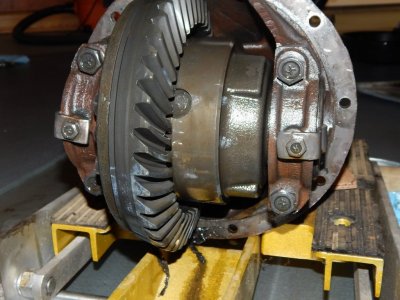
...........U have a cone type sure grip which does not have thrust buttons...The block in the center only comes out if u dissemble the sure grip.........if ur using stock axles u do not have to take the thrust block out...kim...
- Local time
- 9:22 PM
- Joined
- Dec 4, 2009
- Messages
- 34,101
- Reaction score
- 41,950
- Location
- Pasadena, Texas
I would clean the ends of the axles then put clay on them and install and remove to see if they do butt up against it. If they do, you will have to remove the thrust block and that will require total disassembly of the Sure Grip unit to get the block out. If you do not remove the block (if the clay shows the axles are butting up to it), your bearings will fail prematurely.
PaveFE
Well-Known Member
Copy all. I took measurements of the axle with the old bearings and collar. The measurements with the green bearings and collar are nearly the same. I will use the clay and report the findings..
PaveFE
Well-Known Member
The clay option worked out well. I used some detailing clay and formed a 3/16" thick disc the same diameter of the axle and placed it in the left side of the differential. I then installed it back into the housing. I removed the rubber O-rings from the green bearings (didn't want to damage them) and installed and snugged down the right axle first (opposite of the clay disc). I then installed the left axle, snugged it down, and removed the left axle...clay disc was untouched. I removed the right axle and differential... now in the process of getting it all back together. Thanks for the help...
wagonman
Well-Known Member
- Local time
- 9:22 PM
- Joined
- Aug 1, 2015
- Messages
- 2,100
- Reaction score
- 1,762
- Location
- Deming New Mexico
Why are you going with the Green Bearings ??
PaveFE
Well-Known Member
5.7 hemi is correct. I also liked the o-ring placement on the outer race. It allows you to eliminate the OEM axle seal (I installed the seal anyway). I read many reviews on the GB's... some say they can't handle the lateral force of the vehicle in corners but I believe those were the 1st gen GB's. Time will tell...
- Local time
- 9:22 PM
- Joined
- Dec 4, 2009
- Messages
- 34,101
- Reaction score
- 41,950
- Location
- Pasadena, Texas
Cool beans! I always ran the stock inner seals too.The clay option worked out well. I used some detailing clay and formed a 3/16" thick disc the same diameter of the axle and placed it in the left side of the differential. I then installed it back into the housing. I removed the rubber O-rings from the green bearings (didn't want to damage them) and installed and snugged down the right axle first (opposite of the clay disc). I then installed the left axle, snugged it down, and removed the left axle...clay disc was untouched. I removed the right axle and differential... now in the process of getting it all back together. Thanks for the help...
That side loading crap us just that. Most greens fail because the housing isn't straight and that will screw up the bearing. The factory used the Timken for this reason as no housing was perfectly straight and those bearings allowed some leeway.
- Local time
- 10:22 PM
- Joined
- Mar 10, 2010
- Messages
- 29,676
- Reaction score
- 51,289
- Location
- Hanover, Pennslyvania
Anyone ever used green bearings on a tapered axle rear housing?
- Local time
- 10:22 PM
- Joined
- Mar 10, 2010
- Messages
- 29,676
- Reaction score
- 51,289
- Location
- Hanover, Pennslyvania
So is it ok to leave the block in there if you're useing green bearings and the axels are not touching?
Daves69
Well-Known Member
FWIW, Timken offers student basics of bearings if interested.......................
http://www.timken.com/AntiFriction/player.html
http://www.timken.com/AntiFriction/player.html
Similar threads
- Replies
- 23
- Views
- 3K
- Locked
- Replies
- 2
- Views
- 1K
- Replies
- 4
- Views
- 1K
- Replies
- 12
- Views
- 3K


