RT68440
Well-Known Member
Welcome from another '68 Charger owner.
Yes, I've read about the Edelbrock Aluminum heads but I was just having trouble justifying the cost. You are right about the stock heads though, they don't flow well.Motorhome heads are junk.probably the worst stafting point of any head. Ive yet to read anyone making them worth a damn. Because the motorhomes were all cabovers, motors tucked way up under, with no airflow, they have extra water jackets to try to keep things cool, this intrudes on intake and exhaust runner geometry and makes walls thinner so you cant even carve out and form them as you would in an old school port and polish. Its best to save up a little more and get any number of the heads people have recommended on the forum. The wasiest thing would be to get the performer rpm heads to match your whole top end, they are already made to all work with eachother. Find one of the free calculators online and play with the head cc's and headgasket thickness. 10.5 c/r is strong but if youre willing to run premium gas, a thinner headgasket can bumpnyou way up in c/r and in turn, power. Then once the heads are mounted, gasket portmatch the intake, it should be close but stupid little things like smoothing out a hard edge that causes turbulence on one cylinder frees up alot of free hp. Then when you get it on the dyno tune it for the biggest torque number almost ignoring hp and you wont be disapointed.
Plus i wanna say they are only around 7 or 7.5 to 1 c/r i have a 79 beaver motorhome im turning into an oldschool rsmp truck with the 440, damn thing couldnt pull itself up anything a degree over perfectly flat when i drove it home. Granted it was pulling a 9,000lbs box but the torque shouldve helped. The way it revved you can tell it just couldnt breathe strong enough to get the rpms into that strong part in a big blocks torque curve. And given the smog b.s. that was thrown at manufacturers in the mid 70s, the motorhome 440a were automatically the weakest powered ones you can get, although strangely enough in the top the strongest built because of the 6 bbl parts.Motorhome heads are junk.probably the worst stafting point of any head. Ive yet to read anyone making them worth a damn. Because the motorhomes were all cabovers, motors tucked way up under, with no airflow, they have extra water jackets to try to keep things cool, this intrudes on intake and exhaust runner geometry and makes walls thinner so you cant even carve out and form them as you would in an old school port and polish. Its best to save up a little more and get any number of the heads people have recommended on the forum. The wasiest thing would be to get the performer rpm heads to match your whole top end, they are already made to all work with eachother. Find one of the free calculators online and play with the head cc's and headgasket thickness. 10.5 c/r is strong but if youre willing to run premium gas, a thinner headgasket can bumpnyou way up in c/r and in turn, power. Then once the heads are mounted, gasket portmatch the intake, it should be close but stupid little things like smoothing out a hard edge that causes turbulence on one cylinder frees up alot of free hp. Then when you get it on the dyno tune it for the biggest torque number almost ignoring hp and you wont be disapointed.
Heres a thread going on now thats good but its new so there should be alot more good info shortly. http://www.forbbodiesonly.com/moparforum/threads/big-block-aluminum-heads.125581/Yes, I've read about the Edelbrock Aluminum heads but I was just having trouble justifying the cost. You are right about the stock heads though, they don't flow well.
oh, and do a little more research on the long tube headers. they look cool, and work great on gm and ford motors but for whatever reason, the stock hp manifolds out flow and put up better dyno numbers. assuming your motor came with stock hp manifolds. in which case if you can find them easy enough then you gotta compare pricing to new headers.
nice, i stand corrected. goes to show what real testing reveals
Hot Rod magazine has done it all with their test 440. They did a nice one with different intakes, different carbs and I think one with stock heads that get ported and tested again.nice, i stand corrected. goes to show what real testing reveals
haha i saw that one, rememebr their conclusion? its simple geometry, ya a perfect circle should flow more evenly, but with motors firing its a pulse of flow not like a hose of even flowing exhaust gas, so flow doesnt really matter, its the area the flow has to pass through to get rid of those gasses. but if you have a 1 7/8 pipe, thats pipe material stays the same, so the length of the outer edge stays identical. doesnt mater if the pipe is a circle, or has one side caved in making the cross section a C. the area the exhaust has to move through is identical. resulting in almost identical effectiveness for moving the gas out.Hot Rod magazine has done it all with their test 440. They did a nice one with different intakes, different carbs and I think one with stock heads that get ported and tested again.
My favorite was testing headers, maybe it was a video I can't remember. They sttart with pristine headers and get horsepower from the dyno. Then they start denting the pipes to simulate making clearance. At one point they are beating on the pipes with a hammer with llittle to zero effect in hp. At one point the dented headers made more lol.
I also saw a video where they were doing Dyno testing on a 440 and tried 1 7/8 tube and 2.0 and the 1 7/8 gave better numbers on both HP and Torque across the entire rpm range. Sometimes bigger isn't better . Anyway my goal for my 440 is streetable dependability and not to squeeze out every ounce of HP possible.haha i saw that one, rememebr their conclusion? its simple geometry, ya a perfect circle should flow more evenly, but with motors firing its a pulse of flow not like a hose of even flowing exhaust gas, so flow doesnt really matter, its the area the flow has to pass through to get rid of those gasses. but if you have a 1 7/8 pipe, thats pipe material stays the same, so the length of the outer edge stays identical. doesnt mater if the pipe is a circle, or has one side caved in making the cross section a C. the area the exhaust has to move through is identical. resulting in almost identical effectiveness for moving the gas out.


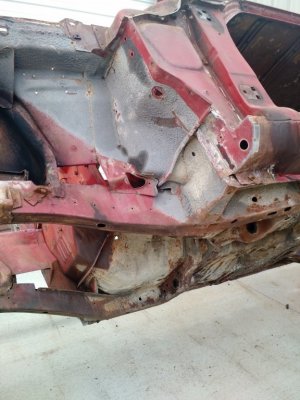
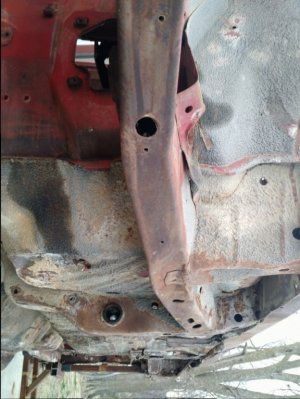
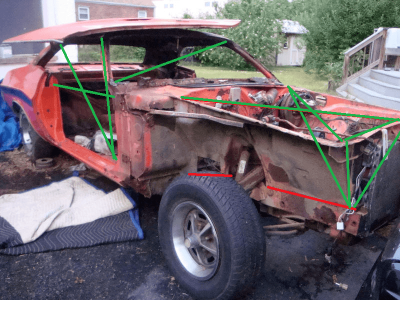
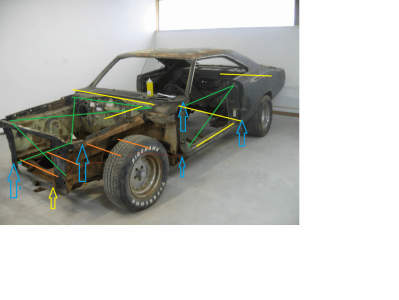
if its bent out of shape sideways, squarewise with the whole car, a frame shop should be able to square it back up (assuming they have the right drawings going back that old(alot of modern shops unfortunately wont touch our cars, gotta find an oldschool guy who does it on the side at home) it may actually be worth having af rame guy look to see if it is out of whack before you make a decision however, if the frames are straight but only crunched up like that, ive never seen a frame shop have the ability to pull down on metal in a way that would straighten that out. its thick so studs and a slide hammer it probably out of the question. how well restored are you going for?


