• When you click on links to various merchants on this site and make a purchase, this can result in this site earning a commission. Affiliate programs and affiliations include, but are not limited to, the eBay Partner Network.

My daily driver 67 Coronet wagon

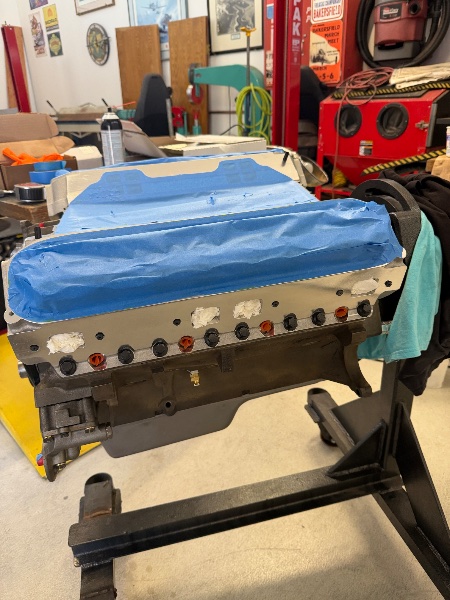
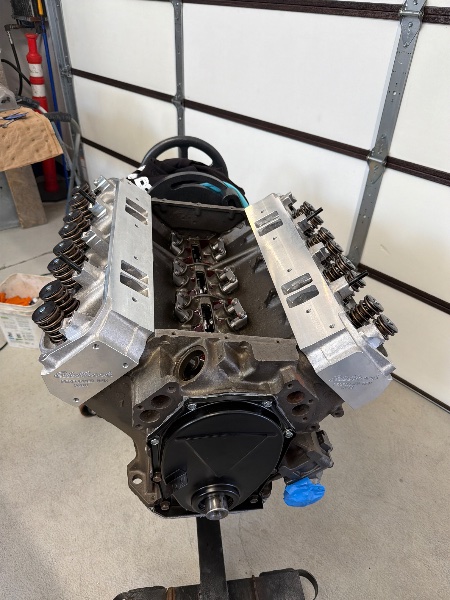
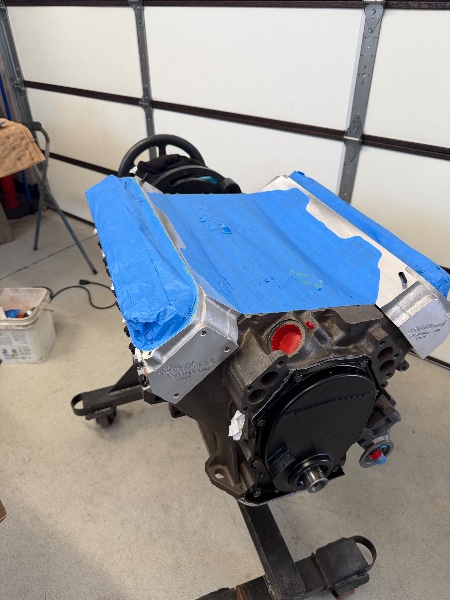
Getting the engine ready for paint. Need to degrease, scuff the machined aluminum and timing cover up, de slime once more, then start painting. Since the 440 Source balancer is etched, I'll hit that with matte clear. May do the rest of the engine with that too after the color, Chrysler Turquoise, is on.
IMG_9040.jpeg


IMG_9041.jpeg


IMG_9042.jpeg
 
Paint is on! Started off with the KBS Rust Seal. Let it sit for an hour, then two coats of color. Have plenty leftover for the intake manifold and water pump housing. Do those once the old engine is out. Going to spray matte clear, KBS, on the balancer tomorrow.

IMG_9047.jpeg


IMG_9048.jpeg


IMG_9049.jpeg


IMG_9051.jpeg


IMG_9052.jpeg


IMG_9053.jpeg
 
Hey, that is NOT orange. I thought that every Mopar engine had to be orange.
 
Paint is on! Started off with the KBS Rust Seal. Let it sit for an hour, then two coats of color. Have plenty leftover for the intake manifold and water pump housing. Do those once the old engine is out. Going to spray matte clear, KBS, on the balancer tomorrow.

View attachment 2038298

View attachment 2038299

View attachment 2038300

View attachment 2038301

View attachment 2038302

View attachment 2038303
Heveans Ta Murgatroid!!
Ain’t She Pretty !!
Mopar2ya!!
 
Put the painted pieces outside, including the engine, to get some UV action. I installed the fuel pump, got it from E-Booger, plus the balancer. I decided to use my Street Dominator manifold as its shorter in height which will help with the topside clearance to the hood. Tapped the two EGR holes in the back to 3/8" pipe. This will give me two manifold vacuum ports. Decided to paint it, the new Allstar air cleaner unit plus some other items which are on the way, the engine color. The manifold is sitting in the sink marinating in ZEP Purple cleaner and hot water to get the contamination out of the casting. Want it clean for painting. I sprayed some of the ZEP on the two filter pieces to get them clean too. I popped a hole in the base for a crankcase filtered air tube which will go over to the cap. Welded that in.

IMG_9055.jpeg


IMG_9056.jpeg


IMG_9059.jpeg


IMG_9060.jpeg


IMG_9061.jpeg
 
My pushrods showed up today. Got them in place, set the rockers/shafts on, torqued fasteners, then set preload. I used the old DC valve lash chart for that as it gets the lifter on the backside of the cam. Tomorrow I'll spin up some oil pressure after I drop the oil in.

IMG_9063.jpeg


IMG_9064.jpeg


IMG_9065.jpeg


IMG_9066.jpeg
 
Shot paint on the intake manifold, air cleaner base and lid, plus the oil fill cap. Tomorrow I'll set those outside to get some UV action while I work on other engine stuff. Needed to get those pieces shot as I need my lift this weekend to do a brake flush on my honey's car.

IMG_9068.jpeg


IMG_9069.jpeg
 
Shot paint on the intake manifold, air cleaner base and lid, plus the oil fill cap. Tomorrow I'll set those outside to get some UV action while I work on other engine stuff. Needed to get those pieces shot as I need my lift this weekend to do a brake flush on my honey's car.

View attachment 2039894

View attachment 2039895
UFO Sightings !!!!

Mopar Style
 
Today I dropped the oil in, then spun up pressure. Just under 50lbs in 1st gear, going slower than max 1st gear speed, on my Dewalt 20v 1/2" drill. Turned the crank slowly to get oil up top to the shafts and arms. Stopped when I got a squirt. Put the covers on and went for a longer period of prime and rotate. When I stopped, I rotated the crank till it was on TDC. I made up some studs for the covers instead of screwing bolts into the aluminum heads. Dorman makes some that were a good length but my local store only had 6, need 12, and they are n/an across the country through their suppliers. Amazon has them shown, but almost $3.00 each. ARP has some but $60.00 for theirs but with nuts. Then I remembered I have some stainless 1/4" all thread. Made 12. Put a little antisieze in the heads, then put the studs in. I put the manifold on, with the pan of course, then called it a day.

IMG_9073.jpeg


IMG_9072.jpeg


IMG_9074.jpeg


IMG_9075.jpeg
 
Since my honey got back yesterday from her outing with family, I got started on the wagon today. Hood off first, then got it positioned on the lift. From there, drain coolant out. Took the 1/4" block plugs out too, so the bulk of it is out. Popped drain plugs on the engine and trans, then started removing pieces. Took the radiator out so it wouldn't become a casualty during the pull, flushed out as much of the bugs/junk etc from the fins as possible, flushed out the unit till it was clear, then dropped some purple cleaner in mixed with water to dissolve any oil film from the tubes. Letting it sit for a day till I flush it out. Tomorrow get back on the car removing pieces so I can pull the engine/trans out.

IMG_9146.jpeg


IMG_9147.jpeg


IMG_9148.jpeg


IMG_9149.jpeg


IMG_9150.jpeg


IMG_9151.jpeg
 
Been slow the last couple of days getting pieces off the wagon in preparation for engine/trans removal. Been Chatty Cathy with friends etc. Anyway, it's getting closer. The plugs were sure oil fouled. Big surprise there. Not! I dropped a few pieces off to my neighbor so he'll do some blasting on them at his work. I'll clean them some more then paint engine color after. I decided to put the cast covers back on since the steel ones are seeping with the engine just on the stand. Took the front wheels off to lose a little height which will help on the extraction.

IMG_9153.jpeg


IMG_9154.jpeg


IMG_9155.jpeg


IMG_9156.jpeg


IMG_9158.jpeg


IMG_9159.jpeg


IMG_9160.jpeg


IMG_9161.jpeg


IMG_9162.jpeg
 
Ok, I'm finally caught up. The improvised spray booth is classic DIY, and have to admit I was a little surprised to see the peanut plugs in the last post.

Thanks for the thread, it's definitely going to run great for you.
 
The PO put 452's on it. I'm just about ready to pop the engine/trans out. While snorking lunch down, I remembered the converter bolts need to get undone too before removal. A little easier now than later.

IMG_9163.jpeg
 
Extraction is complete. On the reversal, I'll get someone to give me a hand plus I'll remove the trans crossmember beforehand.

IMG_9171.jpeg


IMG_9172.jpeg
 
Back
Top