• When you click on links to various merchants on this site and make a purchase, this can result in this site earning a commission. Affiliate programs and affiliations include, but are not limited to, the eBay Partner Network.

Dash Cap Issue

dgraver

Well-Known Member
Local time
12:06 AM
Joined
Jul 28, 2010
Messages
326
Reaction score
115
Location
Pittsburgh, PA
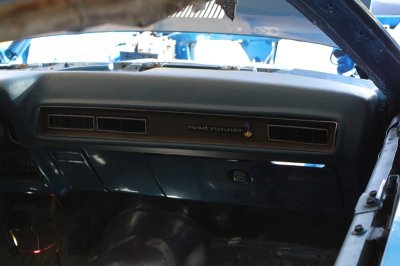
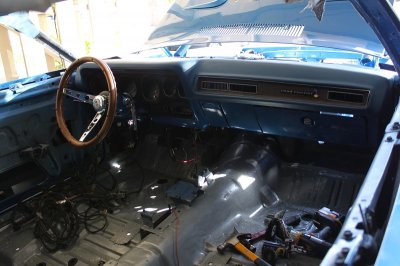
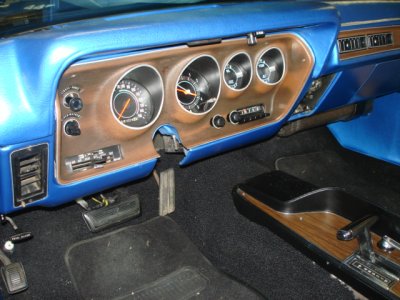
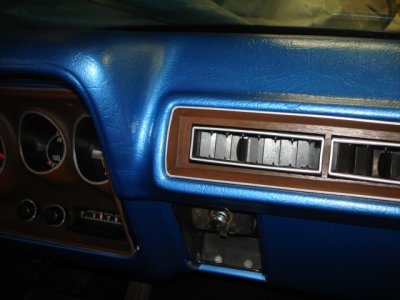
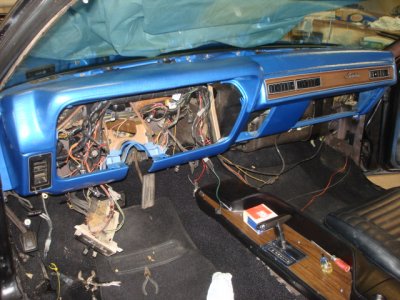
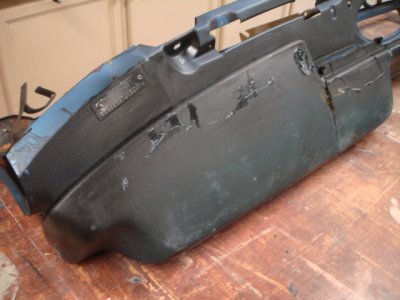
So I installed a coverlay dash cap on my 72 rr GTX. Looks great, but I couldnt fit it on the originasl dash pad without overlapping the edge of the passenger side plastic/fake wood insert. This was annoying me so I decided to take out the insert and reinstall it over the new dash cap.

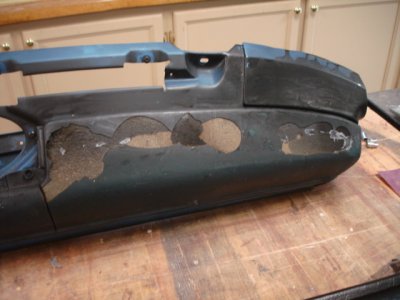
Thought this would be easy but i was dead wrong. With the extra plastic, the insert doesnt fit and the screws are far too short. I tried using longer screws but that isnt working either because of the open mounts. I tried trimming some of the cap with a razor, but I really dont want to butcher it. Am I going to have to resort to glueing it in place?

Has anyone had this problem? If so, please tell me how the heck you solved it, its driving me crazy! Im regretting taking the insert out, should have just kept it as is. Car show tomorrow, loved to solve this before then, thanks!
 
To make it look right, the insert should be removed first. The cap gets glued to the original pad, if not, it will lift up around the speaker grill. You should have received adhesive when you bought the cap.
 
I just bought one myself, and installed it. I had the same problem you are describing. It took a lot of pressure to finally get it on. I have attached a pic of the finished product. I am still not happy with it though. I hope this helps.
 

Attachments

  • 002.JPG
    002.JPG
    120.2 KB · Views: 319
  • 001.JPG
    001.JPG
    164.3 KB · Views: 333
  • 004.JPG
    004.JPG
    173.5 KB · Views: 324
The cap is glued down without any other issues. I realize now I should have removed the insert before installing, but the fact is I'd still be having the exact same fitment issues I am having now.

Thanks for the pics rrgtx72, mine is not even coming close to fitting like yours is, so imagine my frustration. Thats why I said I might have to glue the insert in place, or go at the extra cap plastic with a dremel.
 
on my 73 the cover never fit right the speaker grill never went back right and after a short time it cracked finally just bought a new pad 400.00 and a little more work but perfect now
 
I just finished the dash restoration on 72 SSP. I too ran into problems with the fit of the dash cap on the passenger side around the A/C vent insert. My cap fit like the photos posted from RRGTX72. I wasn't happy with the fit of the cap so I re-shaped the cap to make it fit properly.

My original dash pad seemed to be interfering with the new dash cap plus the new dash cap just wasn't shaped properly. I cut away the original dash pad on the right side under the cap where the fit up problem was. Next, I used some heat to soften the plastic of the dash cap in this area (a heat gun works good). Then I would place the cap over the dash, using the A/C vent trim piece, and assemble the parts together while the plastic cap was warm from the heat. The A/C vent trim piece was used as a guide to re-shape the plastic of the cap. I was able to re-shape the dash cap and achieve a much better fit. See the photos attached.

Don't get in a hurry - doing this does take some time. I had to heat the plastic several times to get the look I wanted. I slowly "moved" the plastic of the cap to the right side. I also took extra time to trim the cap to fit exactly how I wanted around all the edges. This too took some additional time but I'm pleased with the results.

I glued my cap on outside of the car. I installed the original pad onto the dash frame, applied the glue and installed the cap. I then used strips of cloth and wrapped around the dash assembly to securely hold the cap in place until the glue dried.

Yes, this might not be as good as purchasing new dash pad but with a limited budget this will have to do for now.

I'm in the process of changing my car back to the original blue interior. The previous owner dyed the interior black. This was step #1 for the interior.
 

Attachments

  • 020.JPG
    020.JPG
    154.9 KB · Views: 243
  • 022.JPG
    022.JPG
    165.2 KB · Views: 234
  • 023.JPG
    023.JPG
    159.3 KB · Views: 247
  • 012.JPG
    012.JPG
    155.4 KB · Views: 232
  • 017.JPG
    017.JPG
    164 KB · Views: 240
  • 019.JPG
    019.JPG
    150 KB · Views: 241
Auto Transport Service
Back
Top