- Local time
- 8:17 PM
- Joined
- Oct 16, 2013
- Messages
- 1,646
- Reaction score
- 2,880
- Location
- Kiel Germany (back again)
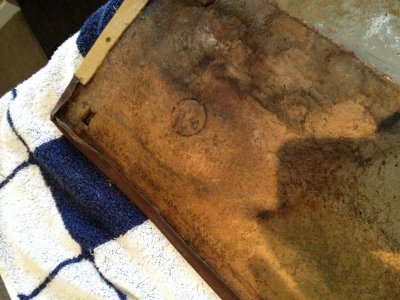
If your car has ever leaked in the past (who's hasn't), then the chances are you might have some panels that look like this.


Here is a basic overview of how I restored mine.
First gently separate the vinyl from the steel top frame and the MDF. Mine parted very easily and did not damage the vinyl at all. There was really hardly any glue on it. My vinyl was still in good shape so obviously if its too far gone then you will need to replace it.
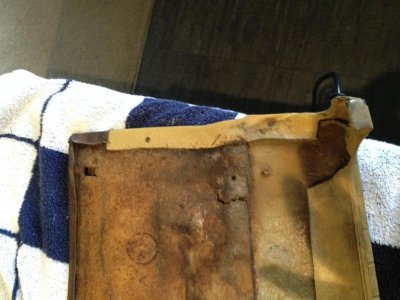
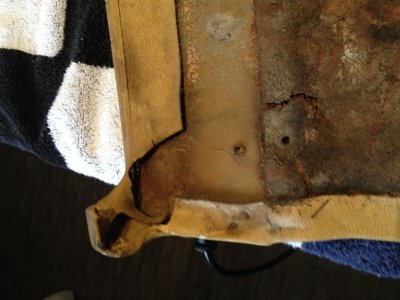
Next, separate the MDF from the steel. These seem to be pressed on there. With a wide blade scraper they will pull through. The rotting timber will make them weak anyway. I also cleaned off the old glue with solvent.


I then cleaned up the rust and treated it. I also painted it with some Rustoleum primer.
Next thing was to make an exact copy of the original MDF using the old board as a template. Then just glue them together with some metal to timber Nailbond of the equivalent.

Spray on the new contact adhesive and carefully refit the vinyl to the new base. Use an off cut of the board and place a weight on it to ensure that you have no lifting. I used a car battery, but whatever suits.
Once that has cured, use clothes pegs to fold over the edges and glue them down.

Now you have a nice wrinkle free vinyl panel. I also used suger soap and a toothbrush to remove the grime.

Now my car is going to be a driver, so of course this is not as good as a brand new panel, but its not far off it. Hope this helps anybody out there who has a similar issue.
- - - Updated - - -
Got a couple of rouge pictures at the bottom of the before shots that I cant remove sorry.
Here is a basic overview of how I restored mine.
First gently separate the vinyl from the steel top frame and the MDF. Mine parted very easily and did not damage the vinyl at all. There was really hardly any glue on it. My vinyl was still in good shape so obviously if its too far gone then you will need to replace it.
Next, separate the MDF from the steel. These seem to be pressed on there. With a wide blade scraper they will pull through. The rotting timber will make them weak anyway. I also cleaned off the old glue with solvent.
I then cleaned up the rust and treated it. I also painted it with some Rustoleum primer.
Next thing was to make an exact copy of the original MDF using the old board as a template. Then just glue them together with some metal to timber Nailbond of the equivalent.
Spray on the new contact adhesive and carefully refit the vinyl to the new base. Use an off cut of the board and place a weight on it to ensure that you have no lifting. I used a car battery, but whatever suits.
Once that has cured, use clothes pegs to fold over the edges and glue them down.
Now you have a nice wrinkle free vinyl panel. I also used suger soap and a toothbrush to remove the grime.
Now my car is going to be a driver, so of course this is not as good as a brand new panel, but its not far off it. Hope this helps anybody out there who has a similar issue.
- - - Updated - - -
Got a couple of rouge pictures at the bottom of the before shots that I cant remove sorry.